Amazon EC2 MacOS Instances allow to execution of on-demand MacOS workloads in the cloud, expanding AWS’ flexibility, scalability, and cost advantages to all Apple developers. Developers working on apps for the iPhone, iPad, Mac, Apple Watch, Apple TV, and Safari may use EC2 MacOS Instances to provision and access MacOS environments in minutes, dynamically scale capacity as needed, and take advantage of AWS’ pay-as-you-go pricing.
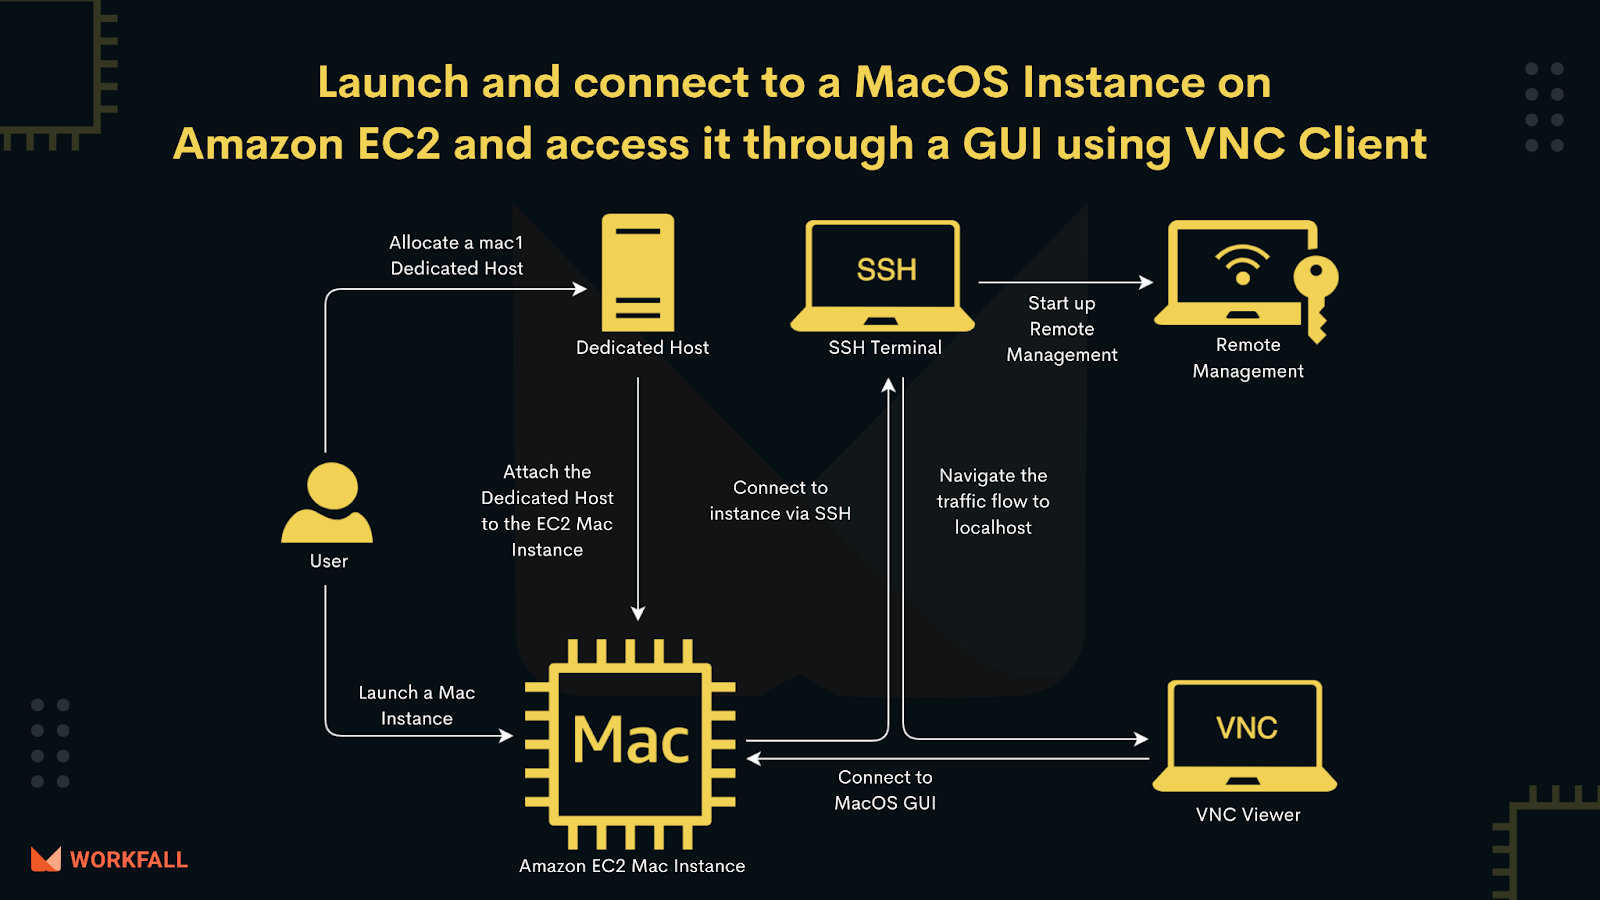
In this blog, we will see a business use case where Mr. James wants to use MacOS for a short period of time and how he is able to resolve his problem by creating a MacOS Instance on Amazon EC2 and accessing it through a GUI using VNC Client. We will see how we can create a Dedicated Host that is to be attached to the EC2 MacOS Instance. We will also have a look at how we can connect to the EC2 MacOS Instance via SSH and via VNC Viewer to start up the GUI.
Amazon EC2 MacOS Instance

EC2 MacOS instances do not fall under the free tier so based on the storage and its usage, you will be charged accordingly. The configurations for windows and linux instances are comparatively easy but when it comes to configuring the EC2 MacOS Instance, we need to perform some add-on configurations. We need to create a dedicated host for the EC2 MacOS instance that needs to be connected to the EC2 instance that we create. Additional setup for VNC is needed for starting up the MacOS GUI if you are using Windows OS. In case you are using MacOS itself, then you can use Screen Sharing to connect to the MacOS GUI.
The smooth usage of the MacOS will depend on the storage you assign for your instance but make sure that adding extra storage might give a huge hike in the cost so make sure to switch off the MacOS Instance as soon as it is not needed. There is a 24-hour minimum allocation duration that is applicable to the Dedicated Host itself, not to your mac1.metal instance. You can launch and terminate mac1.metal instances as you want on that mac1 Dedicated Host, for example, to switch between a MacOS Catalina-based AMI and a MacOS Big Sur-based AMI. However, once you allocate a Mac1 Dedicated Host, you cannot release it until 24 hours later (the minimum lease period is 24 hours for the physical server).
Once past those initial 24 hours, you can release the host anytime you want. This time period is to comply with the MacOS Software Licensing Agreement. As with all Amazon EC2 Dedicated Hosts, you pay per second for the entire duration that Dedicated Host is allocated to your account. Instances launched or terminated on that Dedicated Host have no separate charge. Since the minimum host allocation duration for mac1 Dedicated Hosts is 24 hours, by definition, you pay for a minimum 24 hours.
Hands-on
Mr. James is using Windows OS but he wants to perform some small operations on MacOS for its data analysis purpose. James uses a Windows OS and is unable to install dual boot on its system because of storage and time constraints. The analysis report deadline is closing by and James needs a quick solution to have a MacOS in hand and quickly get done with the analysis. Now, since the task requirement is only for a small duration, James cannot buy a new MacBook altogether. So he decides on making use of an EC2 MacOS Instance to quickly get its task completed with the least cost and within the expected timeband.
In this blog, we will see how Mr. James can quickly get started launching a MacOS Instance and connecting to its GUI (MacOS) to accomplish its time-constraint task. We will have a look at how we can create a dedicated host for a MacOS Instance. We will then switch on the auto-assigning of IPv4 addresses to the instances. Moving further we will see how to create a MacOS Instance with the newly created dedicated host attached to it. Then we will assign the storage for smooth flow of the GUI and create a security group to connect to the instance via a local machine with SSH rule attached to it. Then we will execute a few commands on the command line to change the flow of traffic and start up the Remote Management. Since Mr. James has Windows OS, we will then see how to install RealVNC Viewer, and create an account to start up the MacOS GUI on Windows. At last, we will test the connection via installing an application from the App Store and running it.
To implement this, we will do the following:
- Login to your AWS console and navigate to the dashboard.
- Search for the EC2 service and navigate to the EC2 dashboard.
- Create a new dedicated host for a Mac instance.
- Search for the VPC service and navigate to the subnets of the created VPC.
- Switch on ‘Auto-assign IPv4 addresses’ for your subnets in the created VPC.
- Navigate back to the EC2 dashboard and launch a new instance.
- Make sure to create an instance in the availability zone in which you created the dedicated host.
- Create a new security group for that instance so that we can SSH into the instance.
- Review all the configurations and create a new key-pair and download the key while launching the instance.
- Connect to the newly created EC2 instance either via EC2 connect or SSH client.
- Connect to the MacOS Instance using a command via SSH client.
- Switch to the Bash Scripting dashboard.
- Start a Remote Management using the command line.
- Navigate traffic to the localhost:5900 port.
- Install RealVNC Viewer in case you are using windows to launch the GUI.
- Create a RealVNC account and login to the application using the account.
- Connect to the VNC address (localhost:5900) to start the MacOS GUI.
- Authenticate the traffic flow.
- Test the GUI by installing and running up an application from the App Store.
Login to your AWS console and navigate to the dashboard.

Search for the EC2 service.

You will then be navigated to the EC2 dashboard.

In the left navigation pane, click on Dedicated Hosts.
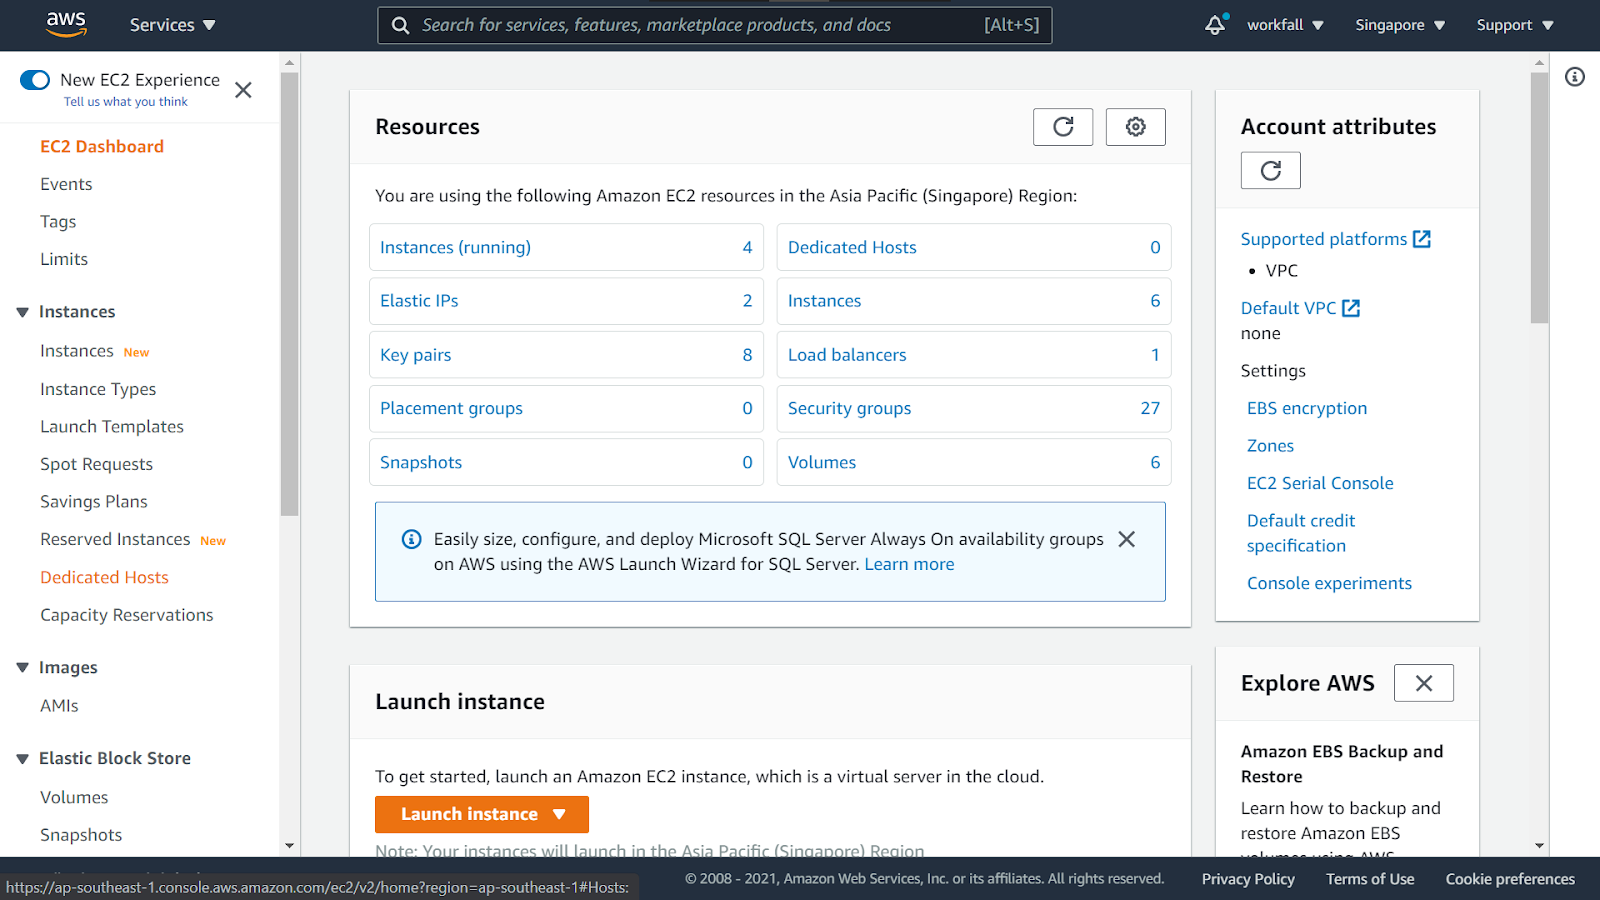
On the dashboard, click on Allocate Dedicated Host.

You will have to fill in the details over here as shown in the images below before creating a MacOS Instance.
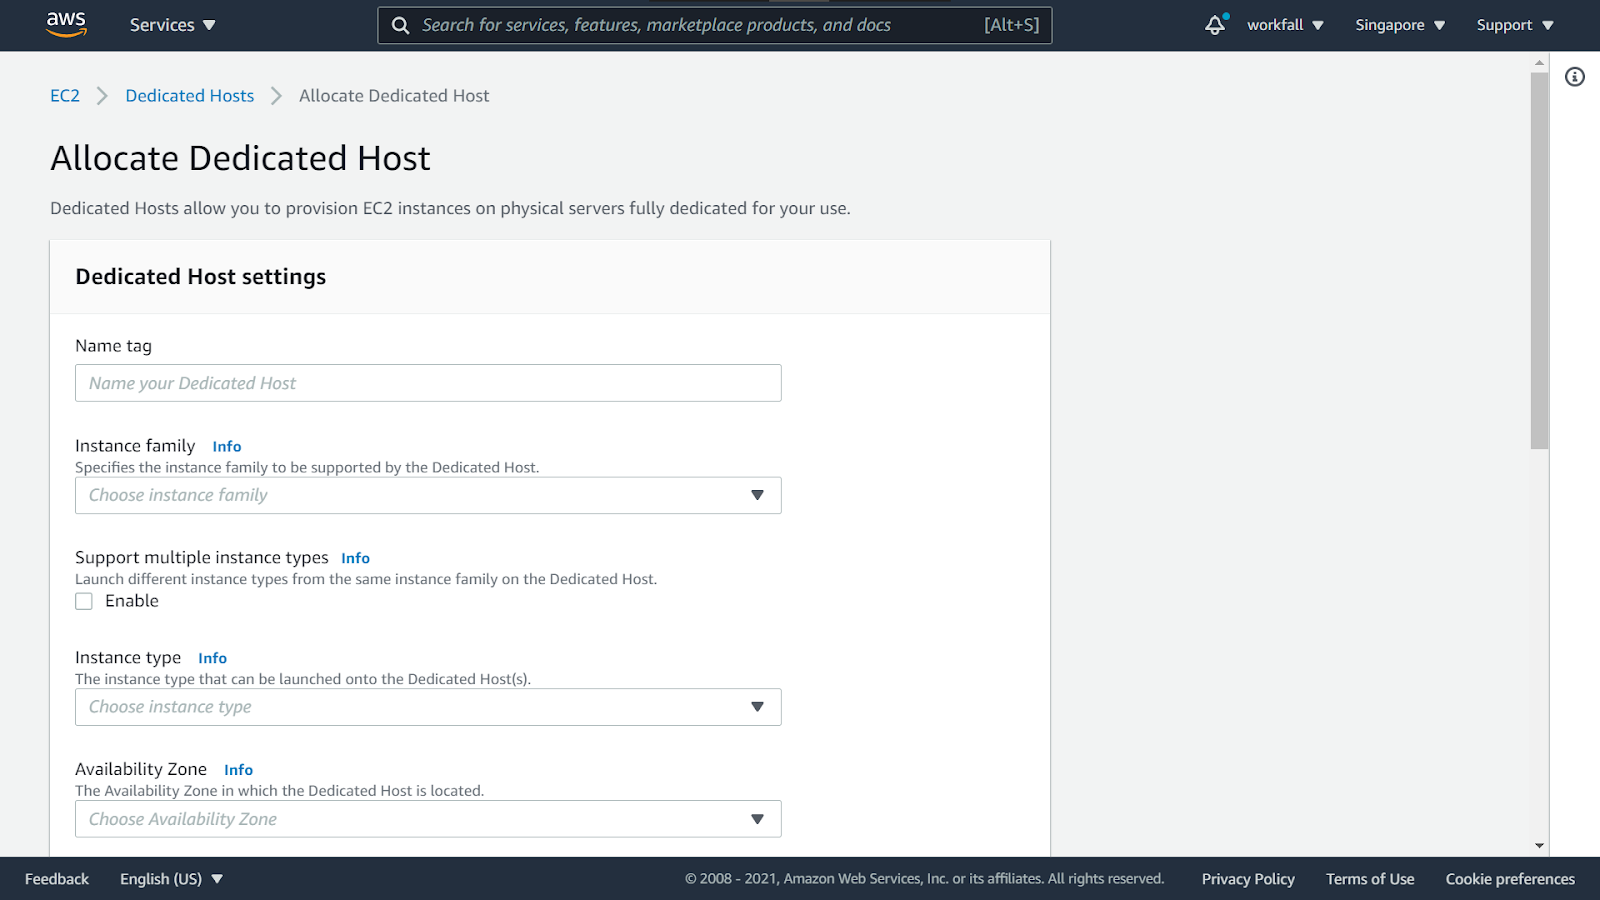
Enter a name for the dedicated host and in the instance family dropdown, search for mac1.

For instance type, select mac1.metal from the dropdown.

Choose an availability zone for your dedicated host.
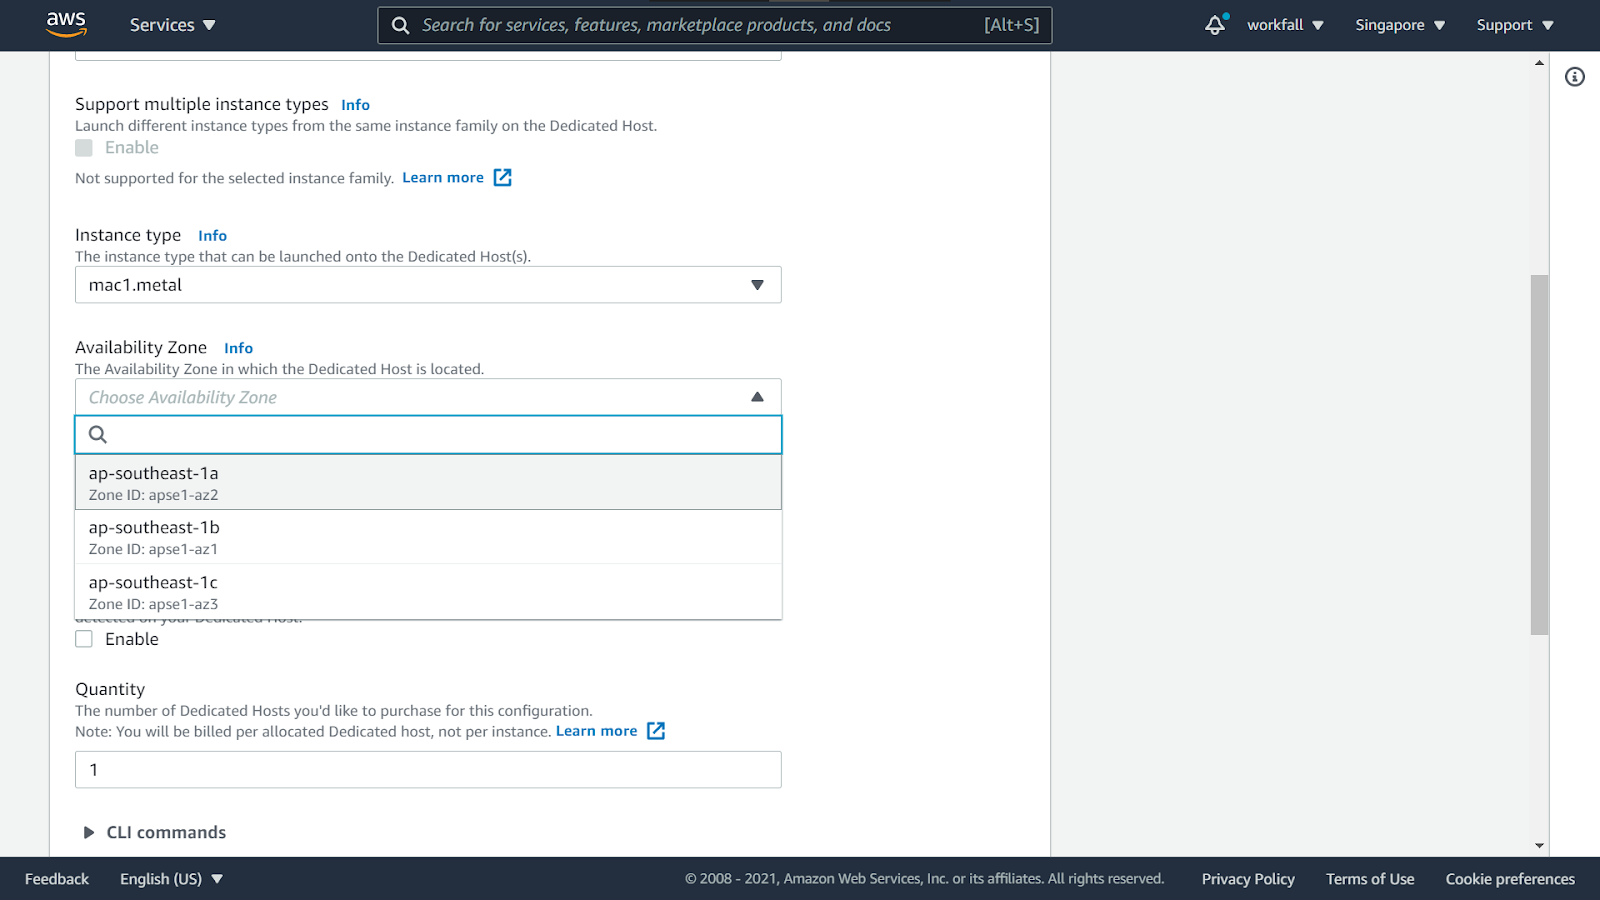
If you expand CLI commands, you will get to see that you can execute commands on your instance on startup.

Add tags for your dedicated host (if needed) and leave all the other settings to its default configuration. Click on Allocate.

On success, you will see the message as shown in the image below and a new dedicated host will then be available to be attached to the EC2 instance.

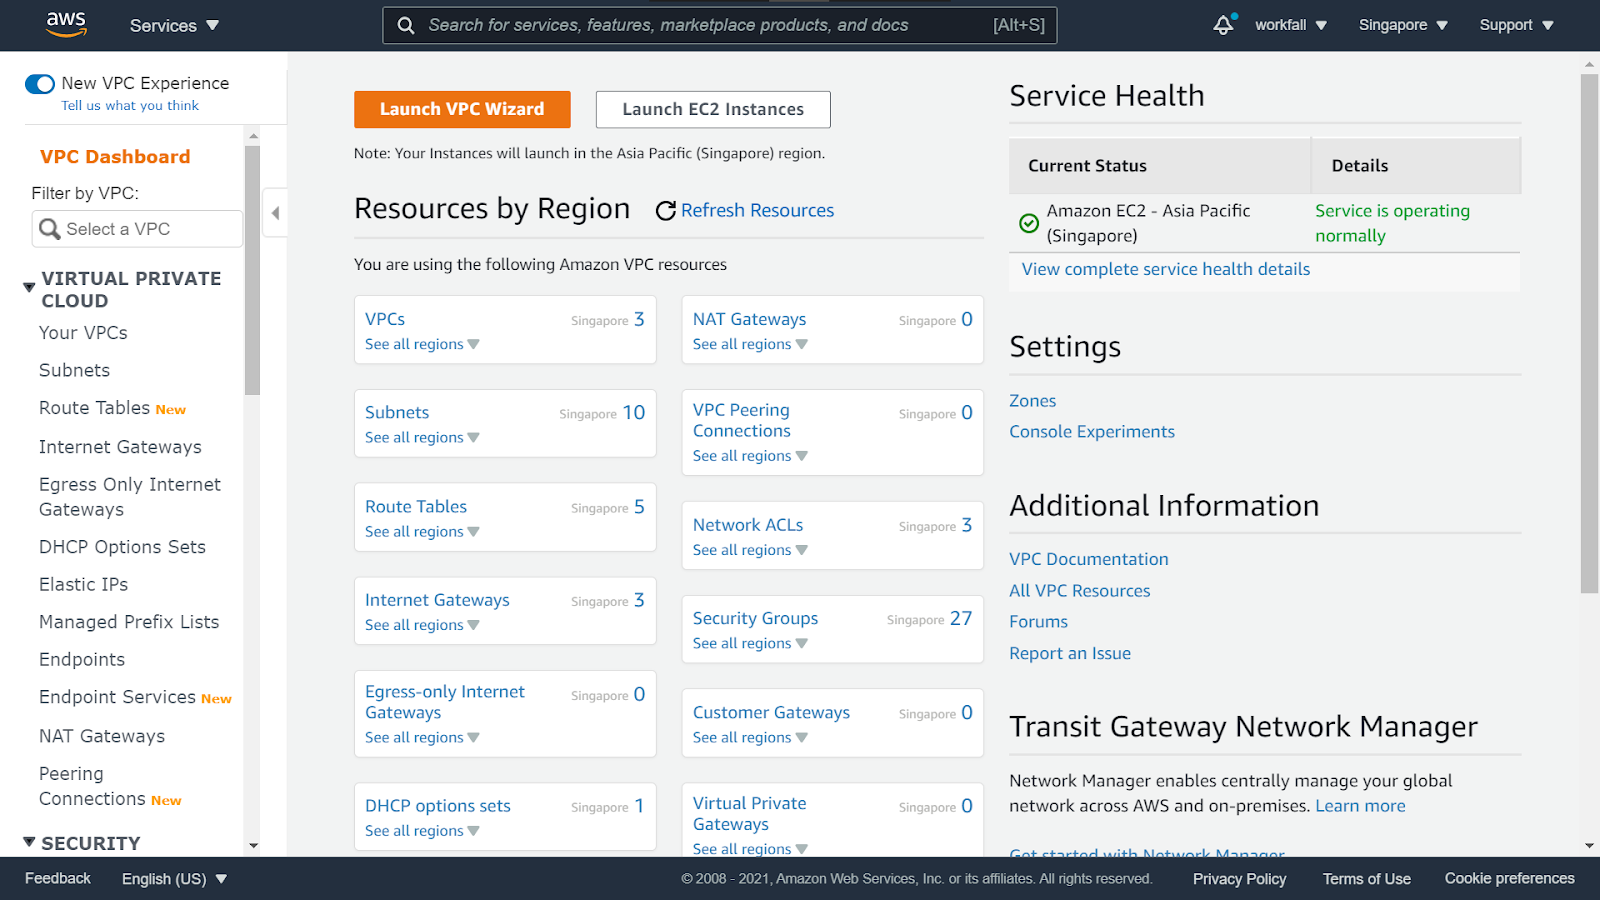
Search for the VPC service.

Next, you need to ensure that your subnet has the “Enable auto-assign public IPv4 address” checked (enabled). This is to be ensured since you will have to connect to your EC2 instance to make sure the SSM agent is installed on your instance. Without the public IPv4 address, you will not be allowed to connect to your instance.
To enable/verify it, navigate to the Amazon VPC dashboard.
Click on “Subnets” on the left navigation pane under the “Virtual Private Cloud” section.
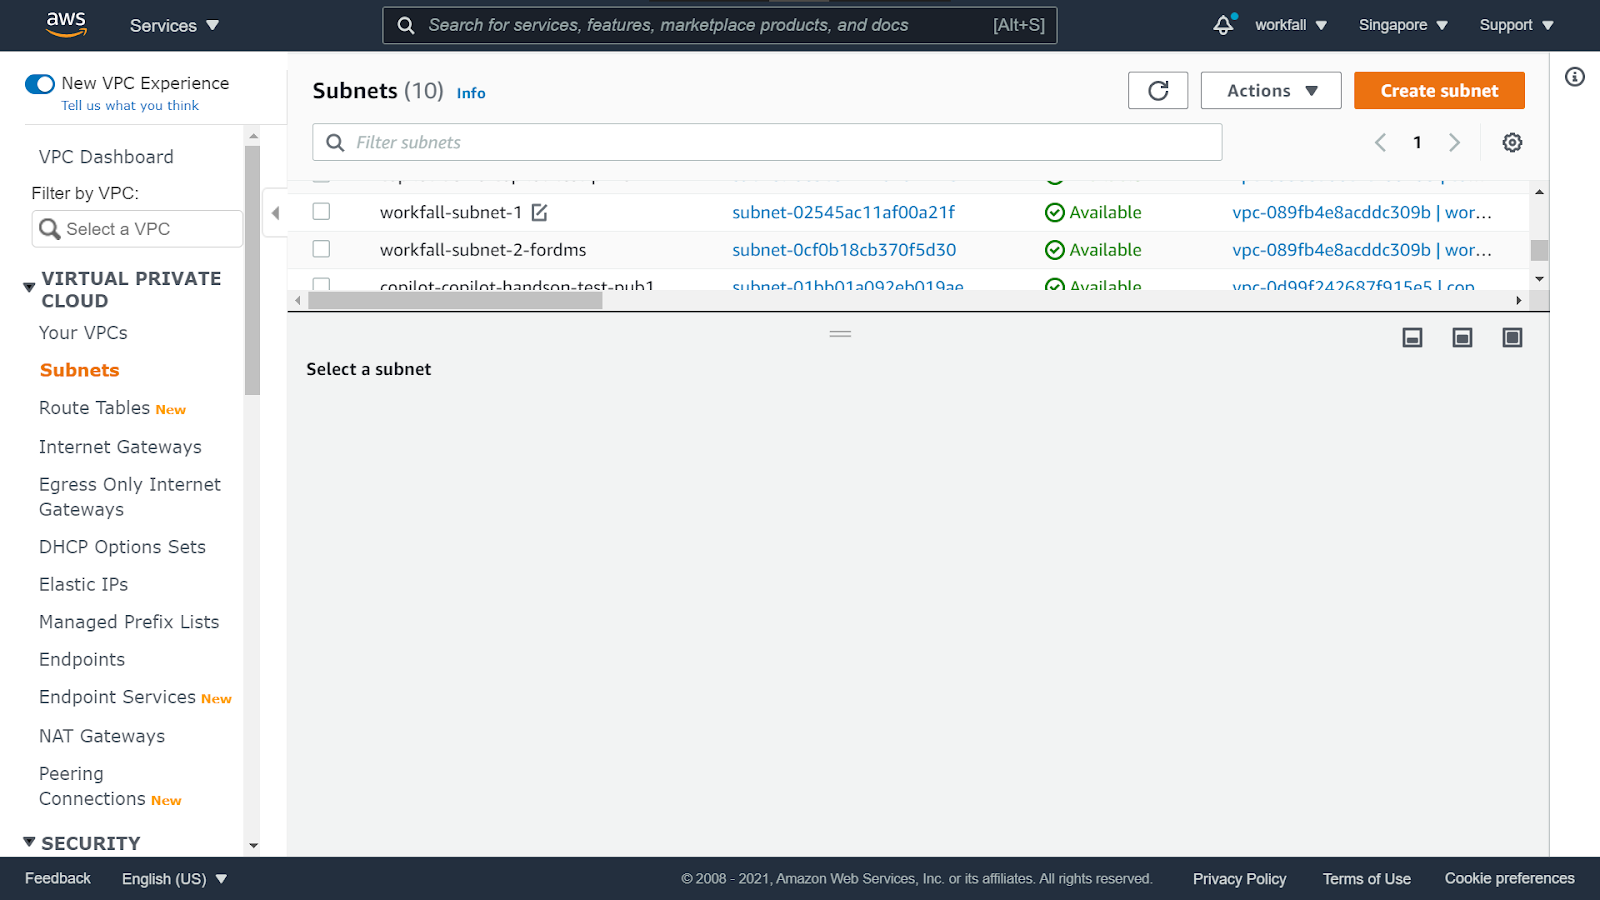
Select your subnet in which you will be creating your instance and click on “Actions”.
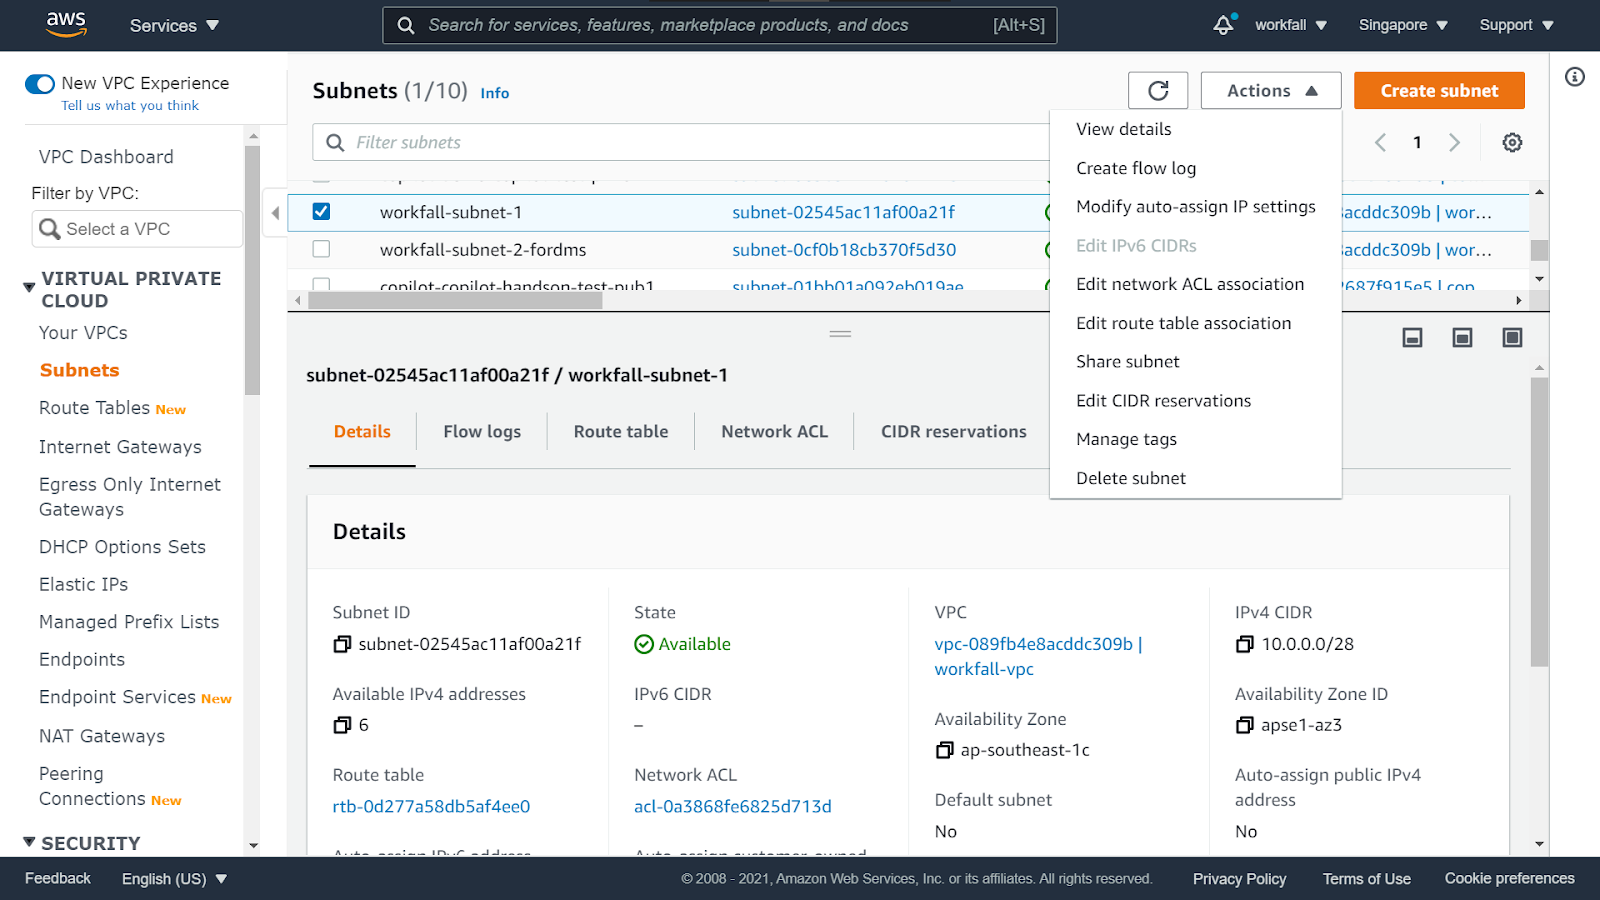
Select “Modify auto-assign IP settings”. Ensure that the checkbox for “Enable auto-assign public IPv4 address” is checked and click on “Save”.

On success, you will get a success message as shown in the below image.

Navigate back to the EC2 dashboard and click on Launch instance.

Select Launch instance from the dropdown.

From the list of EC2 instances, select either MacOS Big Sur 11.5.1 or MacOS Cataline 10.15.7 based on your requirements.

In the next step, select mac1 and click on Next.

Select the VPC and the subnet in which you created the dedicated host.
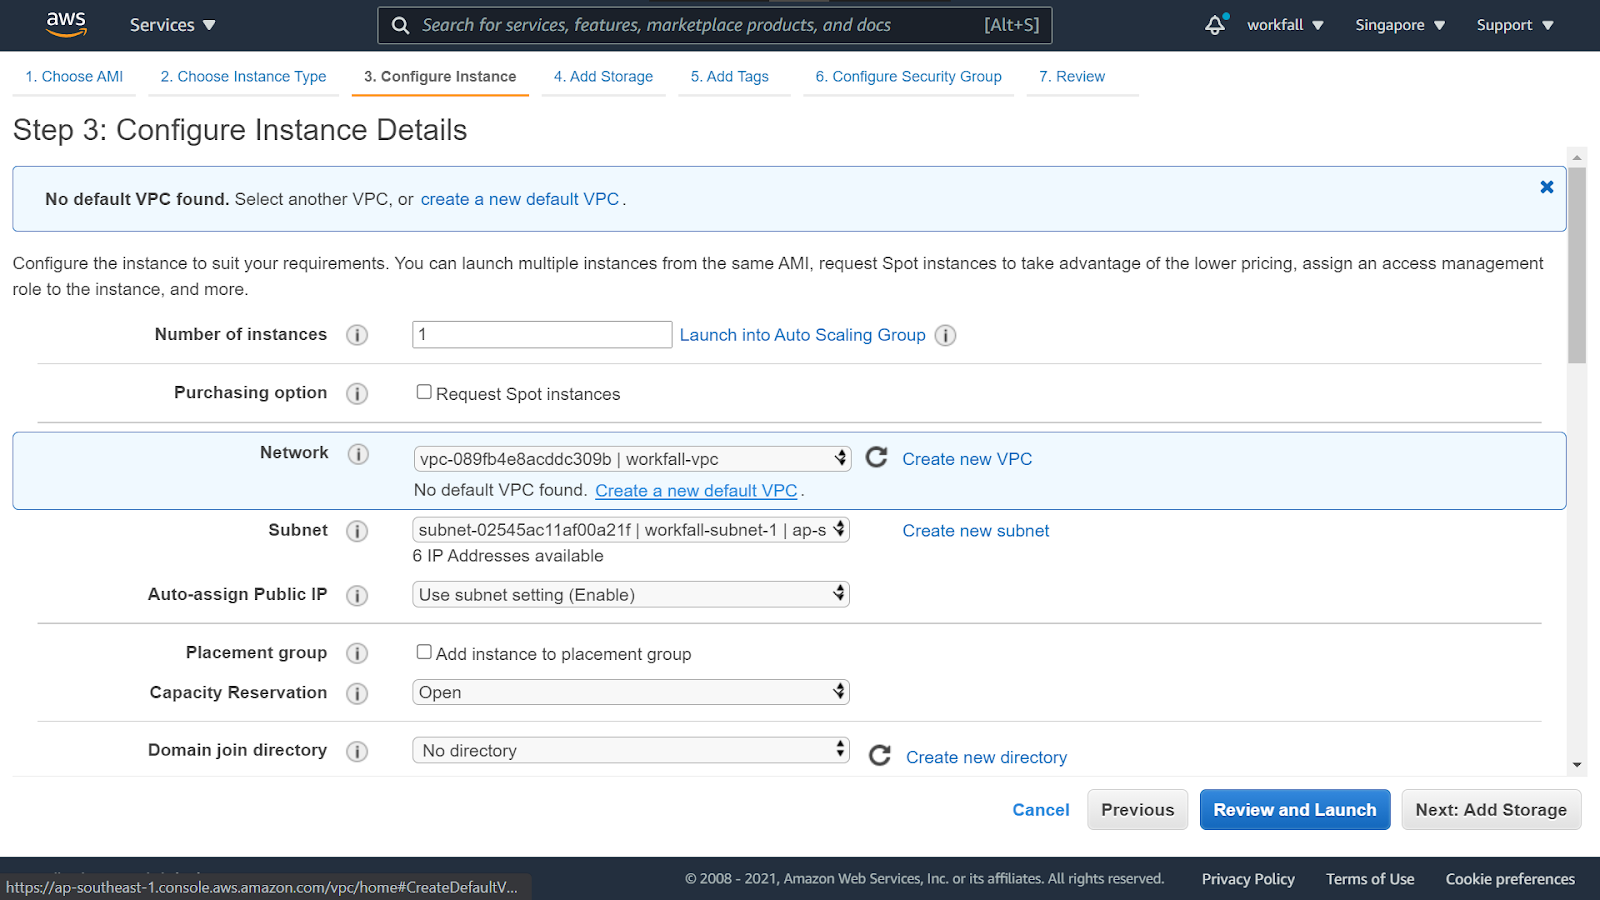
Scroll down and under Host, select the dedicated host that you created above.

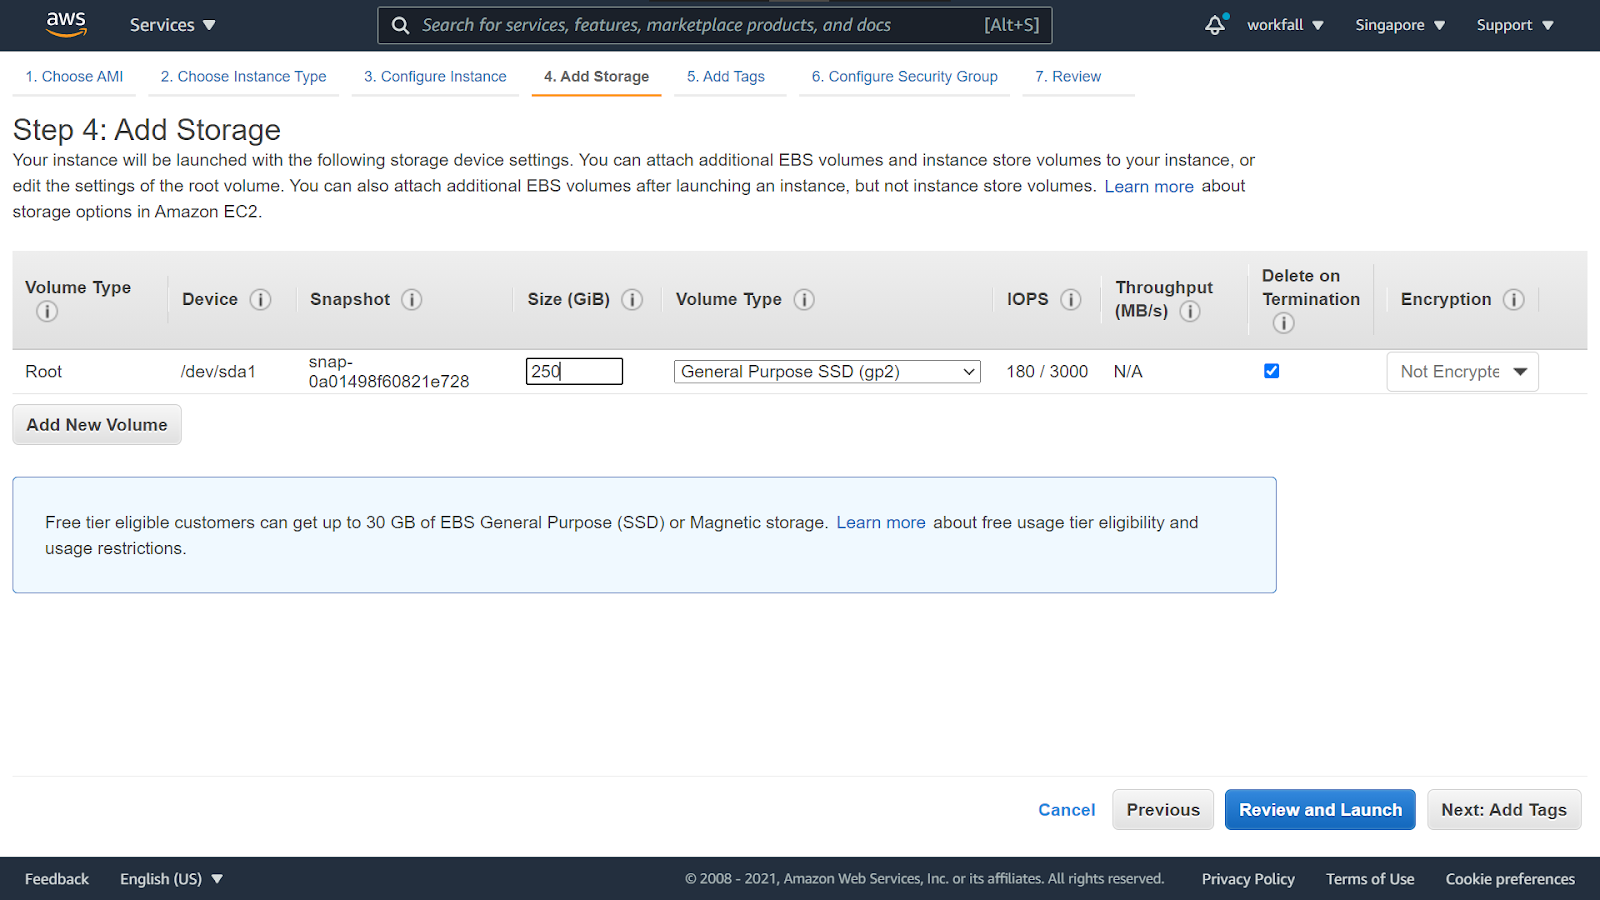
While adding storage, make sure you add the storage size as per your requirements for smooth GUI flow.
In the next step, add tags if you need any for your EC2 instance.

While configuring the security groups, create a new security group to allow SSH to your PC’s IP so that you can connect to your EC2 instance via your local machine.

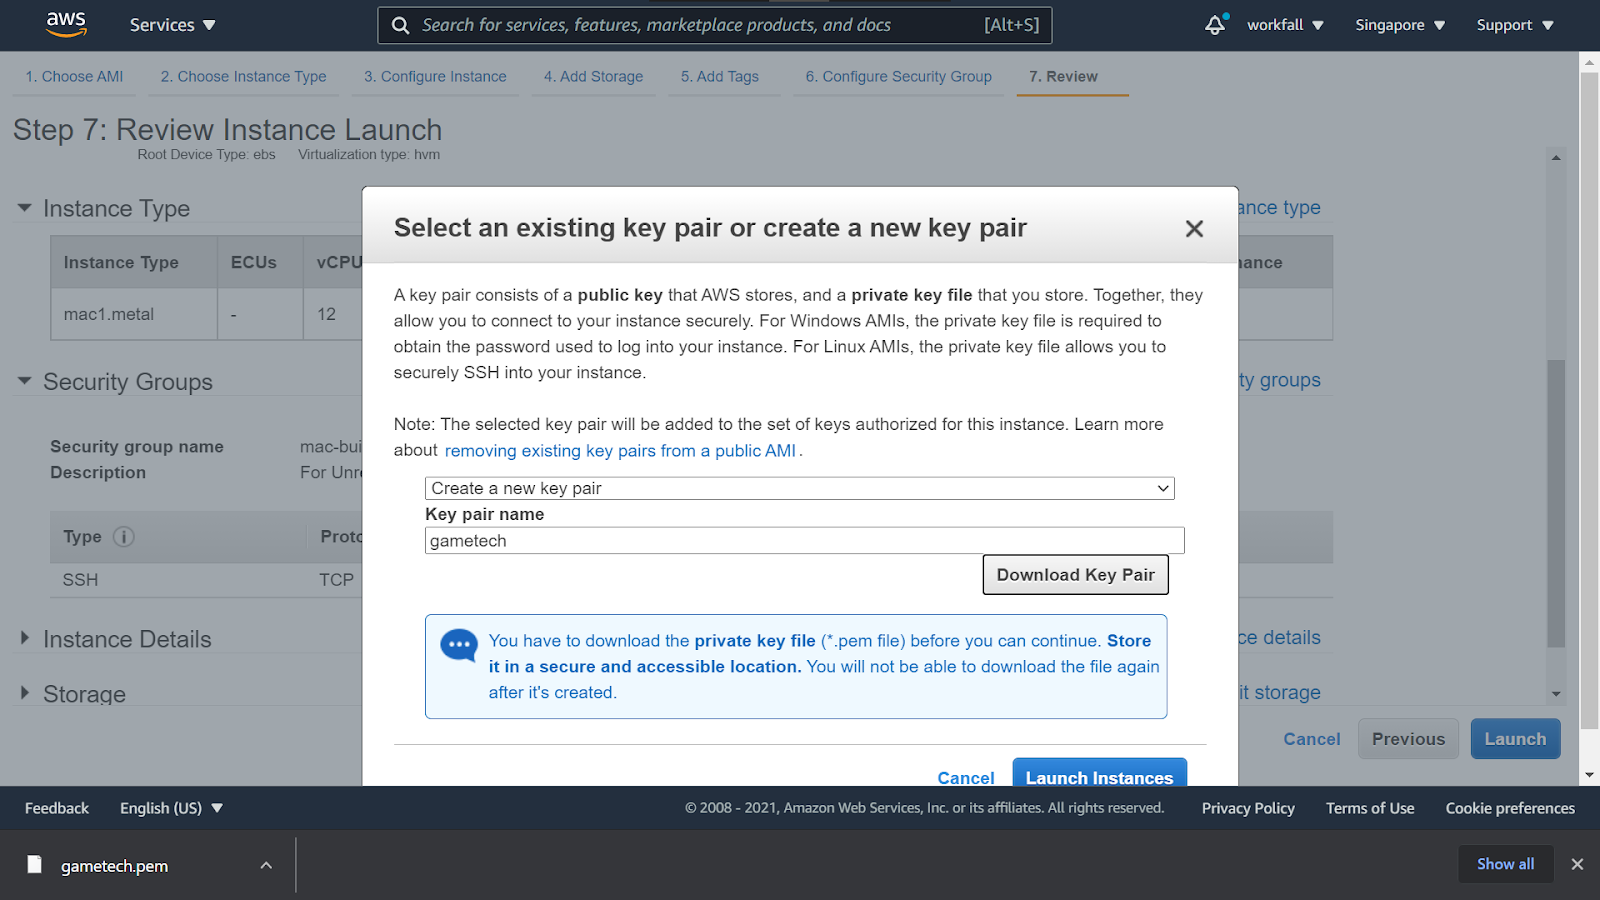
Finally, review all the settings and click on Launch.

Create a new key pair and download it before you proceed.
Once done, your instance will be up and running in a few minutes.

Scroll down and click on View instances.

Search for the instance that you created above.

On successful Status check, you will see the green mark as shown in the image below.

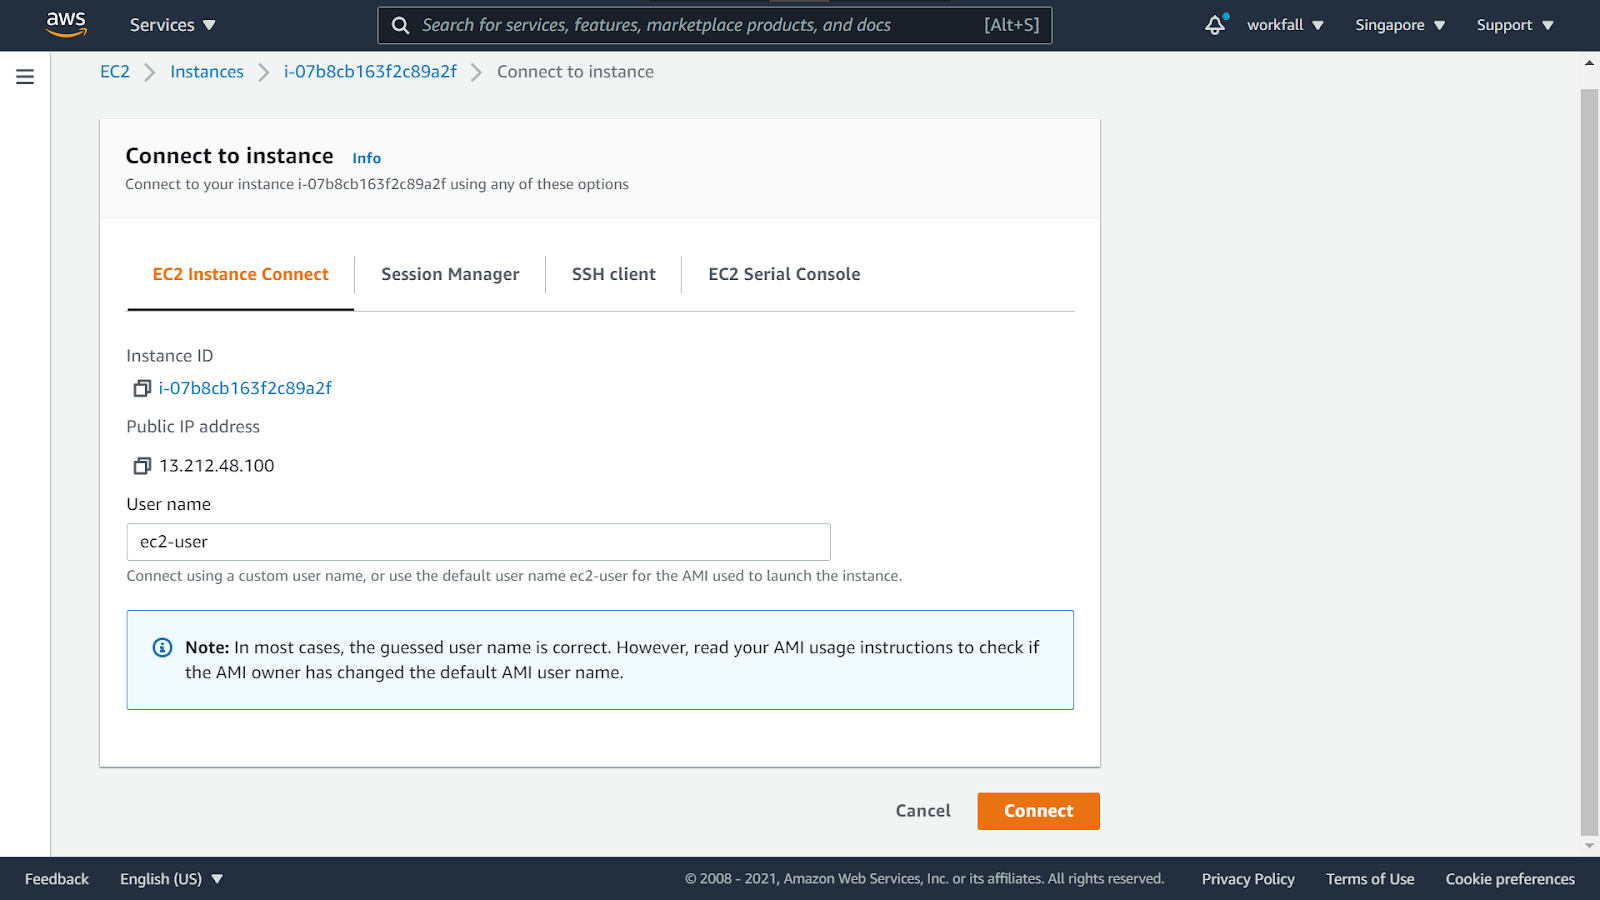
Select the instance and click on Actions. Click on Connect.

You can either choose to connect via EC2 connect or via SSH client. Click on the SSH client tab.
Copy the command shown in the example section.

Navigate to the folder that contains your key pair (.pem) file. Run the copied command in the git bash. On successful connection, you will see the screen as shown in the image below.

Now execute:
sudo passwd ec2-user
To configure a password.

Navigate to https://www.realvnc.com/en/connect/download/viewer/ and download the vnc if you are using Windows OS. Click on Finish after installation completion.

Execute the command:
chsh -s /bin/bash
To change the shell to bash scripting.

Execute the command:
sudo /System/Library/CoreServices/RemoteManagement/ARDAgent.app/Contents/Resources/kickstart -activate -configure -access -on -restart -agent -privs -all
To activate Remote Management.

Execute the command:
ssh -L 5900:localhost:5900 -i “gametech.pem” ec2-user@13.212.48.100
To move traffic to the localhost.

Now, open the VNC Viewer application. Click on Sign in and create a new account.

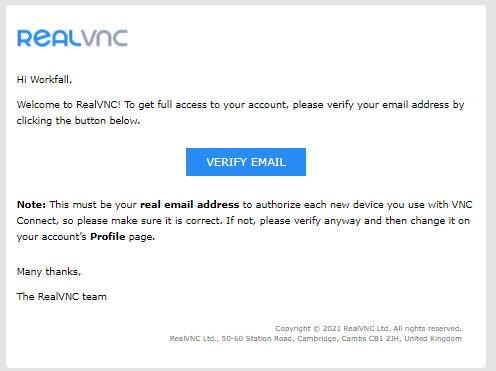
You will receive a confirmation email as shown in the image below. Click on Verify email to verify your email.
Login with your credentials on the application.

On success, you will see the screen as shown in the image below.

Search for localhost:5900 and click on Connect to address.

Enter the username as ec2-user and the password as the password that you configured on the git bash command line.

It might take a few minutes to connect and launch the GUI.

Once the GUI starts, enter the password that you configured above.

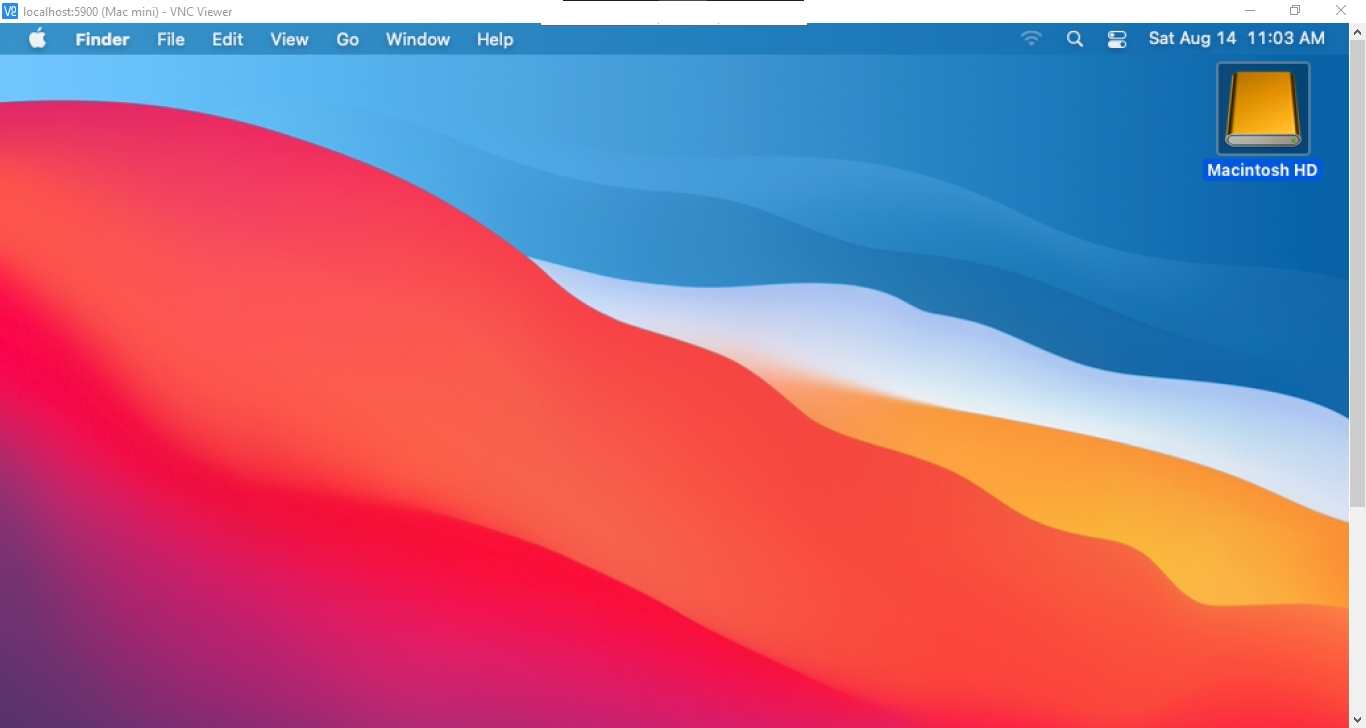
On success, you will see that the GUI will be started.
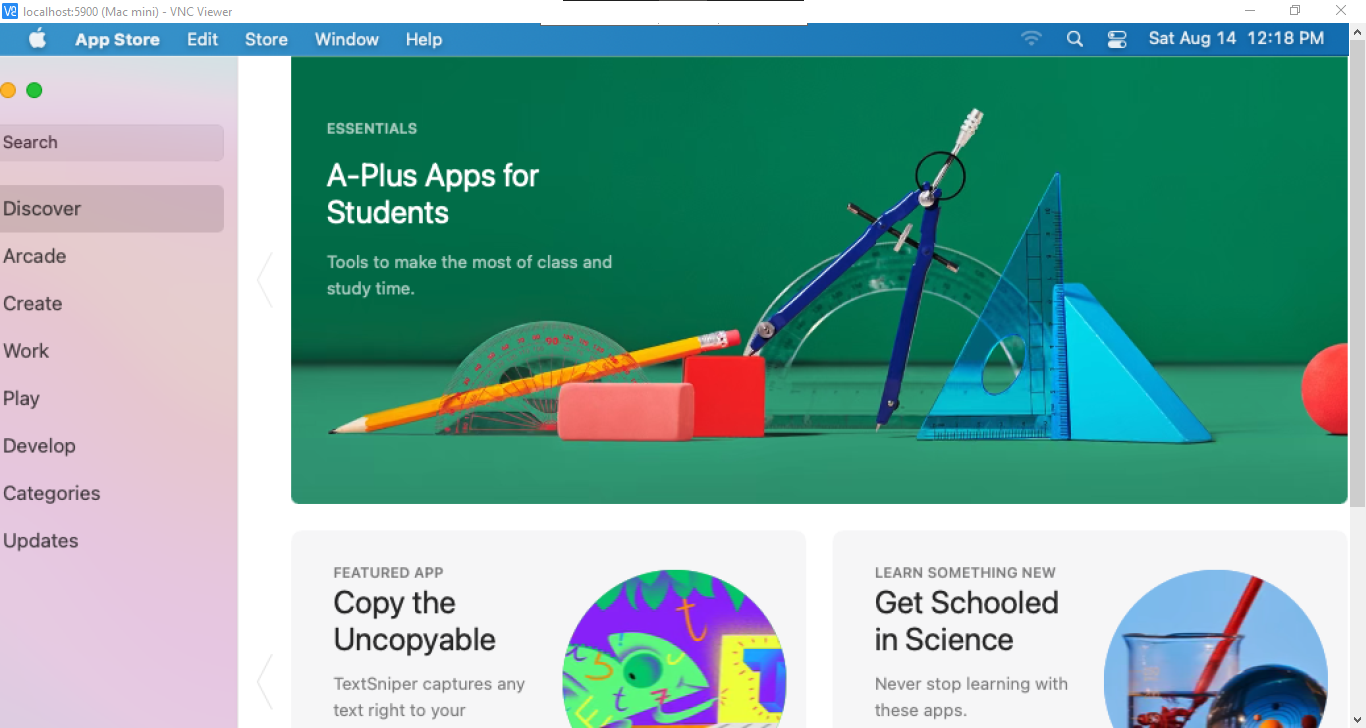
Now, let’s test the OS downloading an application from the App Store. Click on the App Store.

Search for the application ‘Scratch’ in the search bar.
Install the application and click on Open.
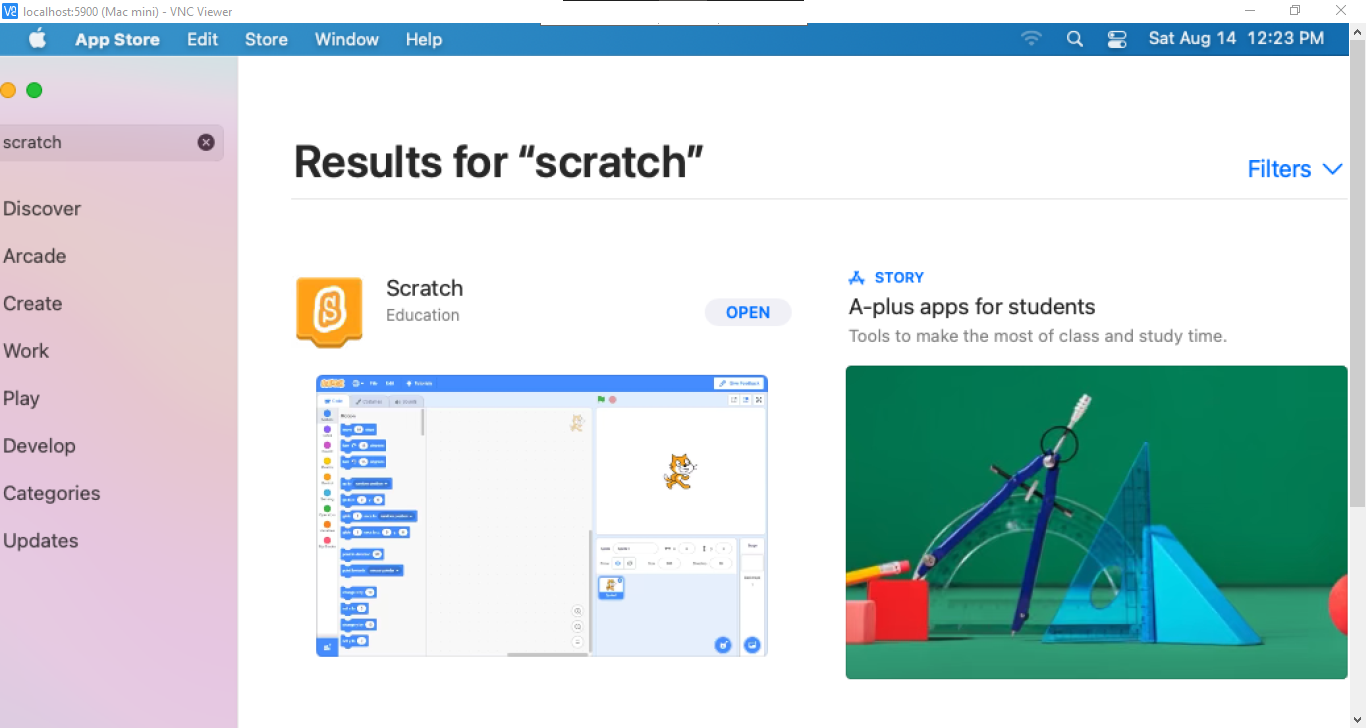
As you can see, the application is up and running.

Conclusion
In this blog, we saw how Mr. James could quickly get started launching a MacOS Instance and connecting to its GUI (MacOS) to accomplish its time-constraint task. We had a look at how we can create a dedicated host for a macOS Instance. We then switched on the auto-assigning of IPv4 addresses to the instances. Moving further we saw how to create a macOS Instance with the newly created dedicated host attached to it. Then we assigned the storage for smooth flow of the GUI and created a security group to connect to the instance via a local machine with SSH rule attached to it. We then executed a few commands on the command line to change the flow of traffic and start up the Remote Management. Since Mr. James has Windows OS, we saw how to install the RealVNC Viewer, and created an account to start up the macOS GUI on Windows. At last, we tested the connection by installing an application from the App Store and running it. We will discuss more use cases of Amazon EC2 MacOS Instances in our upcoming blogs. Stay tuned to keep getting all updates about our upcoming new blogs on AWS and relevant technologies.
Meanwhile …
Keep Exploring -> Keep Learning -> Keep Mastering
This blog is part of our effort towards building a knowledgeable and kick-ass tech community. At Workfall, we strive to provide the best tech and pay opportunities to AWS-certified talents. If you’re looking to work with global clients, build kick-ass products while making big bucks doing so, give it a shot at workfall.com/partner today.