In the evolving landscape of AI-driven innovation, crafting compelling narratives has reached new heights with the power of Generative AI, and Amazon SageMaker stands as a pivotal platform for realizing this potential.
This hands-on exploration will guide you through harnessing the capabilities of Generative AI, specifically the GPT-2 model, to craft engaging stories from incomplete sentences using Amazon SageMaker Studio.
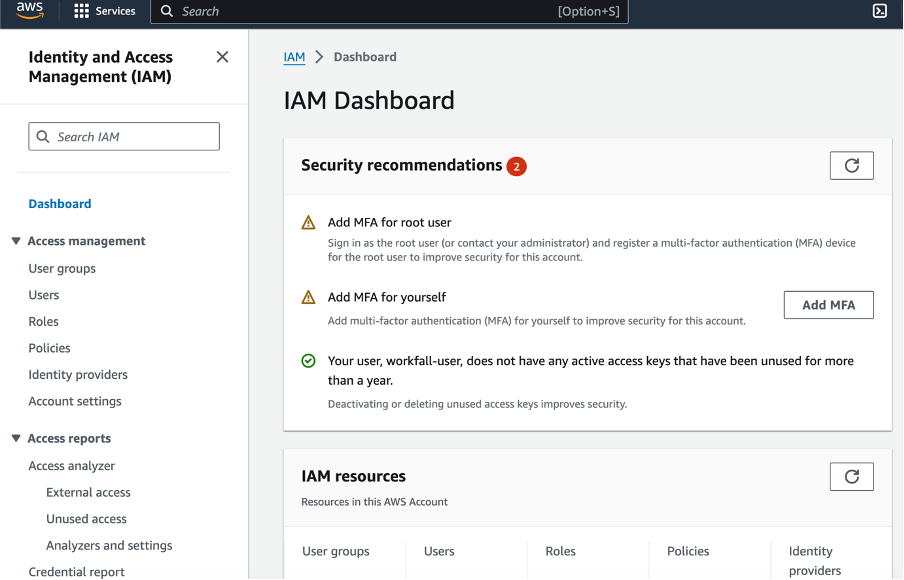
The step-by-step guide ensures a seamless setup by walking you through AWS Console navigation, region configuration, IAM permissions setup, and the establishment of a SageMaker Studio domain for single-user deployment.
As you delve into the intricacies of SageMaker Studio, the tutorial directs you to the HuggingFace hub, where you choose the GPT-2 model and deploy it with ease.
The subsequent testing phase allows you to execute code for text generation, providing a dynamic experience as you observe the model’s diverse narrations for various incomplete sentences.
Crucially, the tutorial concludes with a comprehensive cleanup process to avoid unnecessary charges, emphasizing the responsible utilization of cloud resources.
This immersive journey not only showcases the potential of Generative AI but also equips you with the skills to navigate SageMaker efficiently, ensuring a seamless integration into your business use case.
Hands-on

In this hands-on experience, discover the world of Generative AI and learn to create captivating stories from incomplete sentences using Amazon SageMaker Studio and the GPT-2 model.
The comprehensive journey provided in this implementation will guide you step by step, demonstrating how to effectively use Generative AI to craft engaging narratives. Follow the detailed guide not only for setting up but also for performing a thorough cleanup to ensure you avoid unnecessary charges.
Explore the flexibility of Generative AI and unleash your storytelling potential with this hands-on.
Step 1: Navigate to AWS Console
- Log in to the AWS dashboard to access the AWS Console.
Step 2: Change Region and Set IAM Permissions
- Change the region to US East (N. Virginia) or as per your requirements.
- Search for IAM service, navigate to its dashboard, and select Users.
- Choose the user to which you’ll add permissions. Scroll to the permissions tab and click on “Add permissions.”
- Select “Attach policies directly” and search for the SageMaker service.
- Provide full access to Amazon SageMaker for the IAM user (adjust as needed) and complete the setup.
Step 3: Setup SageMaker Studio
- Search for the Amazon SageMaker service and navigate to its dashboard.
- In the left navigation pane, select “Domains” and click on “Create domain.”
- Choose to set up a domain for a single user and proceed with the setup.
- Once created, click on the domain, select the default user, and launch SageMaker Studio.
Step 4: Explore SageMaker Studio
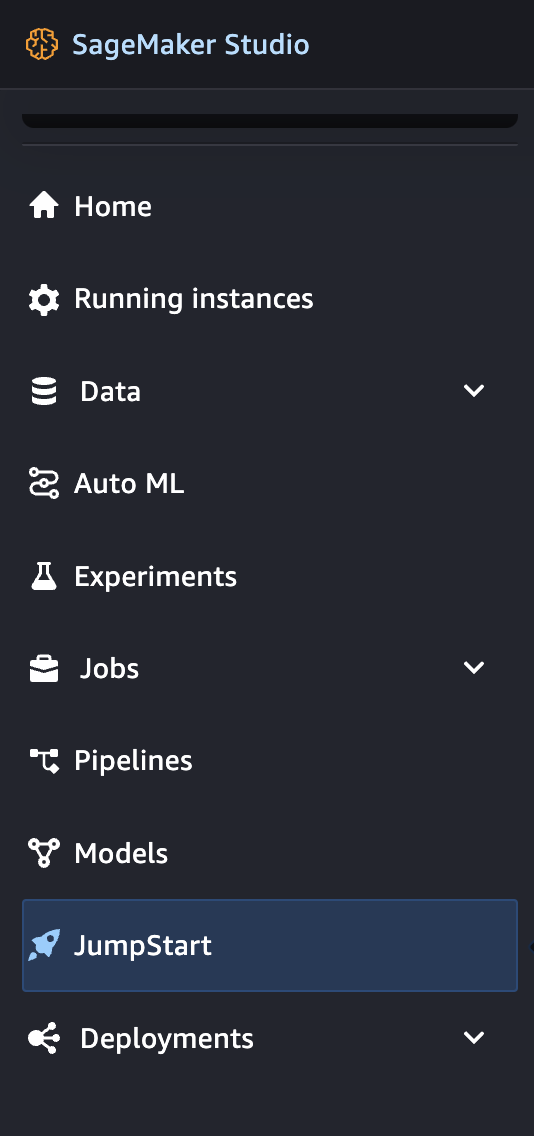
- In SageMaker Studio, select the “JumpStart” option from the left navigation pane.
- Explore different hubs, and for this hands-on, choose the GPT-2 model from the HuggingFace hub.
- Navigate to the GPT-2 model, evaluate its features, and click on “Deploy” for deployment.
Step 5: Deploy the Model
- Set up deployment parameters, including the endpoint name and instance type.
- Click on “Deploy,” and on success, the endpoint status will be “In Service.”
- Access the Studio and start working on the deployed model.
Step 6: Test Text Generation
- Open the notebook and execute the provided code for text generation.
- Experiment by changing input sentences and regenerate the output.
- Observe different narrations generated by the model for incomplete sentences.
Step 7: Cleanup to Avoid Charges
- Head to the SageMaker dashboard, click on “Models,” select the deployed model, and delete it.
- Delete the endpoint configurations and endpoints created during the hands-on.
- Cleanup the EFS created by searching for the EFS service and deleting the file system.
- Finally, delete the domain by removing the default user, deleting apps, and removing the domain.
- Manually delete the S3 bucket created for the domain to complete the cleanup.
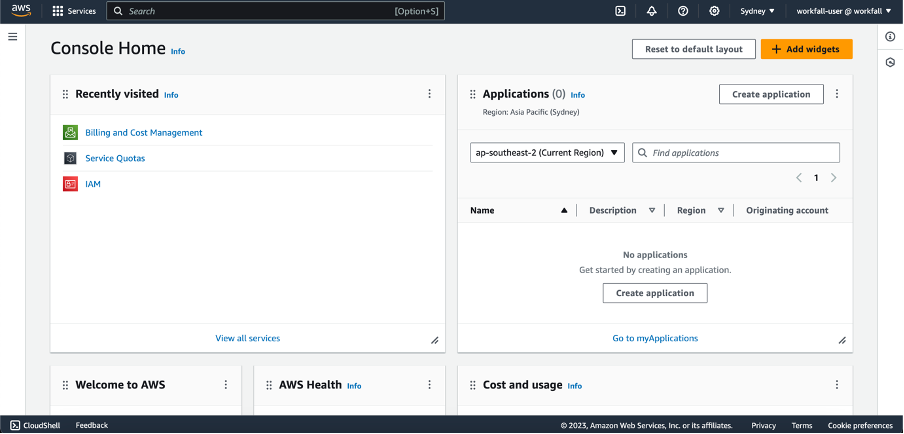
Navigate to the AWS console by logging in to the dashboard.
First, let’s change the region in which we will be performing the hands-on. Select region as per your requirements from the drop-down. In our case, we will select the US East (N. Virginia) region.
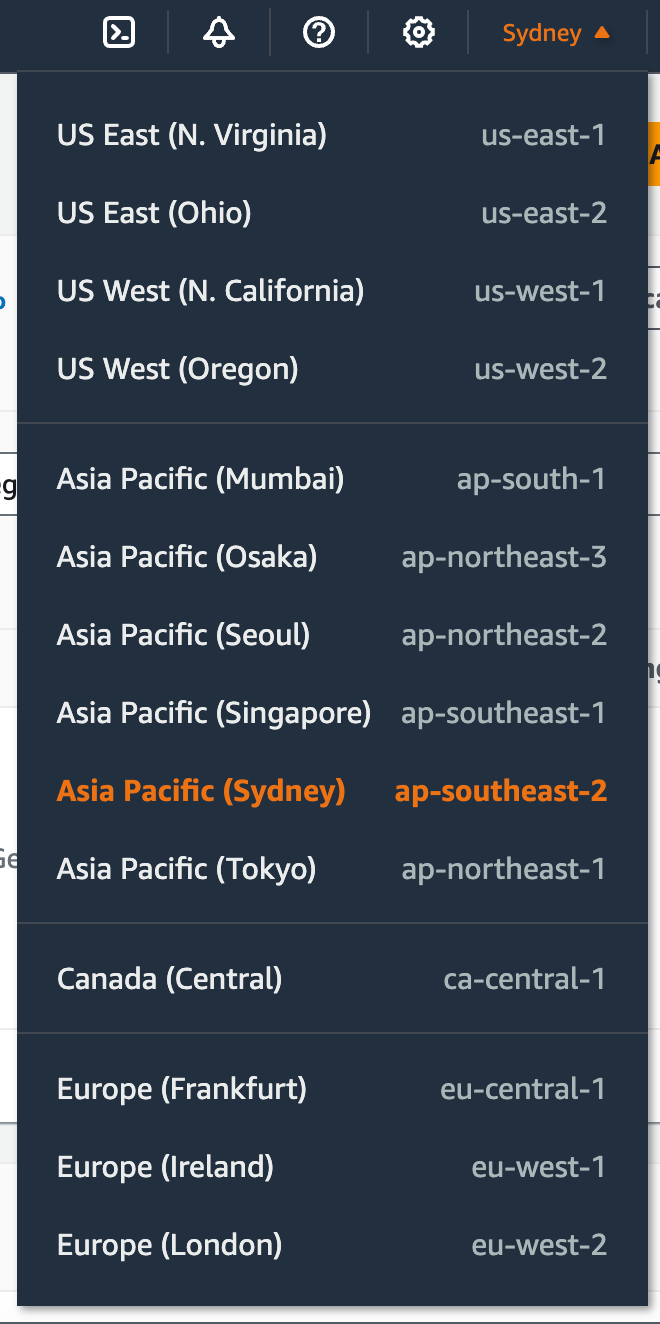
On success, you will see the following region chosen.

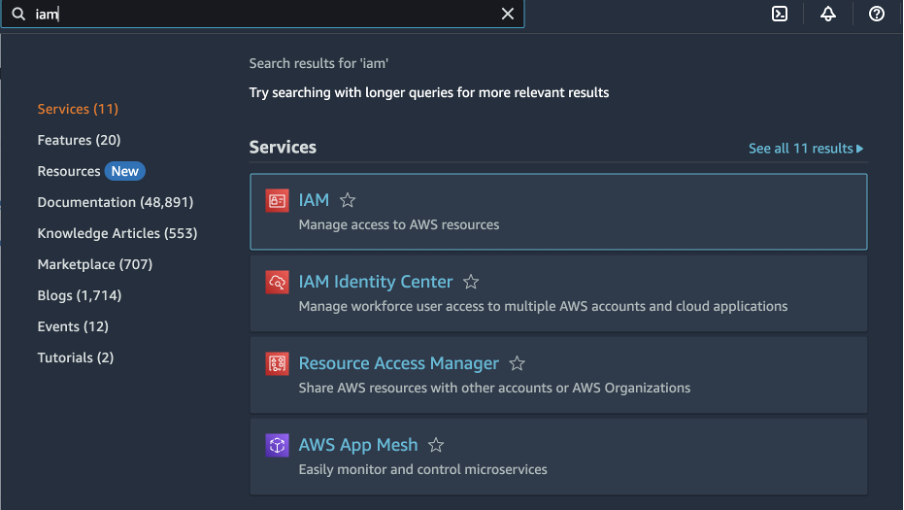
In the search box, search for the IAM service. Click on it to navigate to its dashboard.
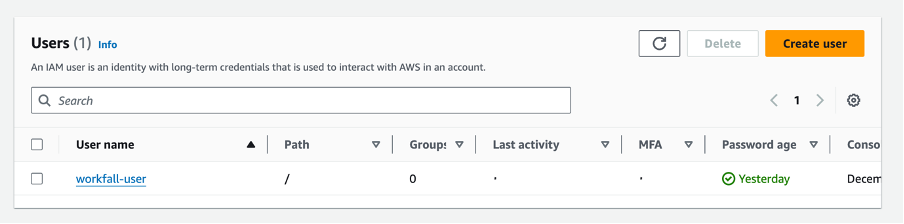
You will then navigate to the screen as shown in the image below. Select Users from the left navigation pane.
You will then see the list of users on the dashboard. Click on the user to which you need to add the permissions. To perform the hands-on, we need to add some permissions to the IAM user.
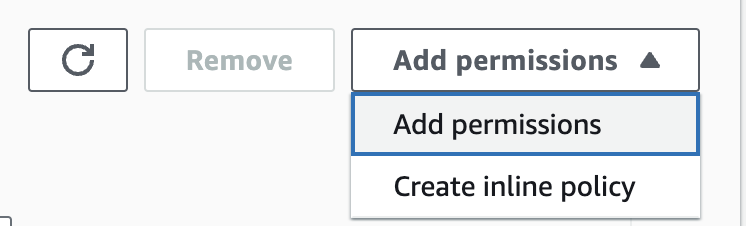
Scroll down to the permissions tab. Click on Add permissions.

Select Add permissions.
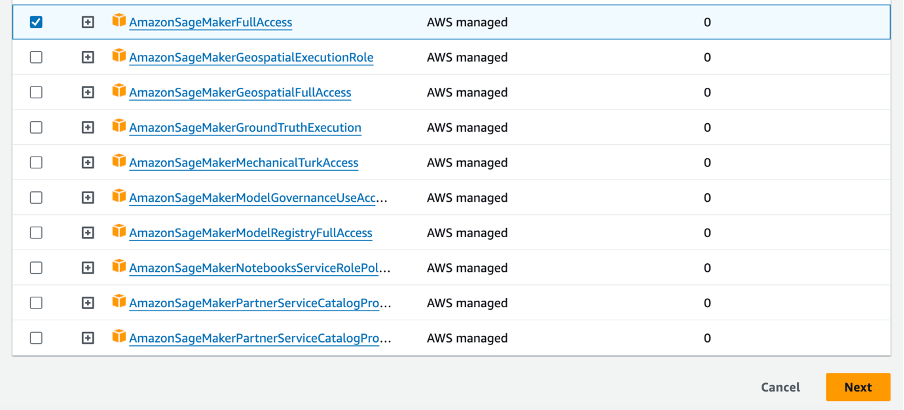
Select the Attach policies directly option.
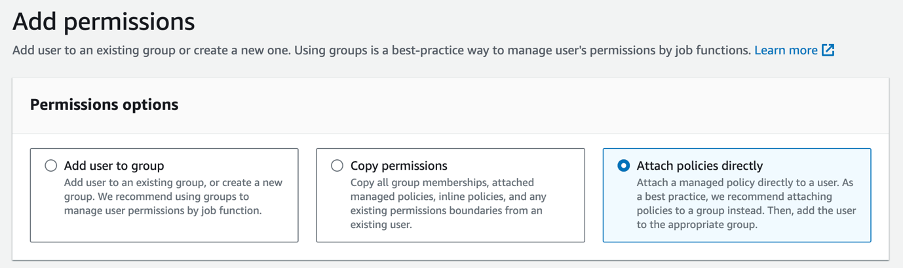
In the search box, search for the SageMaker service.

For this hands-on, we will be providing full access to Amazon SageMaker for the IAM user. You can limit the access as per the requirement and that is recommended. Just for the demo purpose we will be providing the entire access.

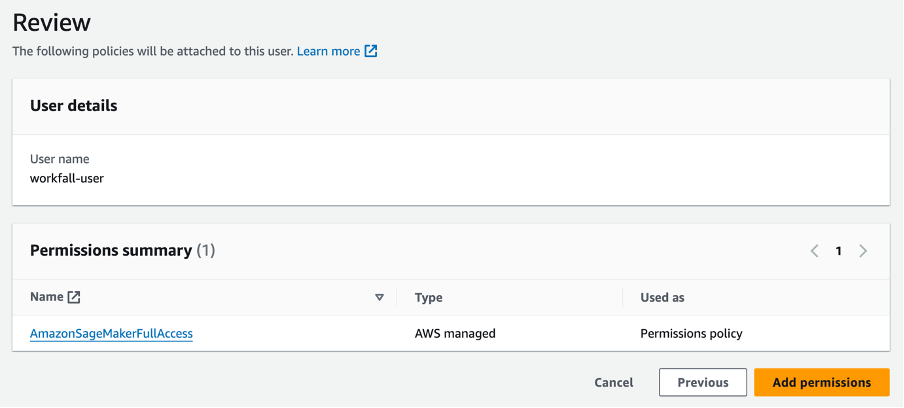
On the bottom of the screen, click on Next.
Review the same and click on Add permissions.
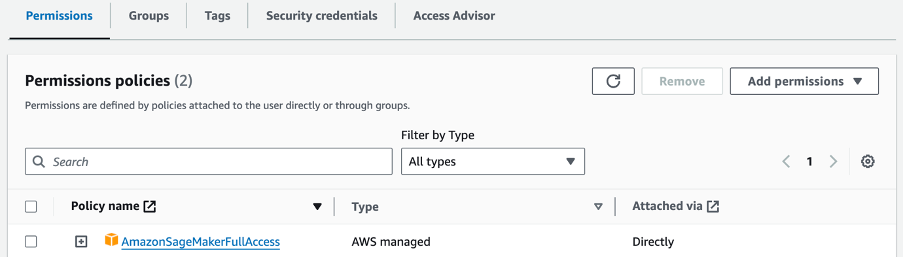
On success, you’ll see the screen as shown below.

Now, if you will see the permissions tab, you will see a new policy added.
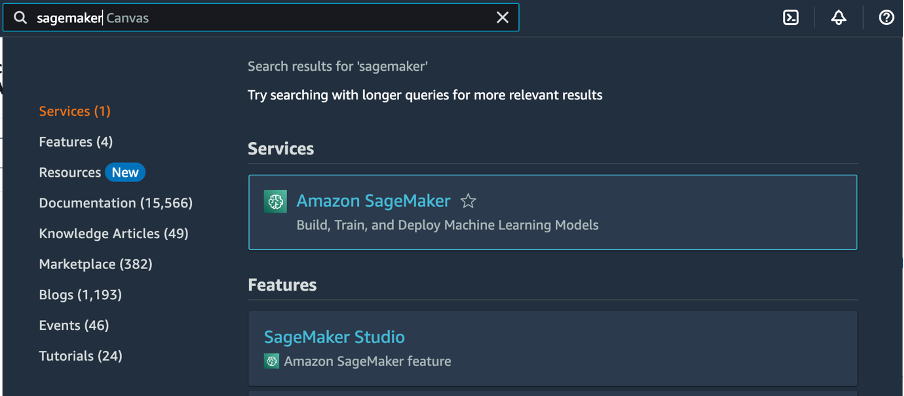
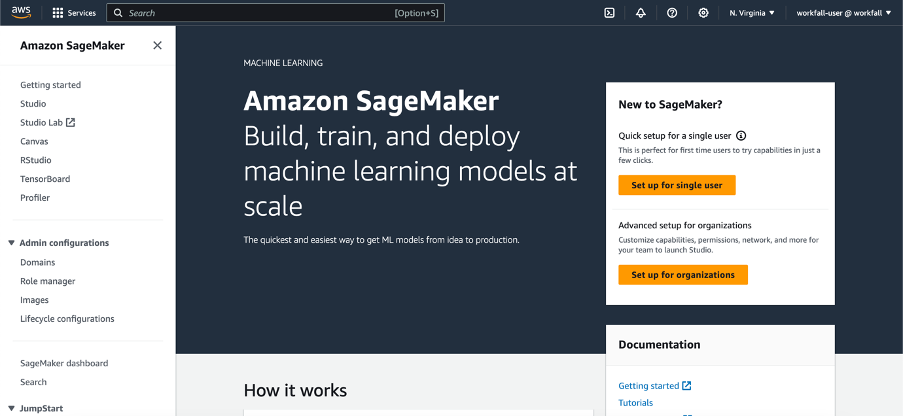
In the search bar, search for the Amazon SageMaker service. Click on it to navigate to its dashboard.
You will see the page displayed as shown in the image below. Now, as a prerequisite, we first need to create a domain to start a SageMaker studio.
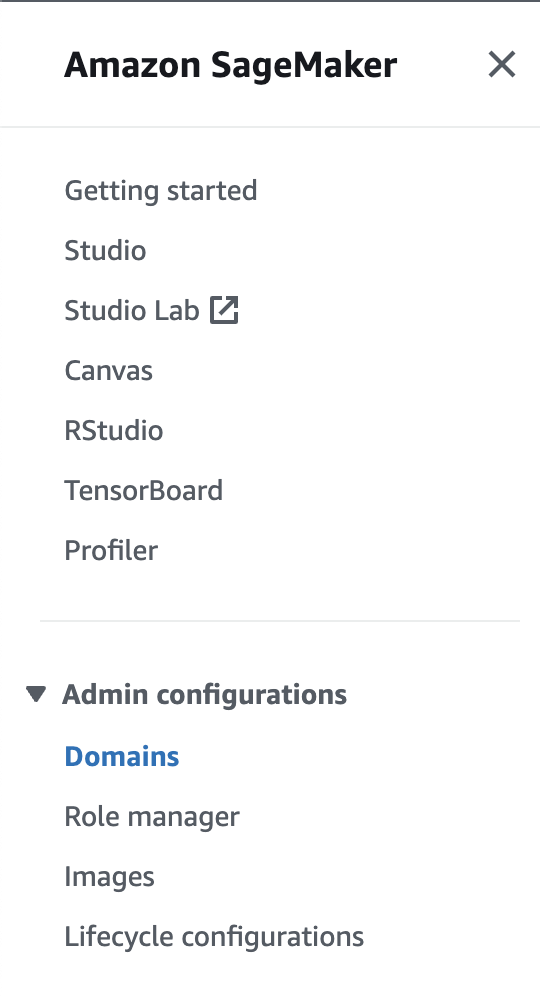
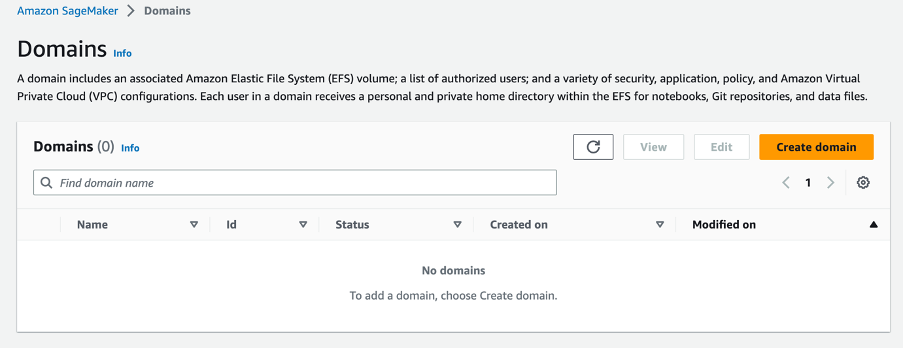
To do so, in the left navigation pane, select the domains option.
In the domain homepage, click on create domain.
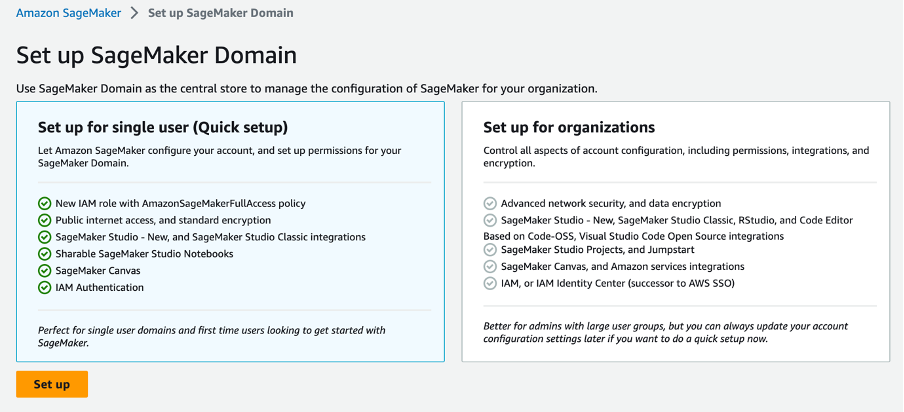
You will be provided with 2 options. You can either set up a domain for a single user which is basically a quick setup process or you can set it up for an organization. In our case, for the hands-on, since we just need one user to have access, we will select the set up for a single user approach. Select the same and click on the setup button.
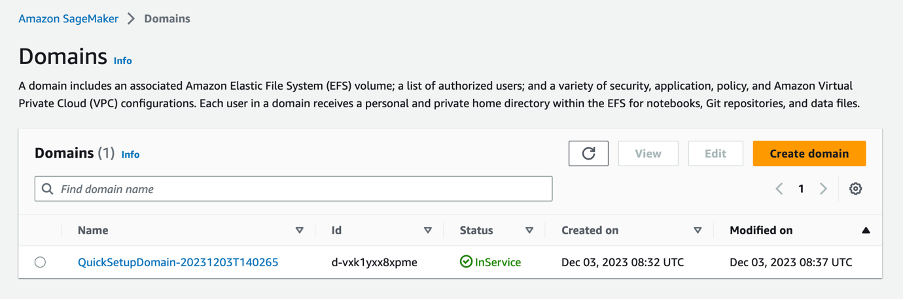
Setting up a domain takes some time. It might take a few minutes. You will be shown the process bar as displayed in the image below.

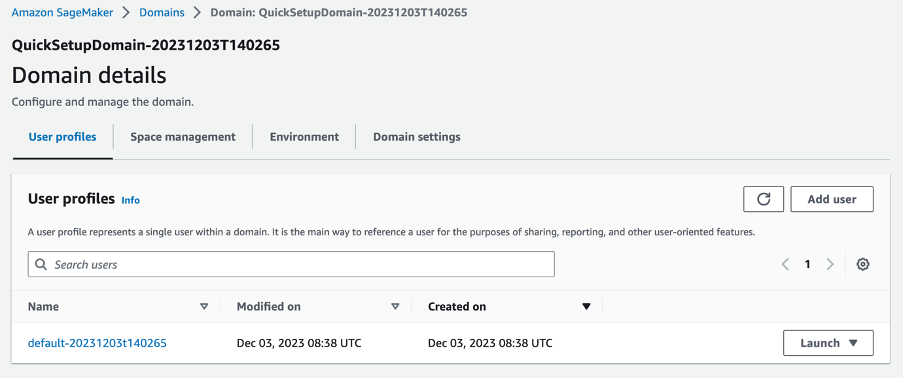
In successful creation, you will see the success message along with the domain entity in the list of domains. Now to start the studio, click on the domain. Under the User profiles tab, you will see the default user created. Click on the default user.
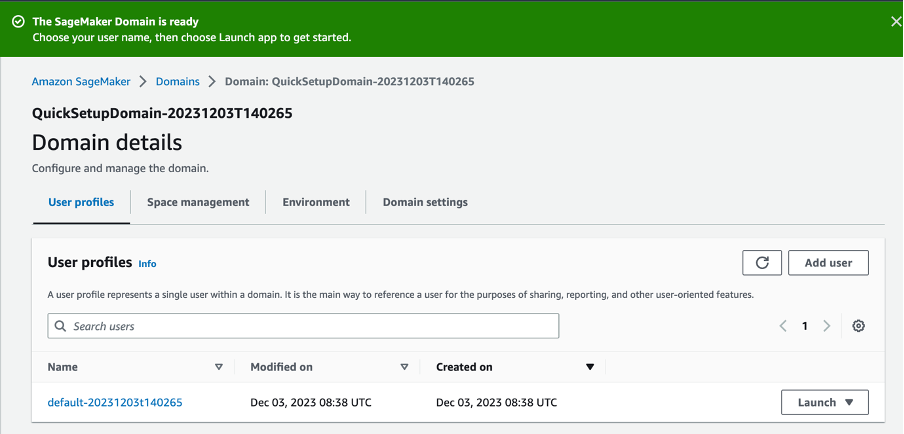
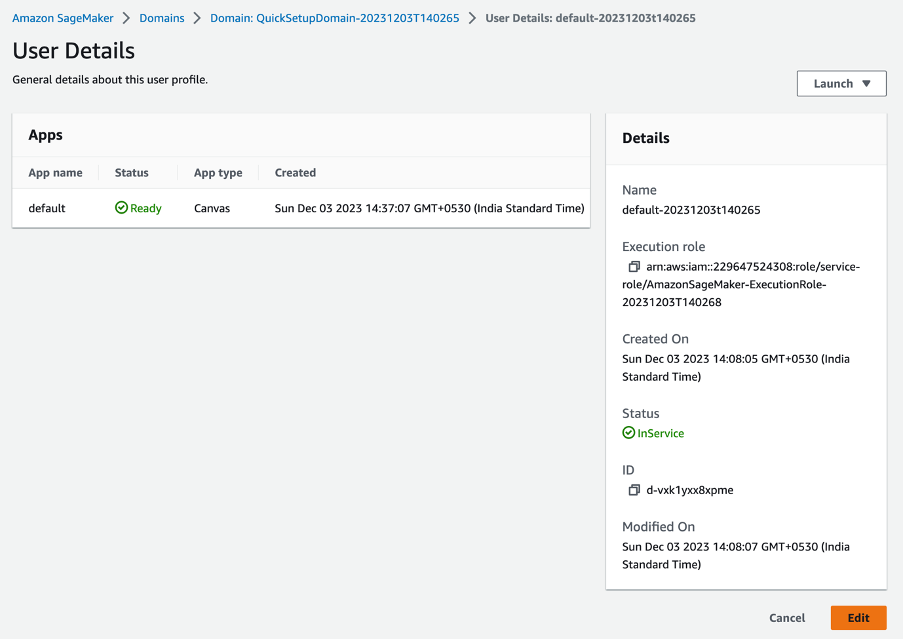
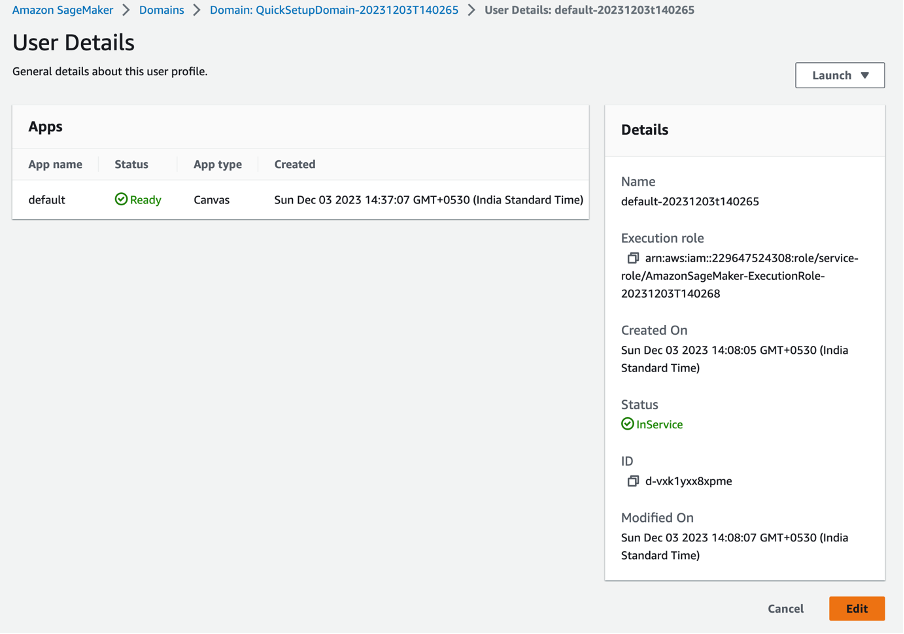
You will then be navigated to the details page of the default user. Click on launch.
Select the studio option.
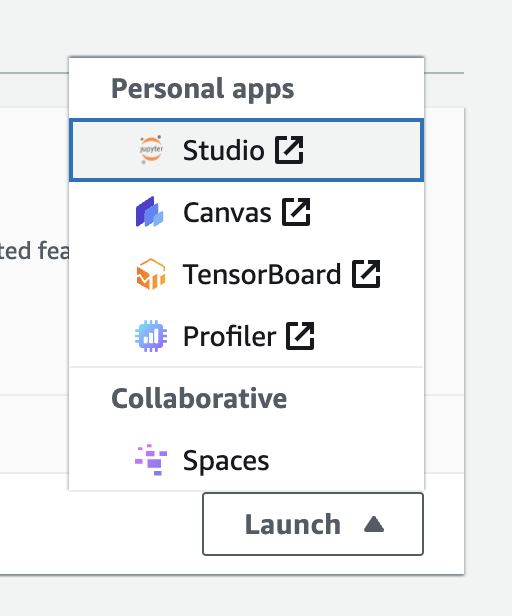
You will be navigated to the SageMaker studio in a new tab.
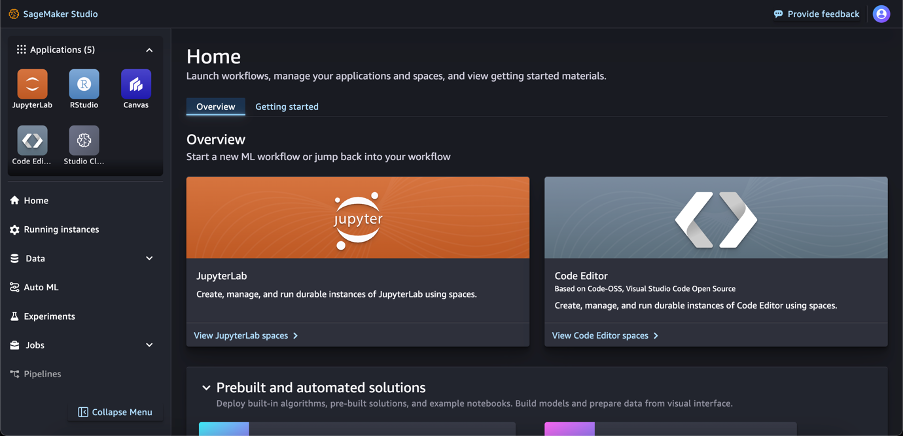
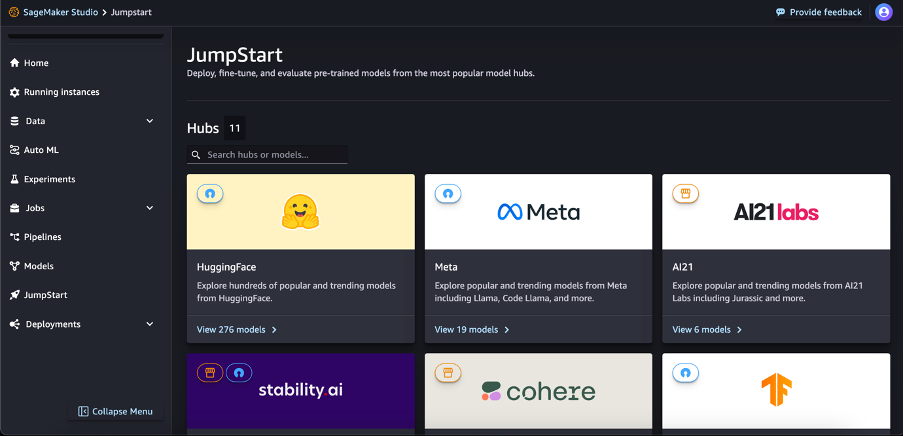
In the left navigation pane, select the jumpstart option.
You will then see a list of hubs as shown in the image below. Now the models are divided as per the hubs who are basically the owner of the different models.
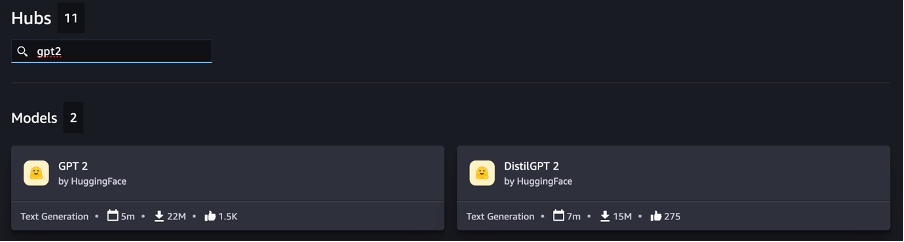
We will be using the GPT 2 models of HuggingFace hub for text completion/generation use cases. You can either click on the HuggingFace hub and search for the GPT 2 model or you can use the search feature in the outer menu to search for the model. In the search bar, enter gpt2 and you will see the model filtered. Click on the GPT 2 model.
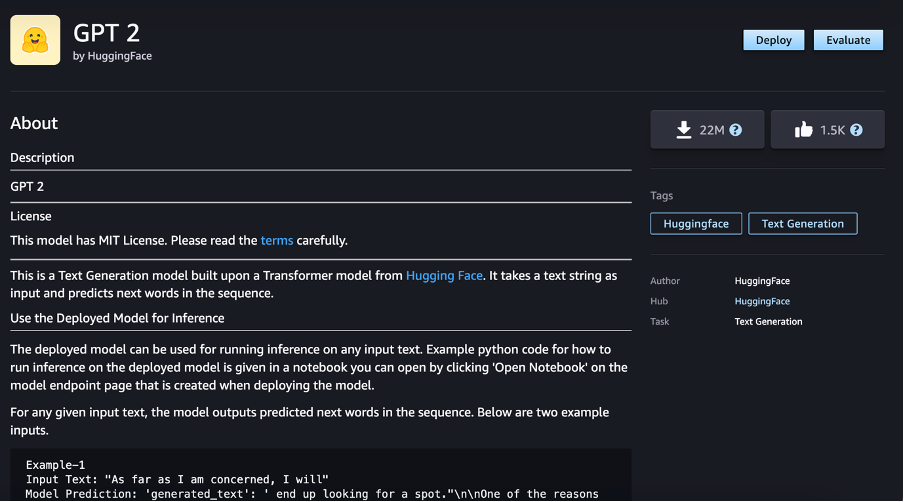
You will be navigated to the details page of the model. On the same page, you are provided with the details of what the model can be used for and what all features it provides along with examples. You will also see the number of likes and downloads for the model. The model provides 2 options.
Either we can evaluate the accuracy of the model clicking on the Evaluate button and setting up the metrics or we can deploy and use the model clicking on the Deploy button. For our use case, we will use the Deploy feature. Click on the Deploy button.
You will then be navigated to the configuration page where we need to set up the deployment parameters.
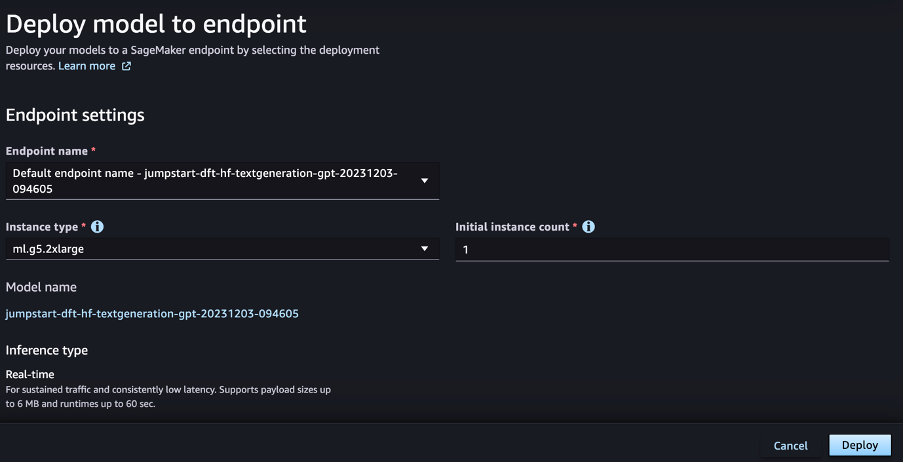
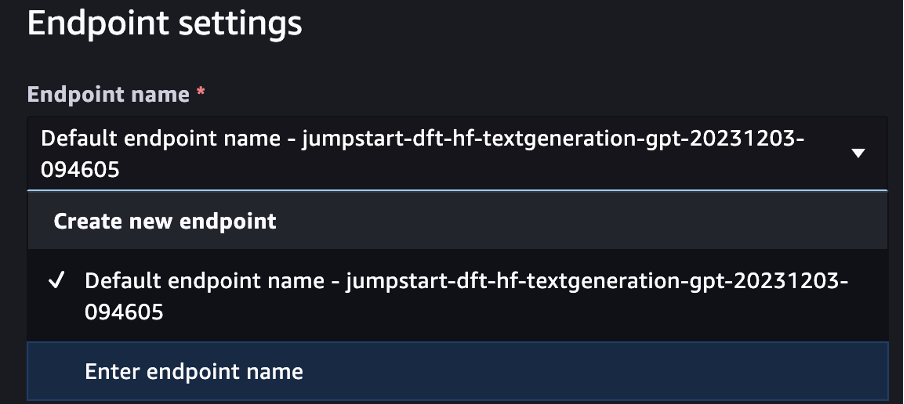
For the Endpoint settings, you can either use the default endpoint or from the drop-down, you can click on the Enter endpoint name option.
Type in a name for the Endpoint as you can see in the image below. Select the Instance type and the count as per your requirements. For the demo purpose, we will just be using 1 instance of ml.g5.2xlarge.
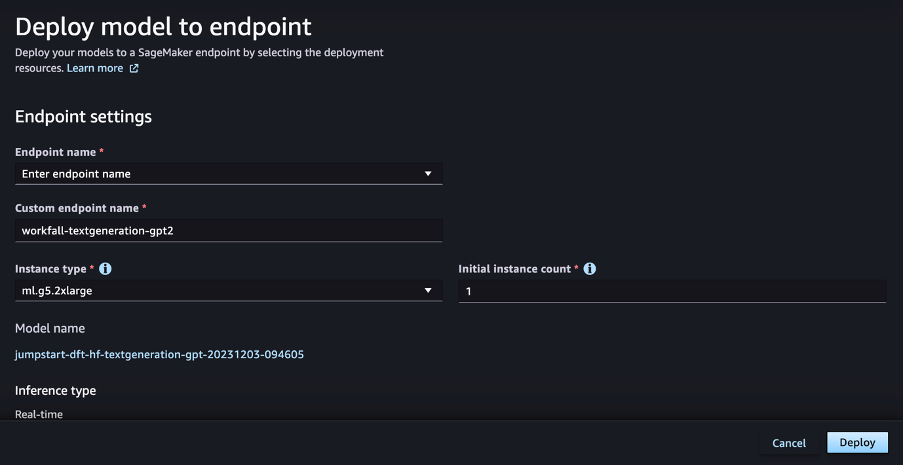
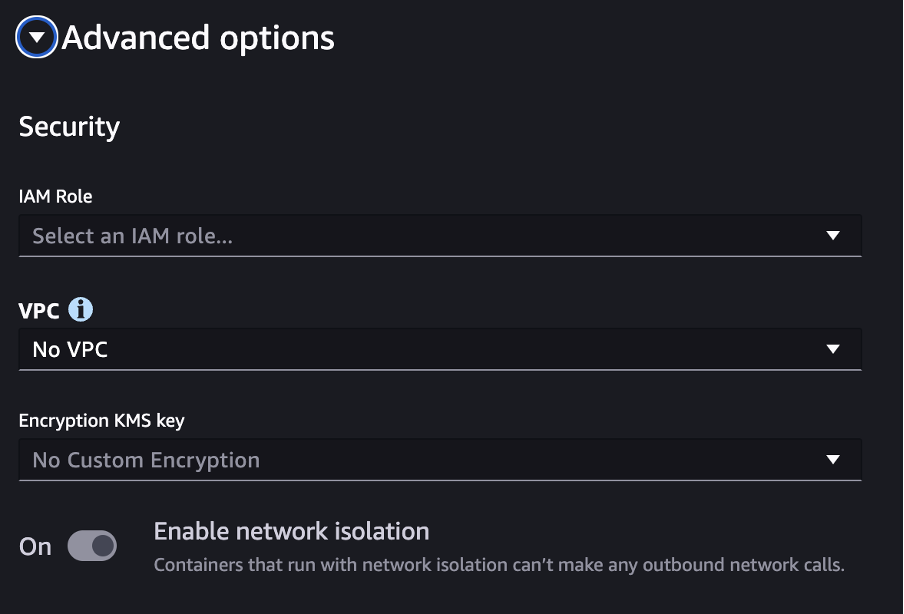
You can leave the Advanced options to default if you are trying out the service following our demo or you can set it up accordingly as per your requirements. Once done, scroll down and click on Deploy.
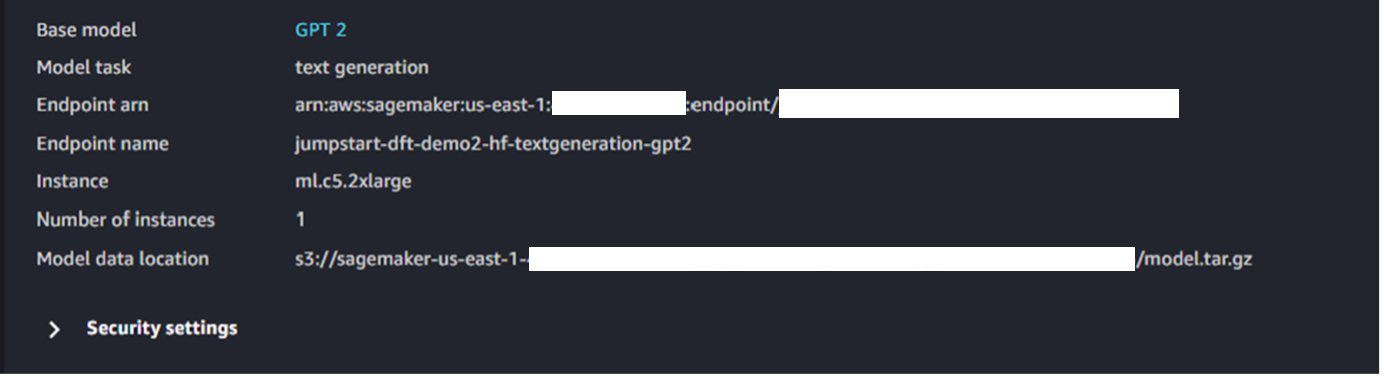
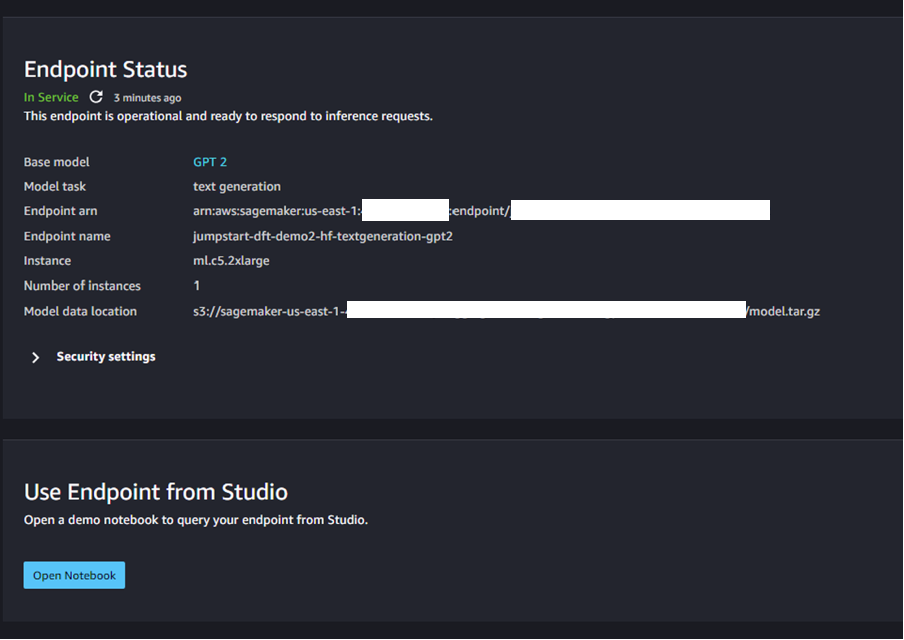
On success, you will see the endpoint status as in service which means it’s ready for usage.

In the same modal below the endpoint status, you will see the deployed model details.
Below that, you will see an option to navigate to the Studio and start working on it.
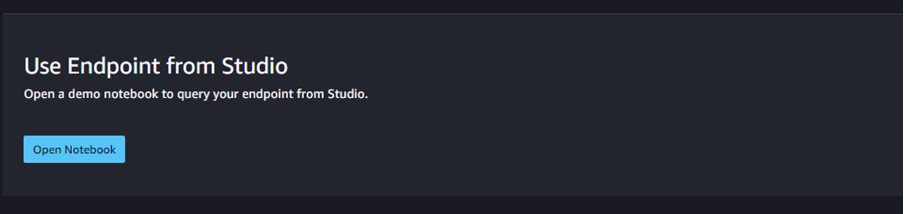
The entire success message looks like as shown in the image below. Click on the Open Notebook button.
You will be navigated to the notebook of the Text Generation model with some filled in code as shown in the image below.
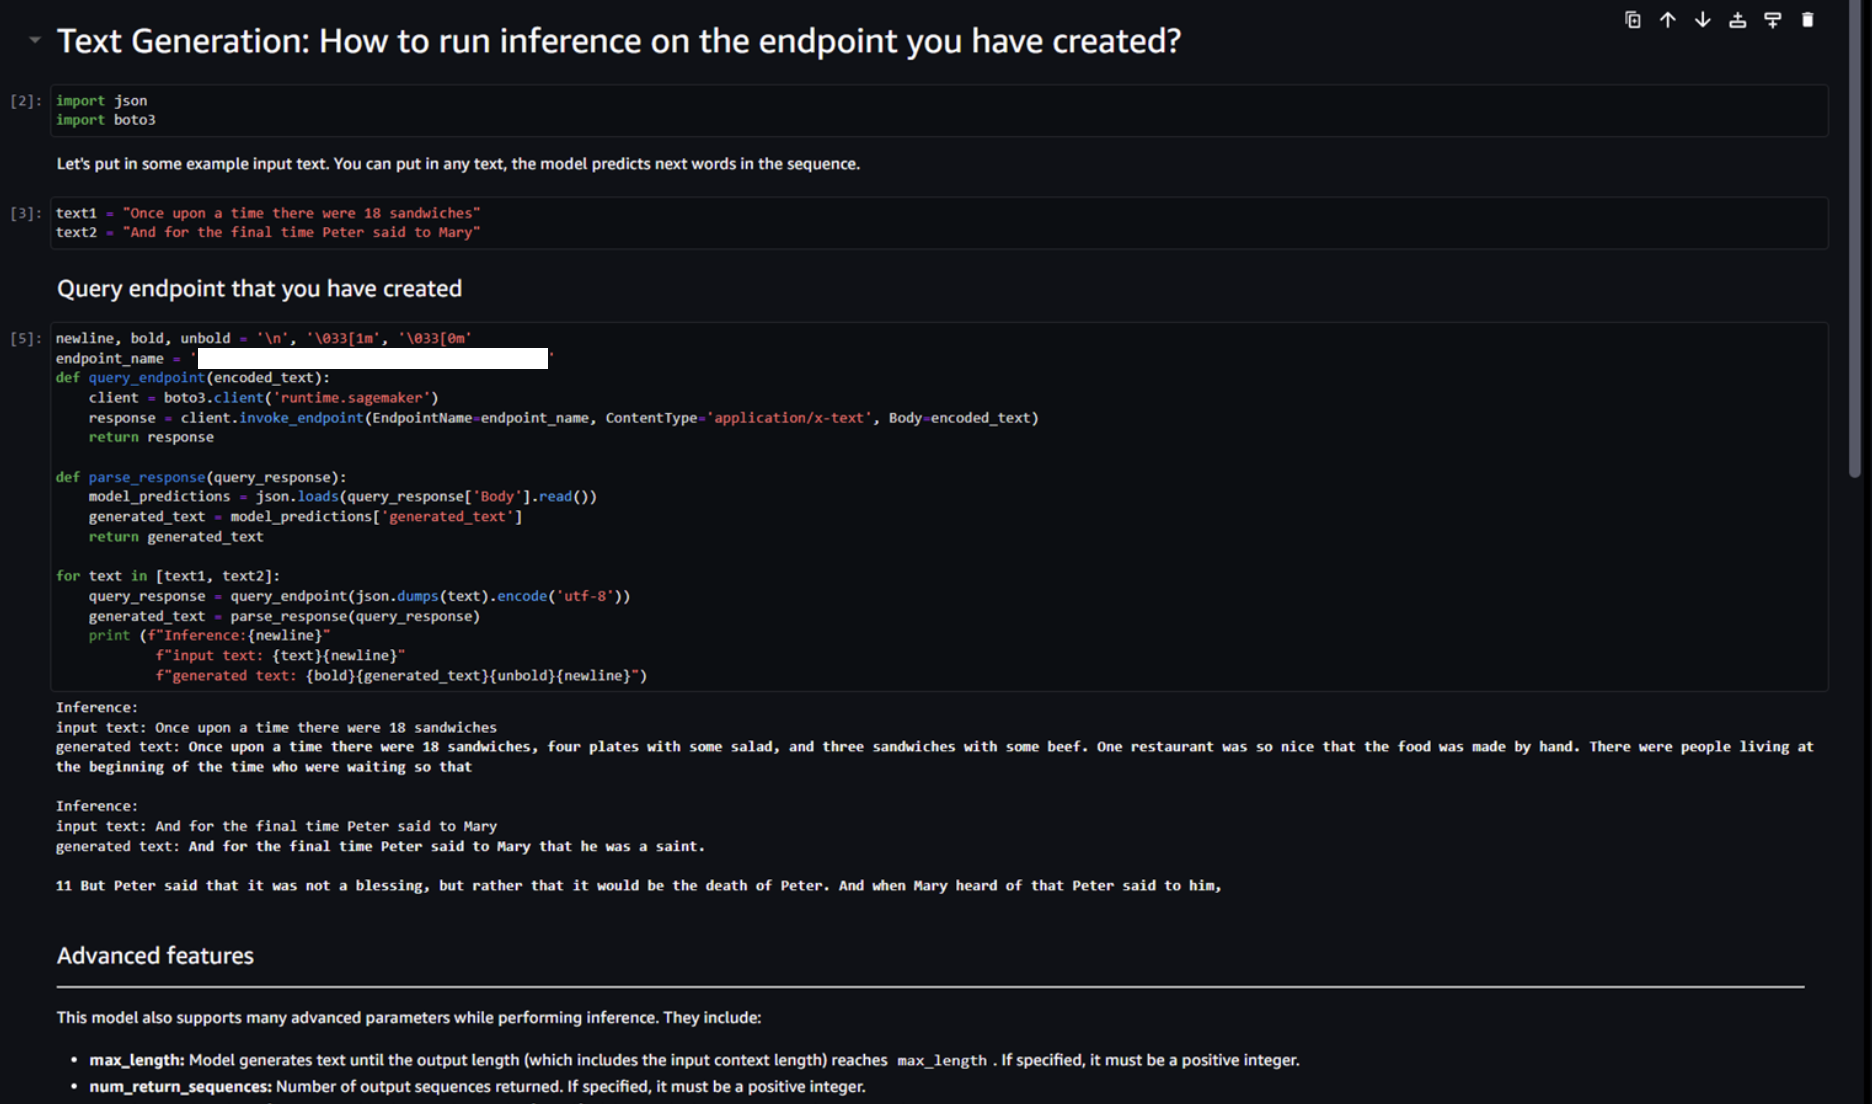
Click on the first editor box and press Ctrl + Enter to execute the same. The same imports will then be executed.

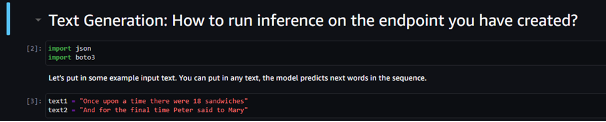
Click on the second editor box wherein we need to initialize variables with text on which the model will run and generate a completed sentence as per the requirements. Press Ctrl + Enter to execute the same.
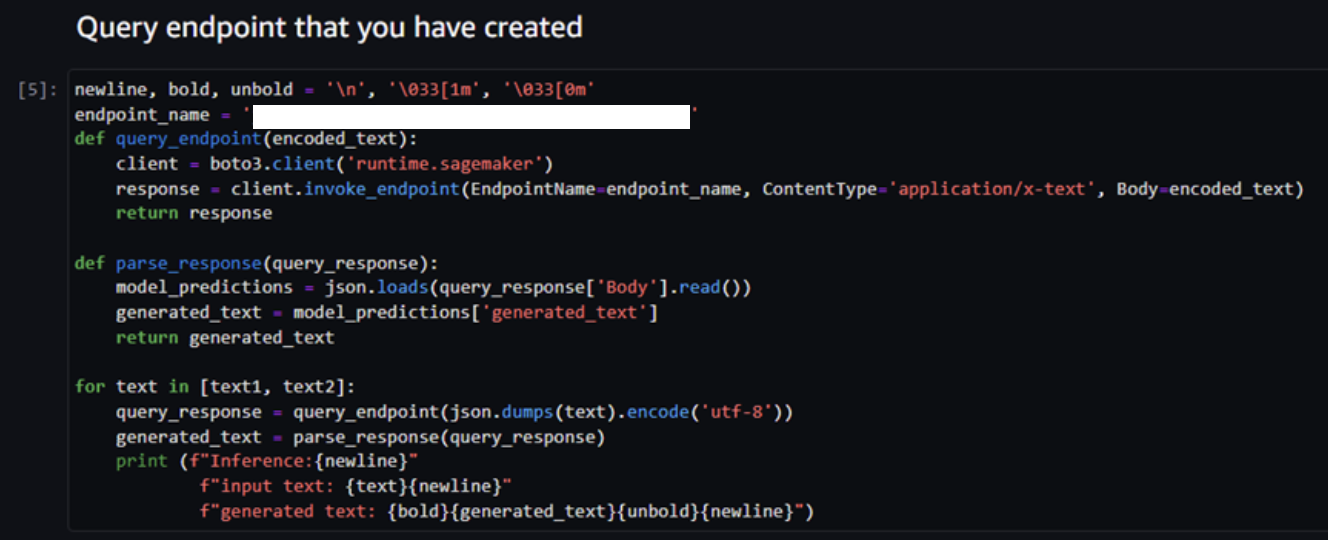
Now comes the main code that uses the model to complete the input sentences. Press Ctrl + Enter for the same editor box. The code uses the endpoint that we configured while doing the deployment and the input sentences and gives the result as a completed sentence.
On success, you will see the output as shown in the image below. The model takes in the input of incomplete sentences and provides an output completing those sentences as shown below highlighted in bold. This in turn shows that the model ran successfully and completed and incomplete sentence narrating a story for the same. On reading the completed sentence, you will figure out that the completed sentence generated by the model narrates a story.
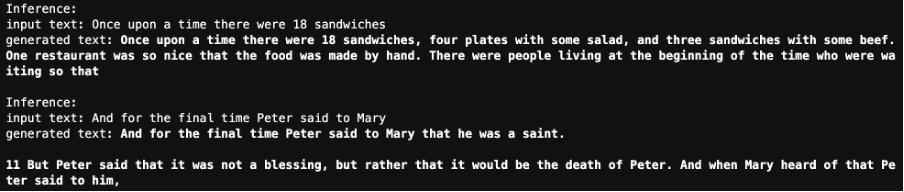
Now, every time we execute the same code, we will get a different narration completing the incomplete sentences. Execute the code and on checking the output, you will see the new story narrated completing the incomplete sentences.

Now, let’s change the input sentences and regenerate the output completing some different and new incomplete sentences. For the input texts in variables text1 and text2, click on the editor box and add incomplete sentences in both the variables as shown in the image below. Click Ctrl + Enter to initialize the variables with the new incomplete sentences.

Click on the box with the code to regenerate the output. On success, you will see that the model would generate the output completing the incomplete sentences as shown in the image below.

Execute the text generation code and let’s see if it generates new output. On execution, you will see that the output generated would be a complete new text completed sentence. Thus, we can successfully conclude that the model generates output as per the need and narrates a story completing the incomplete sentences.

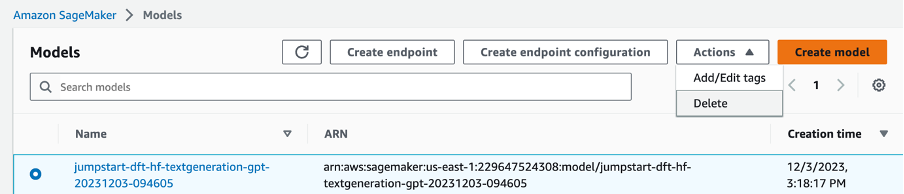
Now that we have tested out everything and since this execution was for a demo purpose, we need to perform a thorough cleanup to avoid unnecessary charges. In case you followed out hands-on to test out the same, please follow the below steps to perform a thorough cleanup. On the Amazon SageMaker dashboard, click on the models options in the left navigation pane.

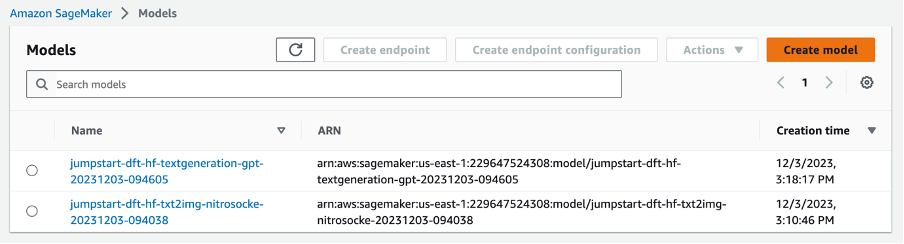
On the screen, you would see the model you deployed on the SageMaker Studio dashboard.
Select the model that is to be deleted and click on Actions and Delete.
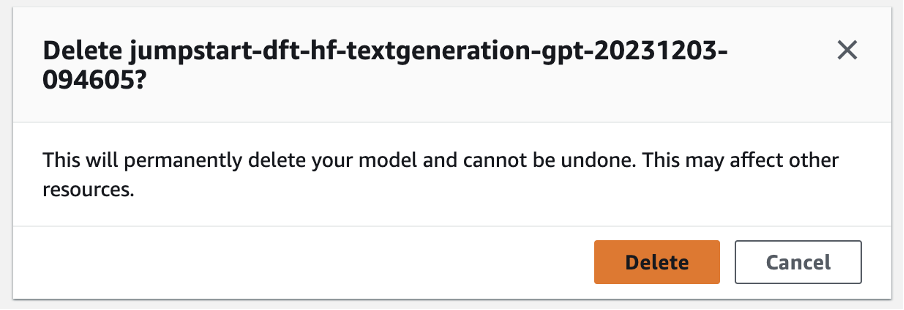
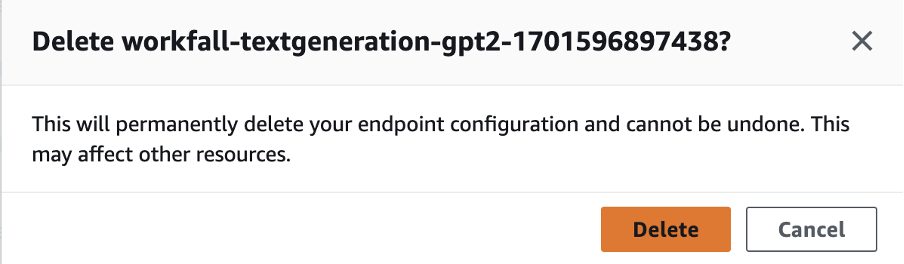
A modal will pop up. Click on Delete.
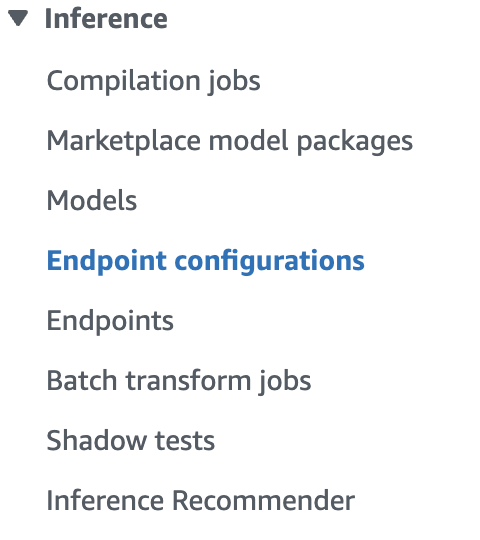
Now that the model is deleted, the next step is to navigate to the Endpoint configurations and delete the same. Click on the Endpoint configurations in the left navigation pane.
You will see the same endpoint that you created above on the screen as shown in the image below.
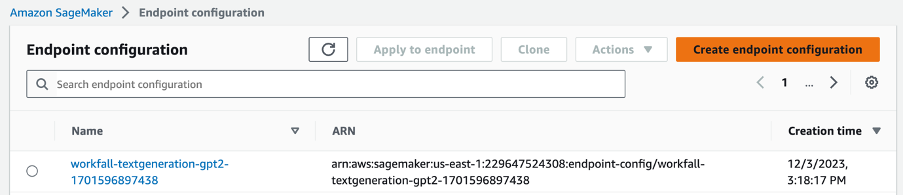
Select the same, click on Actions and click Delete.

On the popped up modal, click on the Delete button.
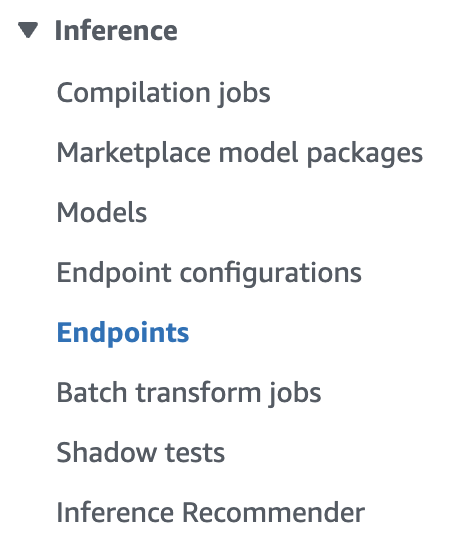
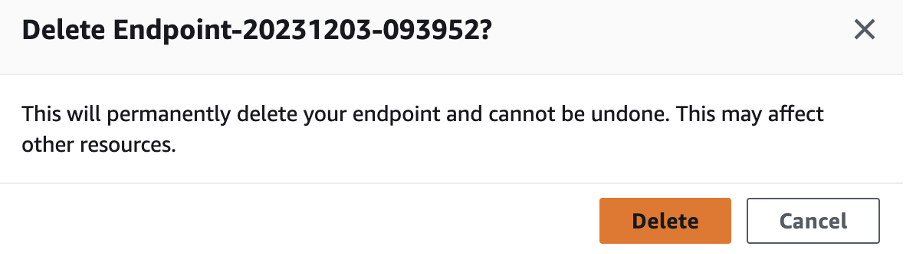
Now, navigate to the Endpoints dashboard clicking on the Endpoints option in the left navigation pane.
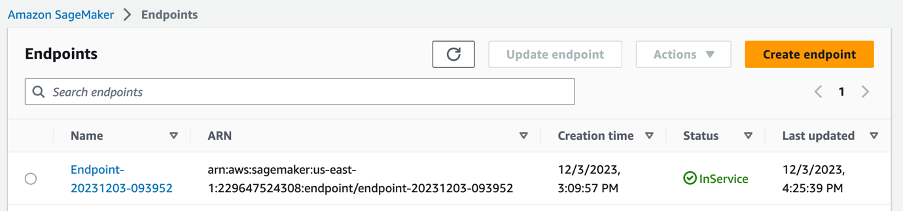
You will see the list of Endpoints.
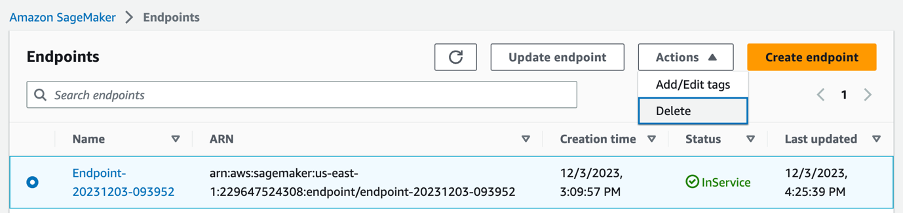
Select the Endpoints, click on Actions and click on Delete.
On the modal, click on the Delete button.
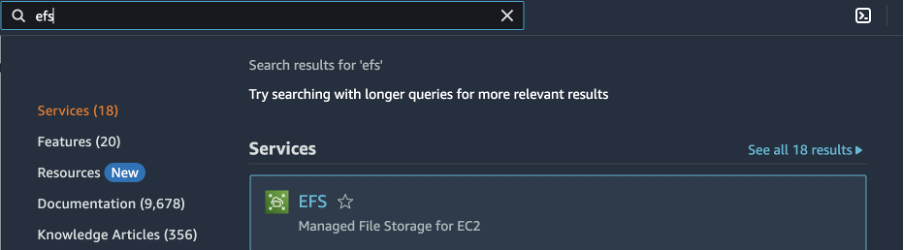
Now, we need to clean up the EFS created since deleting the domain does not delete the EFS created. Search for the EFS service and click on it.
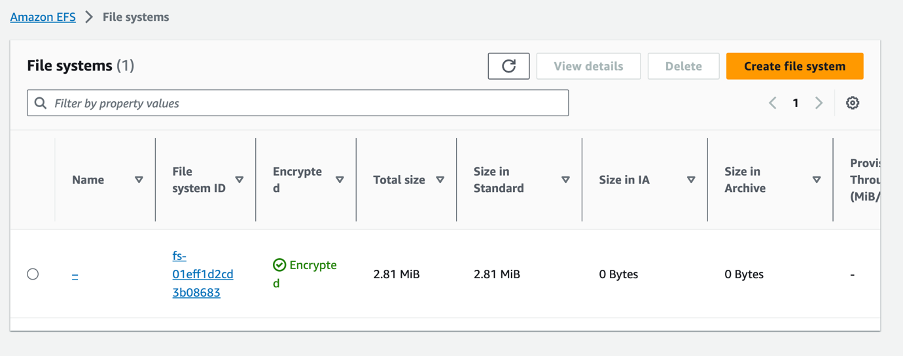
On the dashboard you will see the file system created. Select the file system and click on the Delete button.
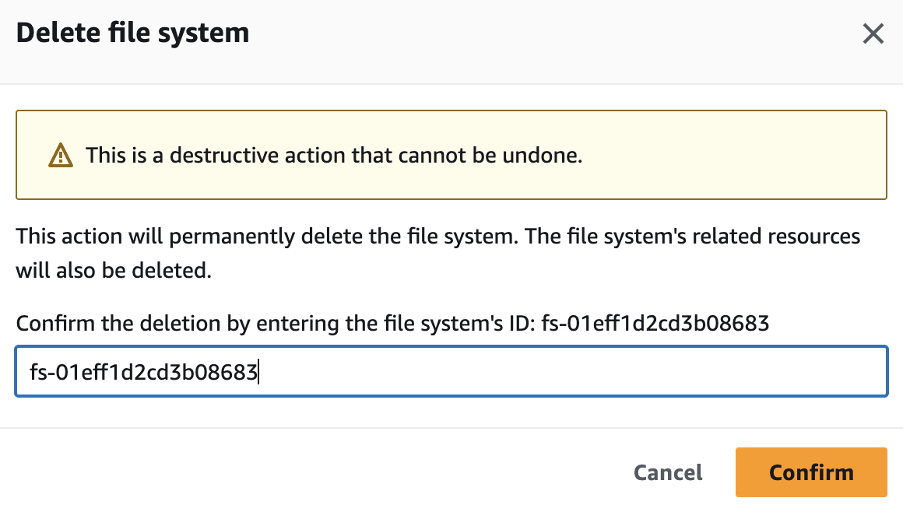
In the popped up modal, enter the file system id to confirm the deletion and click on Confirm.
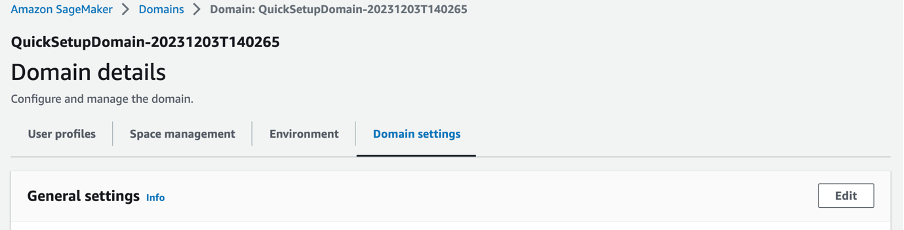
Finally, navigate back to the Amazon SageMaker and click on Domains in the left navigation pane. You will see the domain we created. Click on the domain.
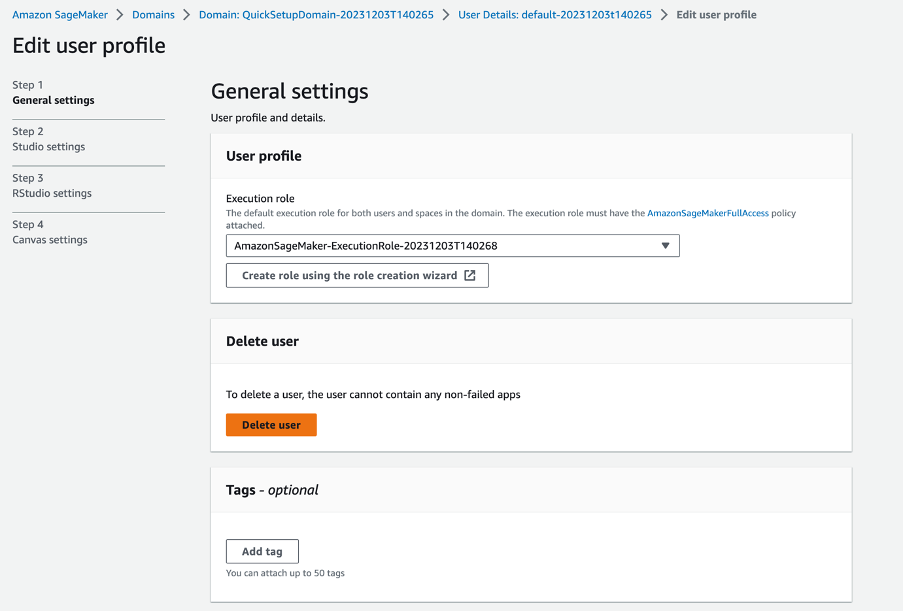
You will be navigated to the Domain details page. Now, to delete a domain, we first need to delete the default user. Click on the default user under the User profiles page.
To be able to delete the user, we first need to delete all the apps. Scroll right under the Apps modal and you will see a Delete button. Click on it to delete the app. Once done, you will see the Status column changed from Ready to Deleted. Now, click on the Edit button on the bottom of the page.
On the Edit page of the user, click on Delete user.
Click on the Yes, delete user button, type delete and finally click on the Delete button.

Now that we deleted the user, we can delete the Domain. Go to the Domain settings section on the domain details page. Click on the Edit button.
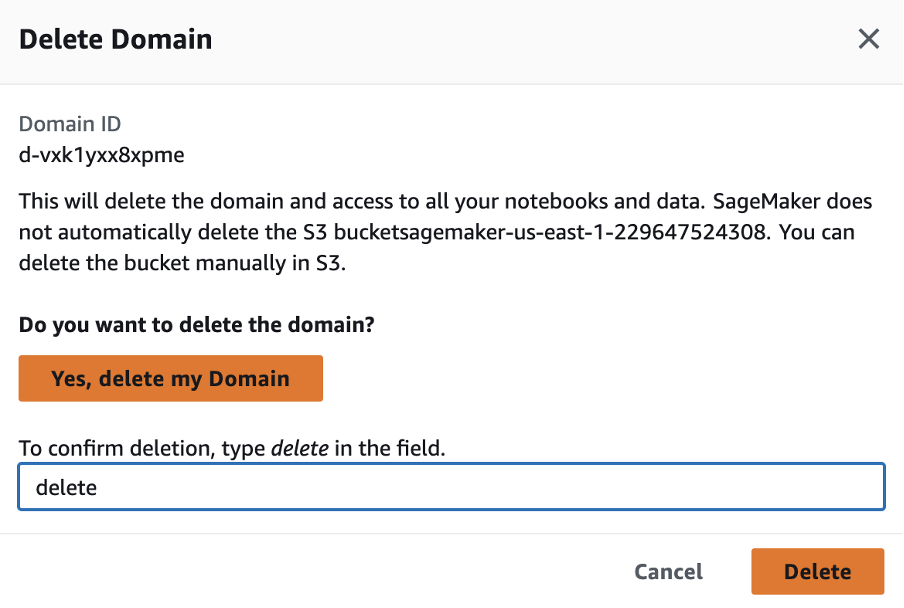
Click on the Delete domain button on the domain’s edit page.

Click the Yes, delete my Domain button, type delete and click on the Delete button. Now, you will see that while deleting the domain as the last step, it states that the S3 bucket created for it won’t be deleted. So, we need to delete the S3 buckets manually.
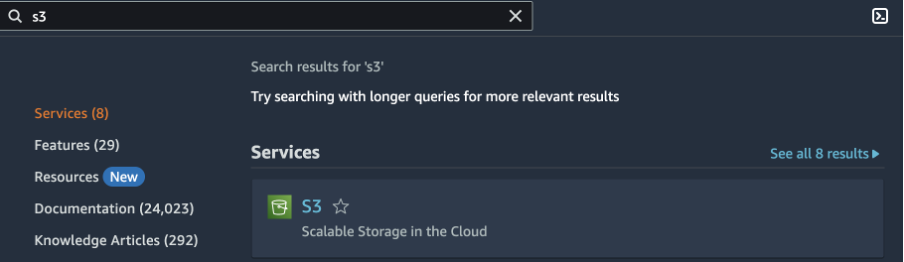
Search for the S3 service and click on it to navigate to its dashboard.
Select the bucket that was created. Click on the Empty button.
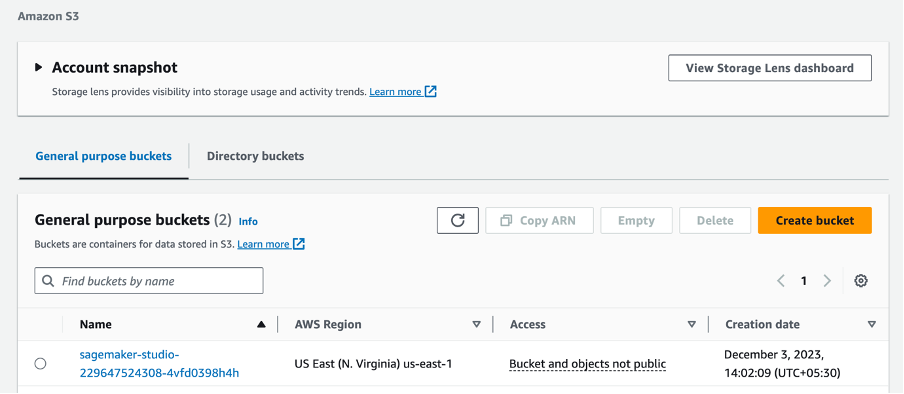
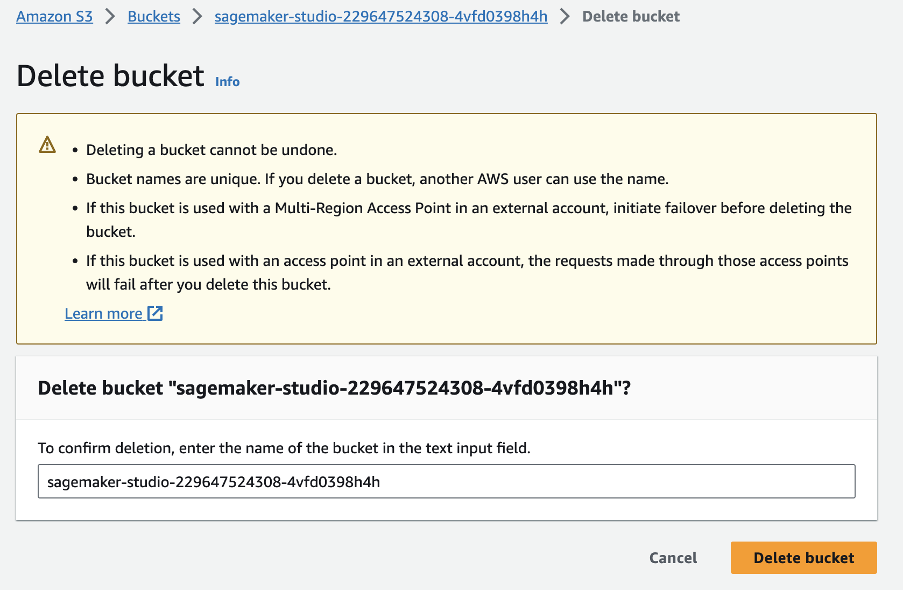
To confirm the deletion, enter the bucket name and click on the Delete bucket button.
Now that we have deleted and cleaned up everything in regards to the hands-on, we won’t be charged anything extra and will only be charged for what we used as per the duration of usage.
Conclusion
In conclusion, our technical blog took you through a hands-on journey into the realm of Generative AI using Amazon SageMaker Studio and the GPT-2 model. We provided a comprehensive guide, walking you through each step to effectively leverage Generative AI for crafting engaging narratives.
We began by navigating to the AWS Console, changing regions, and setting up IAM permissions to ensure a smooth process. Moving on, we explored the setup of SageMaker Studio, creating a domain for a single user, and launching the studio. The blog detailed the exploration of SageMaker Studio, focusing on the GPT-2 model from the HuggingFace hub, and demonstrated how to deploy the model successfully.
The implementation then guided you through testing text generation, where you could experiment with different input sentences and observe the diverse narrations generated by the GPT-2 model for incomplete sentences.
To wrap up the hands-on experience responsibly, we emphasized the importance of cleanup to avoid unnecessary charges. This involved deleting the deployed model, endpoint configurations, and endpoints, as well as cleaning up the EFS and S3 bucket created during the process.
By following our step-by-step guide, you not only gained practical insights into Generative AI but also learned the essential cleanup procedures, ensuring a seamless and cost-effective experience with Amazon SageMaker Studio and the GPT-2 model. We will come up with more such use cases in our upcoming blogs.
Meanwhile…
If you are an aspiring AI enthusiast and want to explore more about the above topics, here are a few of our blogs for your reference:
- Build AI Apps with Amazon PartyRock and Amazon Bedrock
- Amazon PartyRock: A Playground for Generative AI Enthusiasts
- How to Use ChatGPT API to Create an AI-Powered Web Application That Assists Software Engineers’ Productivity?
Stay tuned to get all the updates about our upcoming blogs on the cloud and the latest technologies.
Keep Exploring -> Keep Learning -> Keep Mastering
At Workfall, we strive to provide the best tech and pay opportunities to kickass coders around the world. If you’re looking to work with global clients, build cutting-edge products, and make big bucks doing so, give it a shot at workfall.com/partner today!