AWS Elastic Beanstalk is an AWS service on which you can deploy your application and it offers orchestration for various AWS services such as EC2, and S3 out of the box through auto-scaling, load-balancing, and capacity provisioning. All you have to do is upload your code and AWS Elastic Beanstalk does everything for you including deployment and health check and versioning for the deployed application. It is also easy to roll back to a previous version of a deployed application.
For Part 1 of this blog, refer to: How To Architect NestJS Microservices With AWS Elastic Beanstalk?
In this blog, we will cover:
- What is an AWS IAM?
- Hands-on
- Conclusion
What is an AWS IAM (Identity and Access Management)?
IAM is an AWS service that simply deals with “WHO has access to WHAT”. The major features of IAM are User Groups, Users, Roles, Policies, and Identity providers.
- User Groups: A collection of privileges that can be used together to give access to certain services together with the permission to read and/or write.
- Users: An IAM user is identified as one who has long-term credentials that they can use to access services in an account. The credentials are normally an access key and a secret key.
- Roles: A role is an identity that has specific permissions and uses credentials that are short-lived
- Policies: A policy is an object in AWS that defines permissions.
- Identity providers: An identity provider is used to grant users outside AWS access to AWS services via your account. An example of such a user is Github, of which in our case we shall allow Github Actions to use our account to interact with AWS resources under your account.
In this Part 2 of the two-part series, we are going to deploy our NestJS microservices which are available in this repository. Feel free to clone this repository so that you can follow this blog post.
There are three common ways through which we can interact with AWS Elastic Beanstalk, namely:
- AWS CLI
- Elastic Beanstalk Console
- eb CLI
Benefits of using AWS Elastic Beanstalk
- Saves you the time of monitoring resources so that you can scale up or scale down depending on the need of the application at a particular time. AWS Elastic Beanstalk handles this very well without any worry of downtime.
- AWS Elastic Beanstalk offers a fail-safe in case anything goes bad with a deployment. It offers a way to roll back to a previous stable deployment.
- It offers easy provisioning by the use of platform hooks and other AWS Elastic Beanstalk configurations.
Hands-on

In the Elastic Beanstalk Console, we shall create a new application.


Fill in the application name and Description then click on create.
The next page will appear as below. So in simple terms according to Elastic Beanstalk, an application is a collection of environments. Whereby environments are configurable by selecting the technologies you need to deploy your application. These include Docker, Node.js, PHP, Python, and so on.

Click on Create a new environment and select the web server environment option then click on Select.

Input a domain name that will be used to access your service via the internet, it will automatically check for availability.

For the platform dropdown, select Docker because we had containerized our application then click on Create environment.

It will take a few minutes for the environment to be created.

Code pipeline(Github Actions)
Create an IAM (Identity and Access Management) Identity provider for Github Actions.
We shall need an Identity provider which will enable authentication in our Github Actions set-up. The procedure is as shown in the screenshots below.
Click on Add Provider

The provider URL should be https://token.actions.githubusercontent.com

Make a role for IAM (Identity and Access Management)
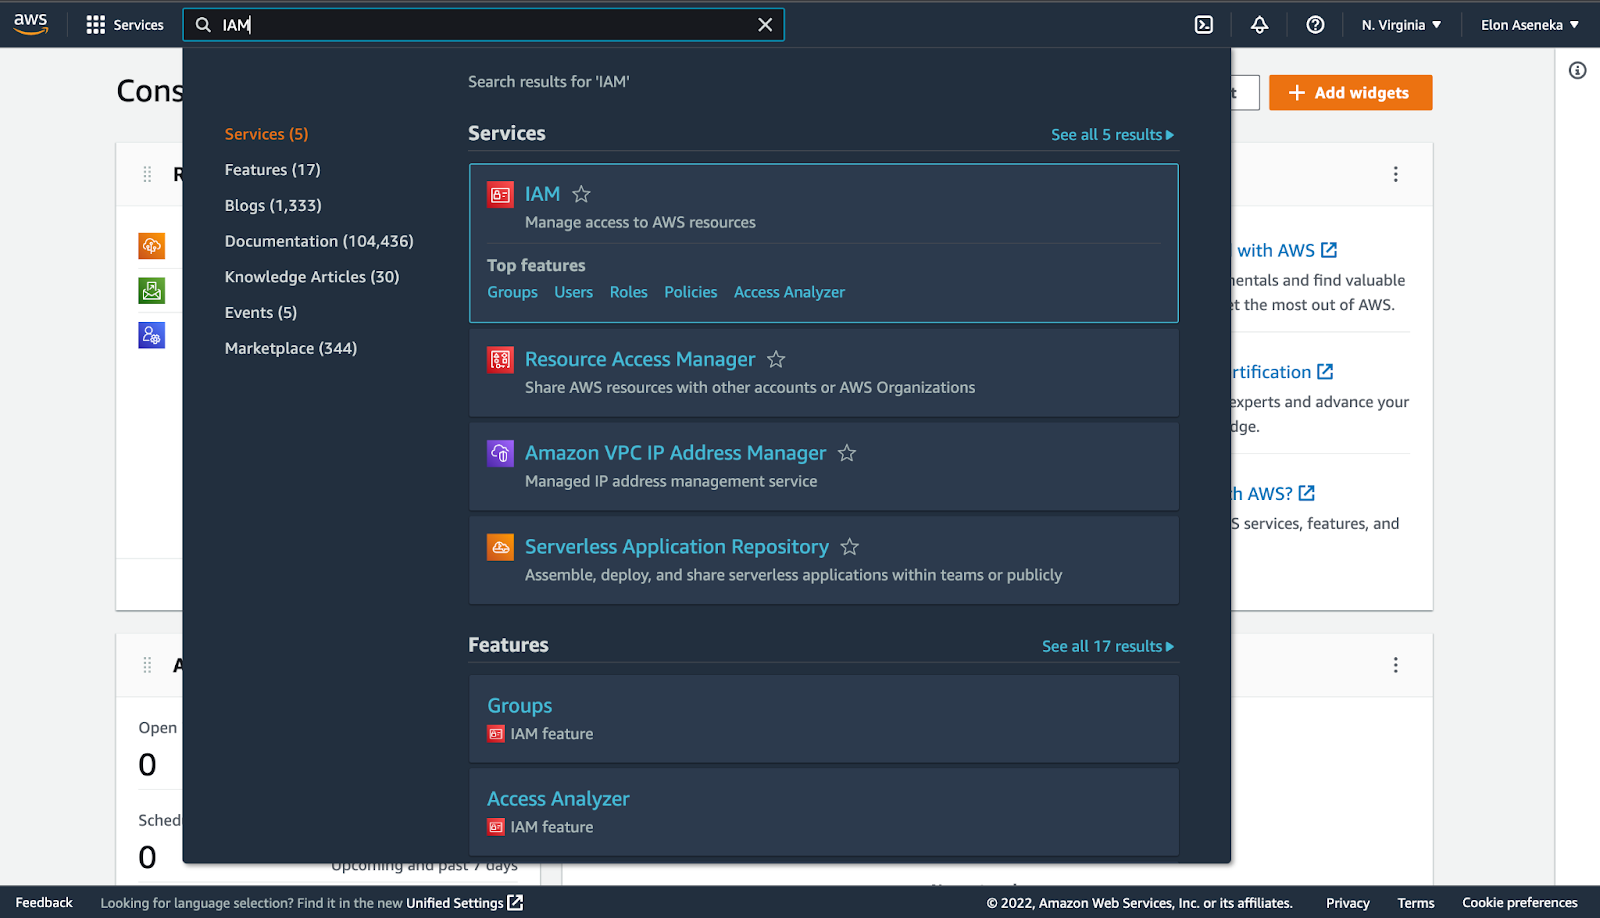
Search for IAM

Click on Roles on the left navigation then click on Create role.

Under Trusted entity type, click on Web Identity. Under Web identity, select the identity provider you created and select sts.amazonaws.com as Audience.

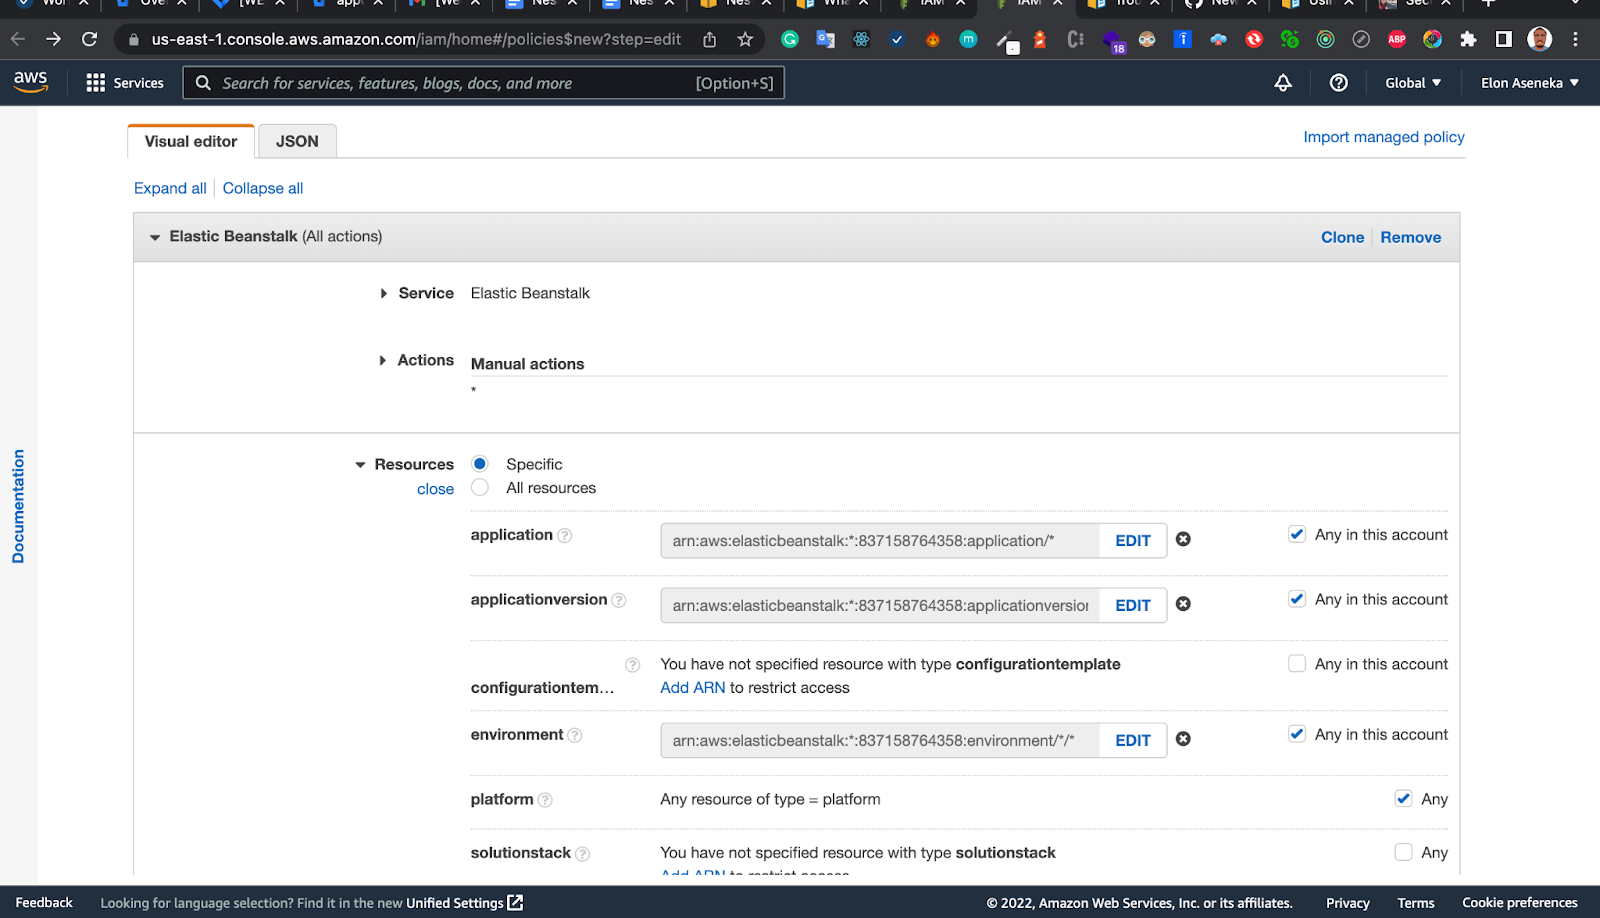
Next is to add policies for the role. Which are simply privileges that the role has. It can be read-only or read and written for a specific AWS service, depending on what GitHub Actions needs to deploy your application. It is however not recommended to give Administrator access. It is advisable to give it full access to Elastic Beanstalk as shown below.
The next step is to create a User, so in the search bar, search for IAM.
In the IAM Console, click on Users on the left navigation then Add users button. On Select AWS credential type, check Access key – Programmatic access

Click on Next:Permissions and then on the following page click on Create group.

Add the following policies to your user group AWSCloudFormationFullAccess, AmazonEC2FullAccess, and AmazonS3FullAccess by simply searching for them and clicking on the corresponding checkbox.
N/B: Remember to also add the custom policy you had created while creating the role then click on Create group button.

On the next page, click on Next:Tags button, you can skip the tags as well and go ahead and create the user. After successful creation credentials for the user will be provided, which is an Access Key ID and a Secret key. Kindly download the CSV file because the secret key is only shown once and if you lose it you will have to create a new one under the Security Credentials in the User Details.
Create Github workflow on Github Actions
Pay close attention to the folder structure in the repository.
main.yml:

The following bit is more crucial, ensure that you create the secrets in your repository by going to the Settings tab. Also, ensure that the application name and environment name match the ones you had created before in the AWS Elastic Beanstalk console.

Final Step
For Elastic Beanstalk to spin up a healthy instance, we have to provide a healthcheck endpoint in our Nginx API Gateway specifically on the “/” route. Therefore we shall add one more microservice to be accessed on the “/” route.
healthcheck-service.controller.ts

Index.ts

docker-compose.yml


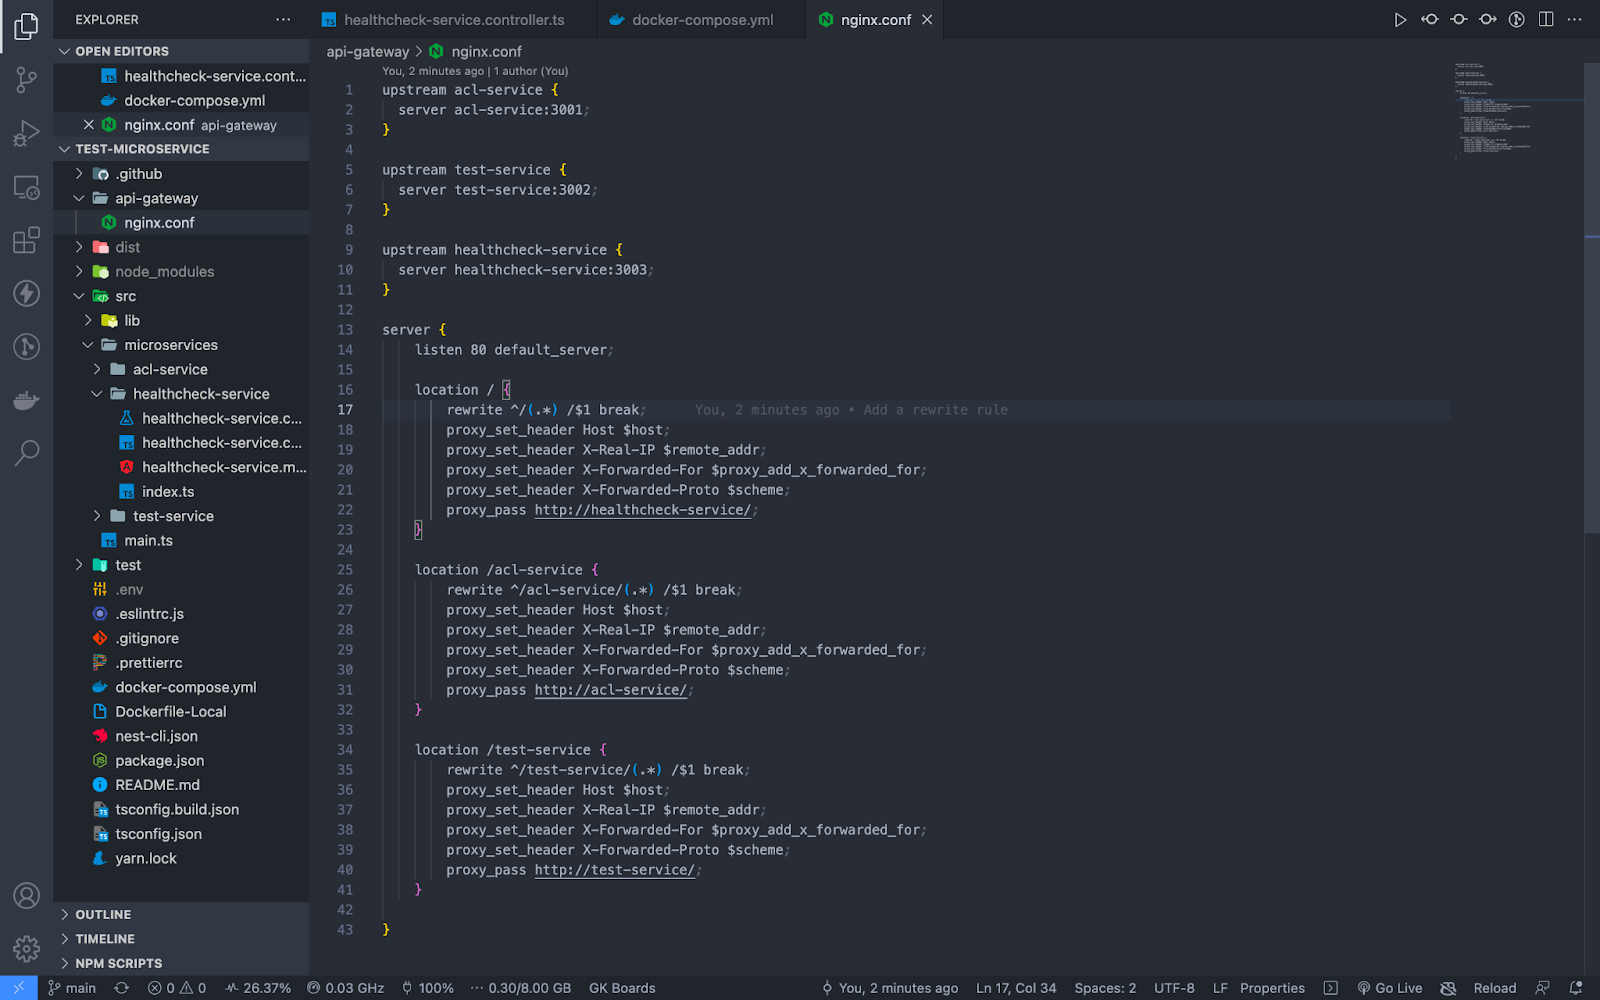
nginx.conf
After the code pipeline succeeds, you will notice that the application version will show the COMMIT SHA of the deployed commit as shown below. You can access your app via the URL given.

Acl-service


Conclusion
In this blog, we deployed the microservices to the AWS Elastic Beanstalk application environment using the Docker Platform. The test-service consumes the acl-service endpoint which proves that the microservices are integrated and can communicate with each other over the docker network. We have also exposed the microservices via the Nginx API gateway via /acl-service and /test-service routes.
Food for thought: How will the architecture change if each microservice is deployed on its own Elastic Beanstalk environment?
We will come up with more such use cases in our upcoming blogs.
Meanwhile …
If you are an aspiring AWS Enthusiast and want to explore more about the above topics, here are a few of our blogs for your reference:
Stay tuned to get all the updates about our upcoming blogs on the cloud and the latest technologies.
Keep Exploring -> Keep Learning -> Keep Mastering
At Workfall, we strive to provide the best tech and pay opportunities to kickass coders around the world. If you’re looking to work with global clients, build cutting-edge products and make big bucks doing so, give it a shot at workfall.com/partner today!