Sizing, configuring, and deploying AWS resources for third-party applications, such as SAP or SQL server is always challenging for you. Are you looking for a wizard who can help you with these challenging tasks? AWS Launch Wizard can help you in simplifying these tasks by offering a guided way of sizing, configuring, and deploying AWS resources for third-party applications, without the need to manually identify and provision individual AWS resources.
The Launch Instance Wizard specifies all the launch parameters required for launching an instance. Amazon EFS file systems are often used for web serving and content management, application development and testing, applications that require shared storage, etc. Thus, the integration of EC2 Launch Instance Wizard with Amazon EFS simplifies and eases the process of mounting the Amazon EFS file system to Amazon EC2 instances at launch time for additional space for handling the scenarios for the above-stated examples.
In this blog, we will discuss the benefits, use cases, and best practices of AWS Launch Wizard. We will also discuss how it works and why we should start using it! At the end of the blog, we will see how we can mount an Amazon Elastic File System (Amazon EFS) file system to an Amazon Elastic Compute Cloud (Amazon EC2) instance using the EC2 Launch Instance Wizard.
In this blog, we will cover:
- What is AWS Launch Wizard?
- Benefits of AWS Launch Wizard
- Use Cases
- Why should we use AWS Launch Wizard?
- Best Practices
- How is this service different from a plain hosting service?
- Pricing
- Featured Customers
- Hands-On
What is AWS Launch Wizard?
With AWS Launch Wizard you are able to size, configure, and deploy AWS resources for third-party applications in a proper step-by-step manner, for example, Microsoft SQL Server Always On and HANA-based SAP systems, without the need to manually identify and provision individual AWS resources.
- Input your application requirements like performance, the number of nodes, and connectivity on the service console.
- Lunch Wizard identifies the right AWS resource like EC2 instances and EBS volumes.
- Deploy and Run

Once you approve the AWS resources, Launch Wizard automatically provisions and configures the selected resources to create a fully-functioning, production-ready application.
Benefits of AWS Launch Wizard

- Repeatable code templates to save time: AWS Launch Wizard provides you with reusable AWS CloudFormation code templates. These templates save time by reusing these code templates to deploy your applications programmatically and can serve as a baseline for creating them each time you deploy a new application.
- Automate AWS resource selection and cost estimation: AWS Launch Wizard recommends appropriate AWS resources, including EC2 instance types and EBS volumes, to match your application requirements and presents you with a cost estimate. You have the ability to modify the recommended resource selections and get an updated cost assessment.
- Leverage proved deployment best practices from AWS: This means applications deployed using AWS Launch Wizard adhere to AWS best practices, and are optimized for security, reliability, performance efficiency, and cost savings.
- Simplify application deployment: When you input the application requirements, Launch Wizard recommends the right AWS resources and then deploys the selected resources for a production-ready application. This reduces the time spent in provisioning and configuring your key applications hence, makes it easy for you to deploy third-party applications on AWS.
Use Cases
Set up production-ready HANA-based SAP systems: AWS Launch Wizard helps customers choose the right SAP-certified EC2 instances based on their performance specifications. Launch Wizard then deploys and configures the instances to run HANA and Netweaver-based SAP applications on HANA.
Test new configurations: When trying out new configurations for development and testing, you can quickly create proof-of-concept (POC) deployments. This helps accelerate rollouts for new production-ready deployments.
Connect on-premises Active Directory to deployments: AWS Launch Wizard enables you to connect your deployments to your on-premises Active Directory through AWS Direct Connect. This is ideal if you choose not to run Active Directory on AWS.
Set up production-ready SQL Server Always On deployments: With AWS Launch Wizard you can specify your application’s components ranging from SQL Server node settings and AMIs to Virtual Private Cloud (VPC), Active Directory (AD), and EC2 instances to effortlessly create a production-ready deployment.
Why should we use AWS Launch Wizard?
AWS Launch Wizard determines the right instance type, EBS volumes, and other resources to match your application requirements such as performance, memory, and bandwidth. You also have the ability to modify the recommended defaults and see an updated cost assessment. AWS Launch Wizard provides you with custom CloudFormation templates that can serve as a baseline for your subsequent application deployments. Moreover, you get an easy way to deploy enterprise applications and optimize costs. Instead of selecting and configuring separate infrastructure services, you go through a few steps in AWS Launch Wizard and it deploys a ready-to-use application on your behalf. It reduces the time you need to spend on investigating how to provision, cost, and configure your application on AWS.
Best Practices

High availability: Using Amazon EC2, you can set the location of instances in multiple locations composed of AWS Regions and Availability Zones. Regions are dispersed and located in separate geographic areas. Availability Zones are distinct locations within a Region isolated from failures in other Availability Zones.
Automatic failover: When you deploy AWS Launch Wizard with the default parameters, it configures a two-node, automatic failover cluster with a file share witness. Launch Wizard implementation supports the following scenarios:
- Protection from the failure of a single instance
- Automatic failover between the cluster nodes
- Automatic failover between Availability Zones
Security groups and firewalls: When Amazon EC2 instances are launched they act as a firewall. You also get complete control over the network traffic entering or leaving the security group.
How is this service different from a plain hosting service?
AWS Launch Wizard provides you with a complete UI-driven guided point-and-click experience to deploy applications. You answer a few high-level questions about your application requirements on the console, and then AWS Launch Wizard handles the end-to-end sizing, cost estimation, provisioning, and configuration of your application.
Pricing
There is no additional charge for using AWS Launch Wizard. You only pay for AWS resources that are provisioned for running your application, such as Amazon EC2 instances and EBS volumes.
Featured Customers

Hands-On
In this hands-on, we will see how to mount an Amazon Elastic File System – Amazon EFS file system to an Amazon Elastic Compute Cloud – Amazon EC2 instance using EC2 Launch Instance Wizard. The Launch Instance Wizard specifies all the launch parameters required for launching an instance. Where the launch instance wizard provides a default value, you can accept the default or specify your own value. This integration simplifies and eases the process of mounting Amazon EFS file systems to Amazon EC2 instances at launch time with recommended mount options.
To implement this, we will do the following:
- Log in to the AWS console and navigate to the Security Groups features on the EC2 console.
- Create two security groups:
- One for EC2 to allow SSH and the other for NFS.
- Navigate to the EFS – Elastic File System console and create a new file system.
- Navigate to the custom settings of the created file system and configure the EC2 security groups attaching the same to the file system.
- Traverse to the Amazon EC2 dashboard on the AWS console to launch a new EC2 instance.
- Add the file system to the EC2 instance and mount it using the wizard.
- Configure the security groups for the EC2 instance and select the above-created security group for the EC2 instance.
- Connect to the newly created EC2 instance via Instance Connect.
- Execute a command and verify that the EFS file system is mounted.
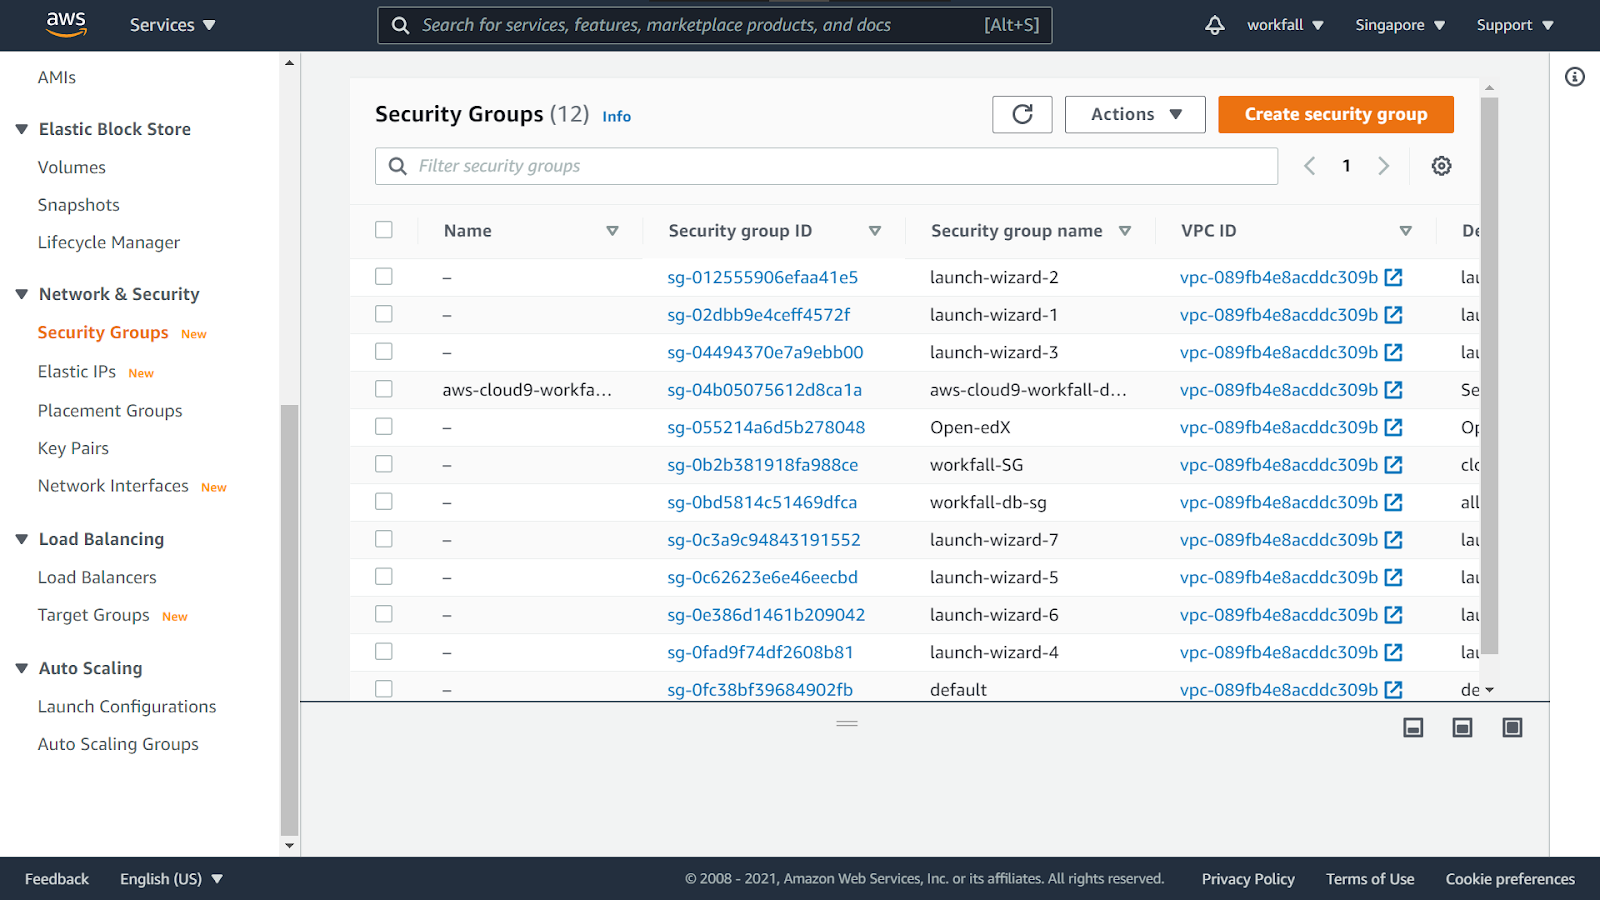
Login to your AWS console and search for Security Groups. Click on the Security groups under Features.

You will be navigated to the Security Groups section on your EC2 instance console. Click on Create security group.
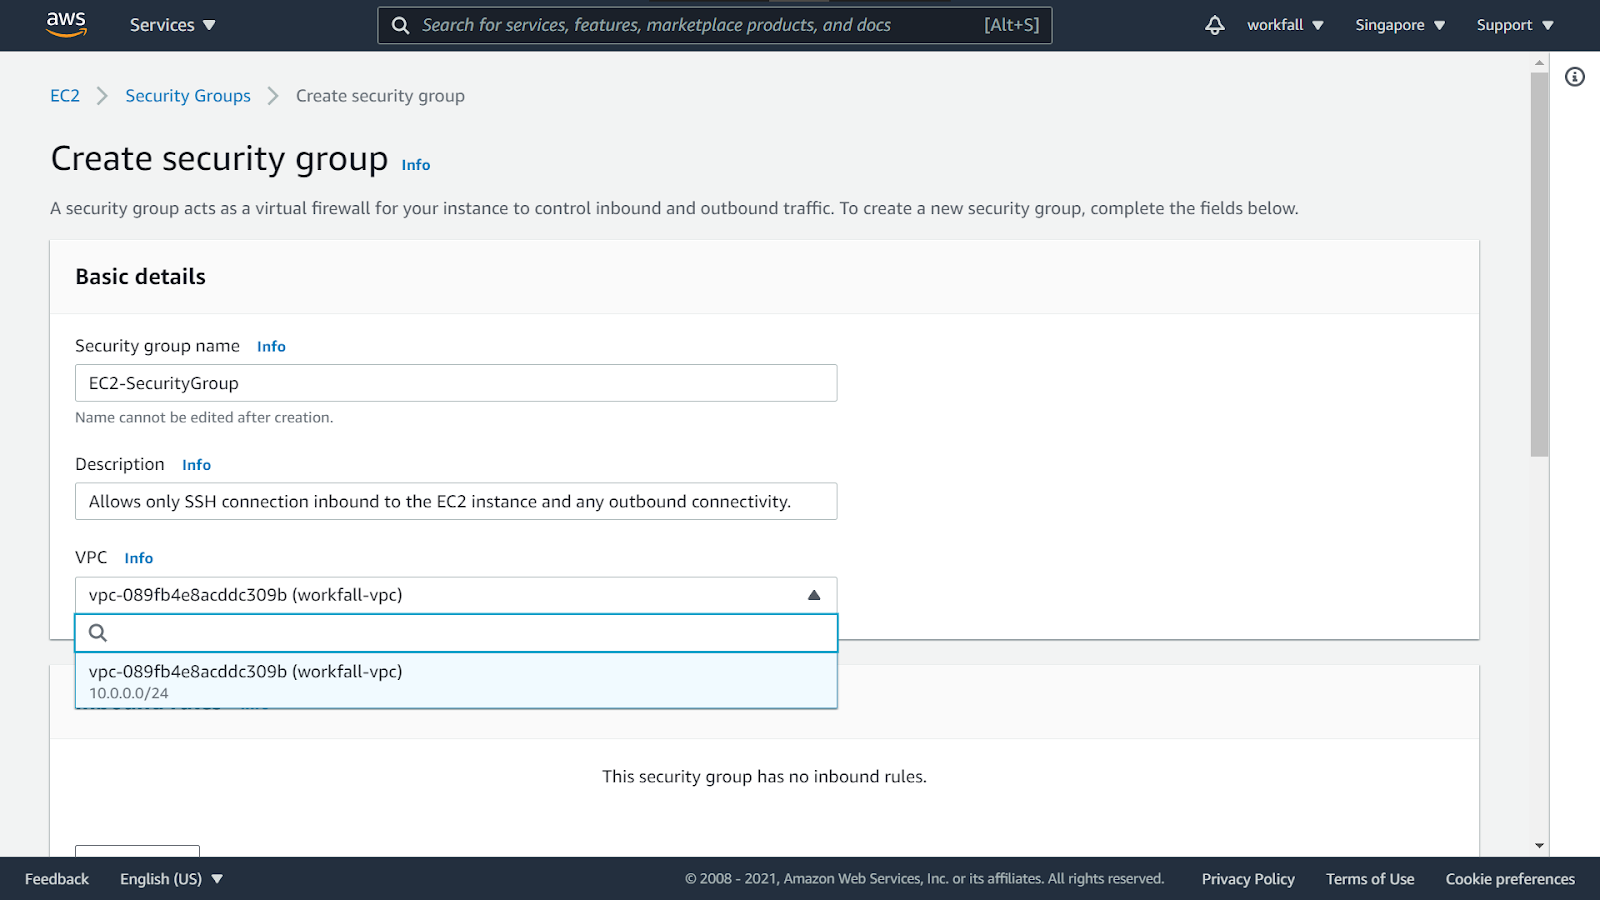
Enter a name for your security group, a description for you to recognize your security group. Open the VPC dropdown and select the default VPC.
Scroll down to the inbound rules and in the search bar for Type, search for SSH. Click on the type and the Protocol and Port range will be configured automatically for you.
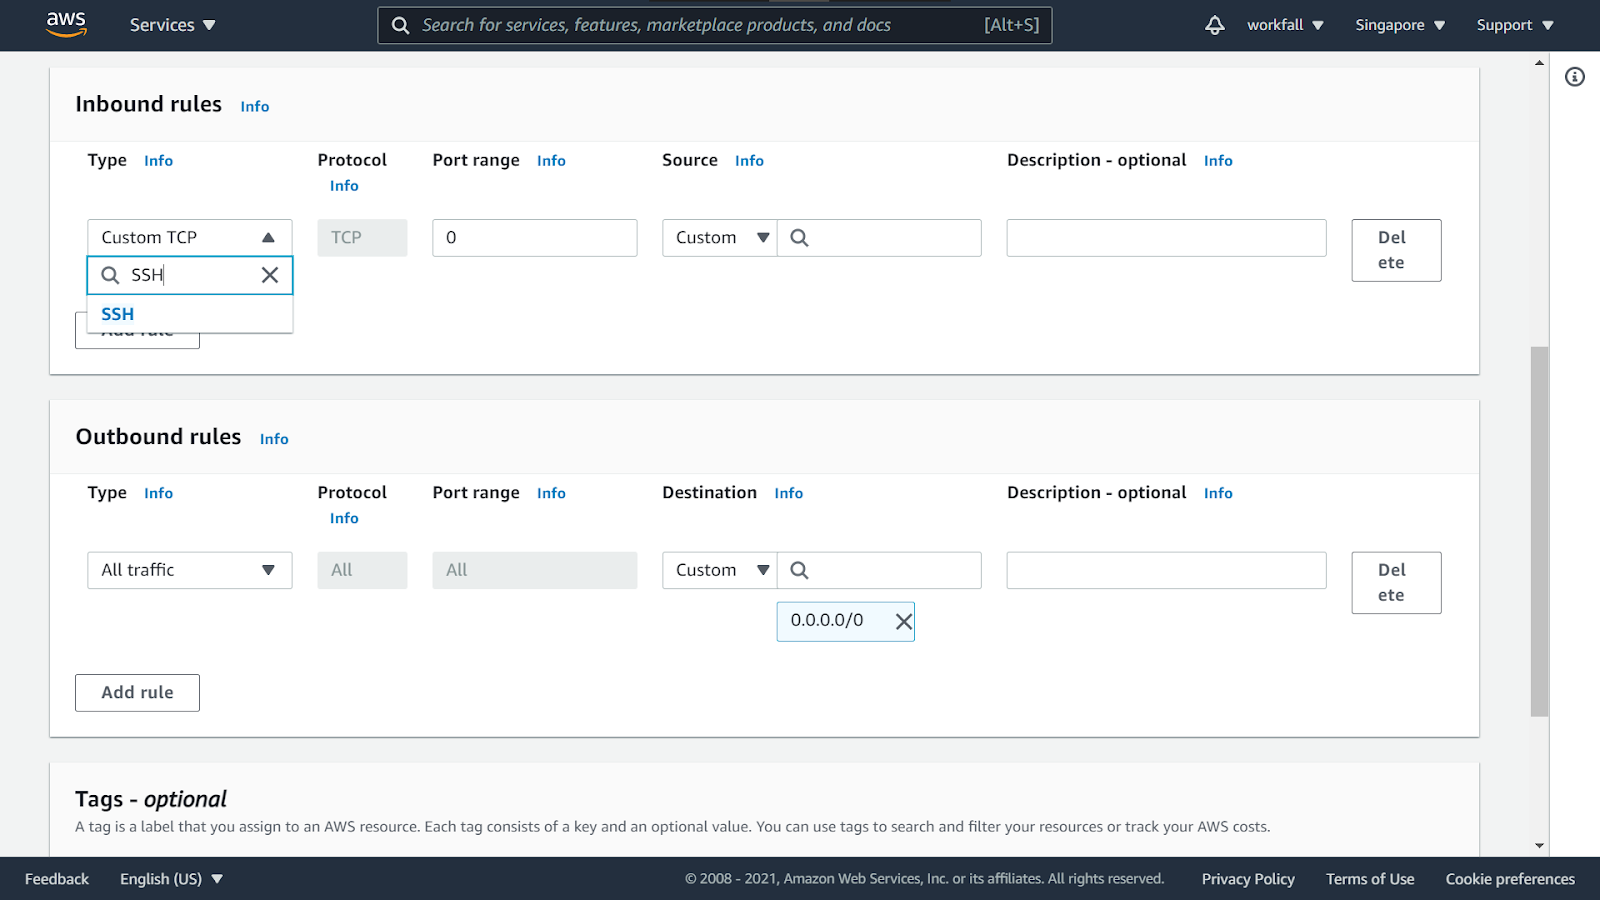
Now click on the search bar under Source and select 0.0.0.0/0. Add a description for the newly created inbound rule if needed.

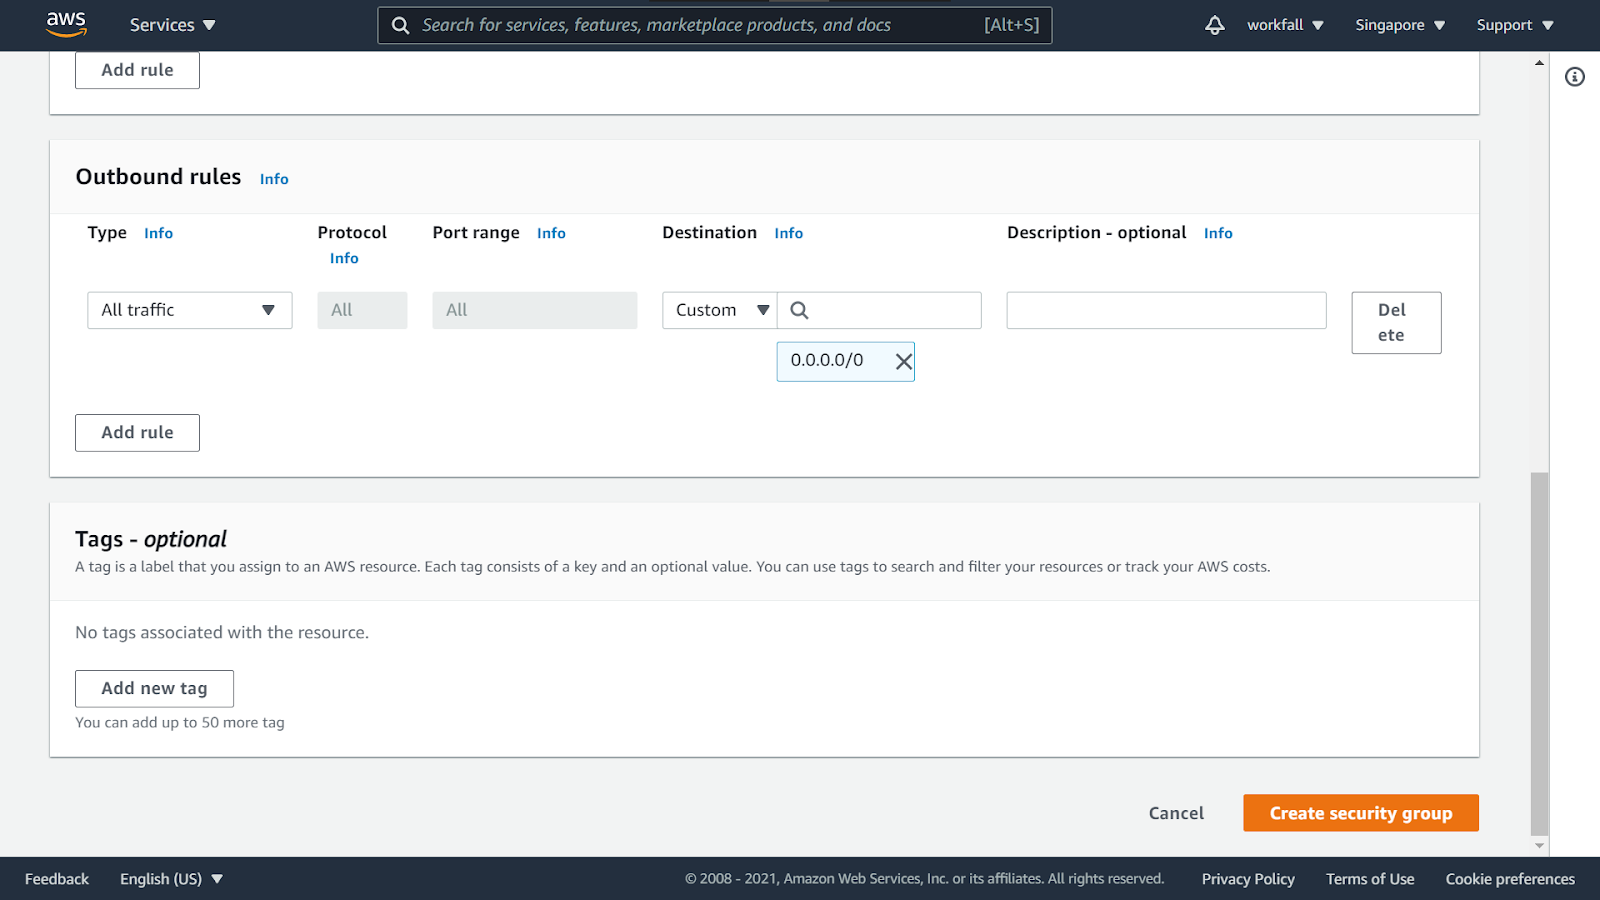
Scroll down to the outbound rule and make the configuration as shown below. Add Tags (if any) and once done, click on Create security group.
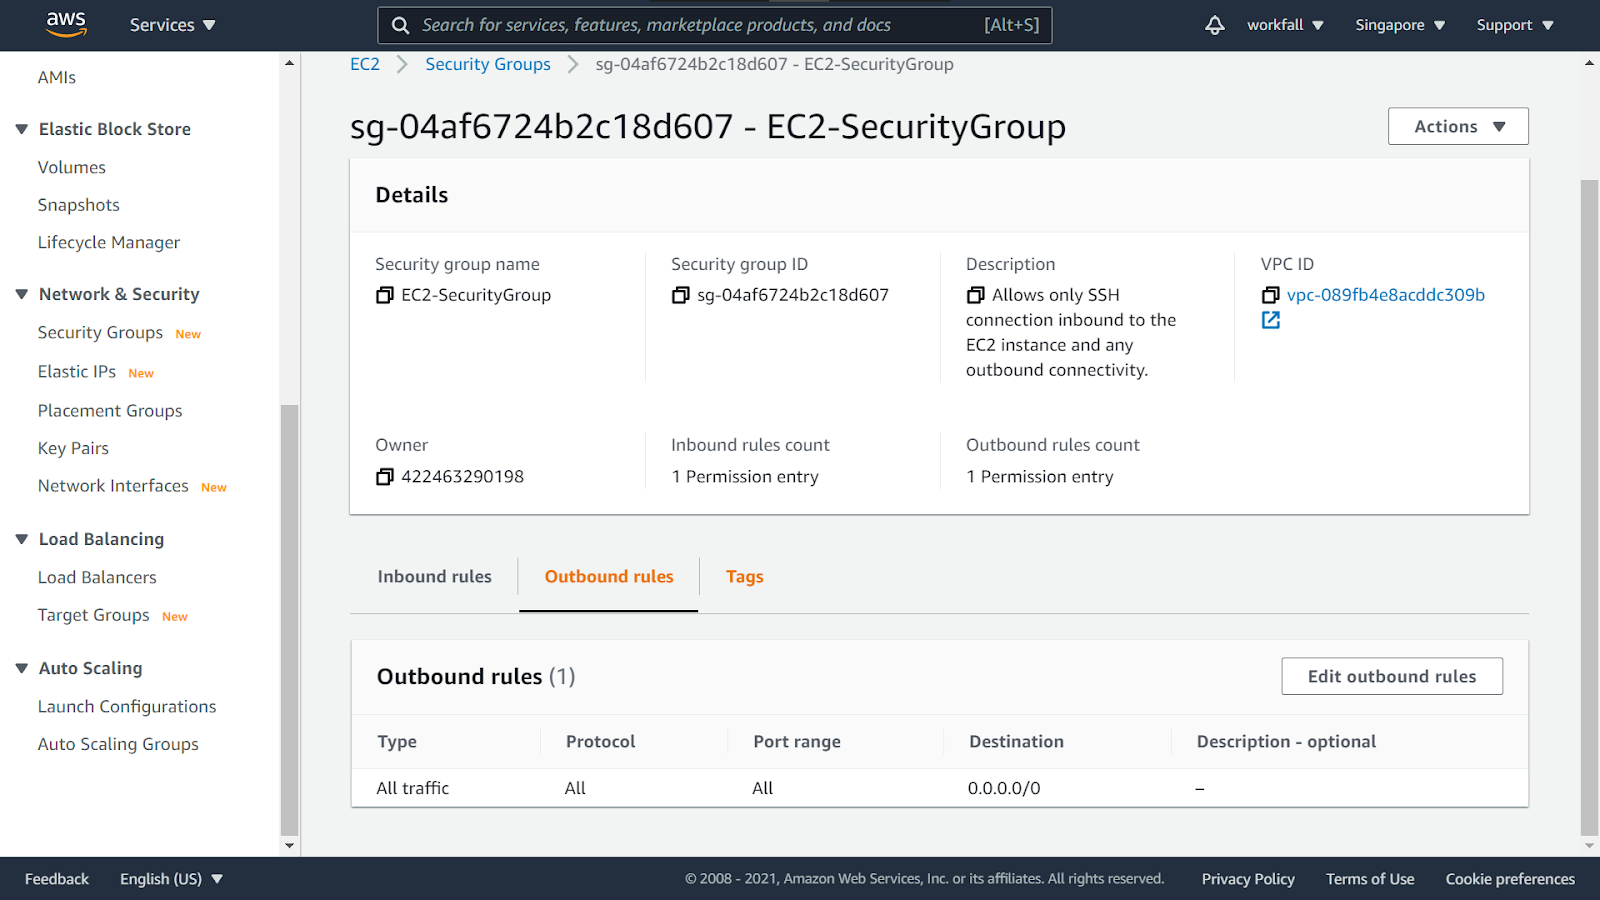
On success, you will see a message as shown in the image below. You can expand the details to see the output.

Scroll down and verify the Inbound rule you just created. Make sure that it is exactly as shown below.

Switch to the outbound rules and verify the configuration settings as shown in the image below.
Now, navigate back to the security groups dashboard and click on create a security group to create a new security group for AWS EFS.

Enter a name, description and select the default VPC or configured VPC as shown in the image below. Scroll down to the inbound rules.

Click on Add Rule. For type, search for NFS and click on the result.

The protocol and port number will be configured automatically as shown as you choose a type.
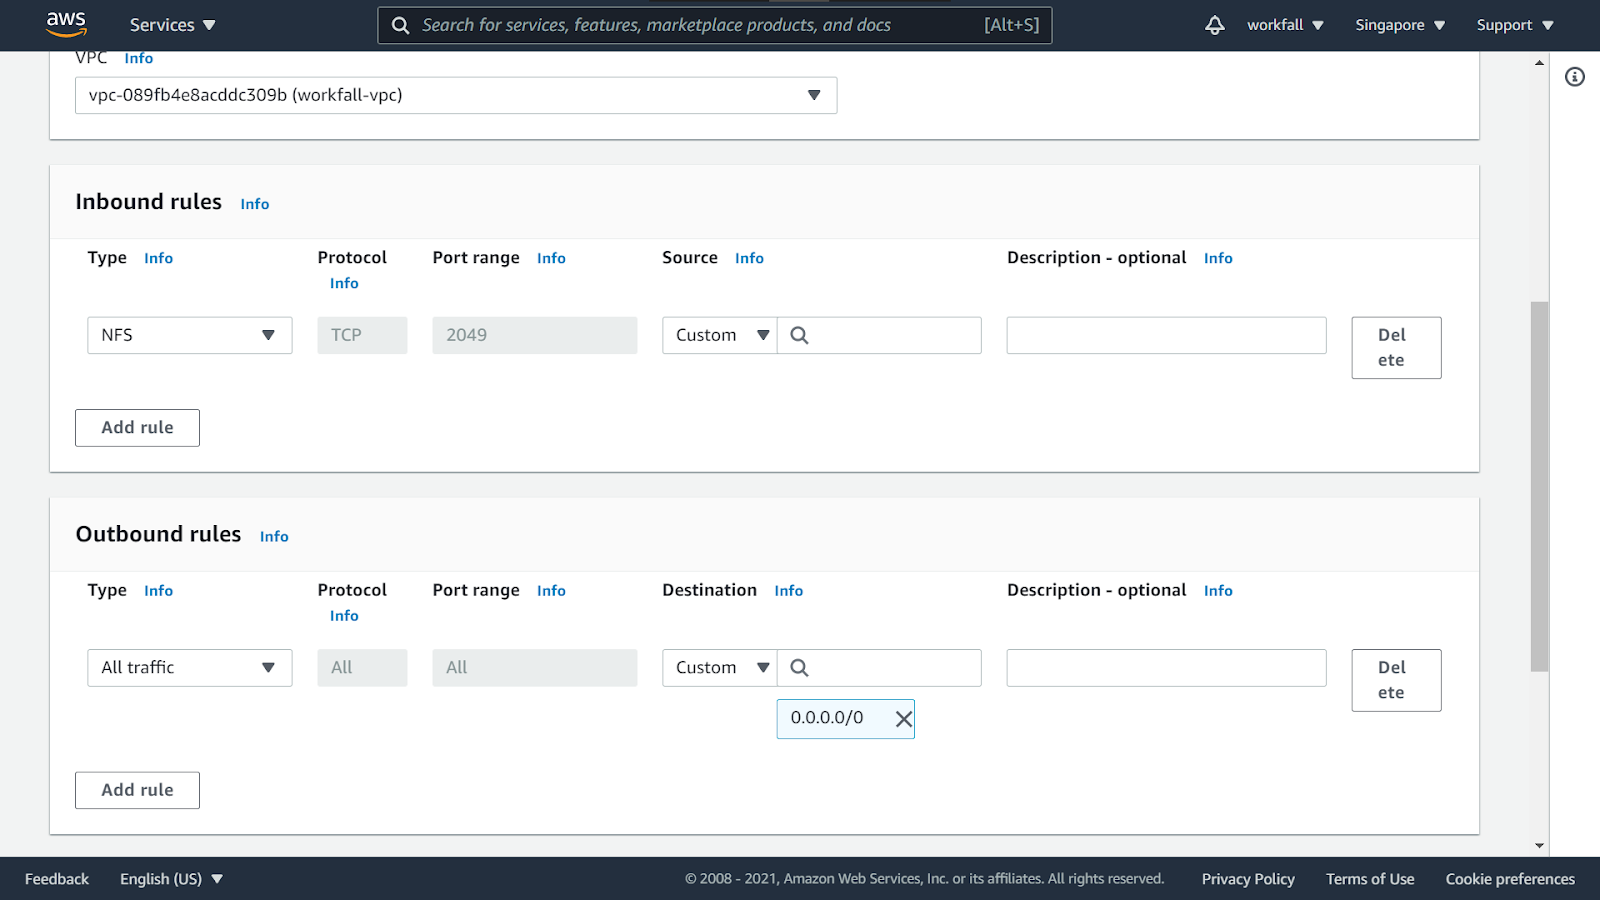
For the source, click on the search bar and search for the EC2 security group you created above. Select that security group and add a description if needed.

Make the configuration of outbound rules look like as shown below. Add Tags (if any) and click on Create Security Group.

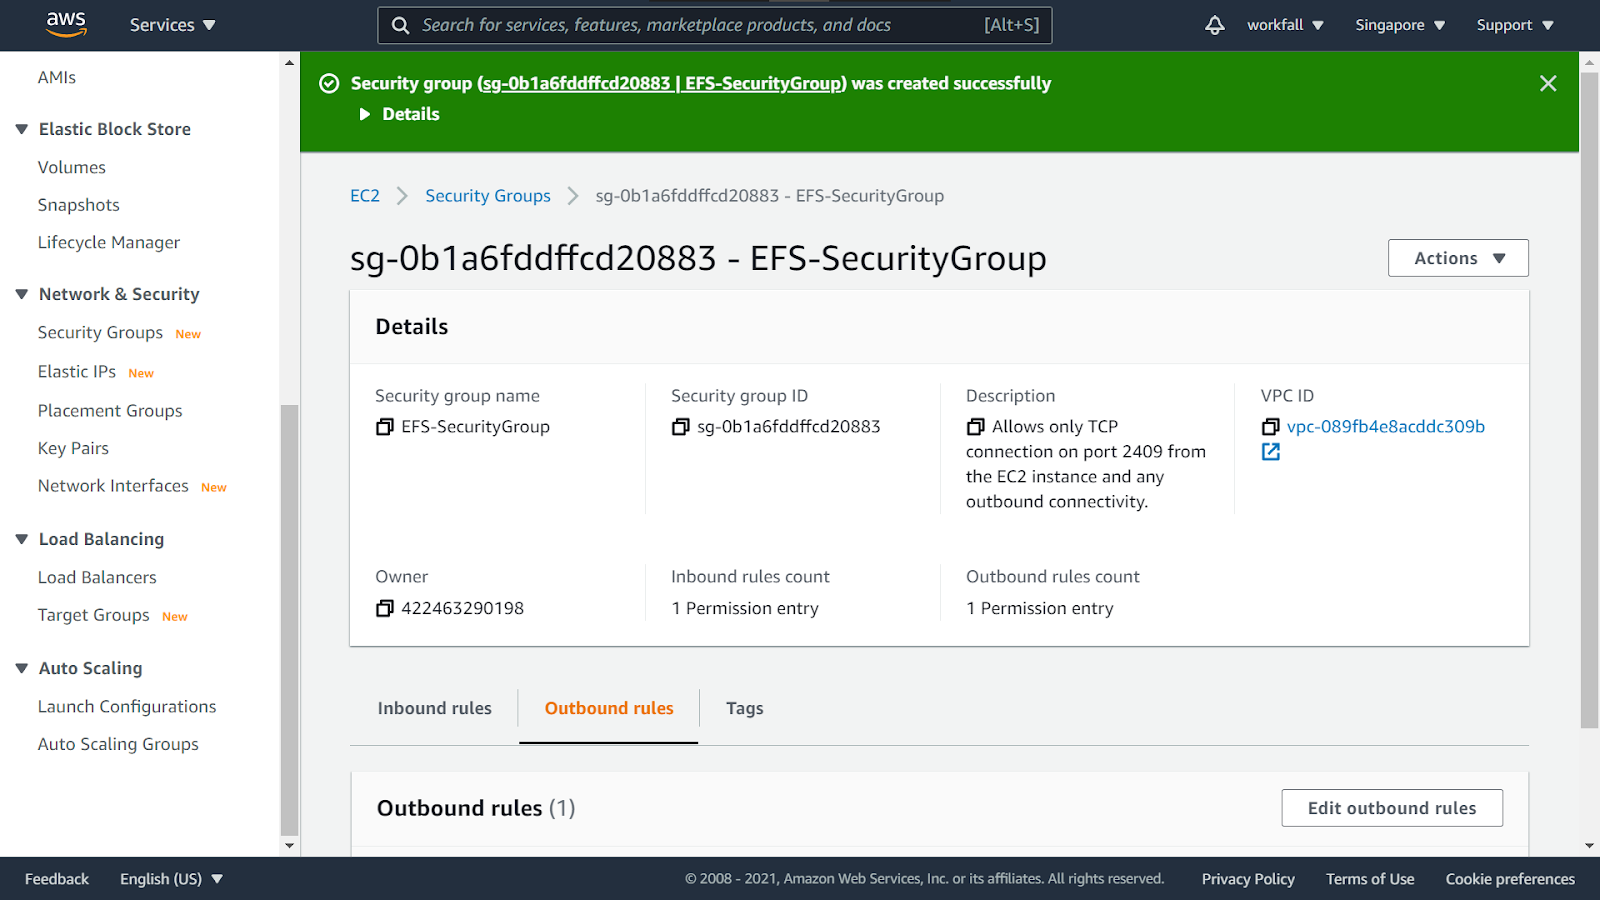
On success, you will see the message as shown in the image below. Please verify the inbound and outbound rules before proceeding further.
Now search for EFS in the search bar and open it in a new tab.
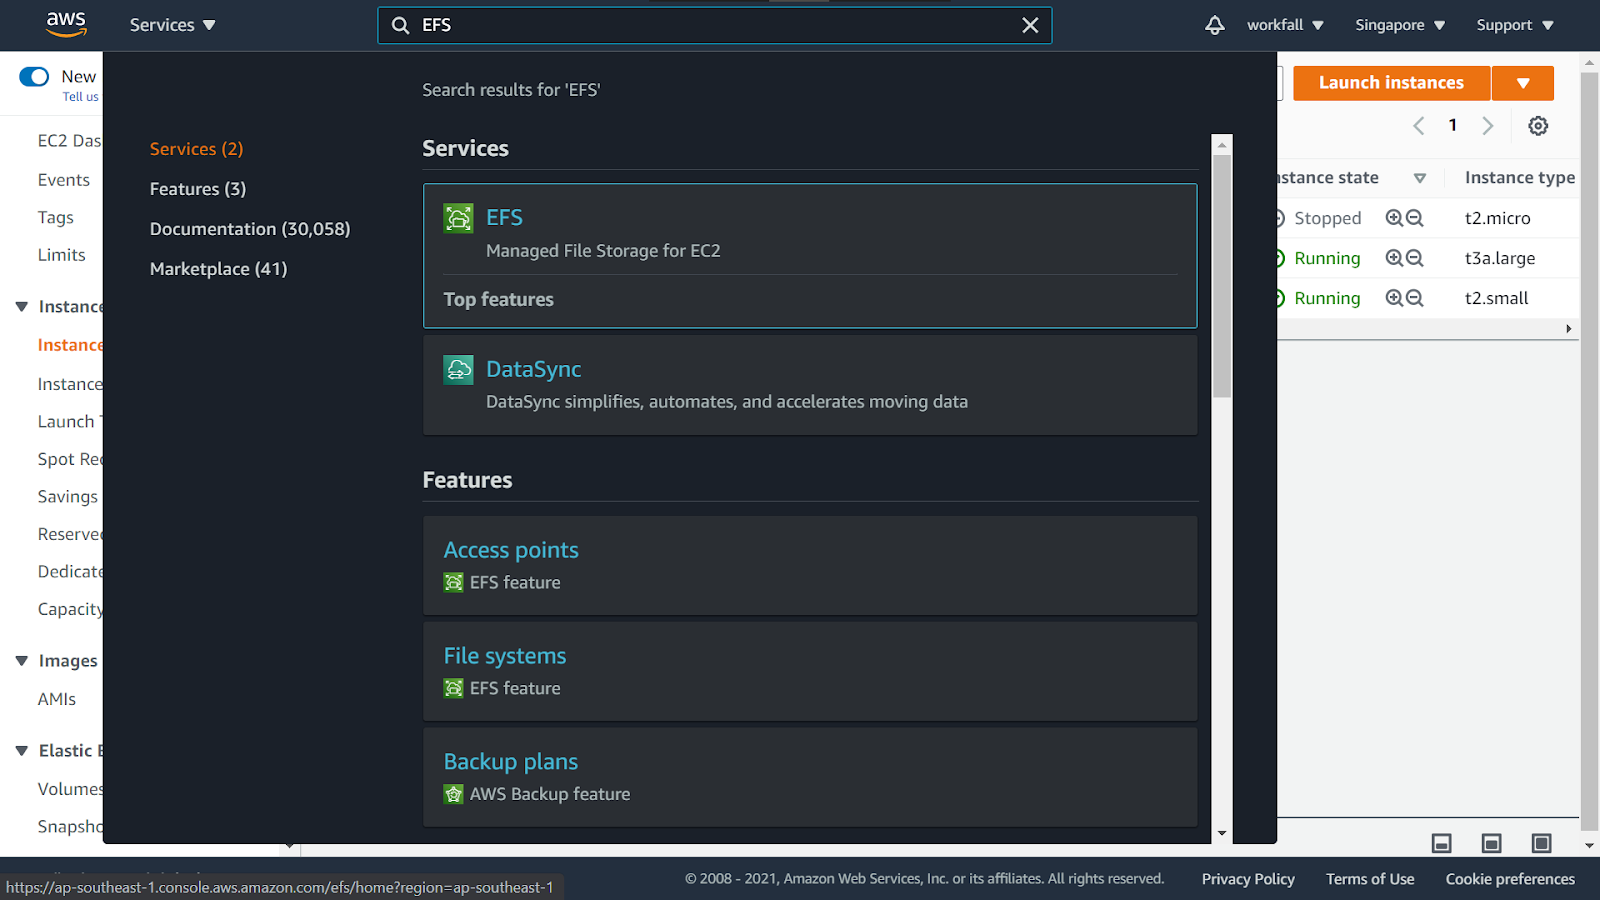
You will be navigated to the Amazon Elastic File System dashboard. Click on Create file system to create a new file system.

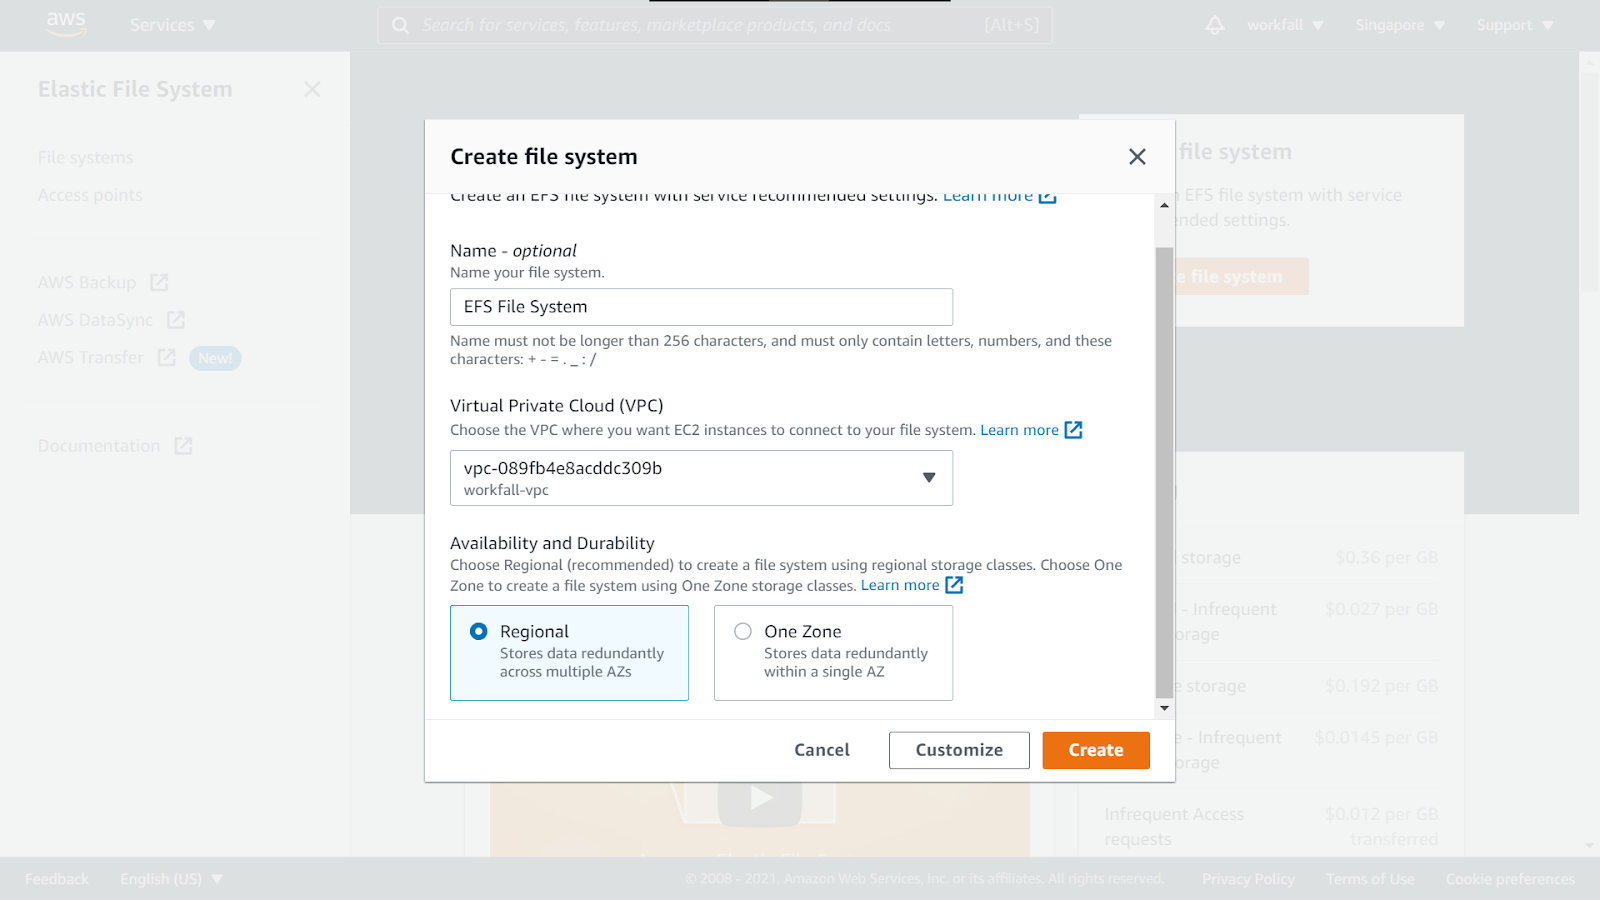
A modal will appear for configuring the EFS.

Enter a name for your EFS and select a VPC from the dropdown. For availability and durability, select Regional. Click on Customize to navigate through the Advanced settings and configure the same.
Enable automatic backups for your file system by selecting the checkbox for the same.

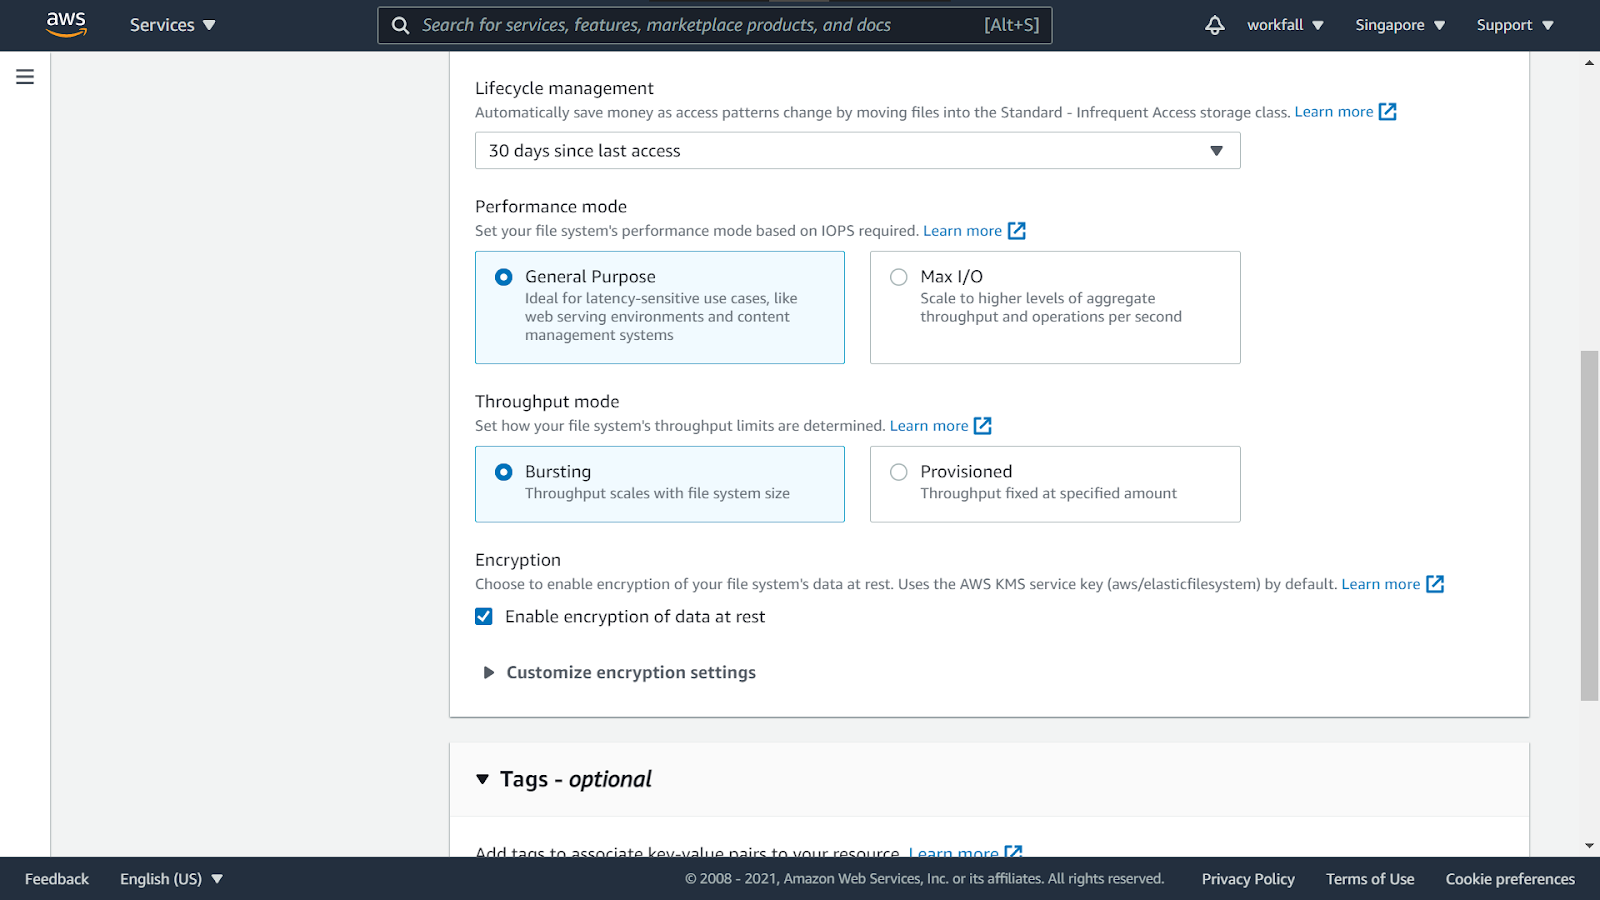
Scroll down and configure the Lifecycle management settings for your file system (as required). For Performance mode and Throughput mode, select the options as shown in the image below. Check the Encryption checkbox so that the data is encrypted at rest when stored in EFS.
Add tags for your file system (if needed) and once done, click on Next.

You will be navigated to Step 2 – Network Access wherein you have to attach the Security group you created above for EFS.

Remove the already attached security groups and search for the name of the security group you created above for EFS and select the same for the mount targets for all the availability zones.

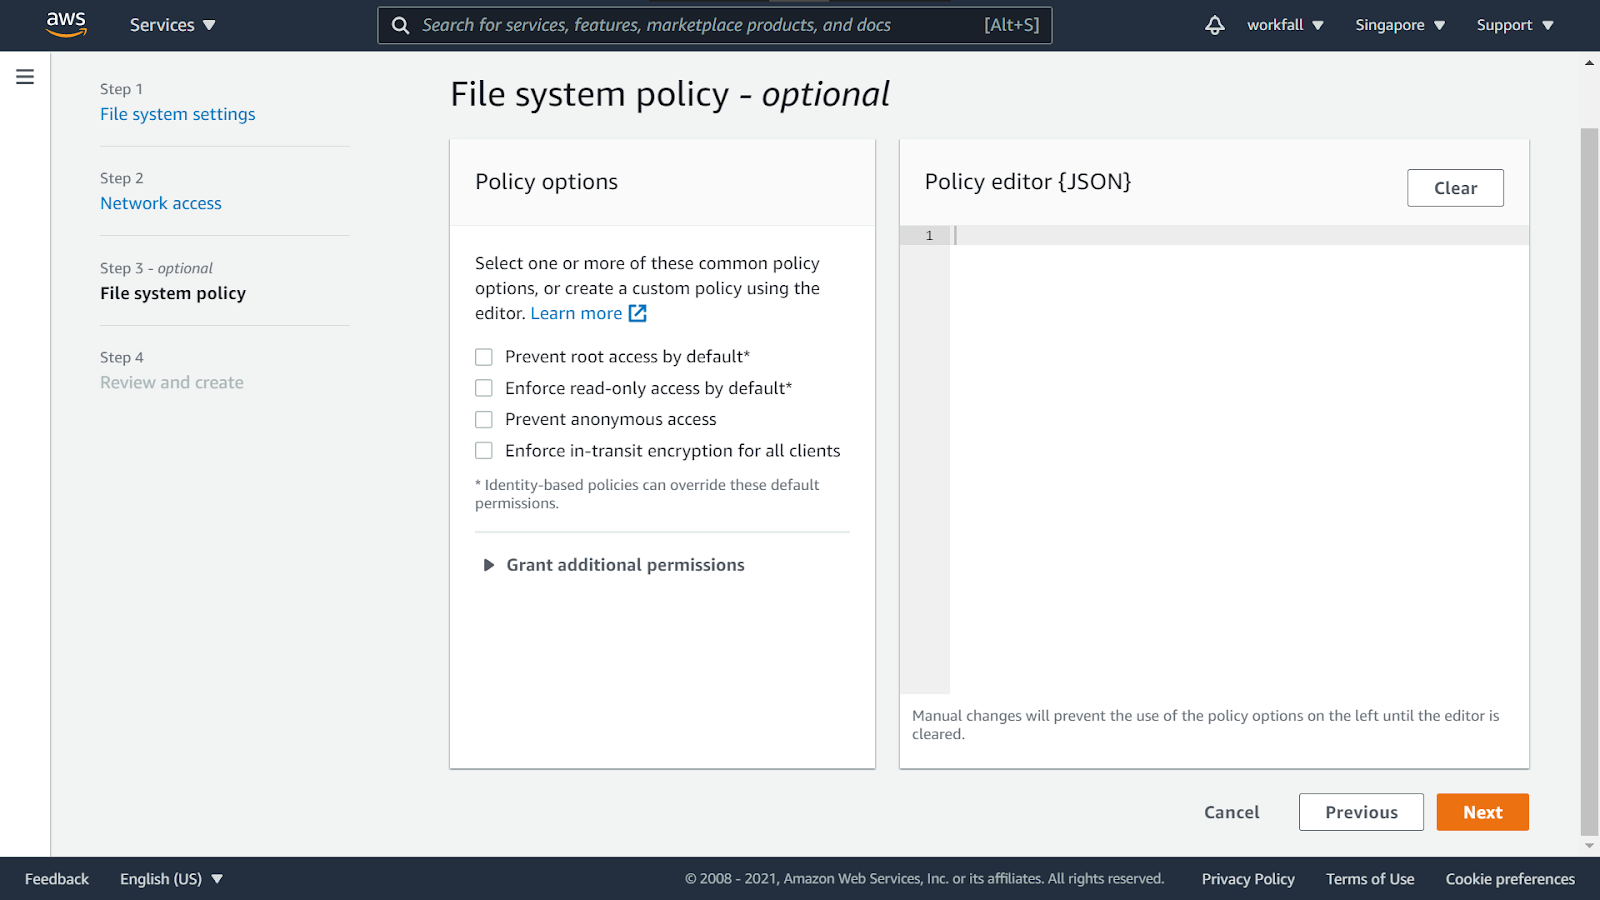
Once done, click on Next to navigate to the File system policy for your EFS.

Add an additional policy if needed for your file system and click on Next.
Review all the configuration settings before proceeding to the next step.
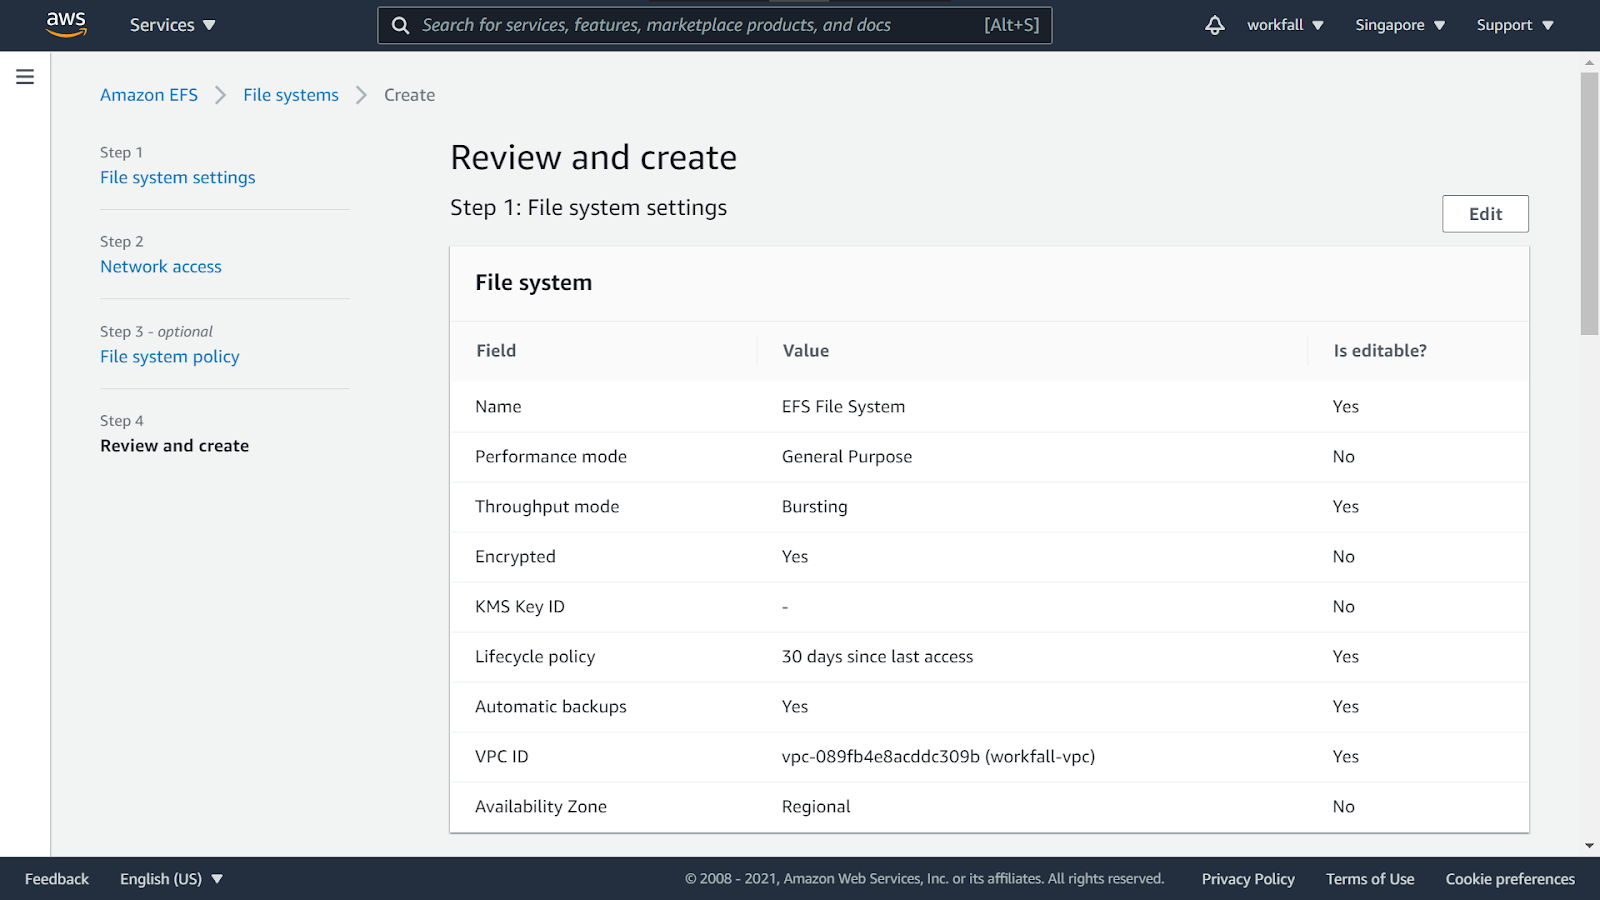
Once done, scroll down to the bottom of the dashboard and click on Create.

It might take a few seconds for the settings to be configured and for your file system to be created.
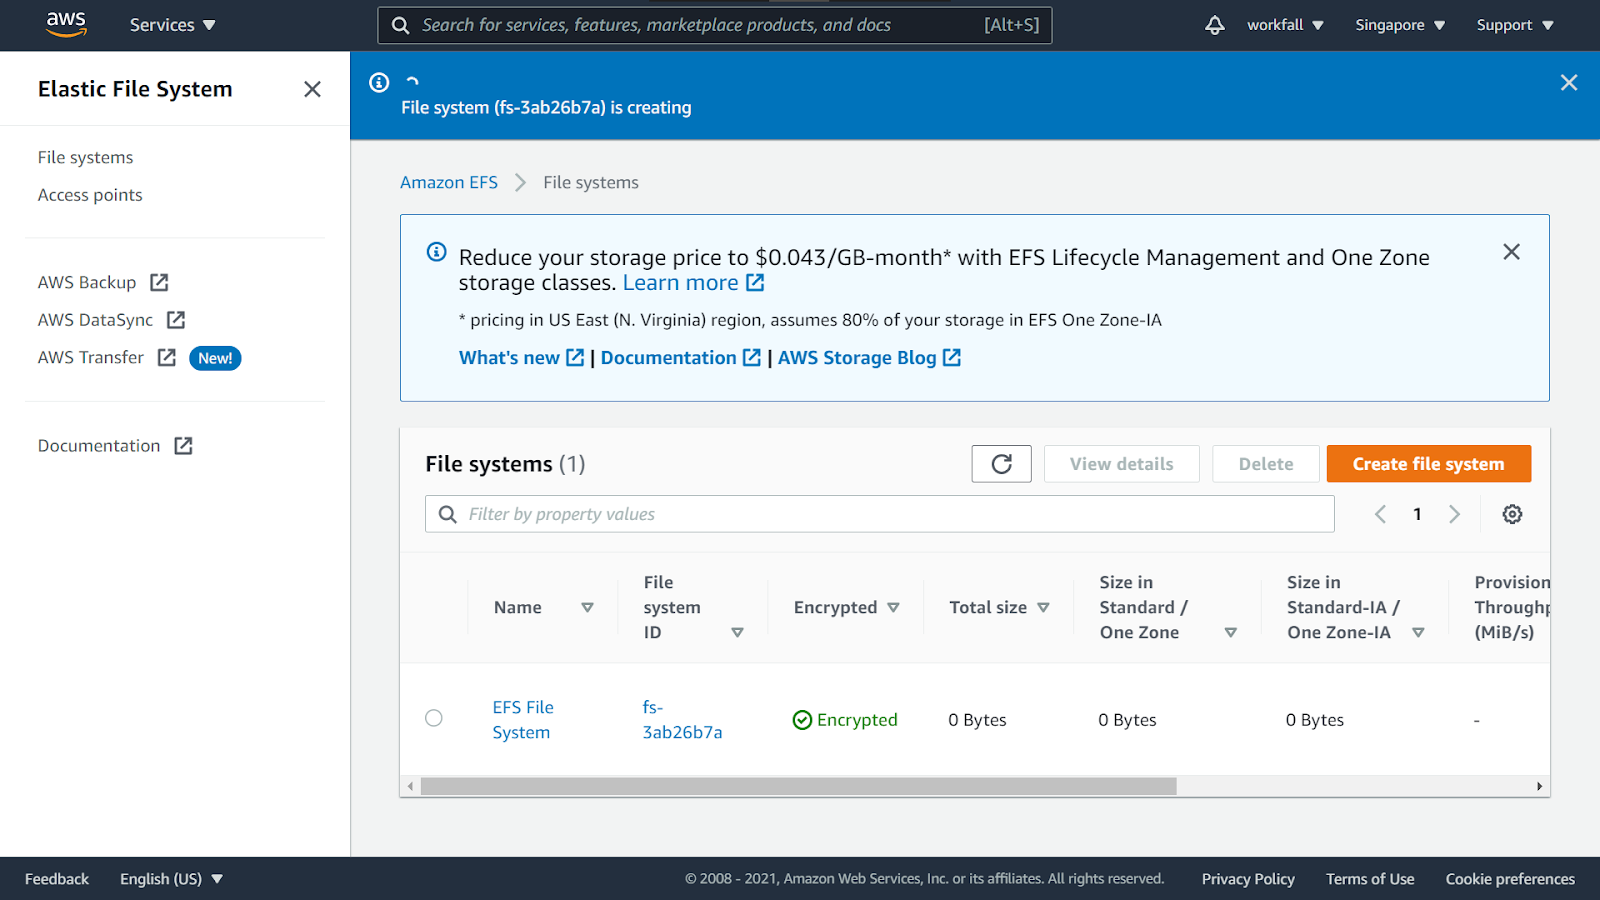
On success, you will see a message as shown in the image below. Click on View file system to check the settings.

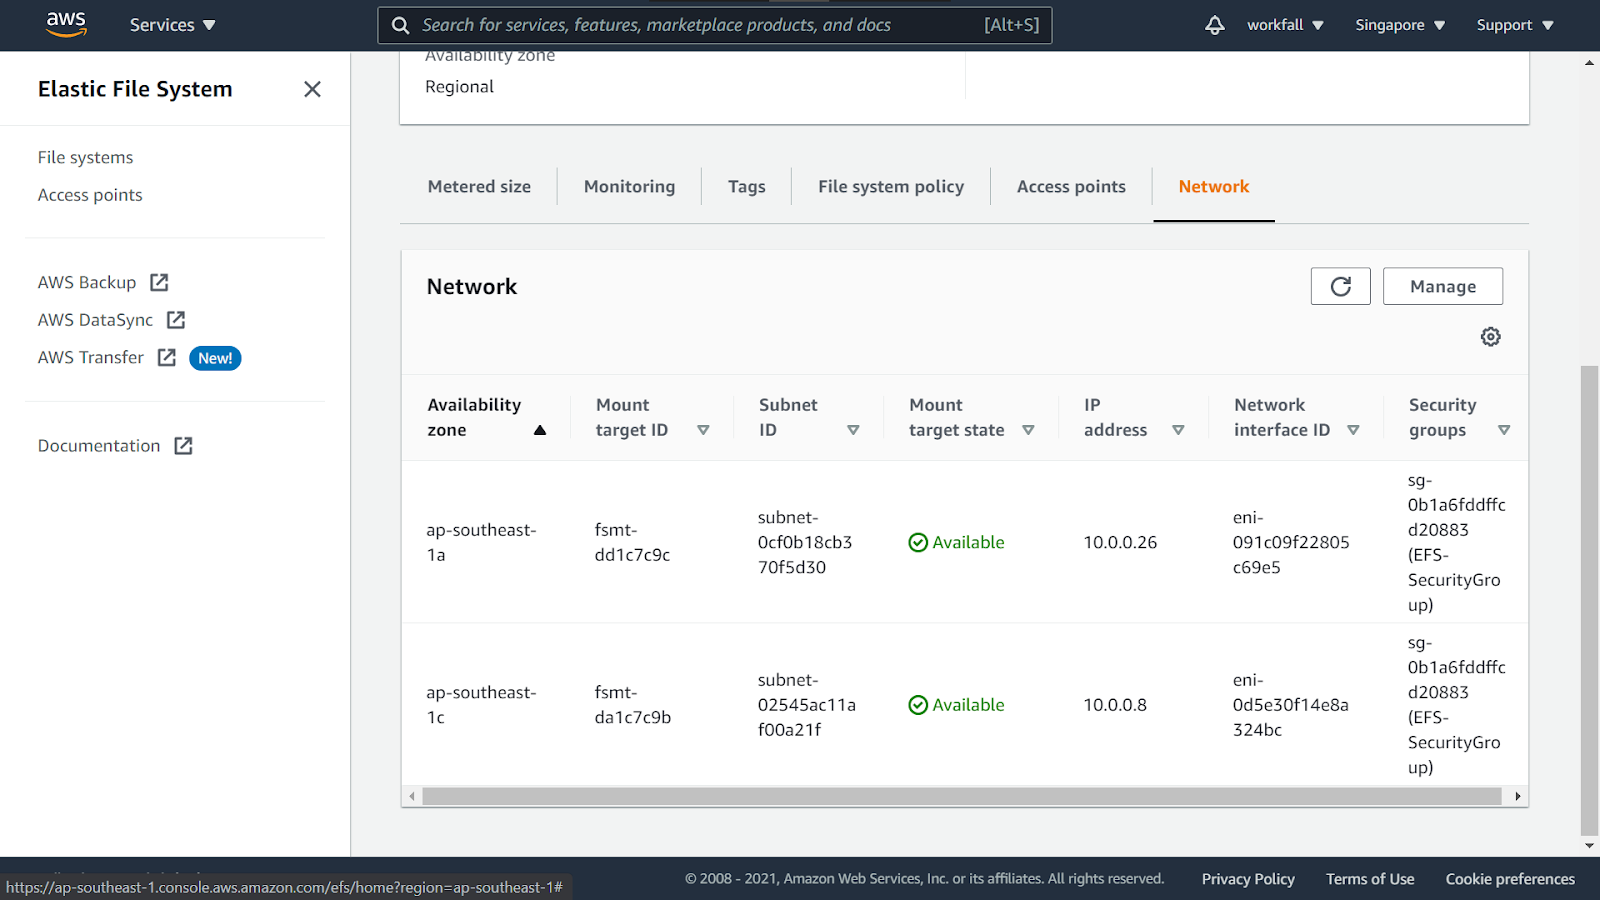
On the created file system dashboard, select the Network tab from the tabs below.

Make sure that for all the availability zones, the mount target state is set to Available.
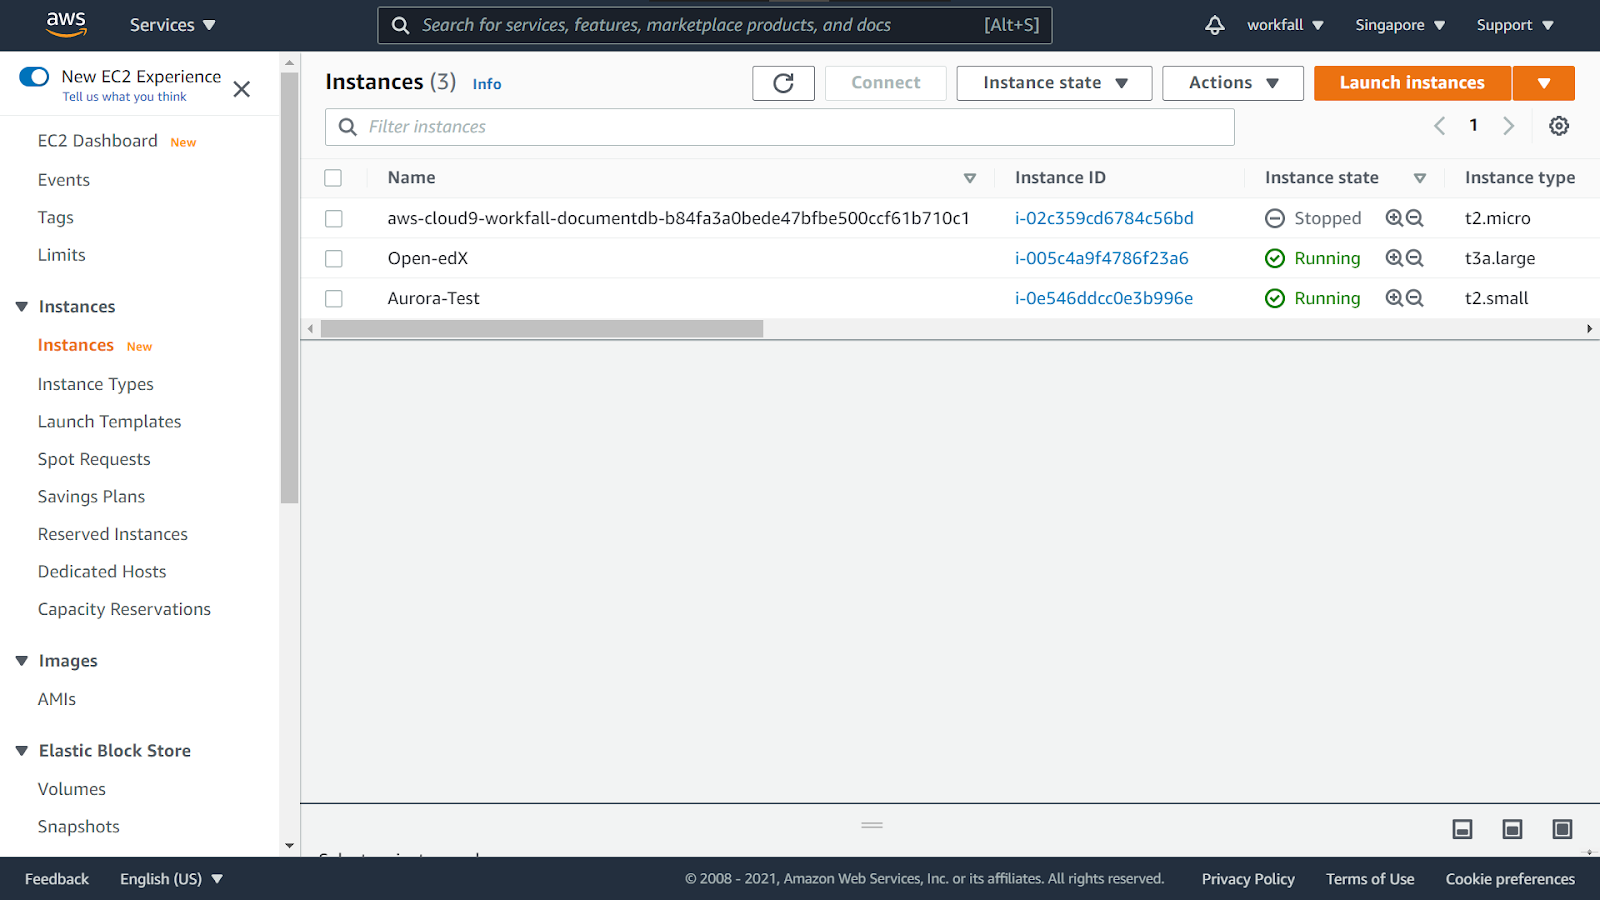
Now navigate to the Amazon EC2 console on AWS to create a new instance. Click on “Launch instance” to launch a new managed instance in your preferred region.
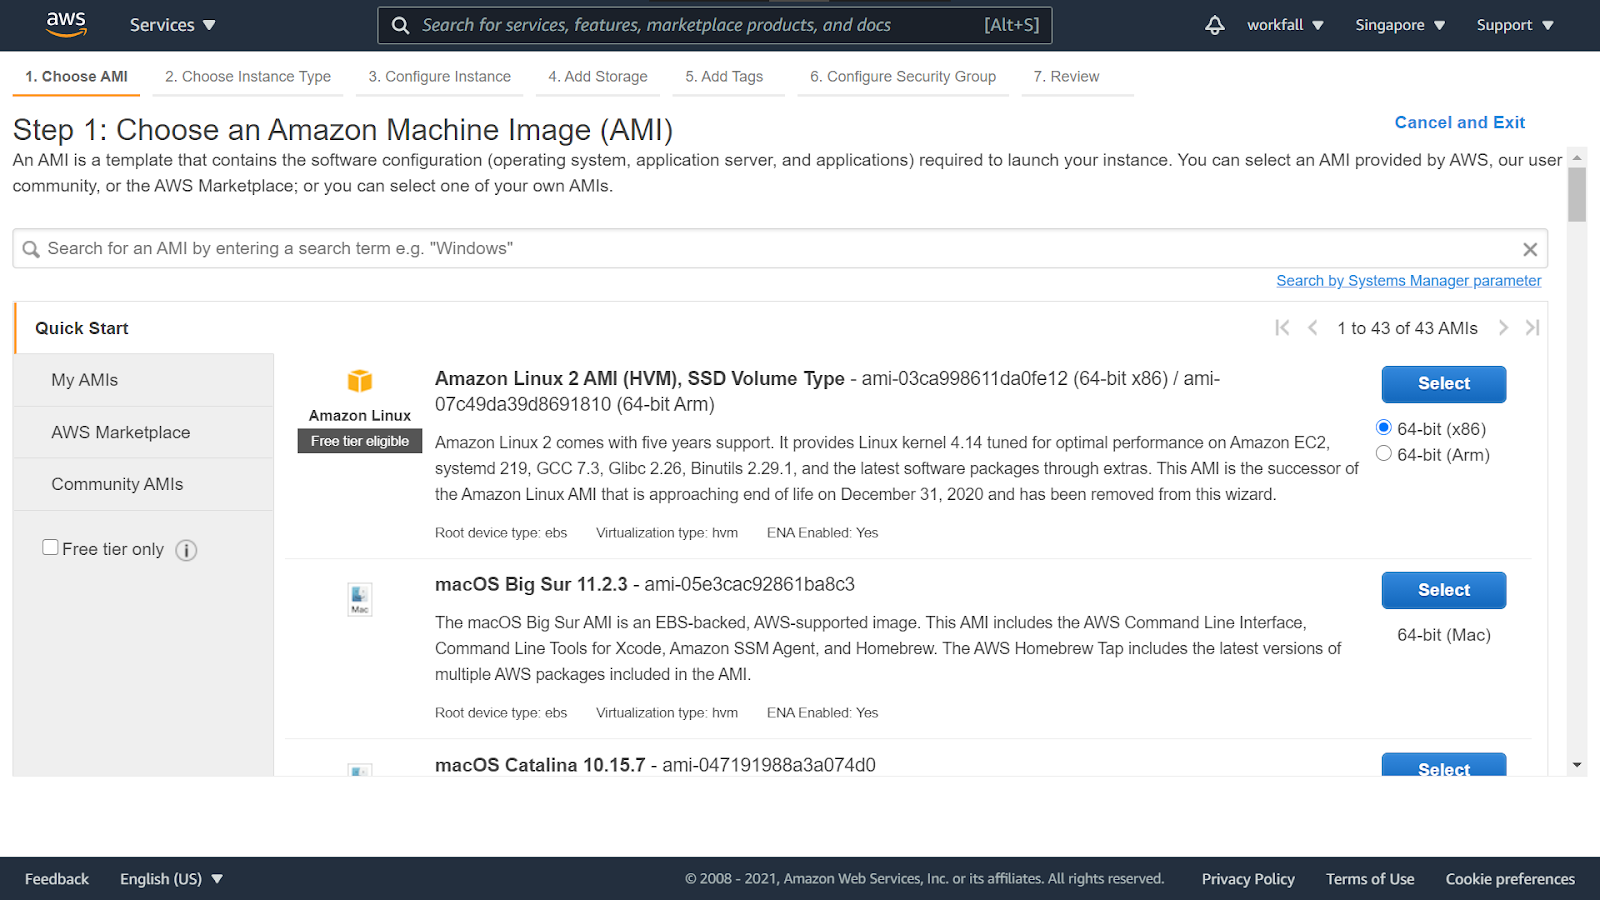
Under “Choose an Amazon Machine Image (AMI), select “Amazon Linux 2 AMI (64-bit)” and click on “Select”.
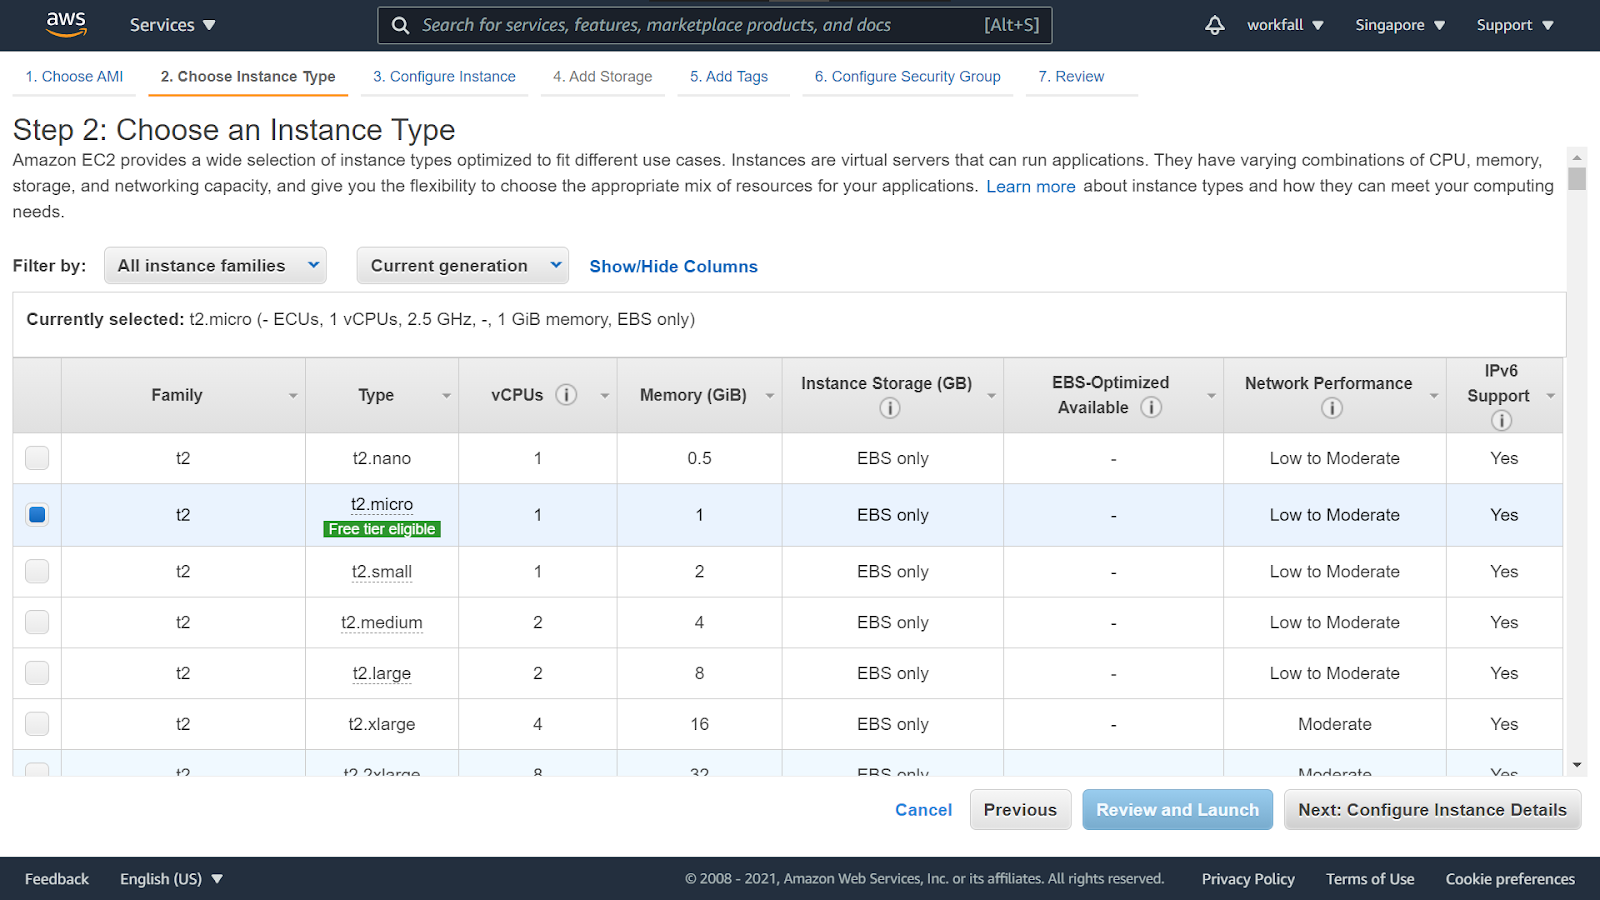
In Step 2, you can select the instance type you prefer. For this tutorial, we will be using “t2.micro”. Click on “Next: Configure Instance Details”.
Ensure that the “Subnet” selected is the one for which the auto-assigning of public IPv4 addresses is enabled. Scroll down to the file system setting and click on Add file system.

You can make changes in the storage configuration depending on your requirements. For this tutorial, we will be using the default storage configuration. Once done, click on “Next: Add tags”.

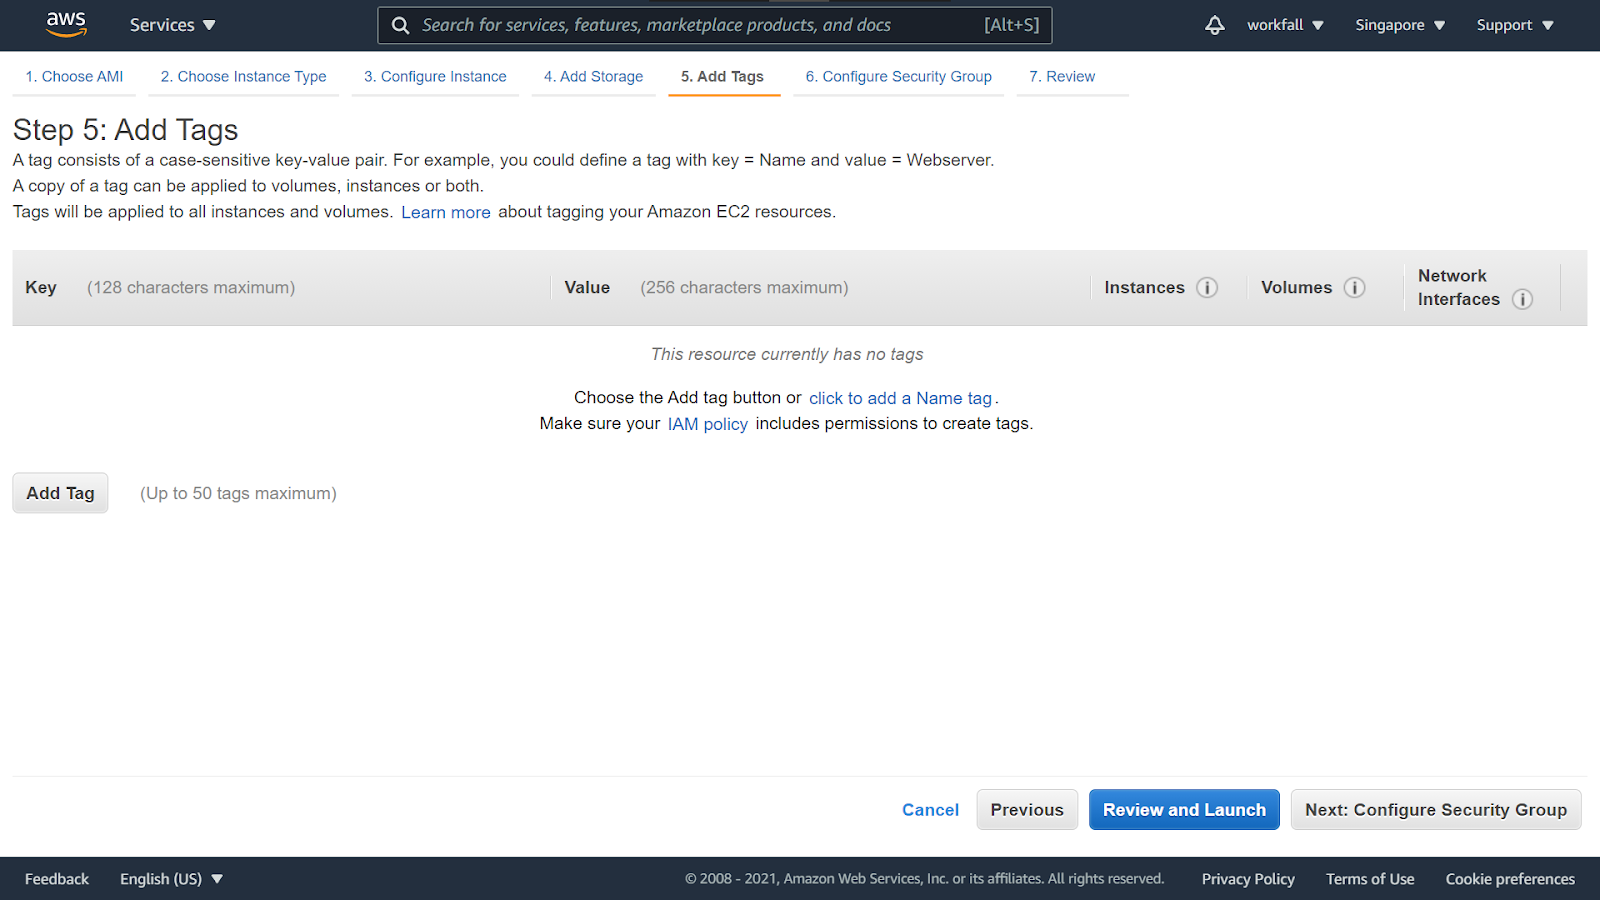
Add tags (if any) for your instance. We will not be adding any tags in this tutorial for our instance. Click on “Next: Configure Security Group”.
Choose ‘Select an existing security group’ to select the security group you created above.

Select the EC2-SecurityGroup you created above and once done, click on Review and Launch.

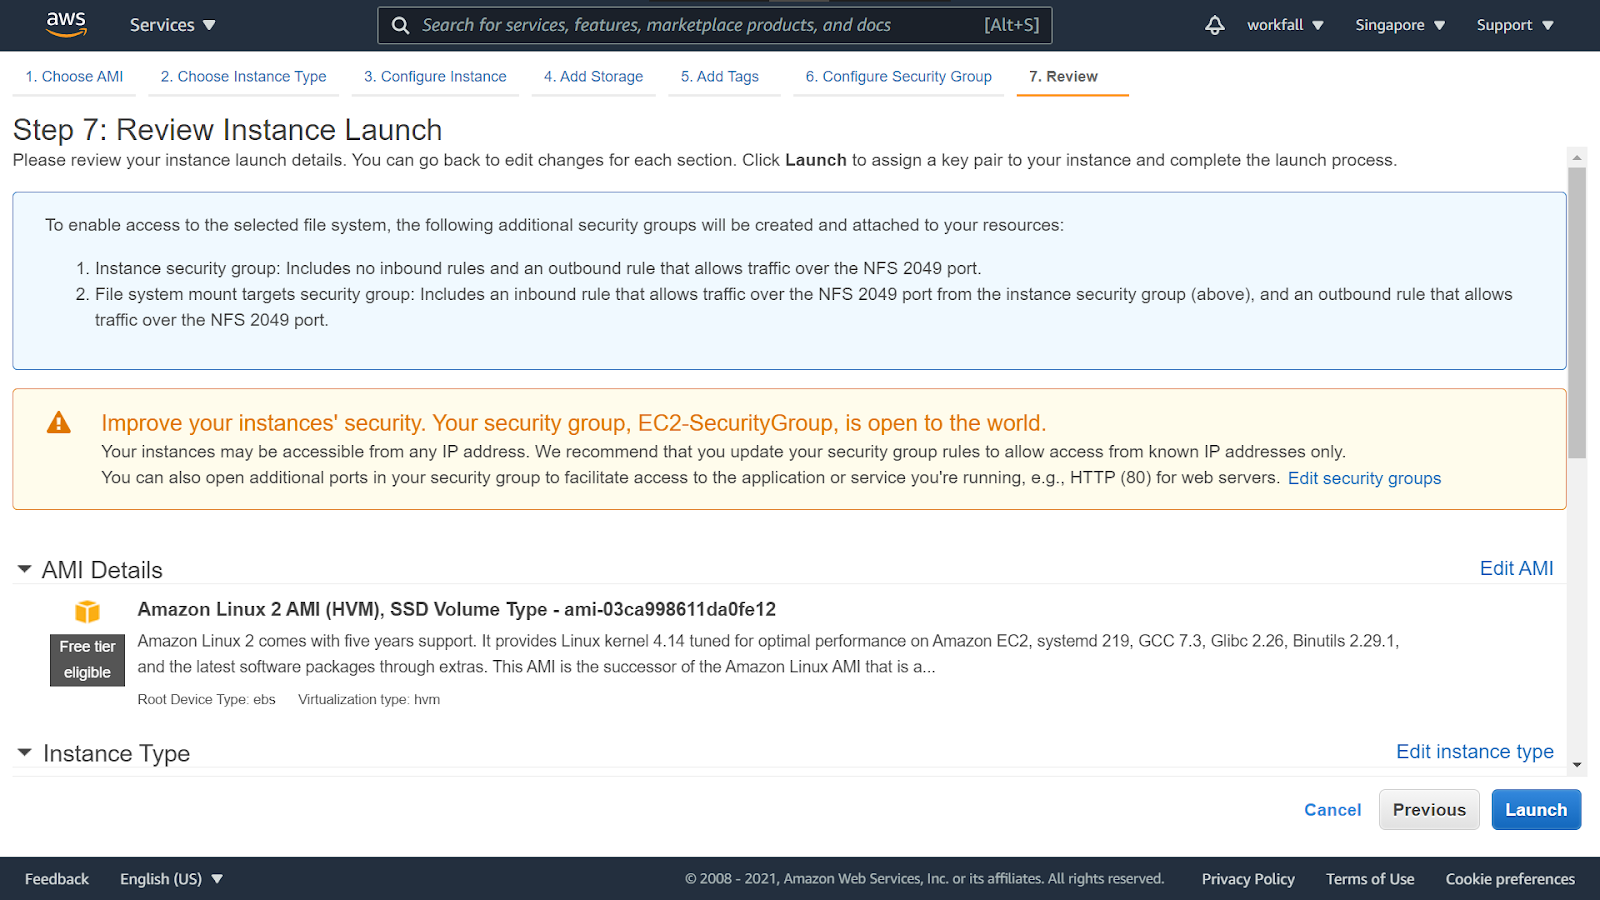
Review all the configuration details and click on “Launch”. For key pairs, from the dropdown, select an existing or create a new key pair based on your requirements. You can also proceed without a key pair. In this tutorial, we will not be creating a key pair. Once done, click on “Launch Instances” .
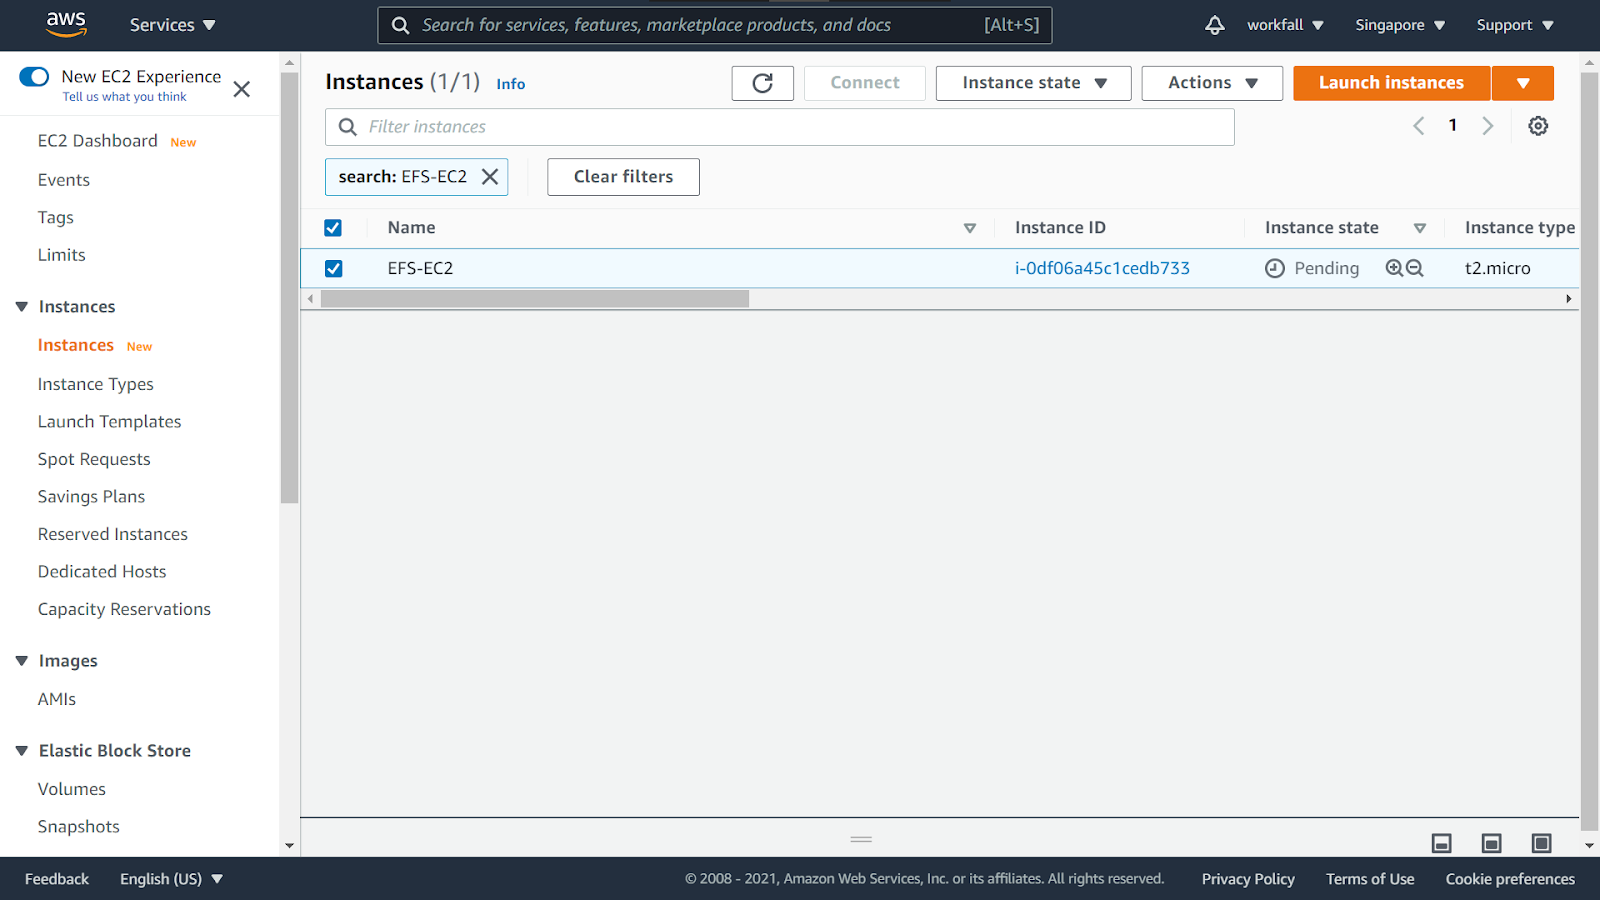
On success, you will view a screen as shown below. Click on “View Instances” to navigate and connect to the instance you created.

You will see the newly created instance in the list shown below. Ensure that the “Public IPv4 DNS” column has an IP address for your newly created instance. Once the “Instance State” changes to the “Running” state, select the newly created instance and click on “Actions”. Select “Connect” from the dropdown.
Enter a “User name” for your instance and click on “Connect” to connect to your EC2 instance.

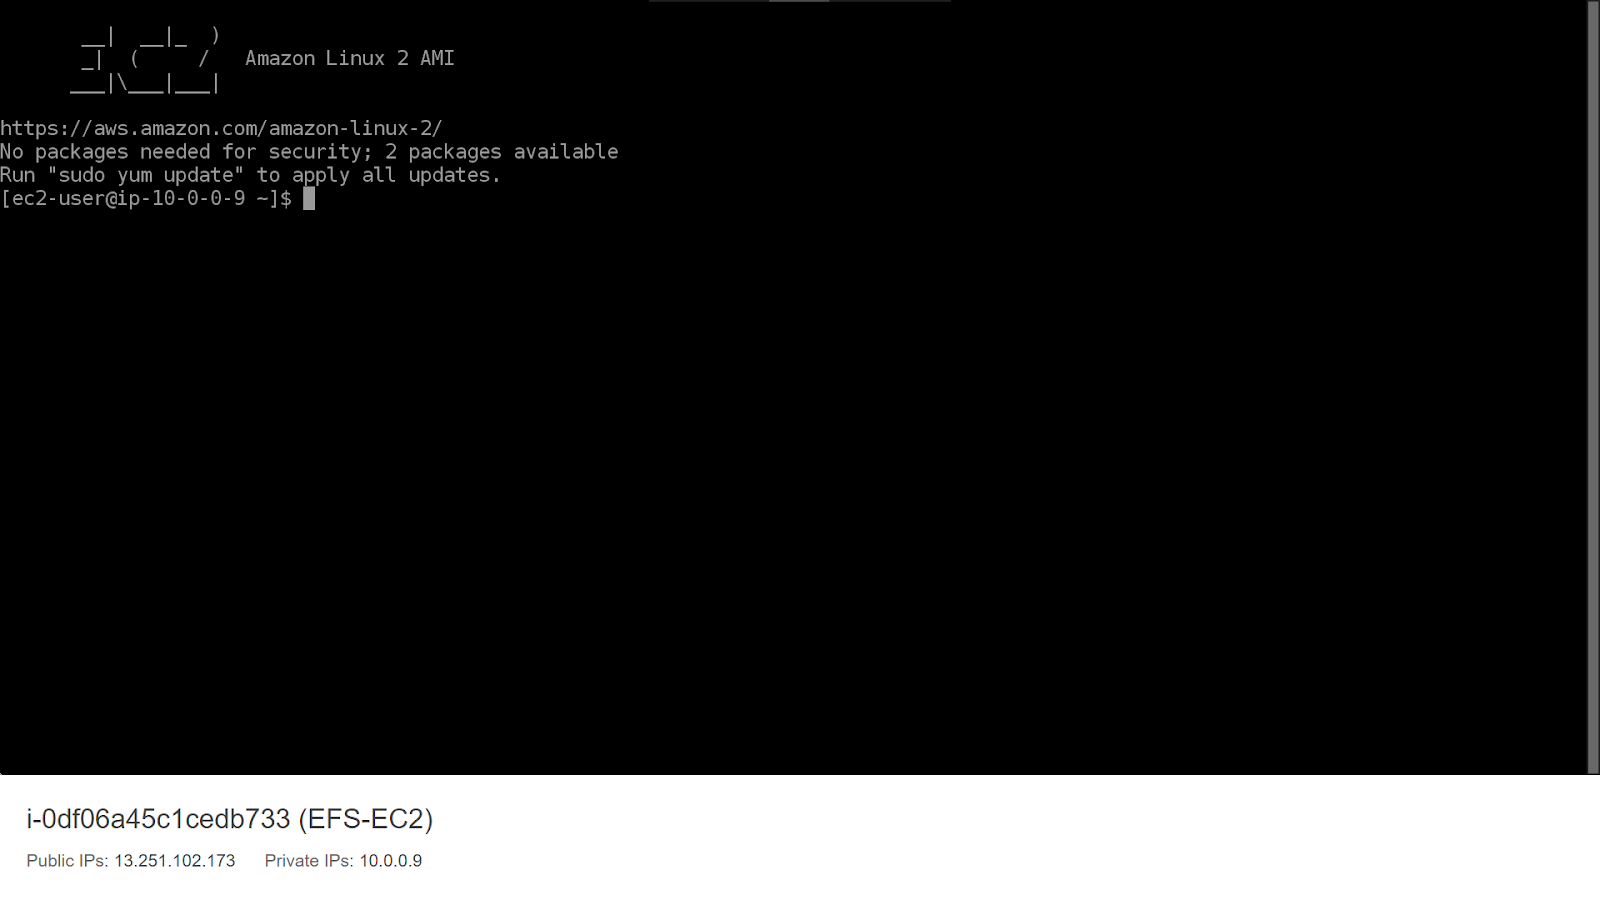
A new terminal console will open in a new tab as shown below.
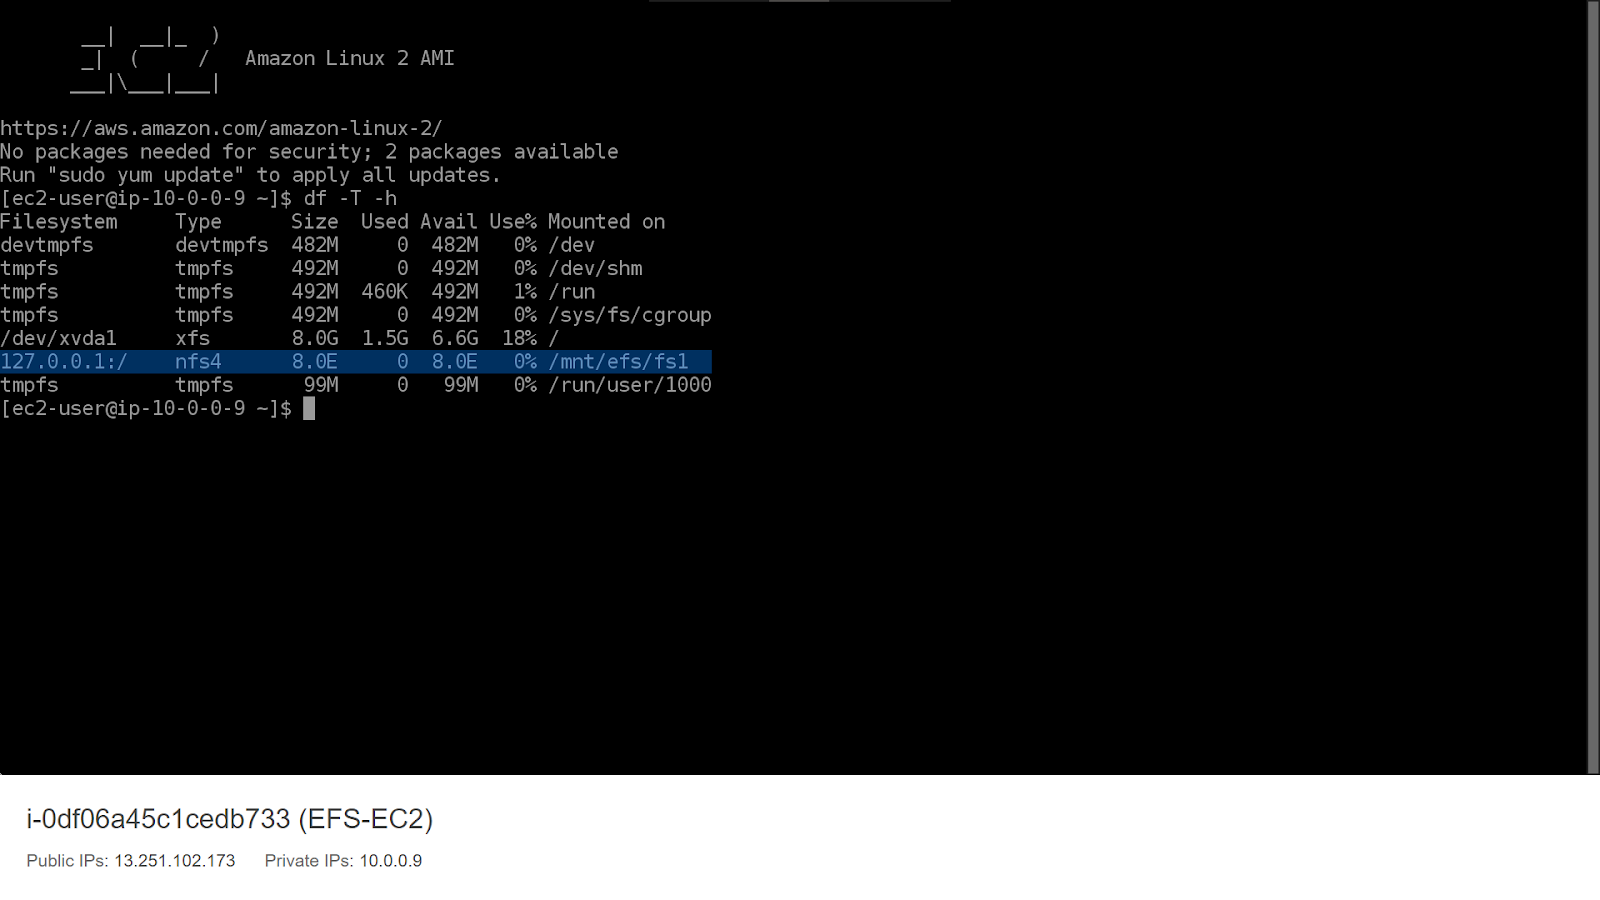
Execute the below command to verify if the file system has been attached to the EC2 instance successfully.
Command: df -T -h

From the list of the configurations listed for your EC2, verify that the highlighted entry in the image below is present in the list of entries which proves that the file system has been created successfully.
Conclusion
In this blog, we explored the integration between Amazon EC2 and AWS EFS Service to mount a file system to an EC2 instance to be able to share data for a business use case. We also explored the various offerings of EFS and created 2 security groups: one to allow SSH and the other for NFS and attached the same to the EFS file system. We will discuss more use cases of AWS EFS in our upcoming blogs. Stay tuned to keep getting all updates about our upcoming new blogs on AWS and relevant technologies.
Meanwhile …
Keep Exploring -> Keep Learning -> Keep Mastering
This blog is part of our effort towards building a knowledgeable and kick-ass tech community. At Workfall, we strive to provide the best tech and pay opportunities to AWS-certified talents. If you’re looking to work with global clients, build kick-ass products while making big bucks doing so, give it a shot at workfall.com/partner today.
Do you want to mount an Amazon Elastic File System (Amazon EFS) file system to an Amazon Elastic Compute Cloud (Amazon EC2) instance using the EC2 Launch Instance Wizard? Here is our blog with step-by-step instructions.
Be a part of our kick-ass AWS community, by following us at https://www.linkedin.com/company/workfall/