AWS RoboMaker is the most complete cloud solution for robotic developers to simulate, test, and securely deploy robotic applications at scale. RoboMaker’s managed ROS and Gazebo software stacks free up engineering resources and enable you to start building quickly. In this blog, we will navigate through the AWS Robomaker service and see how we can build a ROS CI Pipeline using AWS Robomaker and CodePipeline. We will see how to create a development environment, structure the code base, execute commands, create an S3 bucket, build a pipeline and finally add a new action group to the pipeline to integrate AWS Robomaker with CodePipeline to build a fully configured ROS CI Pipeline. Refer to part 1 of the blog here.
Hands-on
AWS RoboMaker is the most complete cloud solution for robotic developers to simulate, test, and securely deploy robotic applications at scale. With AWS RoboMaker, it is easy to enable a robot running ROS to navigate, communicate, comprehend, stream data, and learn. Tasks that once could either not be done or took months can now be done in hours or days. In this blog, we will see how we can make use of the AWS Robomaker service to create a ROS CI pipeline. We will have a look at how we can create a new development environment. Cloning the code files, we will then execute a set of commands. After the command execution, we will create multiple scenarios in a JSON file, create a new S3 bucket, configure the simulation launcher and create a builspec.yml file for the configuration. Finally, we will create a CodePipeline and add a simulation trigger as an action group to link AWS Robomaker with CodePipeline.
To implement this, we will do the following:
- Log in to the AWS account and navigate to the dashboard.
- Navigate to the AWS Robomaker service dashboard.
- Explore the service and its various offerings.
- Create a development environment in the service dashboard.
- Clone the repository for the code files.
- Explore the various code files.
- Create a new JSON file and define scenarios for the same.
- Clone simulation launcher code files.
- Install brew and update AWS CLI.
- Follow the execution of commands.
- Navigate to the S3 bucket dashboard and create a new bucket.
- Follow the execution of the next set of commands.
- Create a buildspec.yml file for your configuration.
- Navigate to the CodePipeline dashboard and create a new pipeline.
- Follow the configuration steps, create a new connection and connect to your GitHub account.
- Create a build project in the CodePipeline.
- Once the pipeline is created, edit the pipeline stages and add a new action group.
- Following all the steps, you’ll have a complete processing ROS CI pipeline configured.
Login to your AWS console and navigate to the Dashboard.

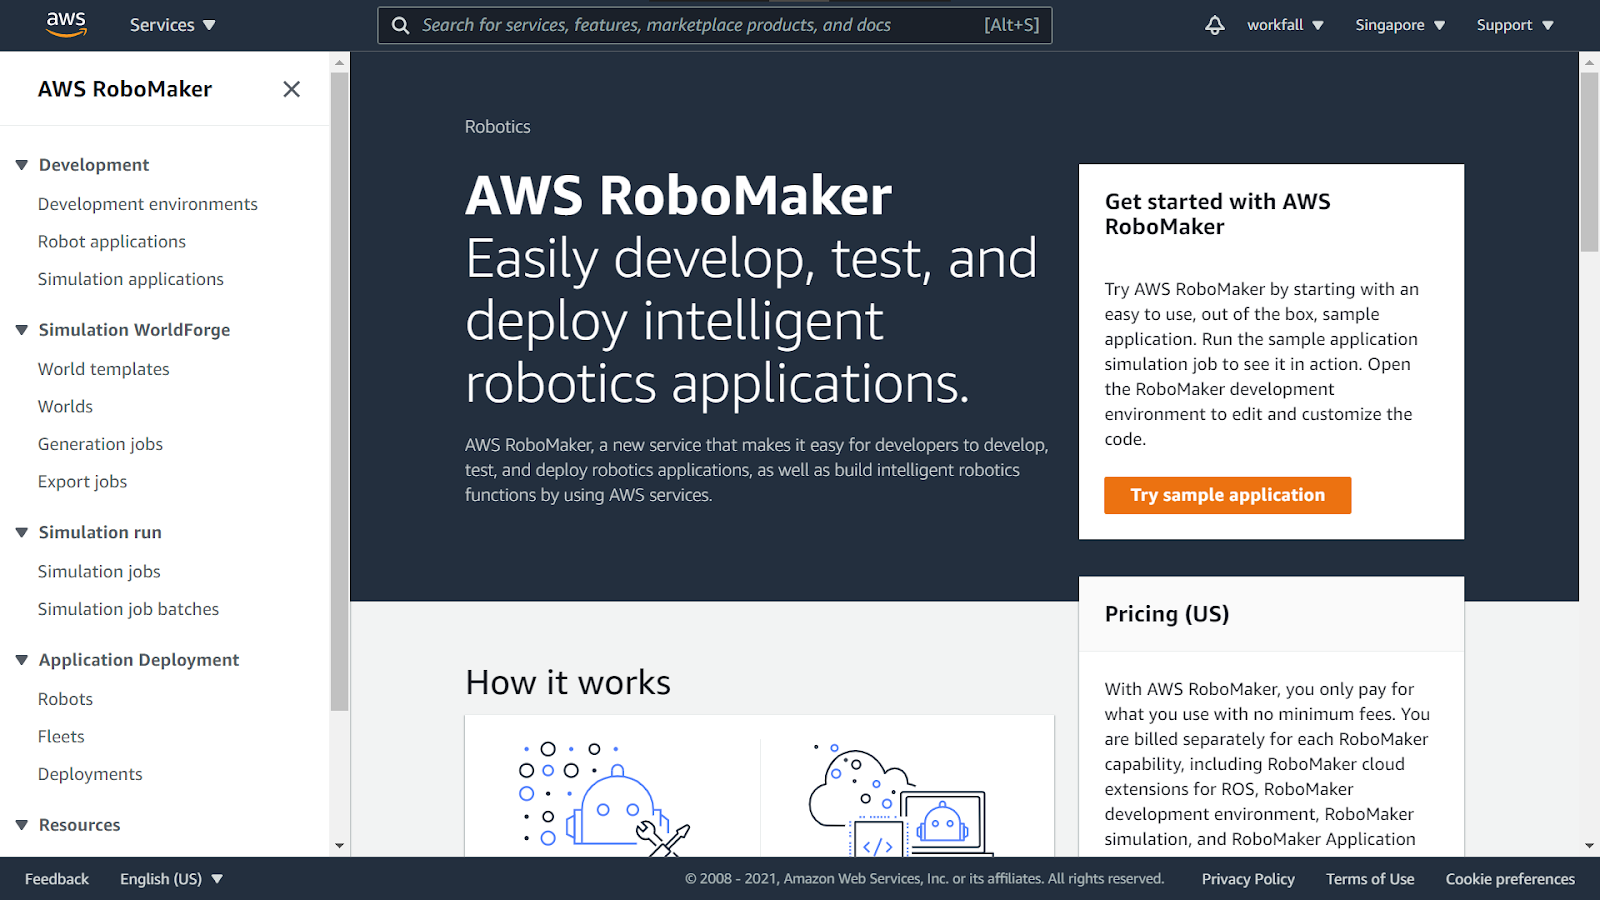
Search for the AWS RoboMaker service and click on it.

You will be navigated to the AWS RoboMaker dashboard as shown in the image below.

Expand the left navigation pane and click on Development environments.
On the homepage of the development environment, click on Create development environment.

You need to fill in the details to create a new development environment.
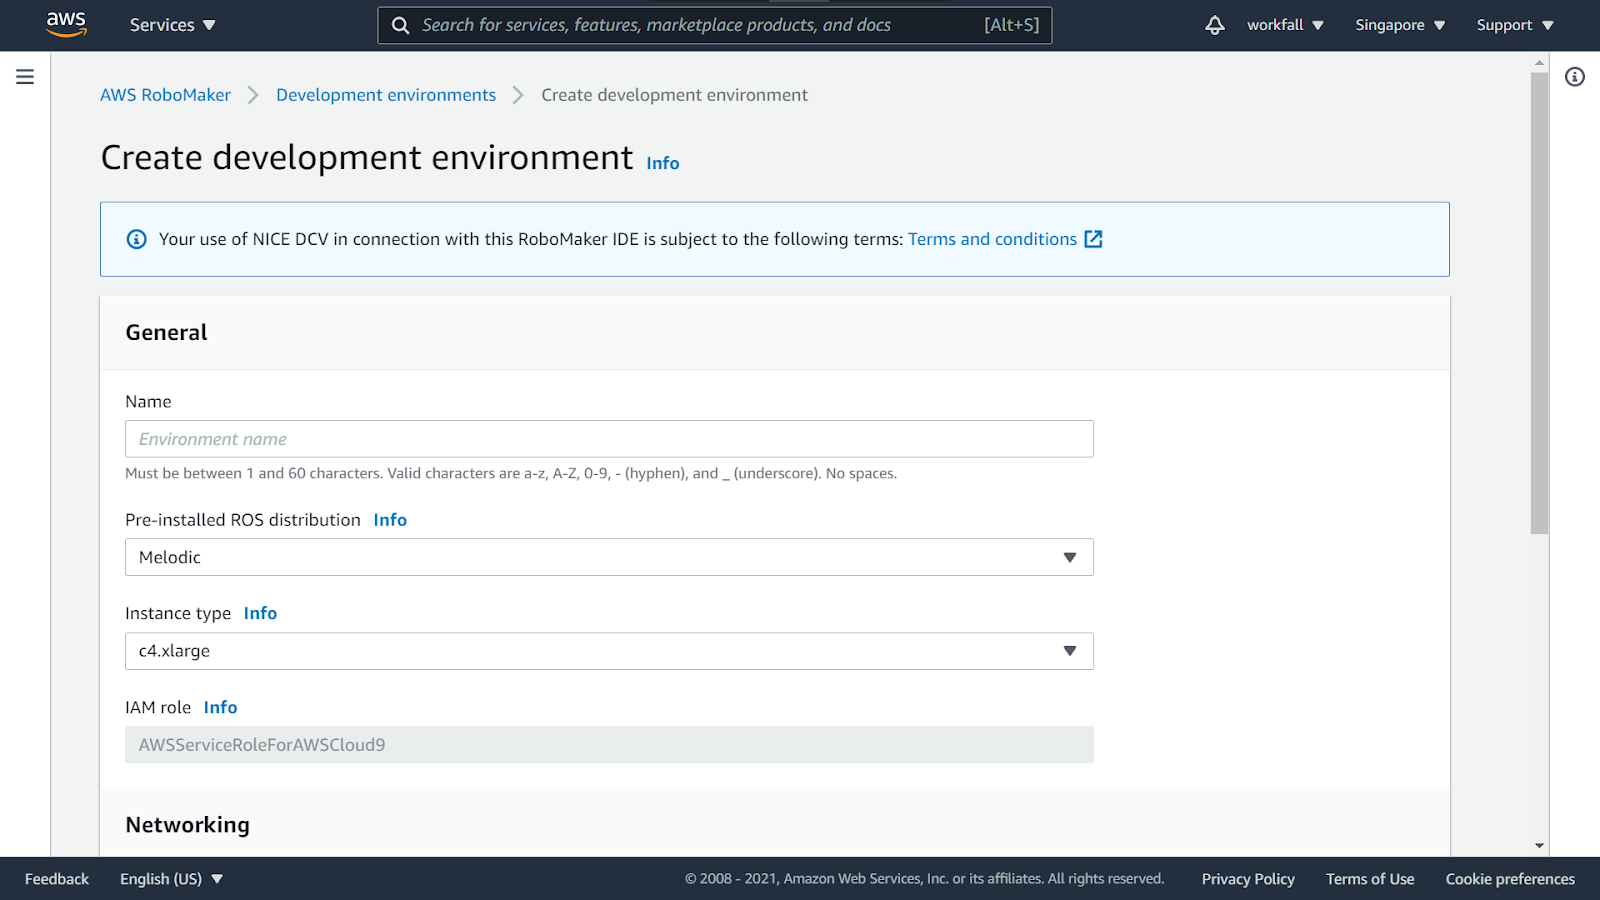
Enter a name for the environment and select the details as shown in the image below.
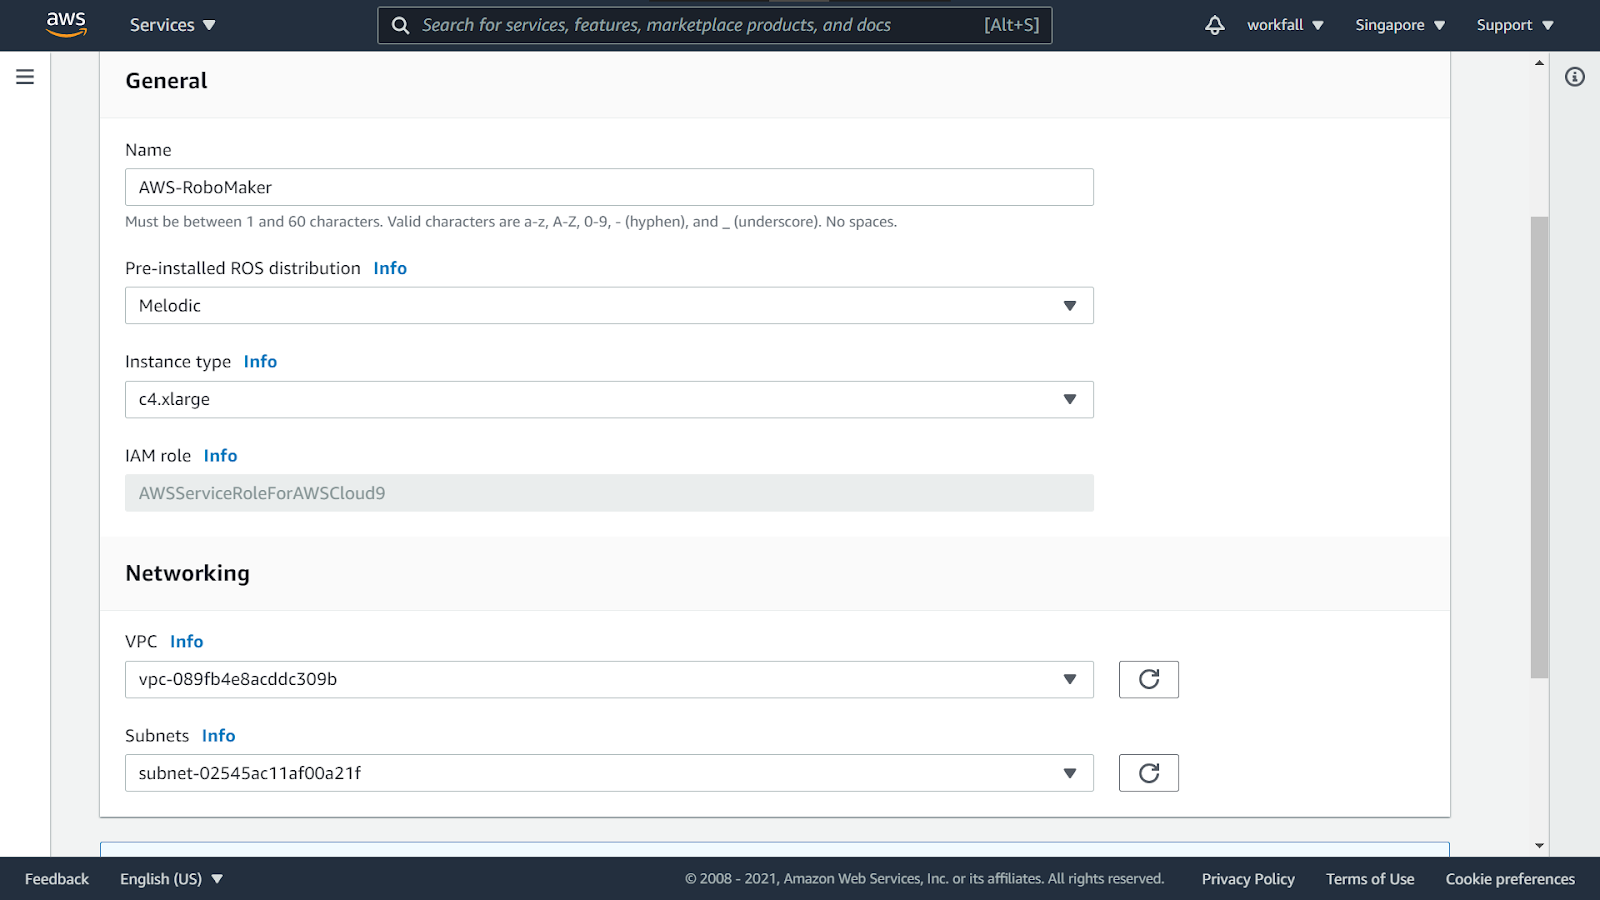
Scroll to the bottom and click on Create.
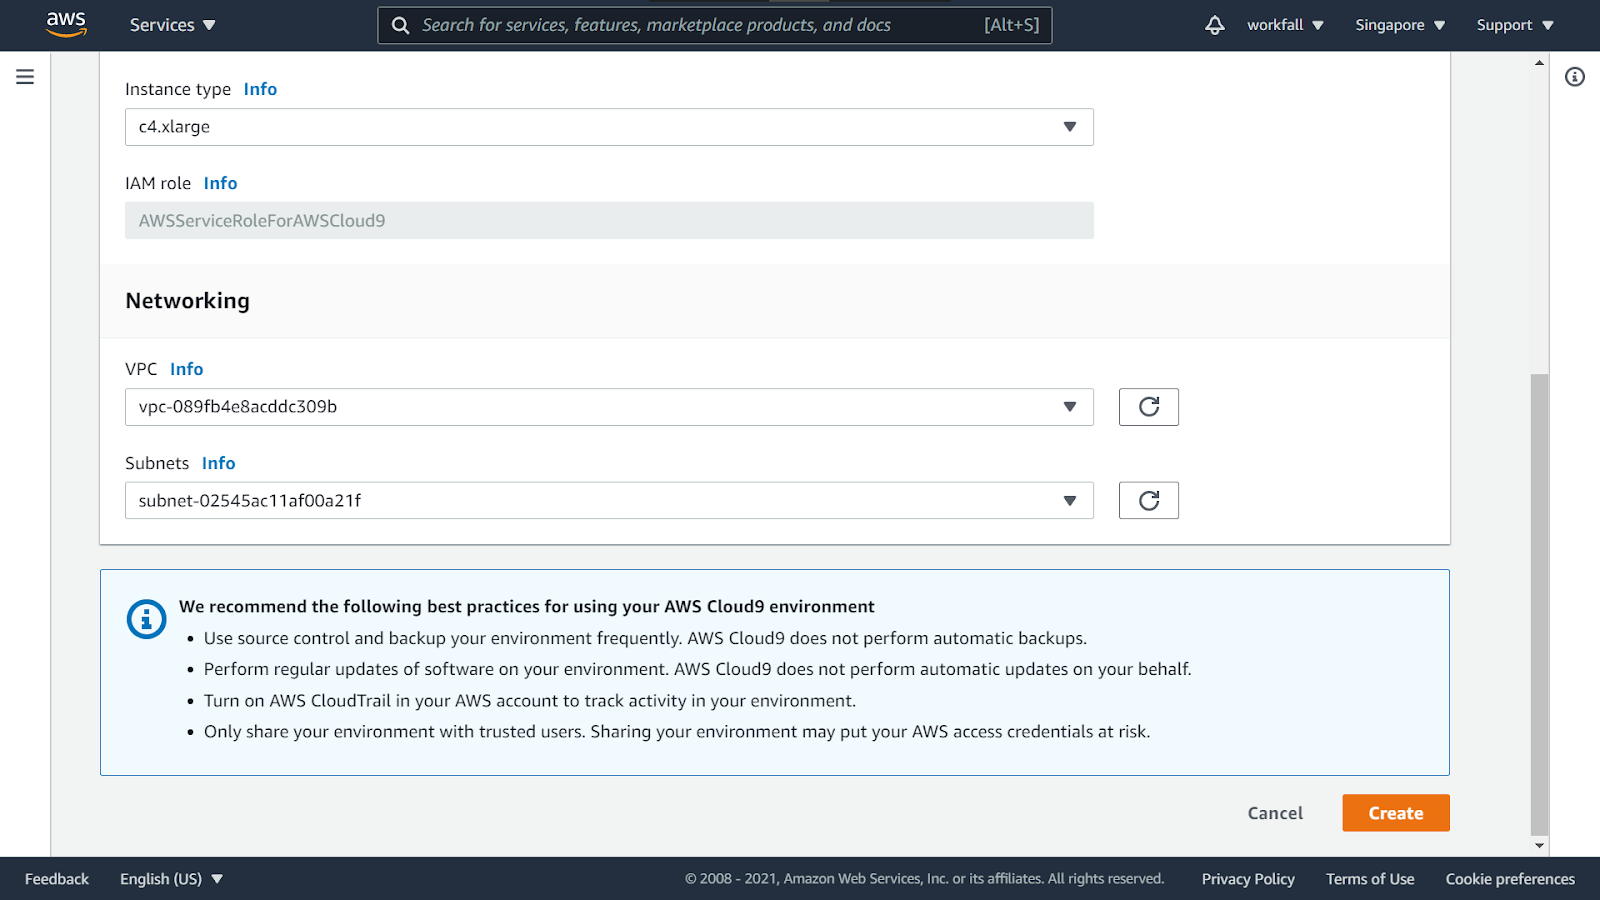
The environment creation might take some time to be configured.
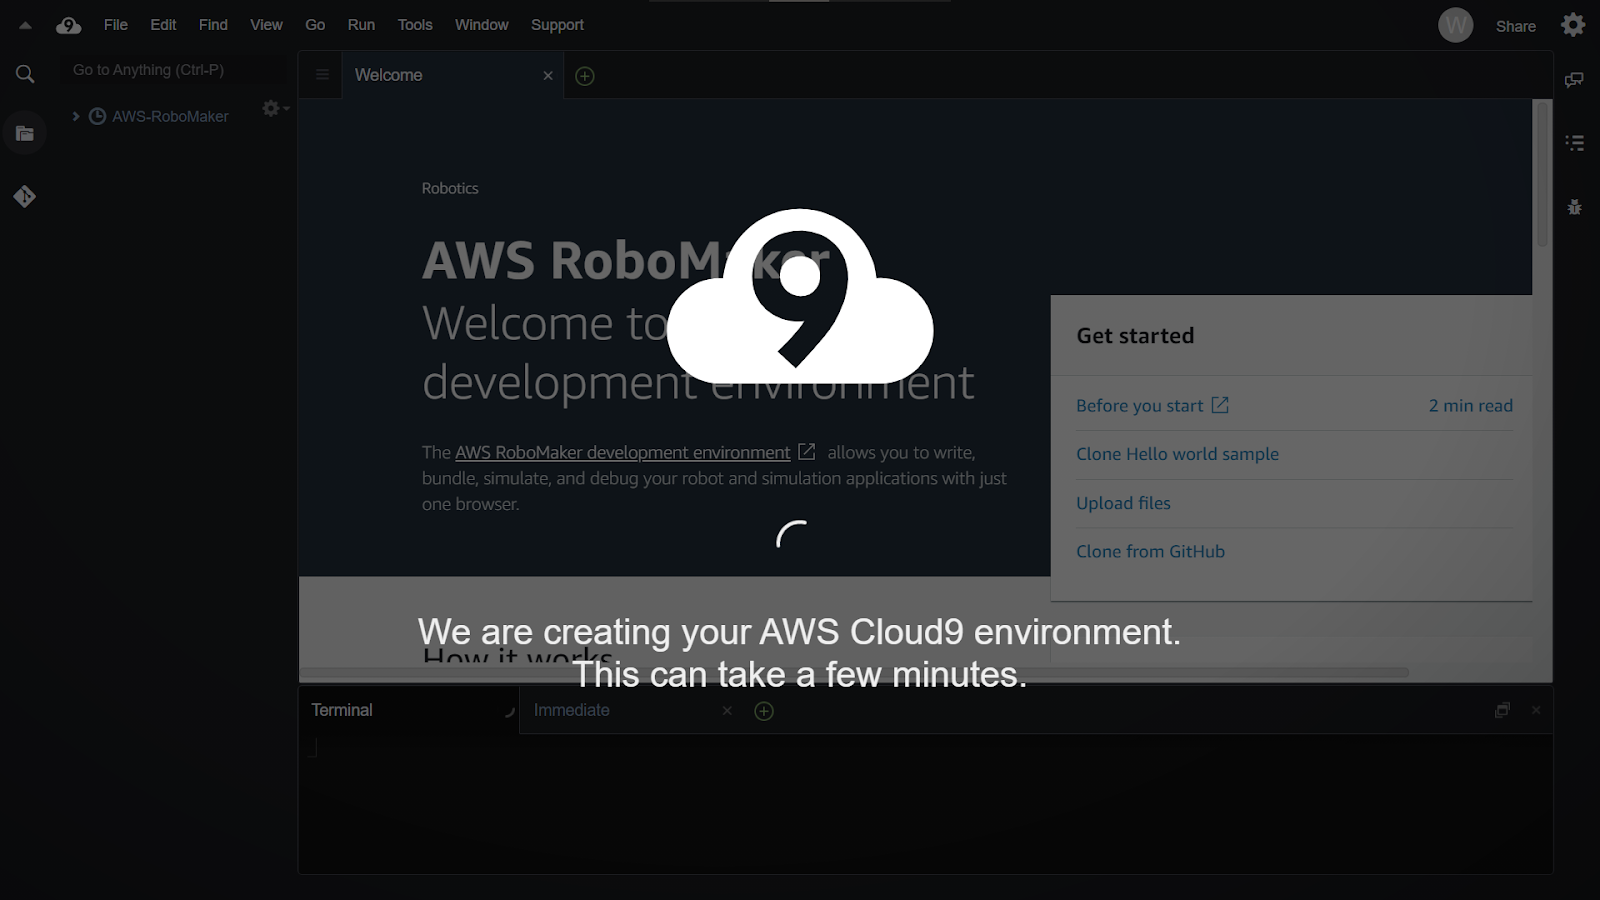
Once done, you will be navigated to the home page on the console.

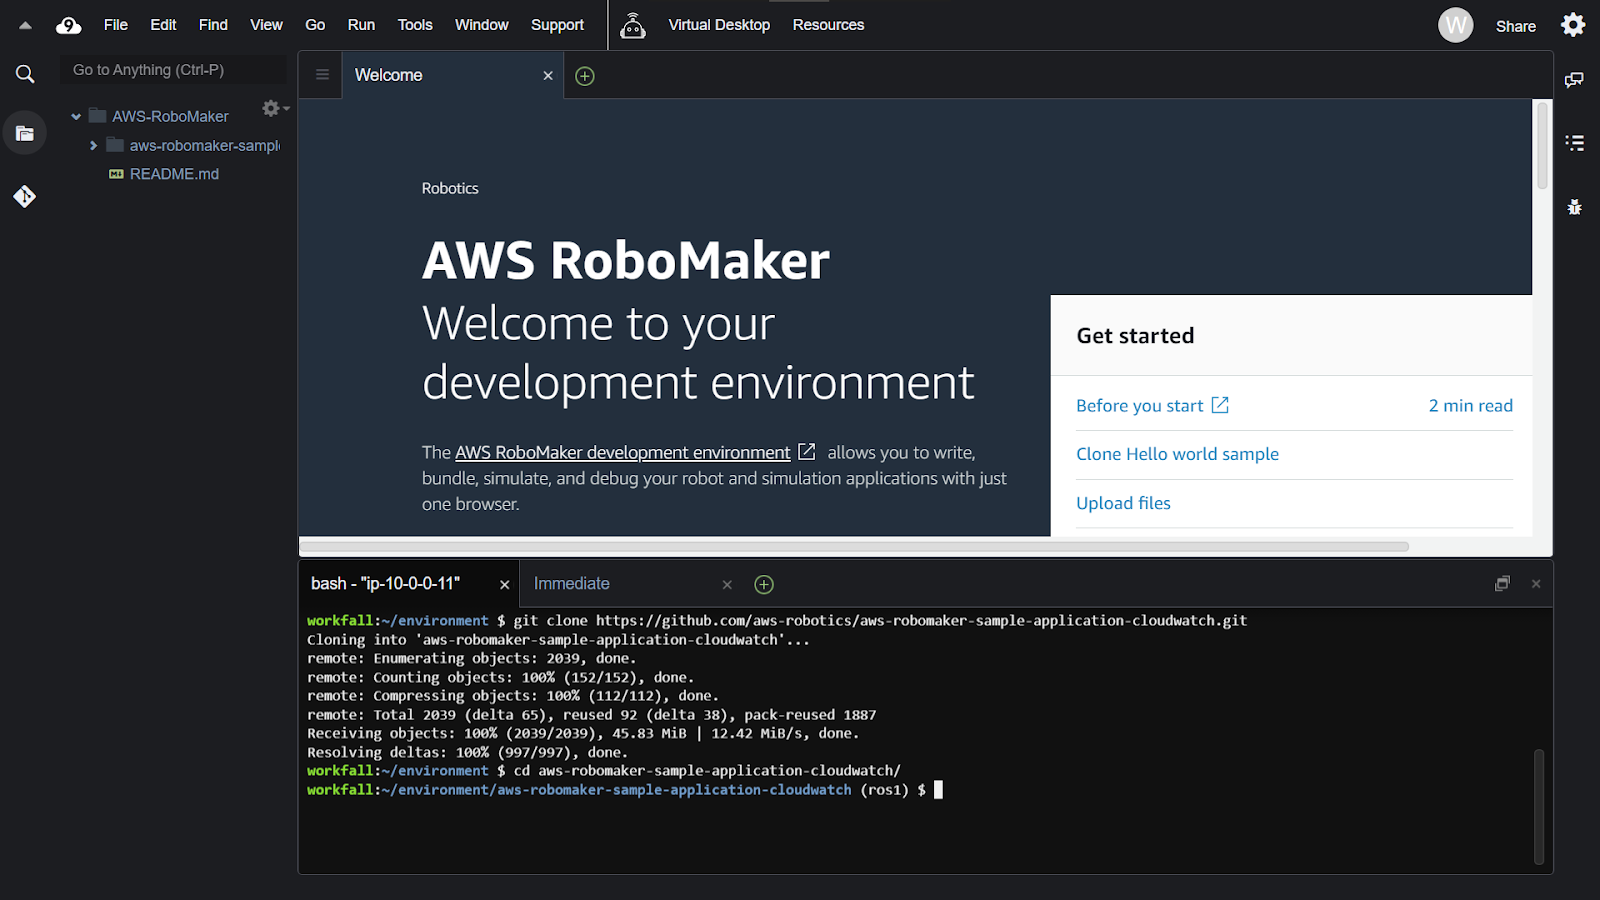
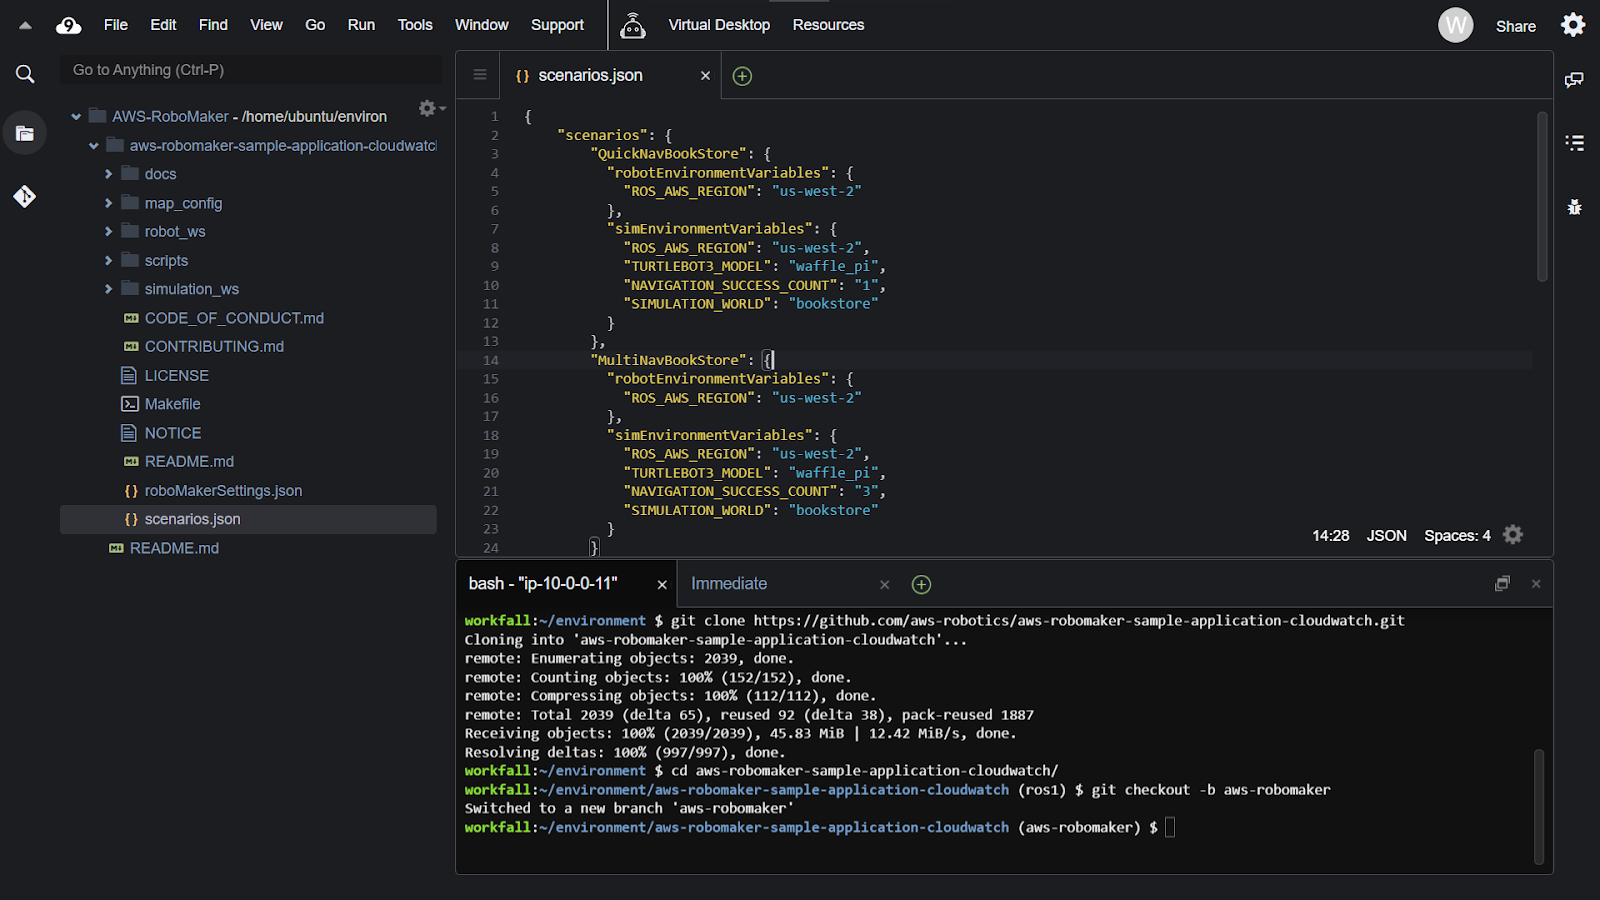
Use git clone https://github.com/workfall/aws-robomaker.git to clone the repository for this walkthrough.

Navigate to the project directory of the cloned application using:
cd aws-robomaker-sample-application-cloudwatch/
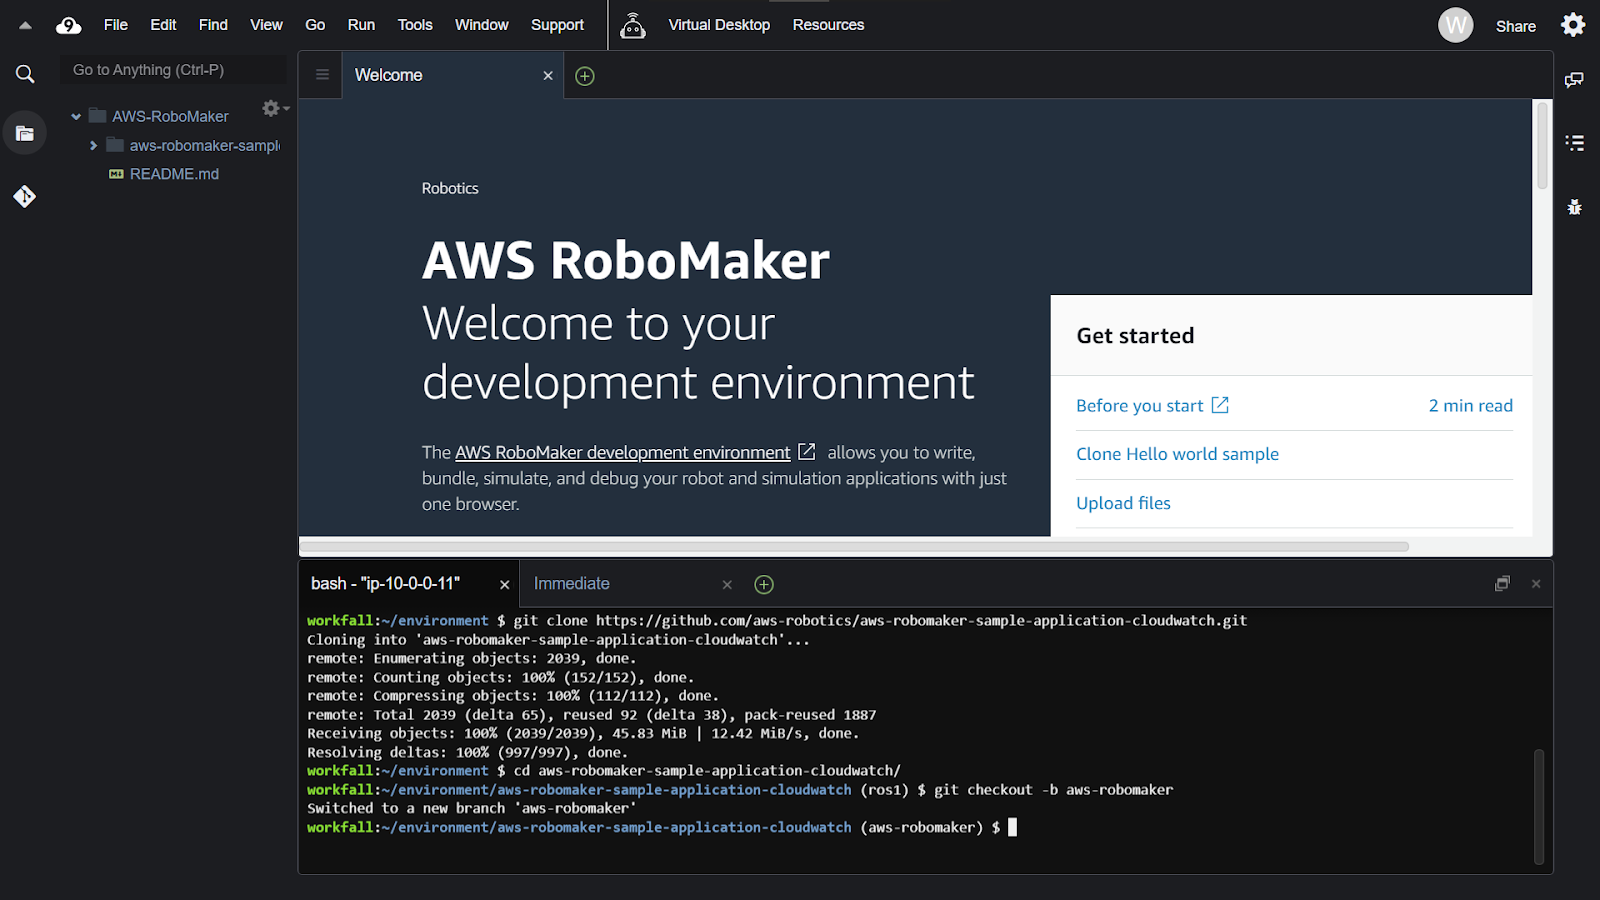
Now, use:
git checkout -b aws-robomaker
To create a new branch.
The test node below monitors the status of the navigations and can be configured to assert success or failure in one or more navigations as well as accommodate short and long lived tests. The Gazebo world is parameterized in the launch file allowing us to run the test in many different worlds. In this example, we’ll run our tests in the AWS RoboMaker Small House World and the AWS RoboMaker Bookstore World. Finally, it includes two utility methods that will cancel the running RoboMaker simulation job as well as tag it.
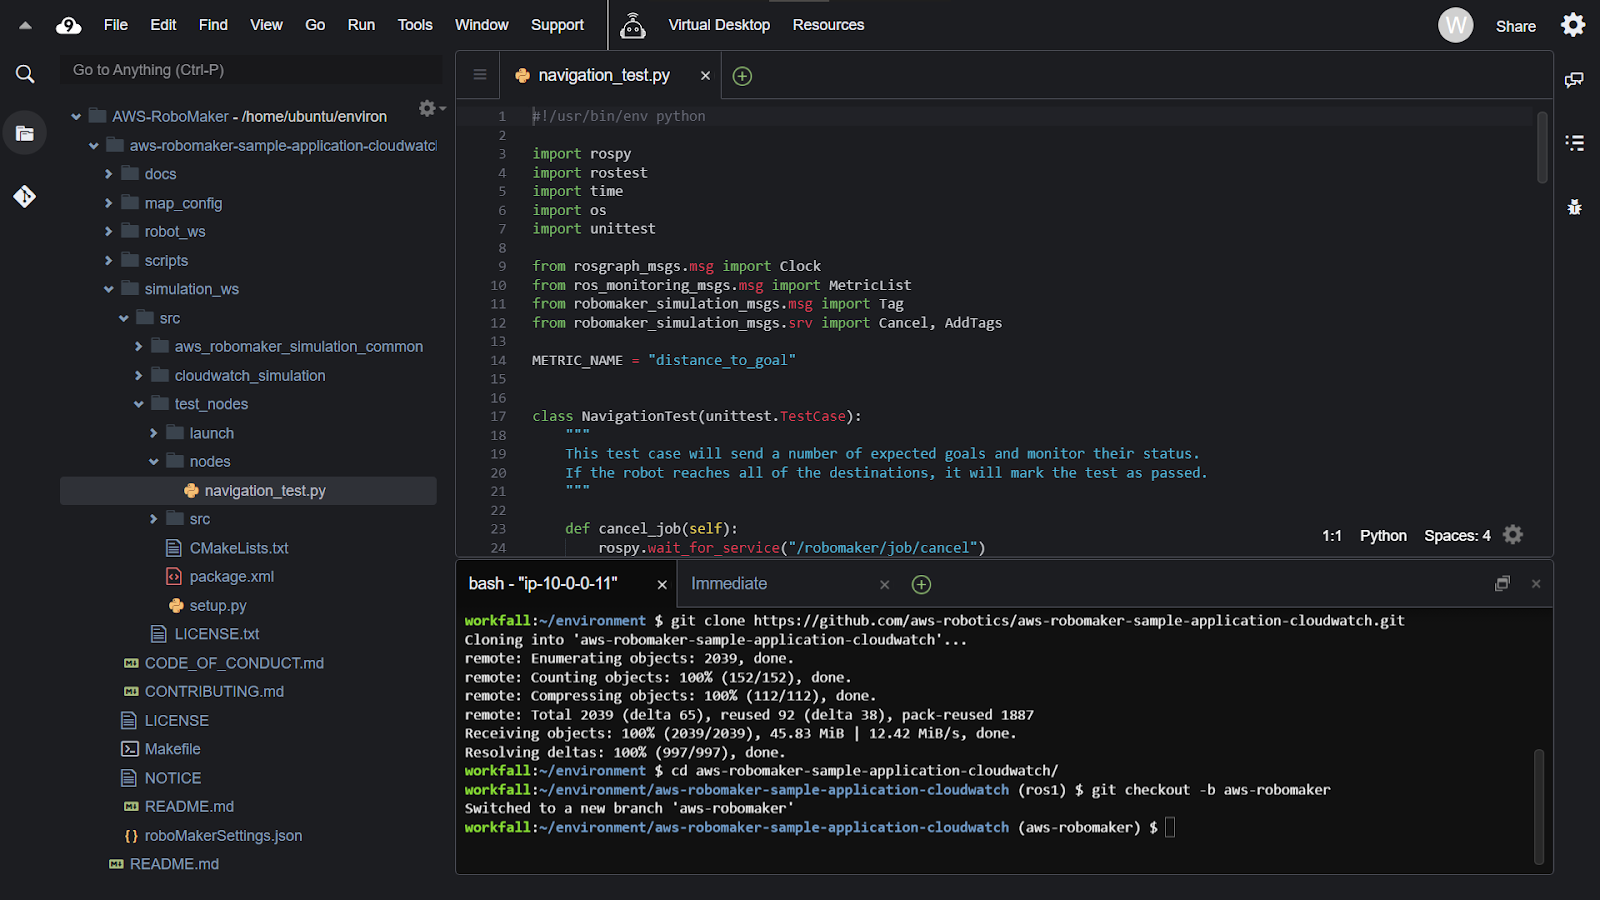
In the Launch folder, you will find all the launch files for your application.

In this case, we are using multi-layered launch files to run the simulation test. The highest order launch file is worlds.launch. Here, we use the SIMULATION_WORLD environment variable to include the correct launch file for the world defined in this variable.
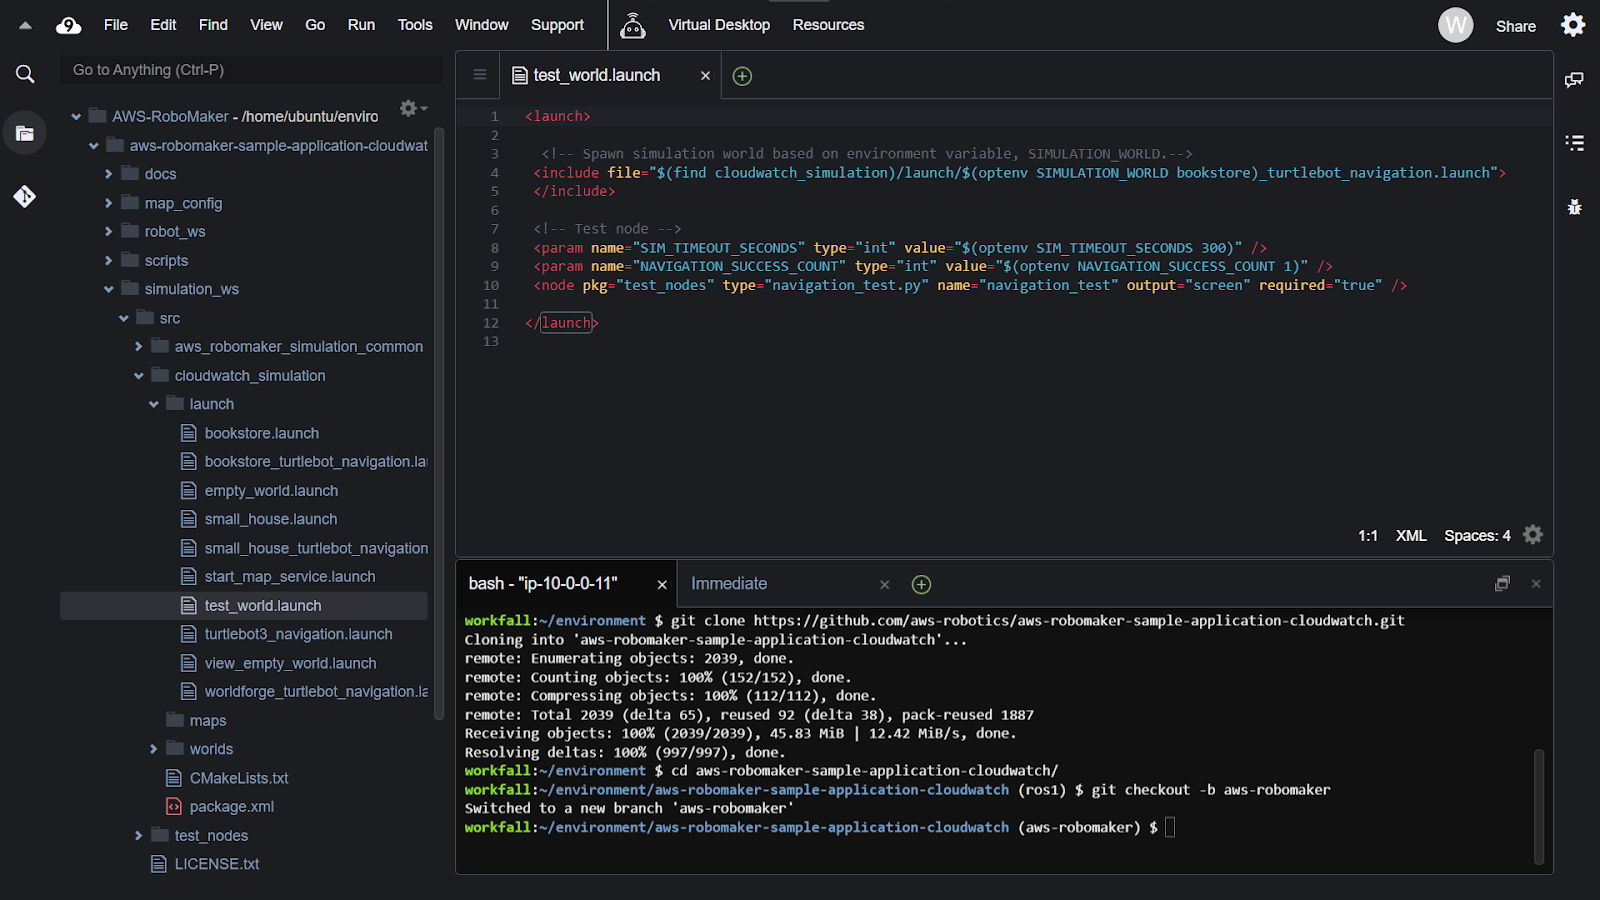
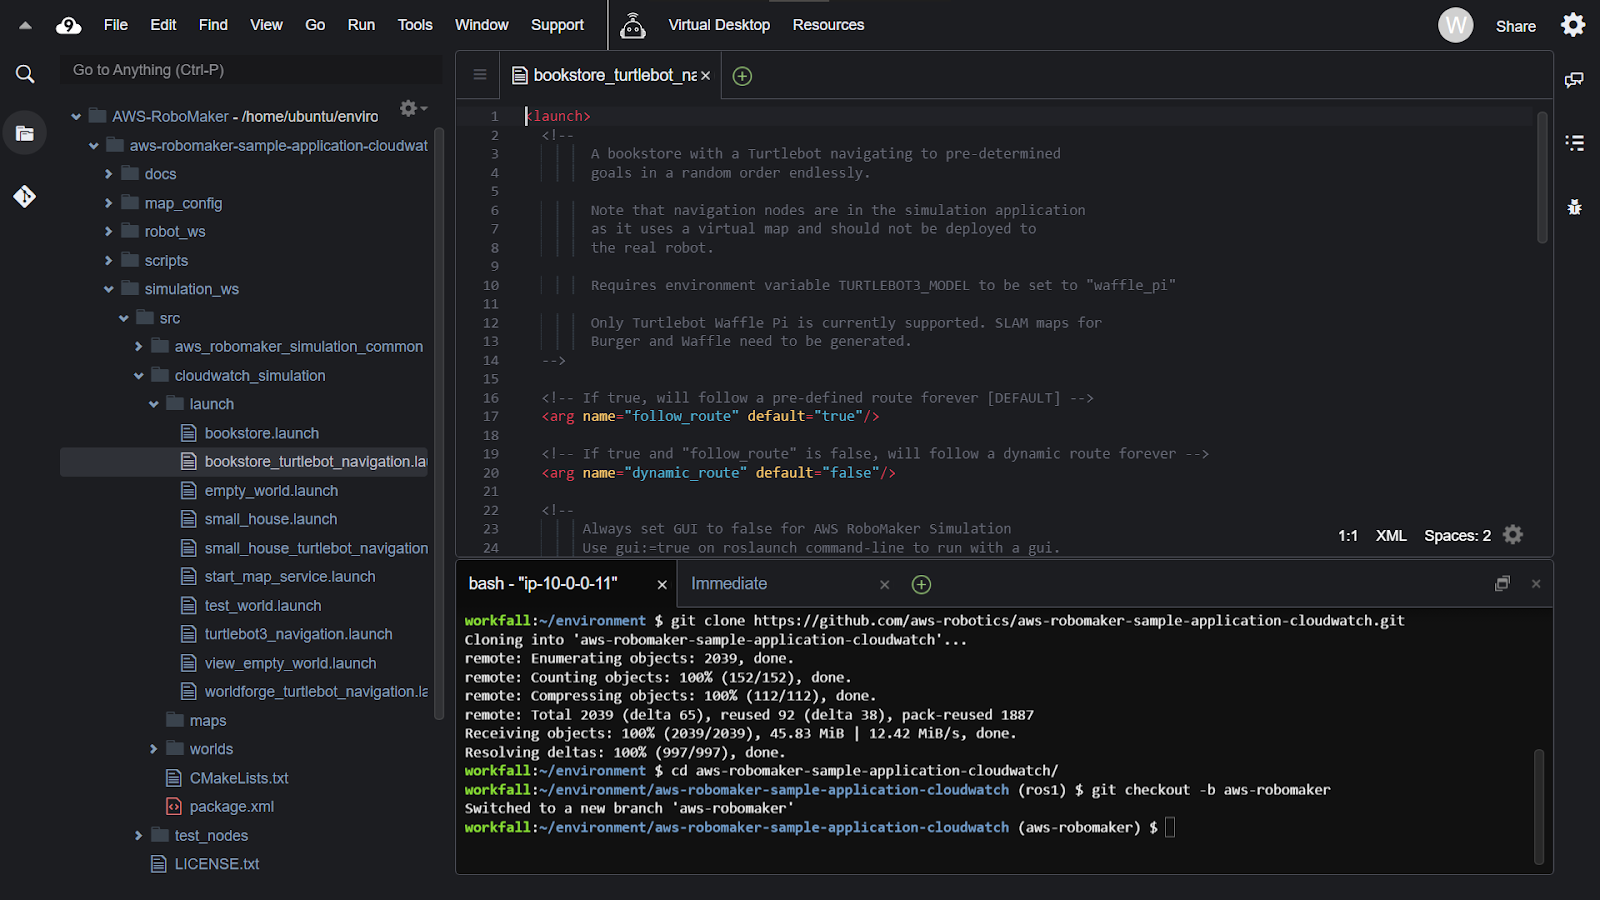
For example, if the environment variable is set as a bookstore, then it will include the launch file below. The test node will be included in this second launch file.
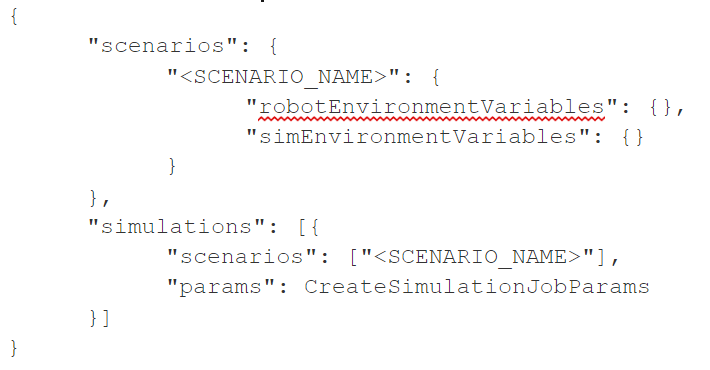
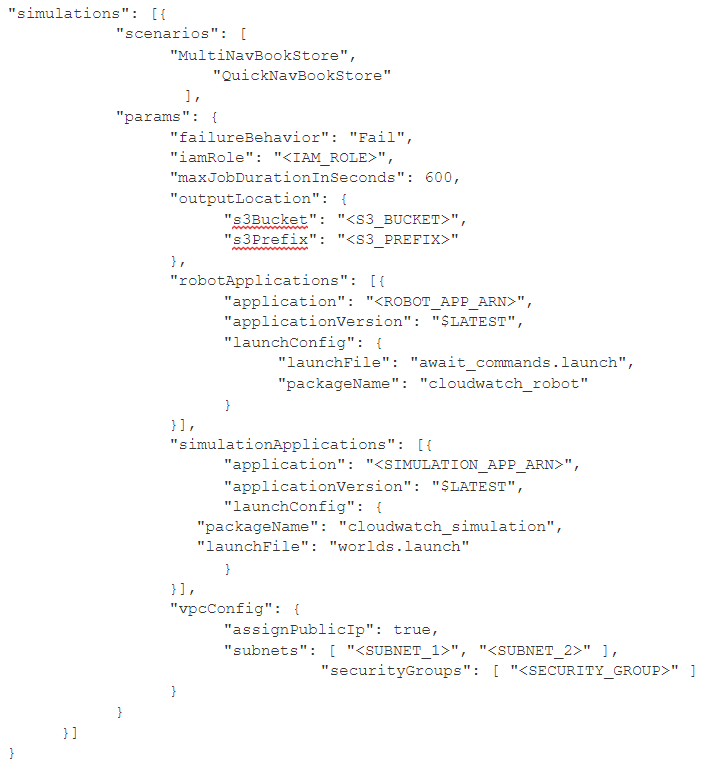
First, we will create a JSON document to define the scenarios that will be launched in AWS RoboMaker Simulation. We will use this document in our CI pipeline to create an array of simulation job requests.
Right click on the project folder and click on New file.
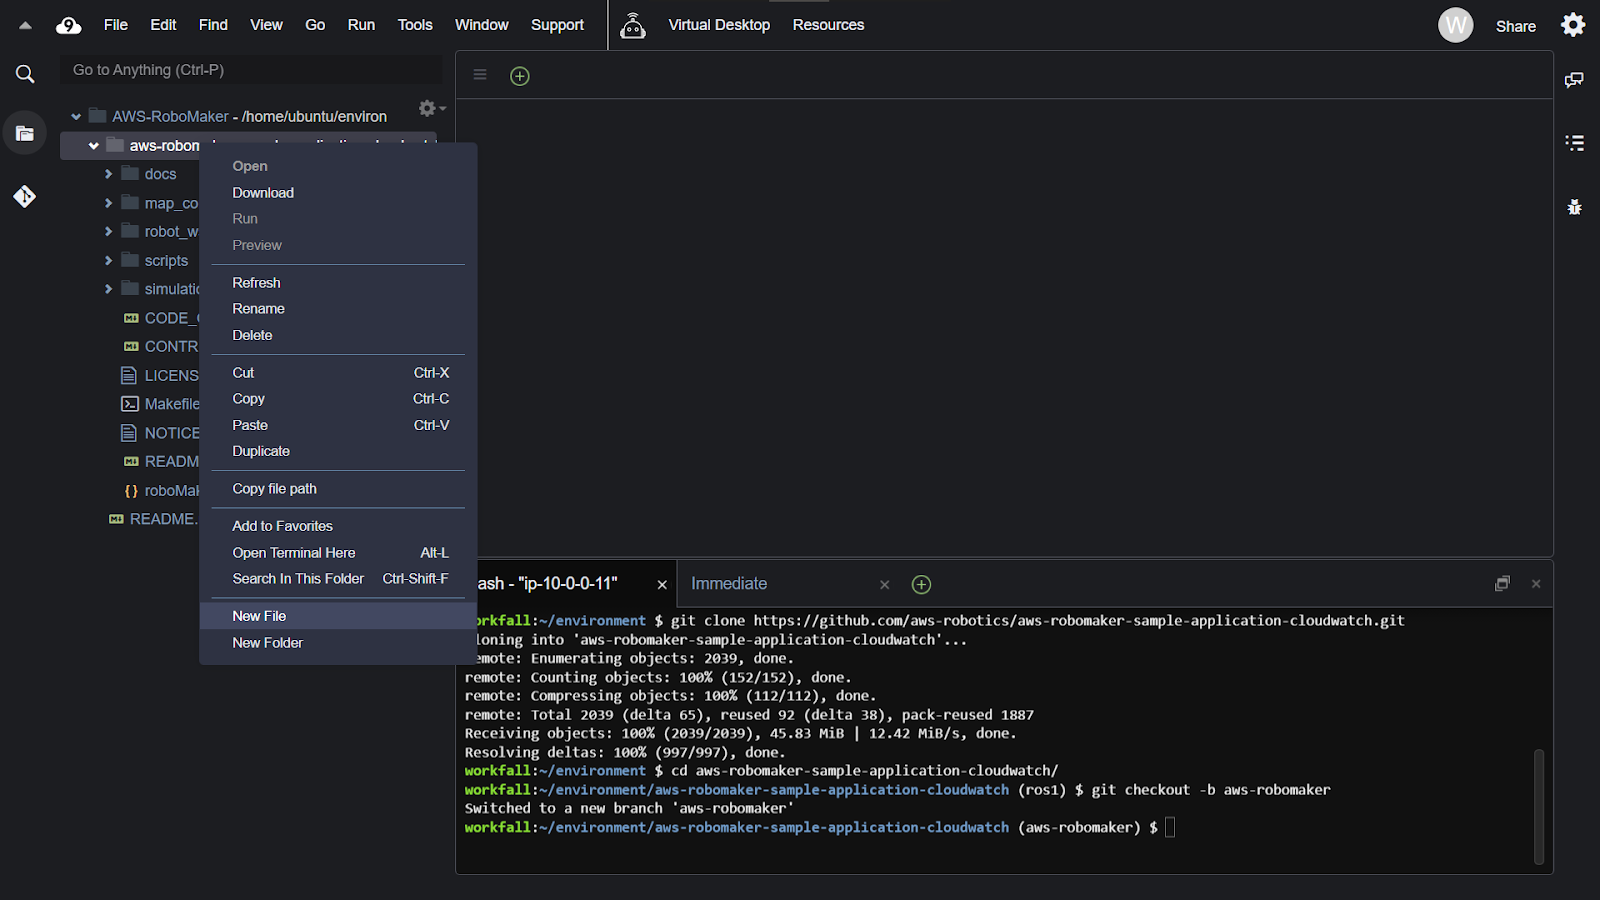
Enter the name of the file as ‘scenarios.json’ and save the file.

Add the below snippets in the scenarios.json file that you created above.
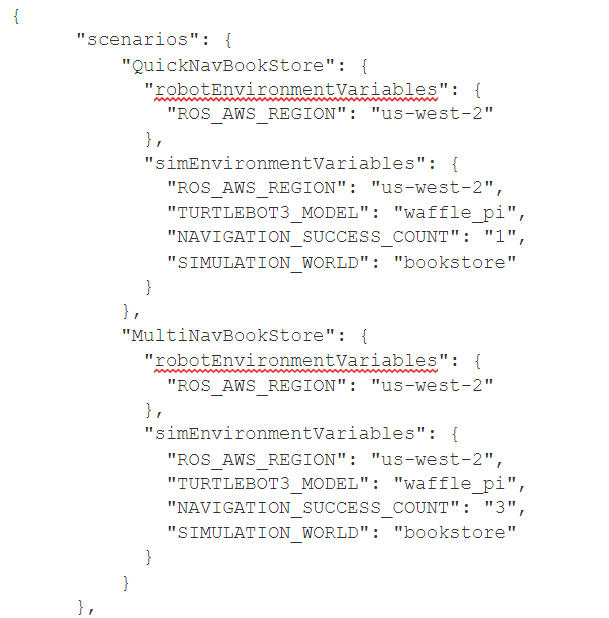
Make sure you save the file once the changes are configured.
Now, in the terminal, use the command:
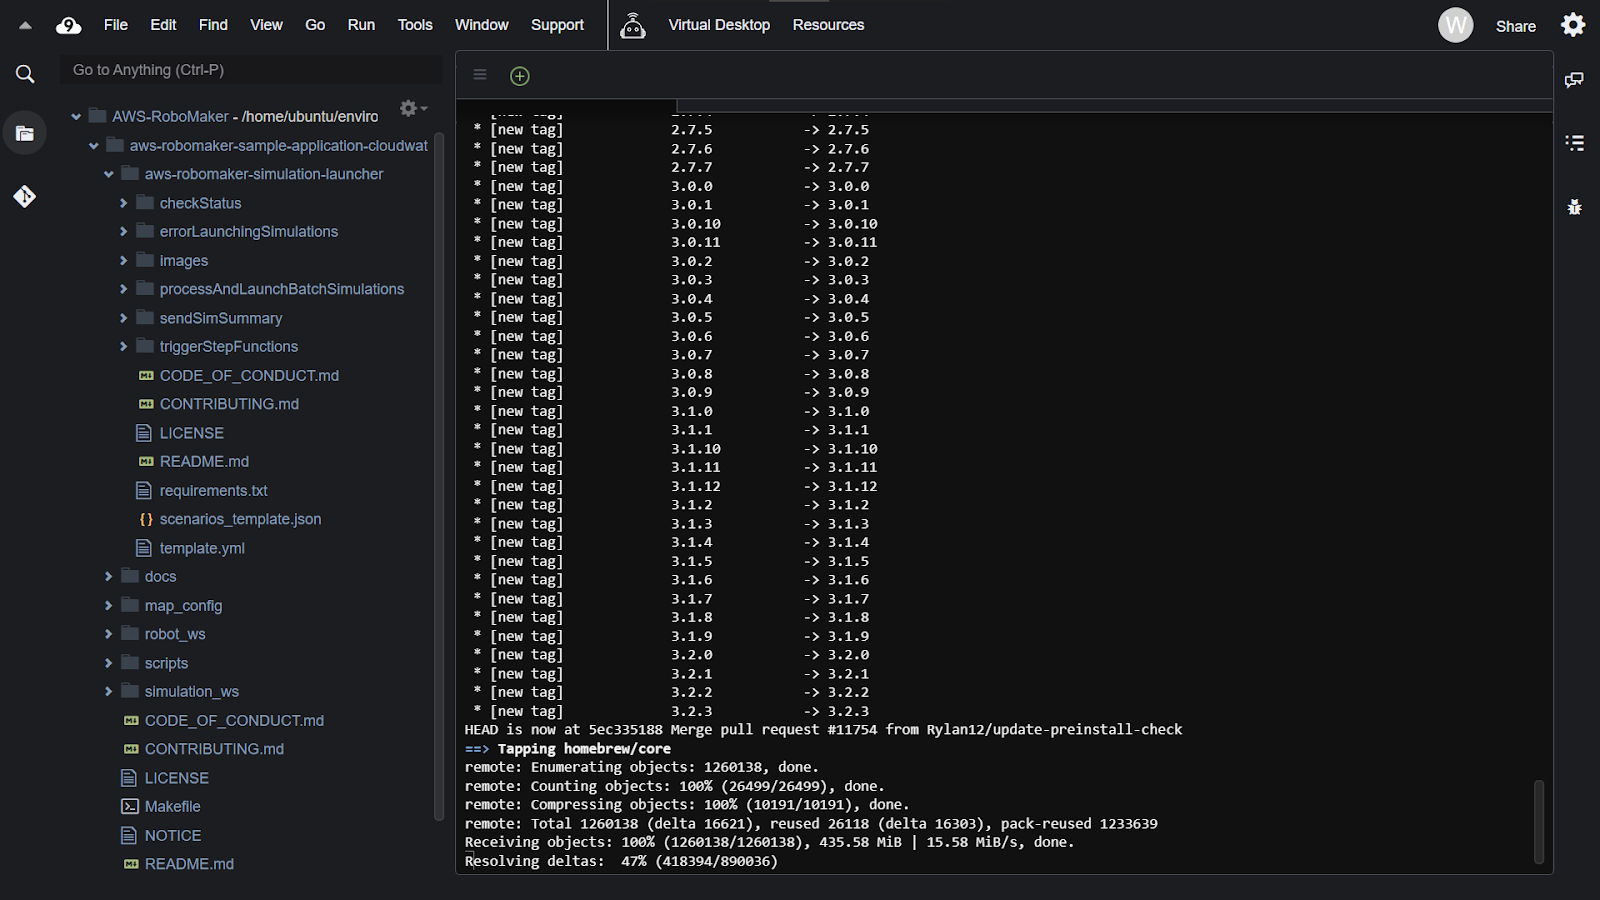
git clone https://github.com/aws-samples/aws-robomaker-simulation-launcher

You will see the cloned folder in the folder structure.

Navigate into the newly cloned directory using the command:
cd aws-robomaker-simulation-launcher
Then run:
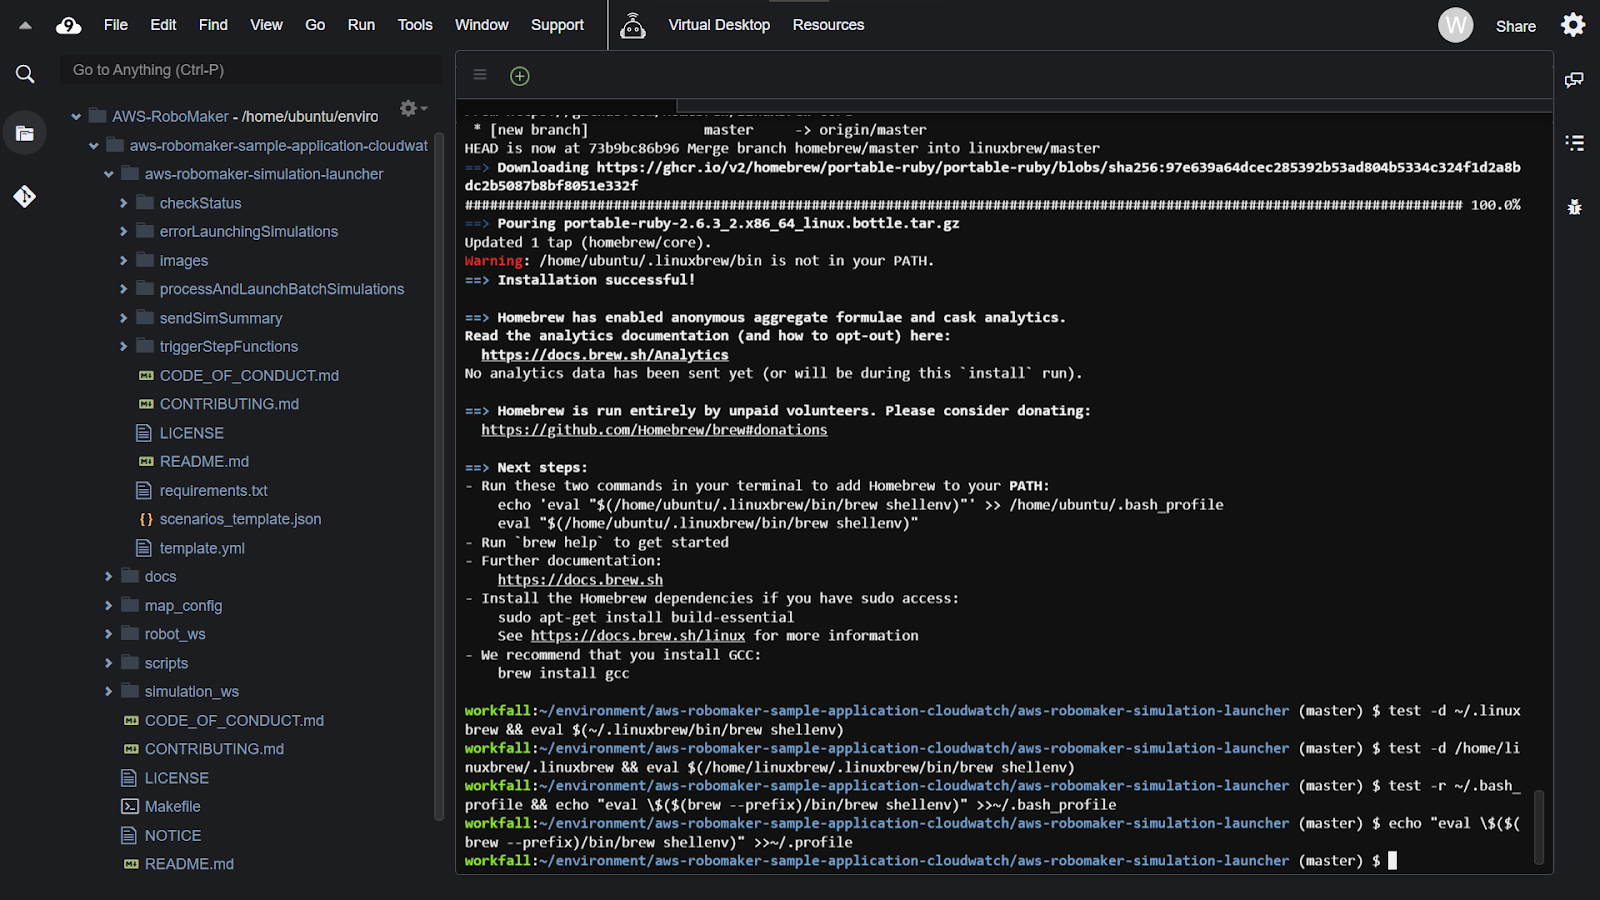
sam build --use-container -m ./requirements.txt
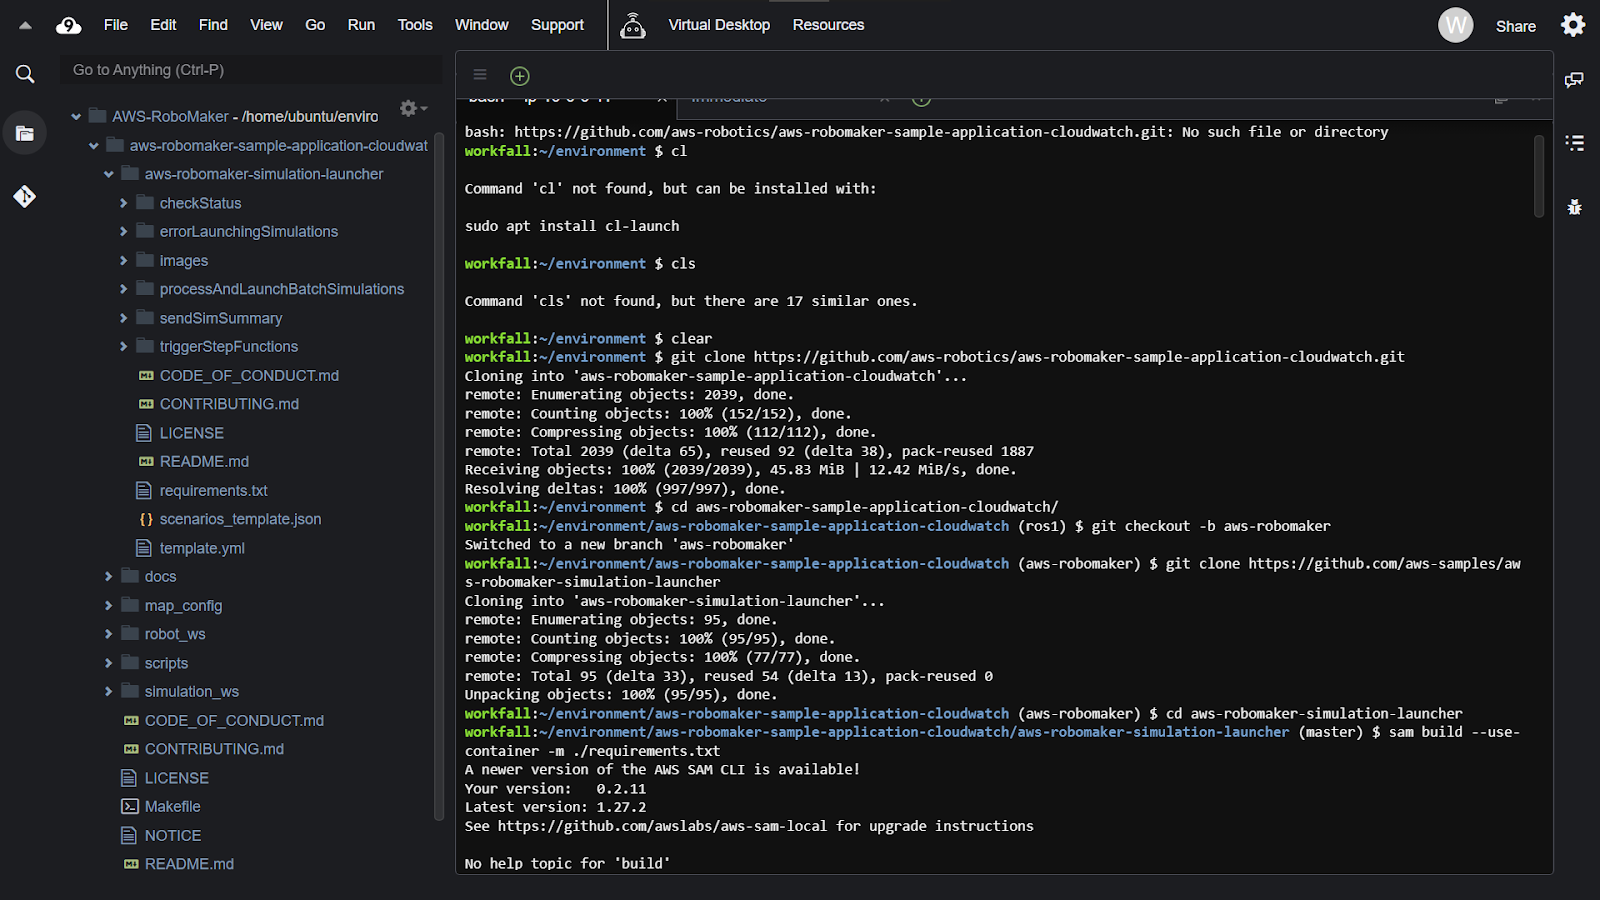
If it gives you an error as shown in the image above, run the command:
sh -c "$(curl -fsSL https://raw.githubusercontent.com/Linuxbrew/install/master/install.sh)"
On success, you will see the message as shown in the image below.

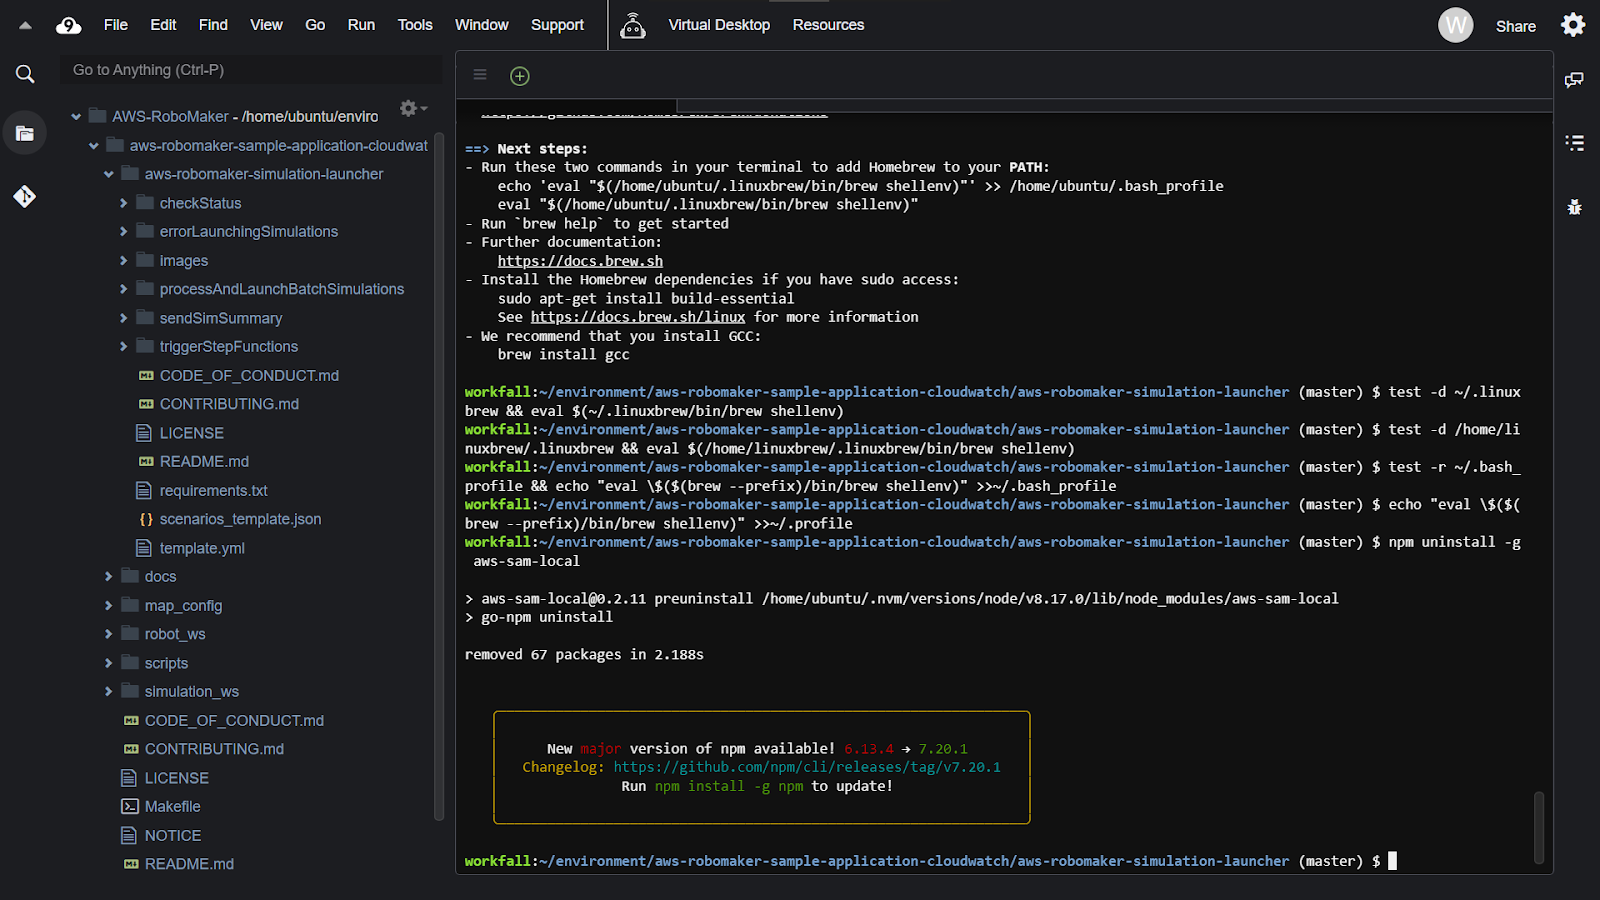
Now, copy paste these 4 commands in the terminal:
test -d ~/.linuxbrew && eval $(~/.linuxbrew/bin/brew shellenv)
test -d /home/linuxbrew/.linuxbrew && eval $(/home/linuxbrew/.linuxbrew/bin/brew shellenv)
test -r ~/.bash_profile && echo "eval \$($(brew --prefix)/bin/brew shellenv)" >>~/.bash_profile
echo "eval \$($(brew --prefix)/bin/brew shellenv)" >>~/.profile
Execute, npm uninstall -g aws-sam-local to uninstall and then we will install the latest version.
Run the command:
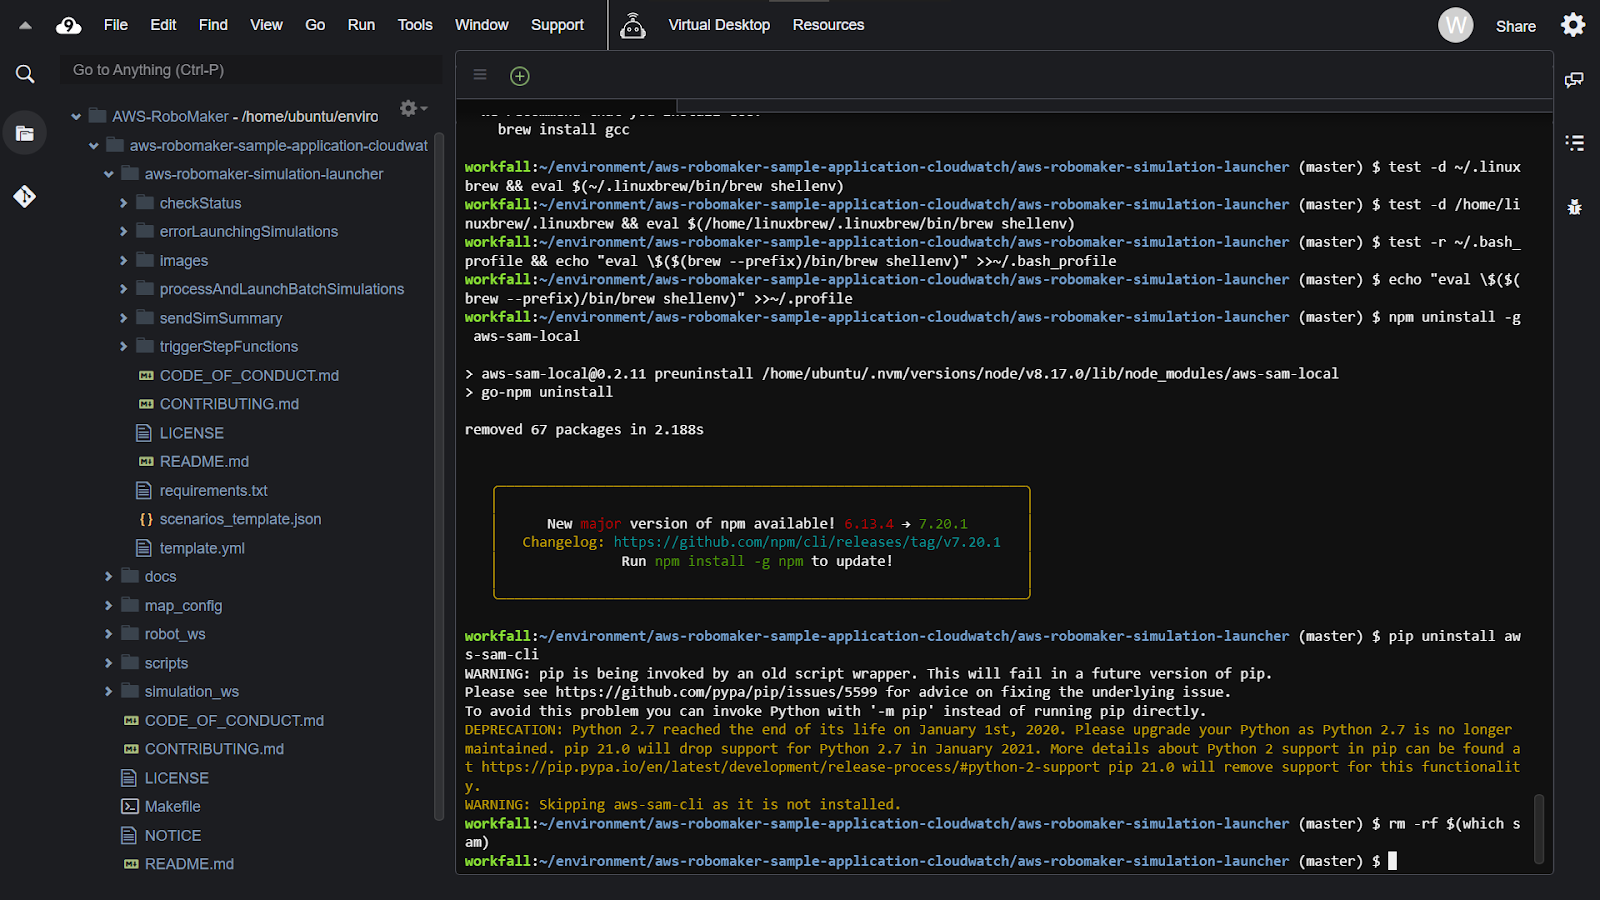
pip uninstall aws-sam-cli

Finally, execute the command:
rm -rf $(which sam)
In the terminal.
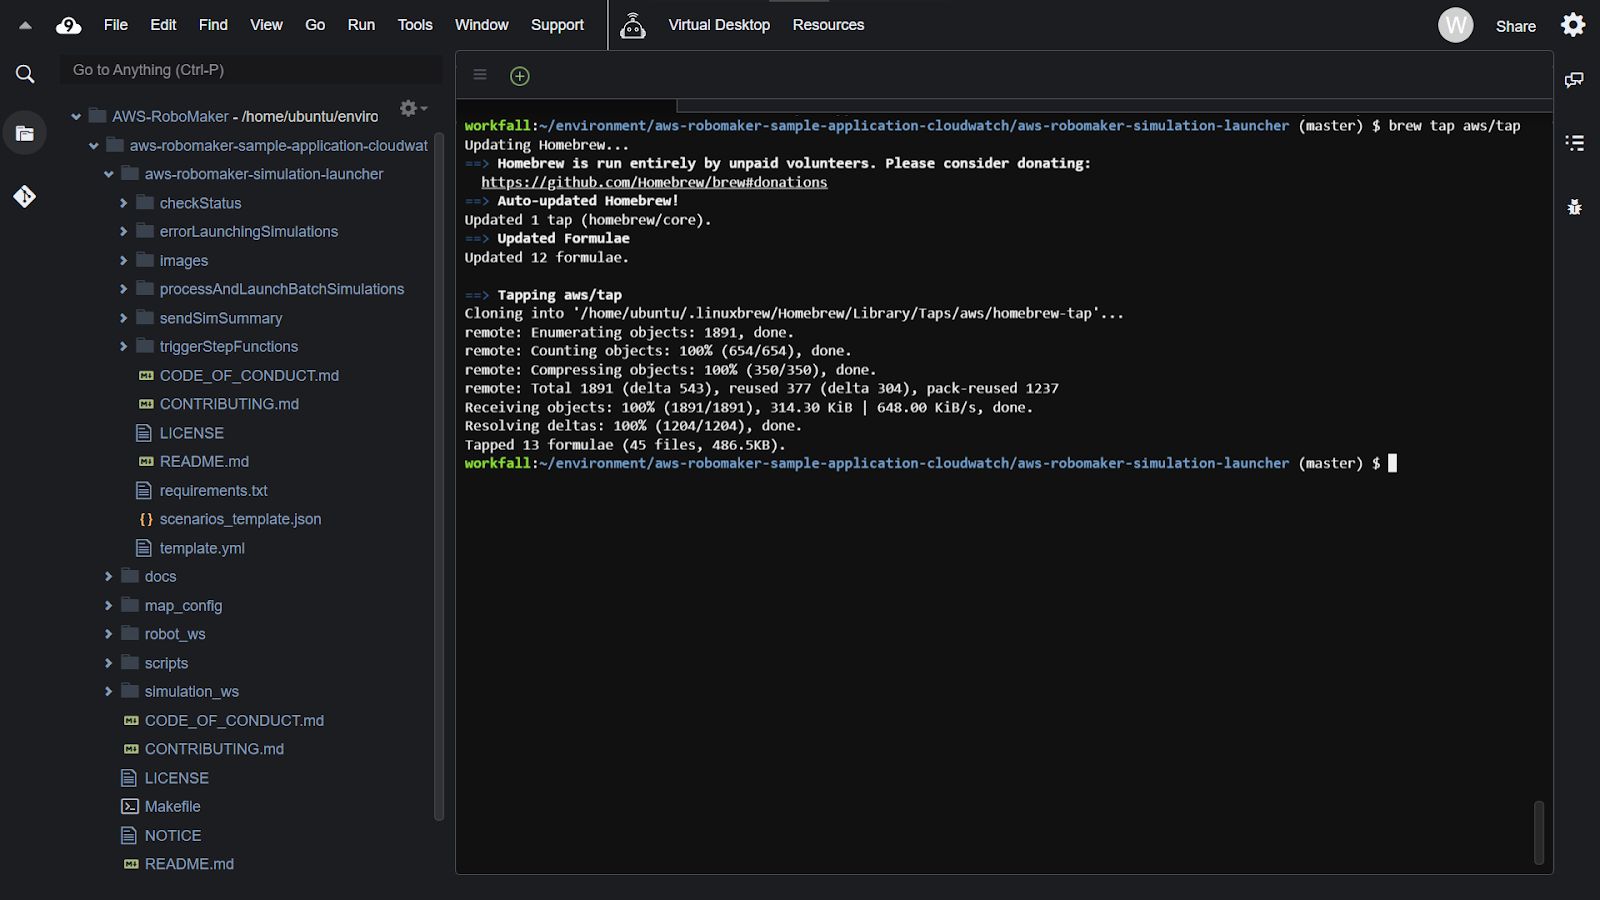
Now, to install brew, run the command:
brew tap aws/tap
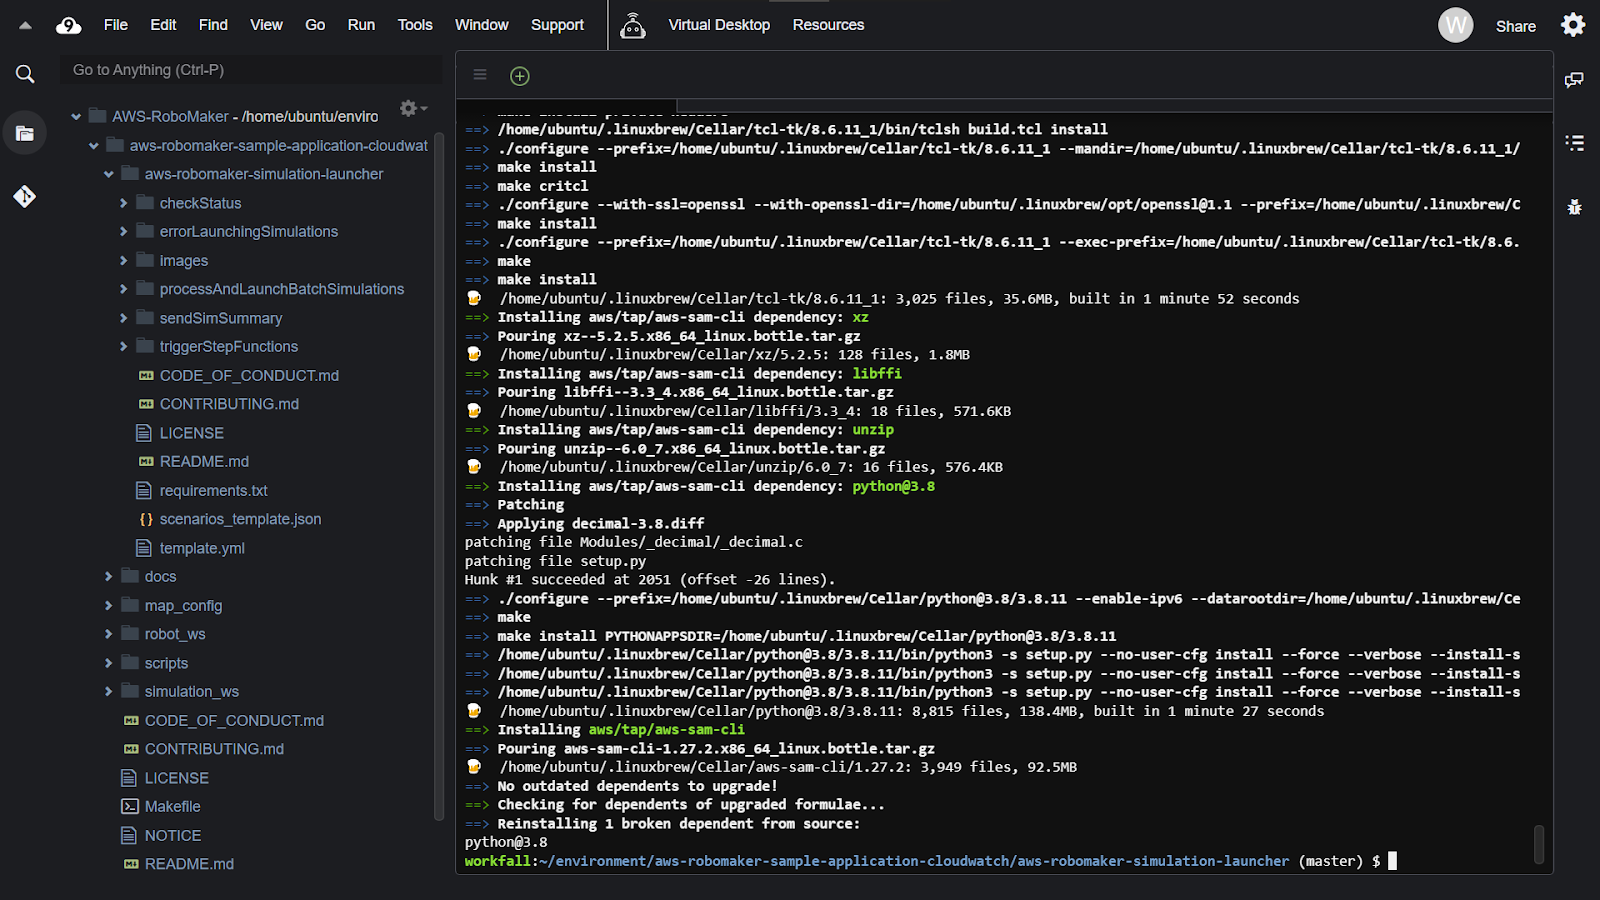
Install the latest version of sam cli using the command:
brew install aws-sam-cli
Then execute the command:
sam build --use-container -m ./requirements.txt
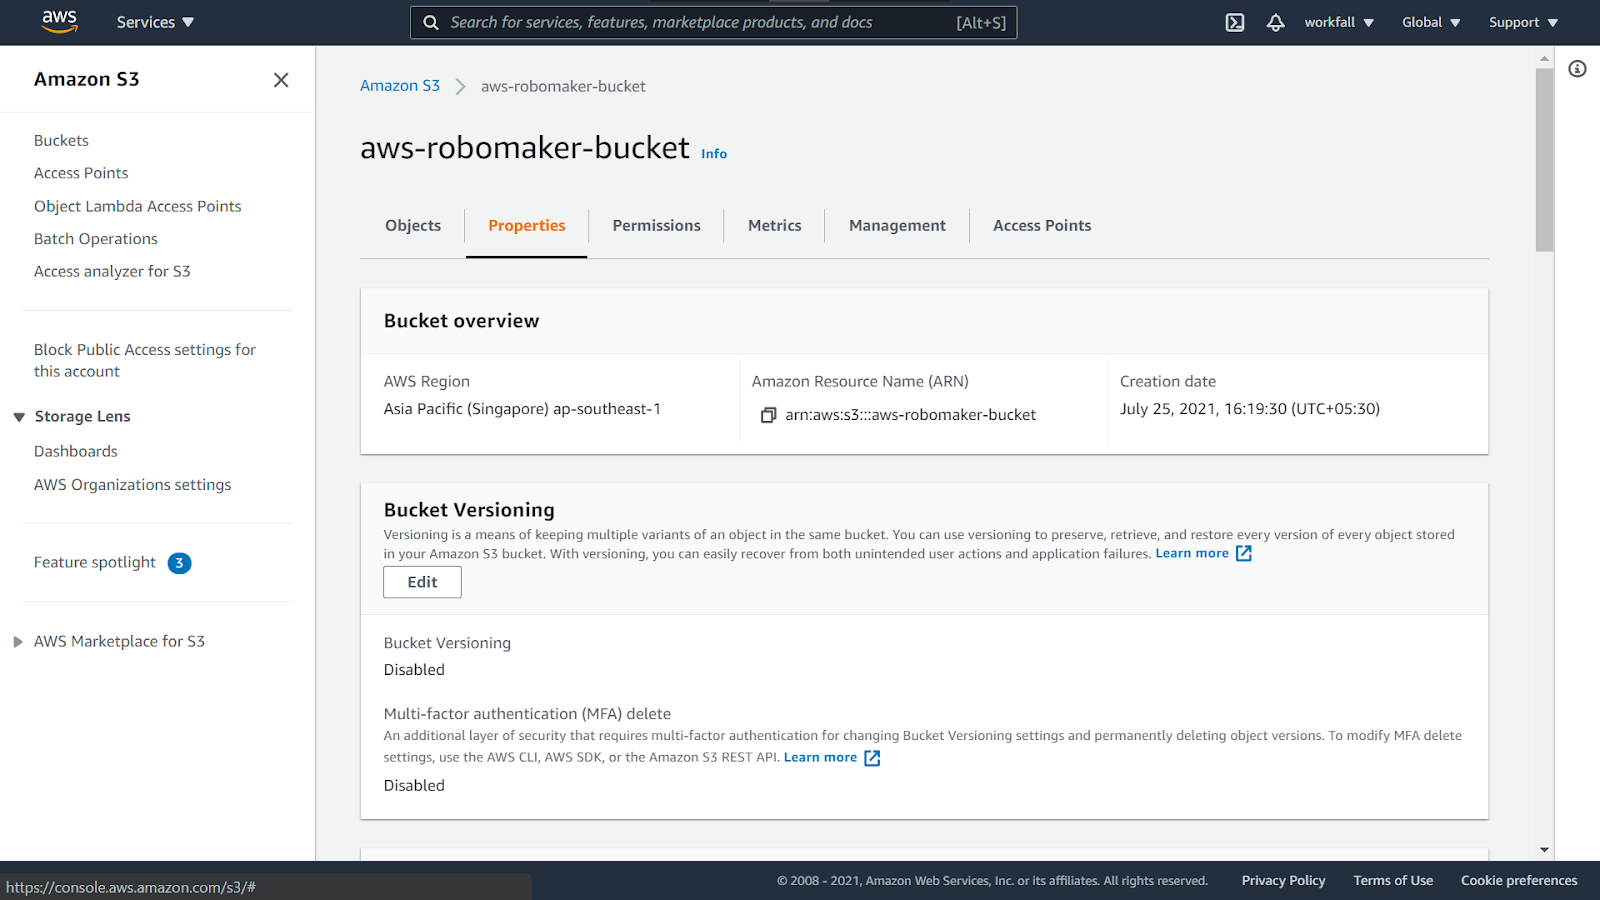
In the terminal. Once done, navigate to the S3 dashboard. Click on Create bucket.

Enter a name for the bucket.
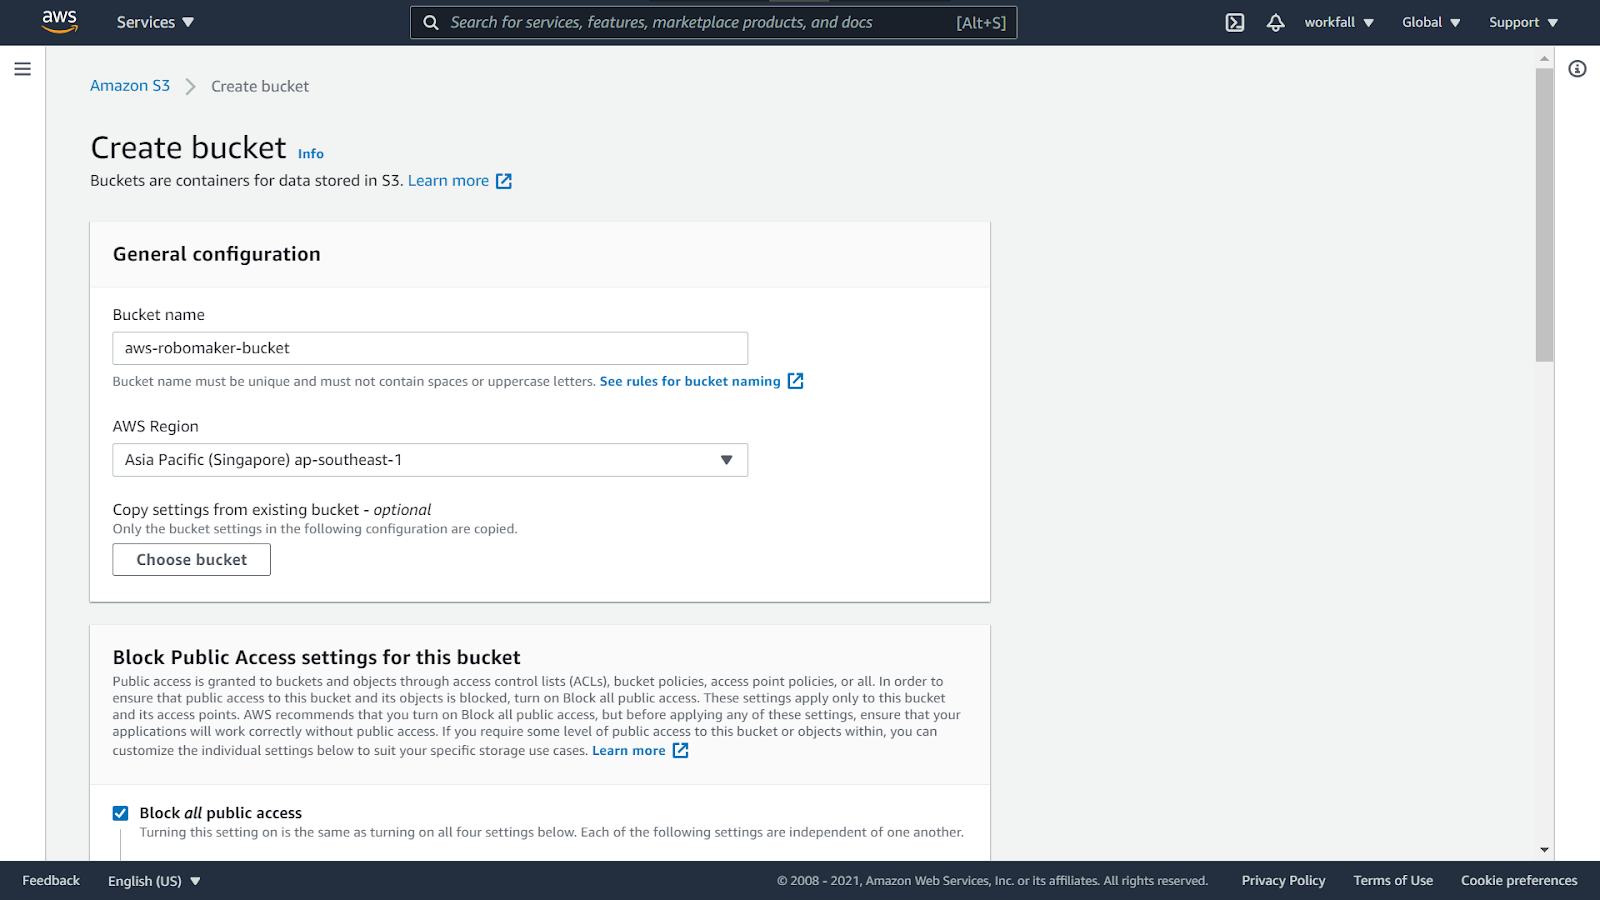
Scroll to the bottom and click on Create Bucket.

Now, open the newly created bucket. Click on the Properties tab.
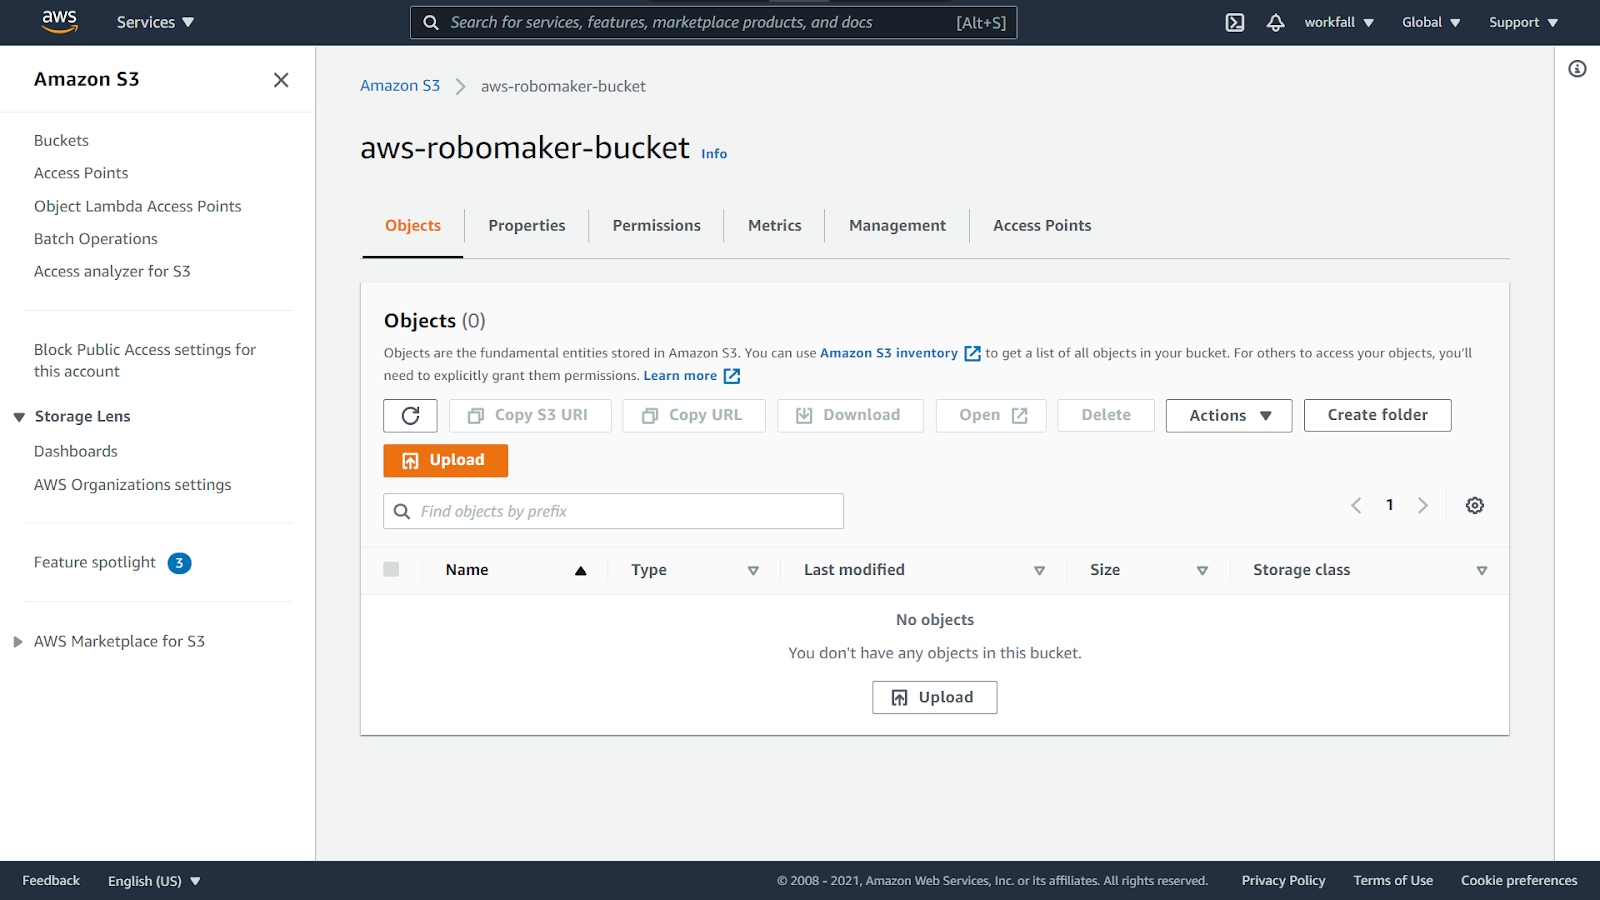
Copy the arn for the newly created bucket.
Now, navigate to the development environment and run the below commands. Make sure to replace <YOUR_S3_BUCKET> with the arn that you copied above.
sam package --output-template-file package.yml --s3-bucket <YOUR_S3_BUCKET>
sam deploy --template-file package.yml --stack-name cicd --capabilities CAPABILITY_NAMED_IAM --s3-bucket <YOUR_S3_BUCKET>
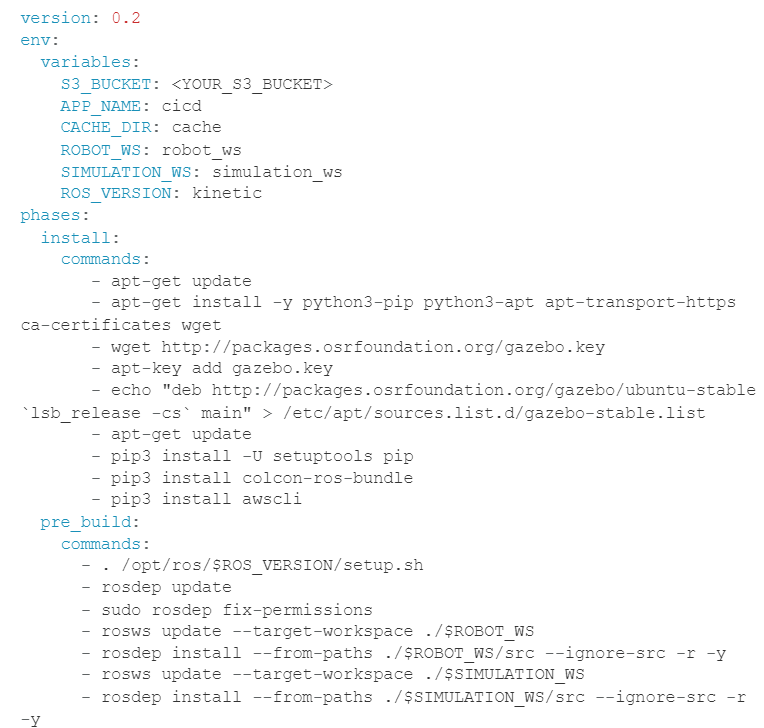
Once done, create a new file in the project directory with the name buildspec.yml and paste the below code in the file.

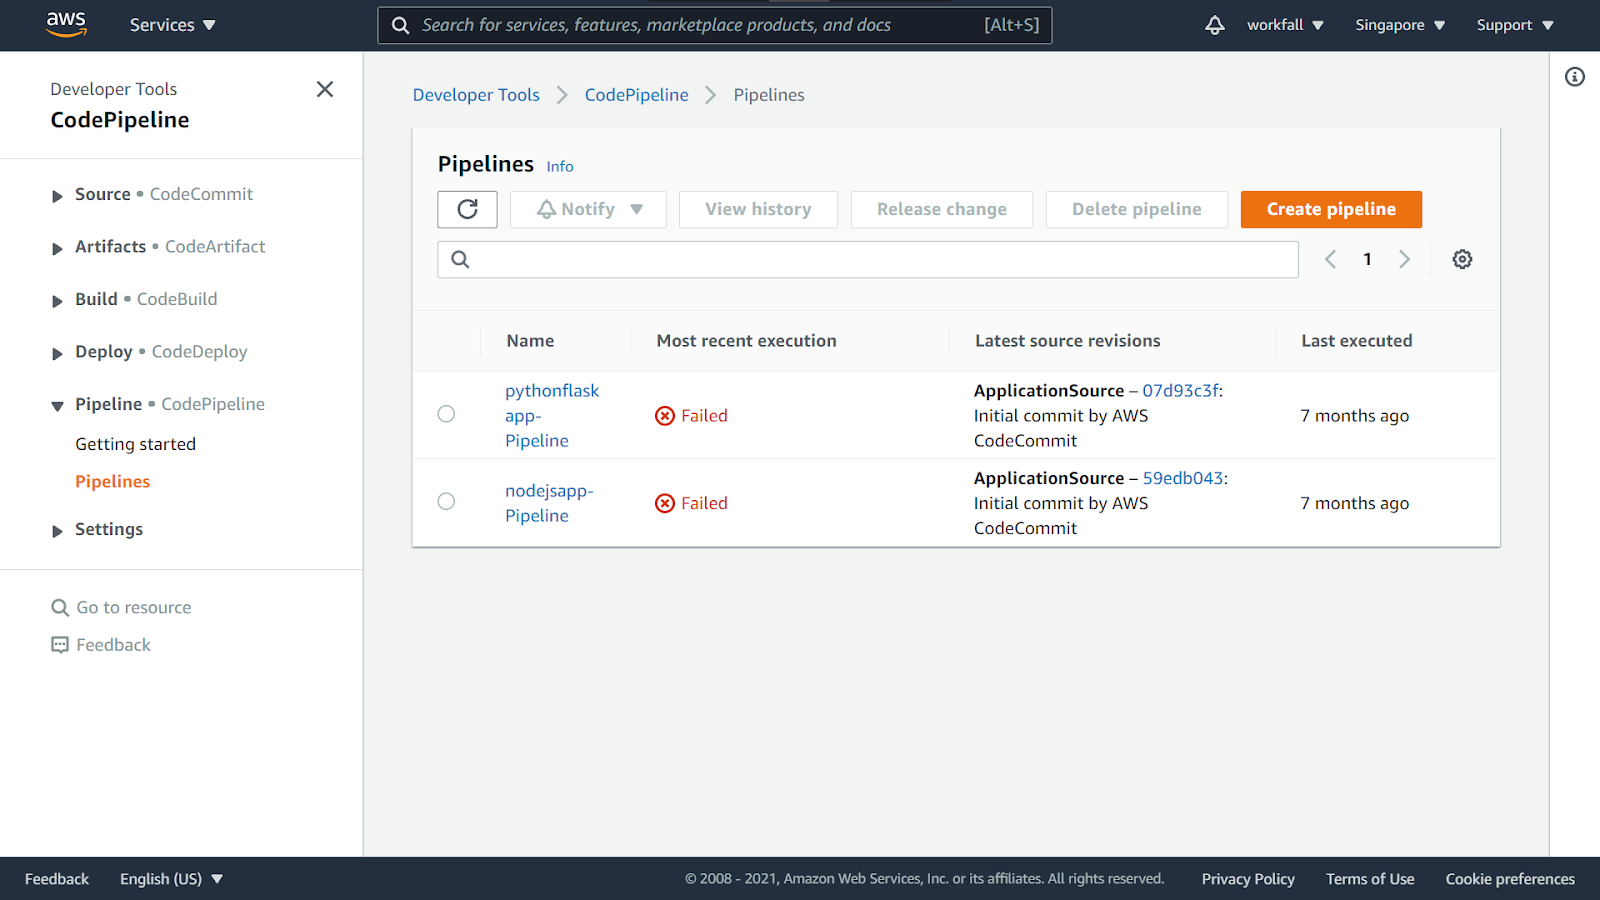
Now, navigate to the CodePipeline dashboard to create a new pipeline.

Click on Create pipeline.
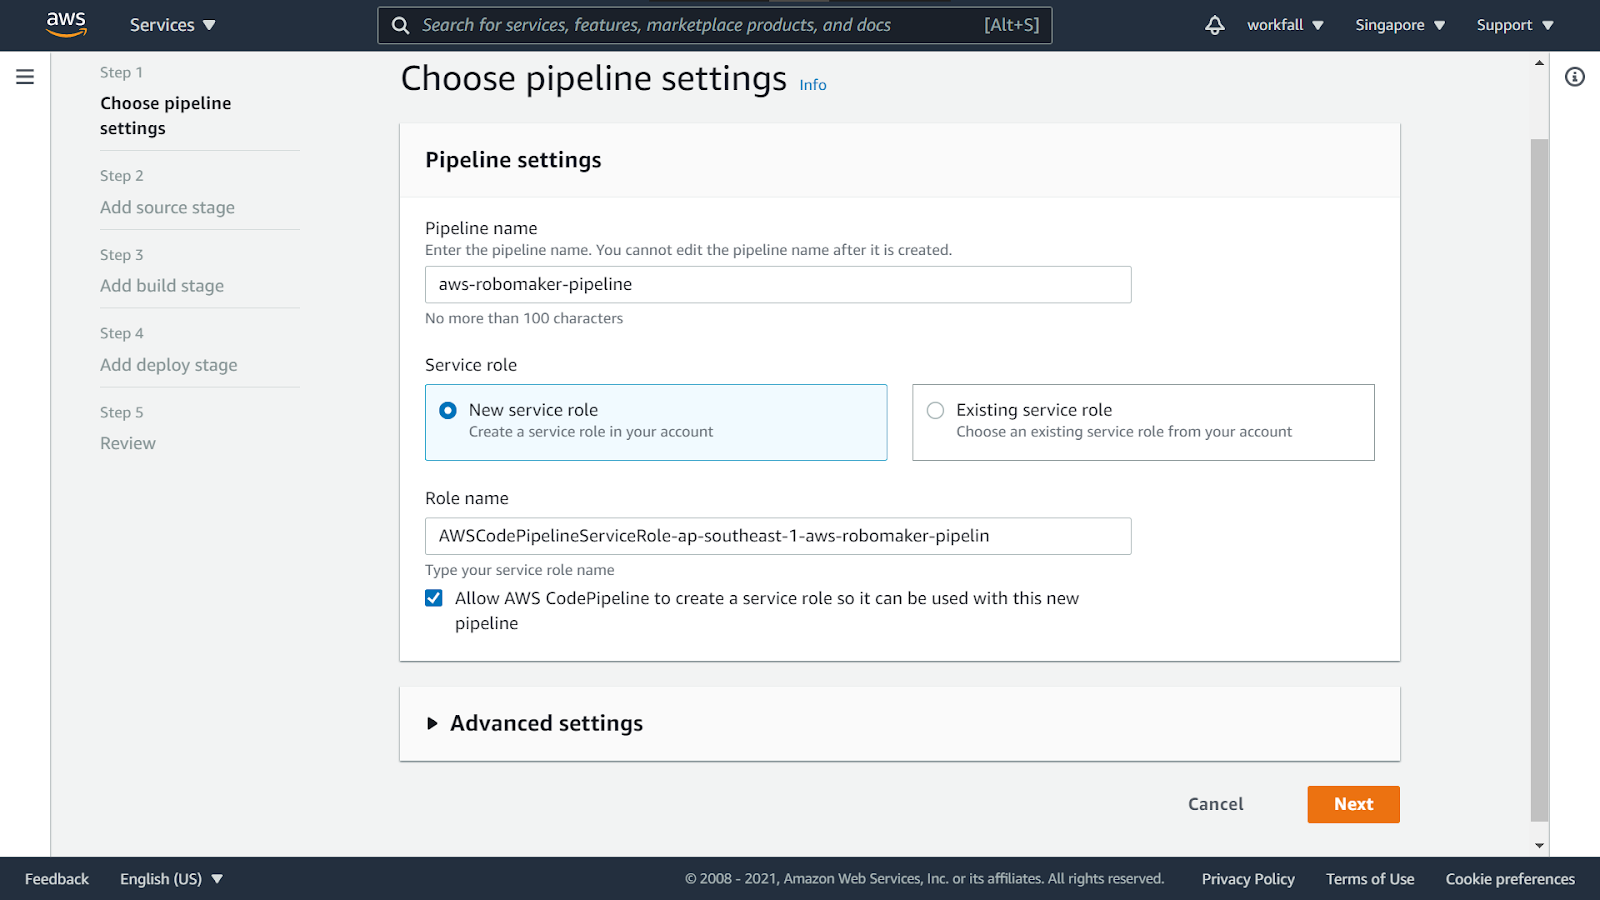
Set a name for the pipeline, select the Create a New Service Role radio button and click the checkbox that allows the role to be used with the pipeline. Keep the Advanced Settings as default. Press Next.
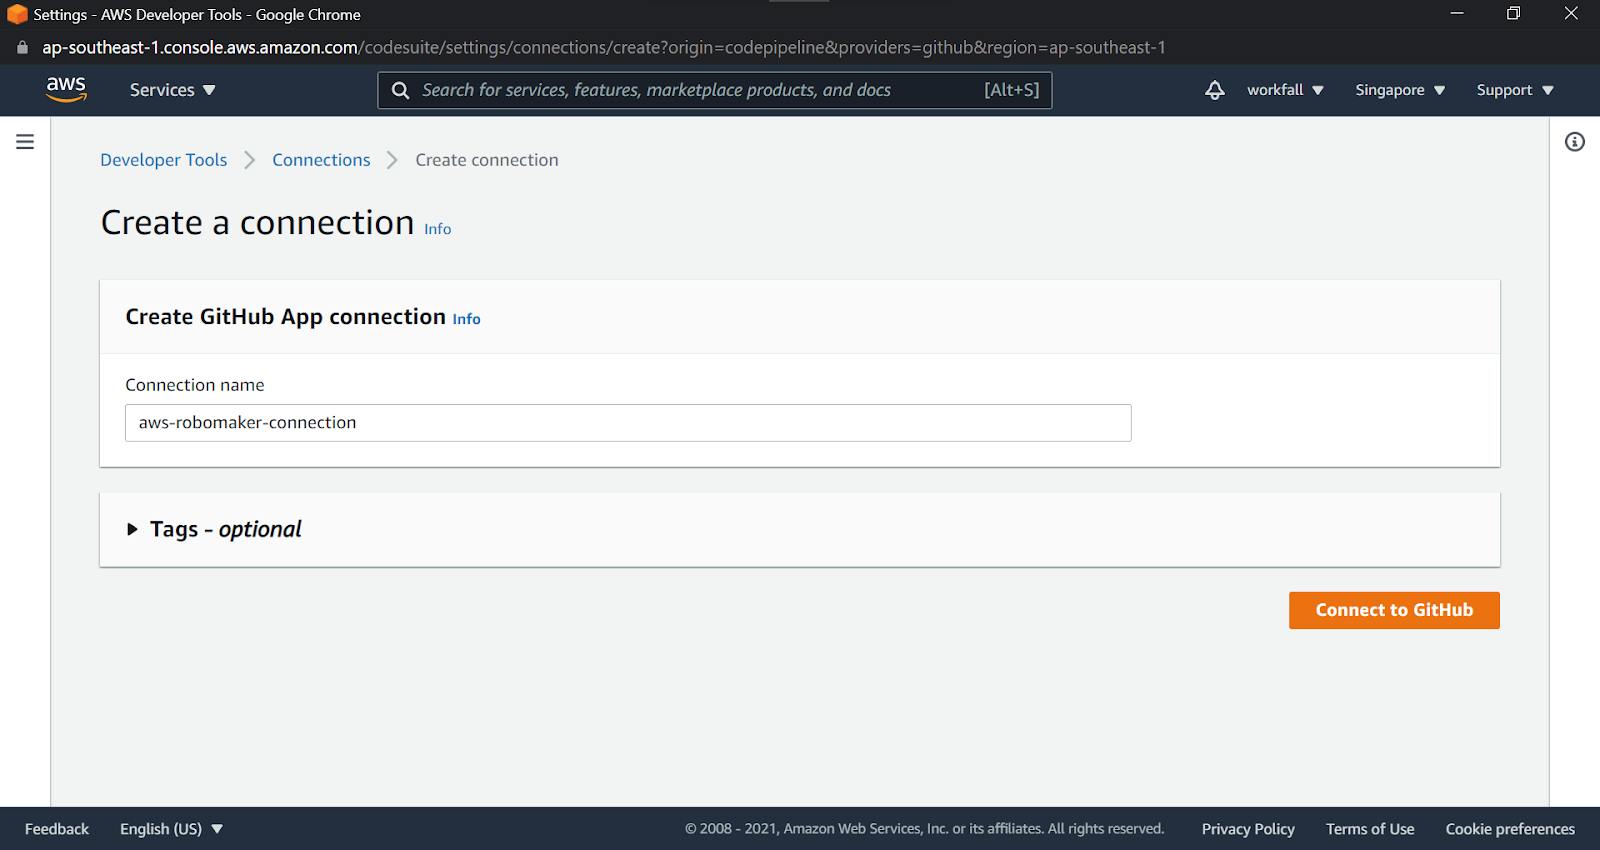
In the next step, click on Connect to connect to your GitHub account. Enter a connection name and click on Connect to GitHub.
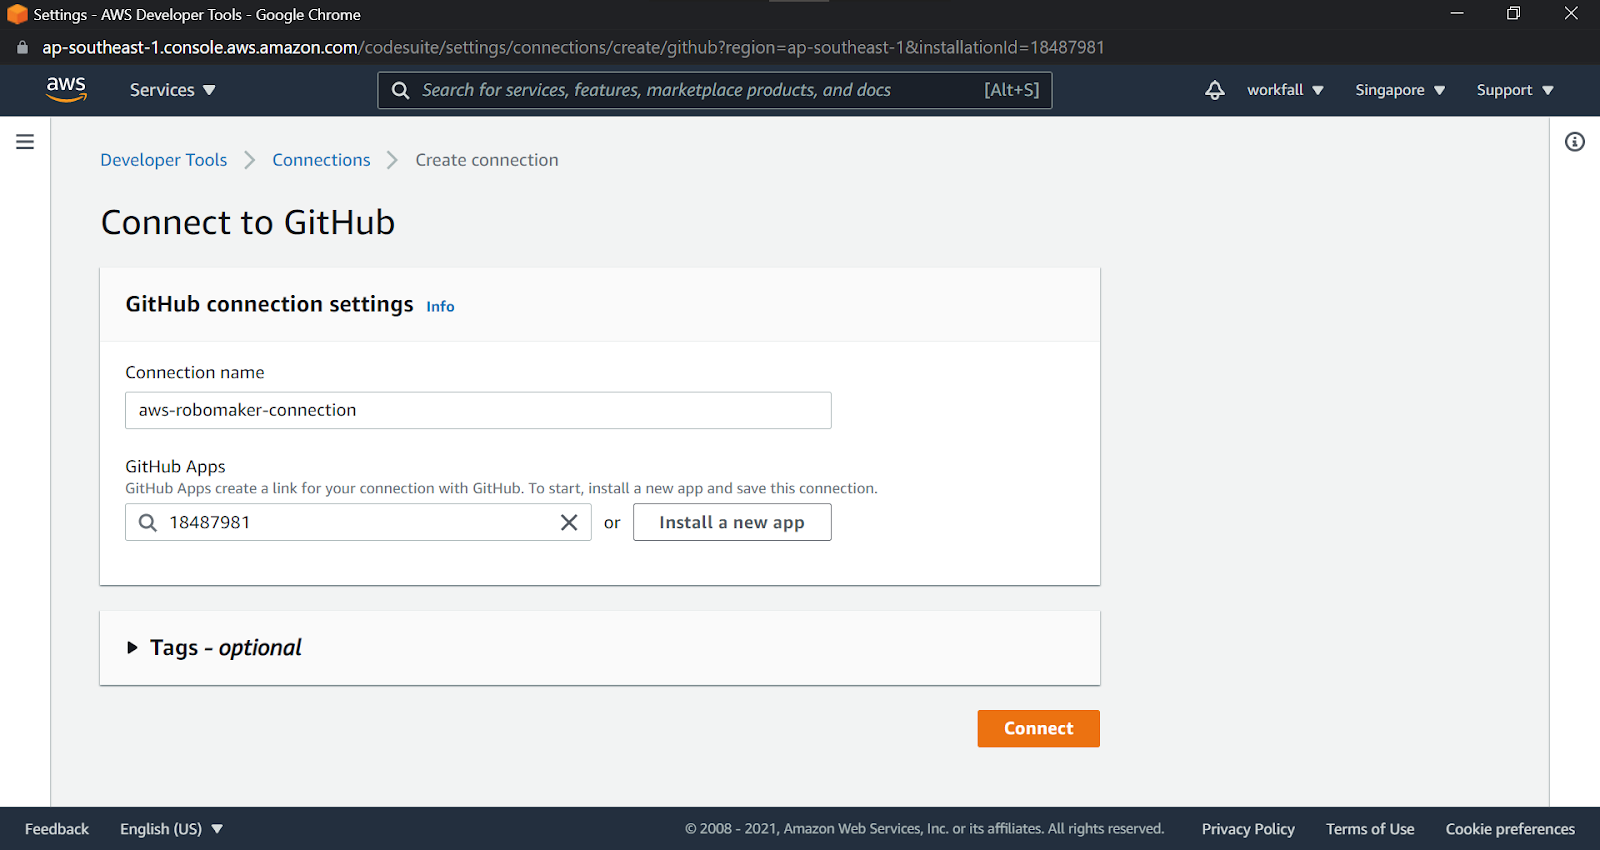
Click on Install a new app to install and then click on Connect.
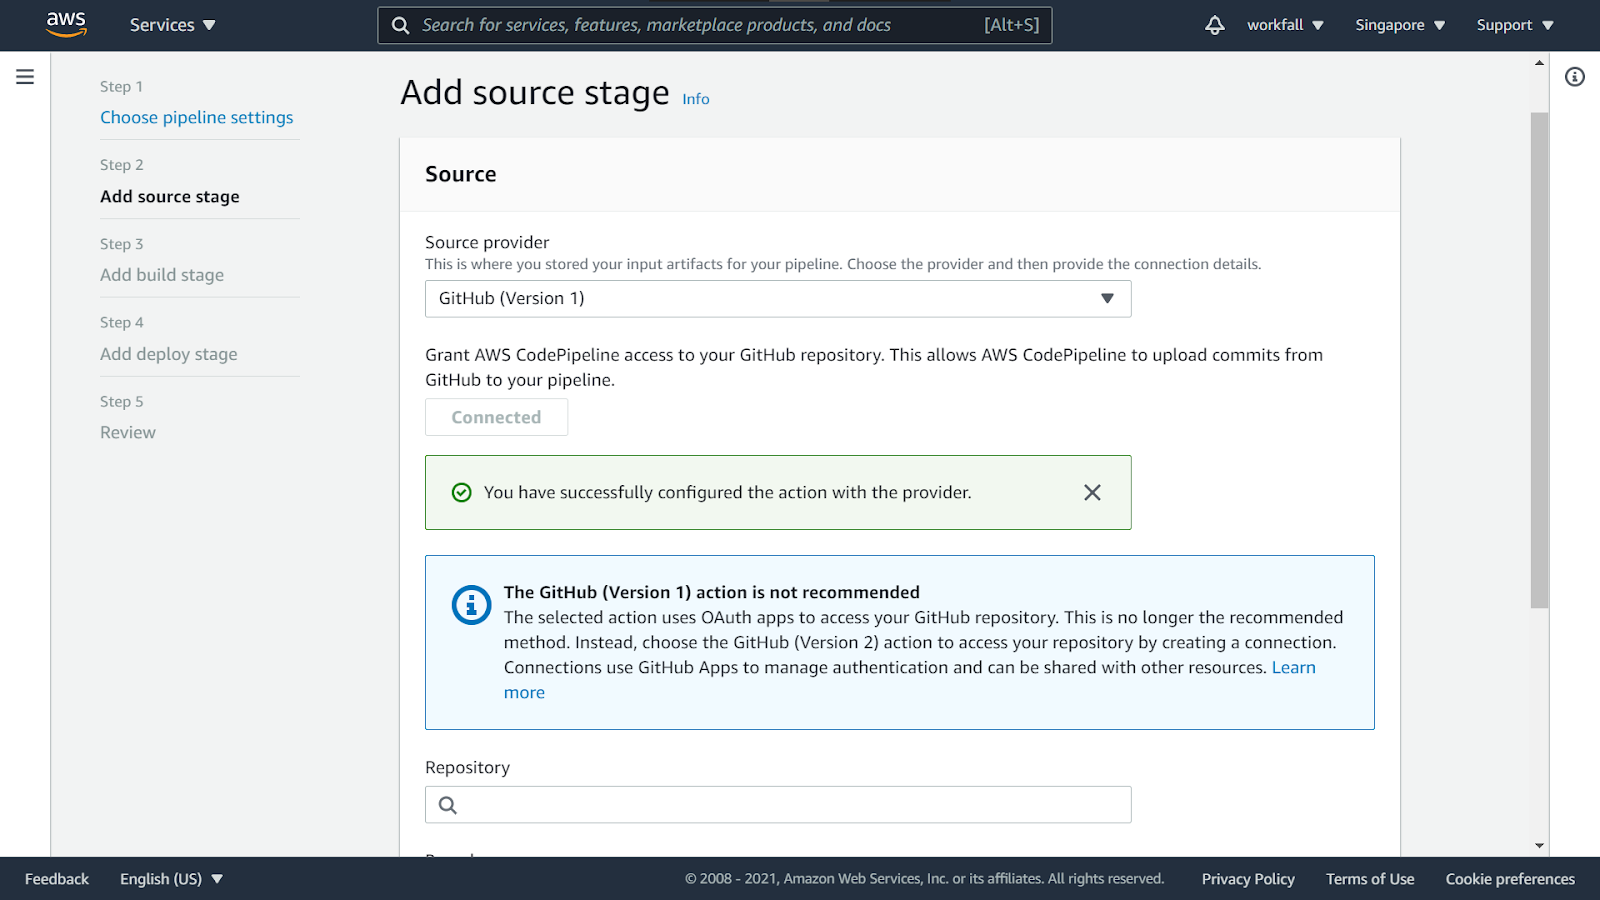
Select the source as GitHub(version 1).
Select the repository and the branch that contains the code files. Select the template as GitHub webhooks and click on Next.

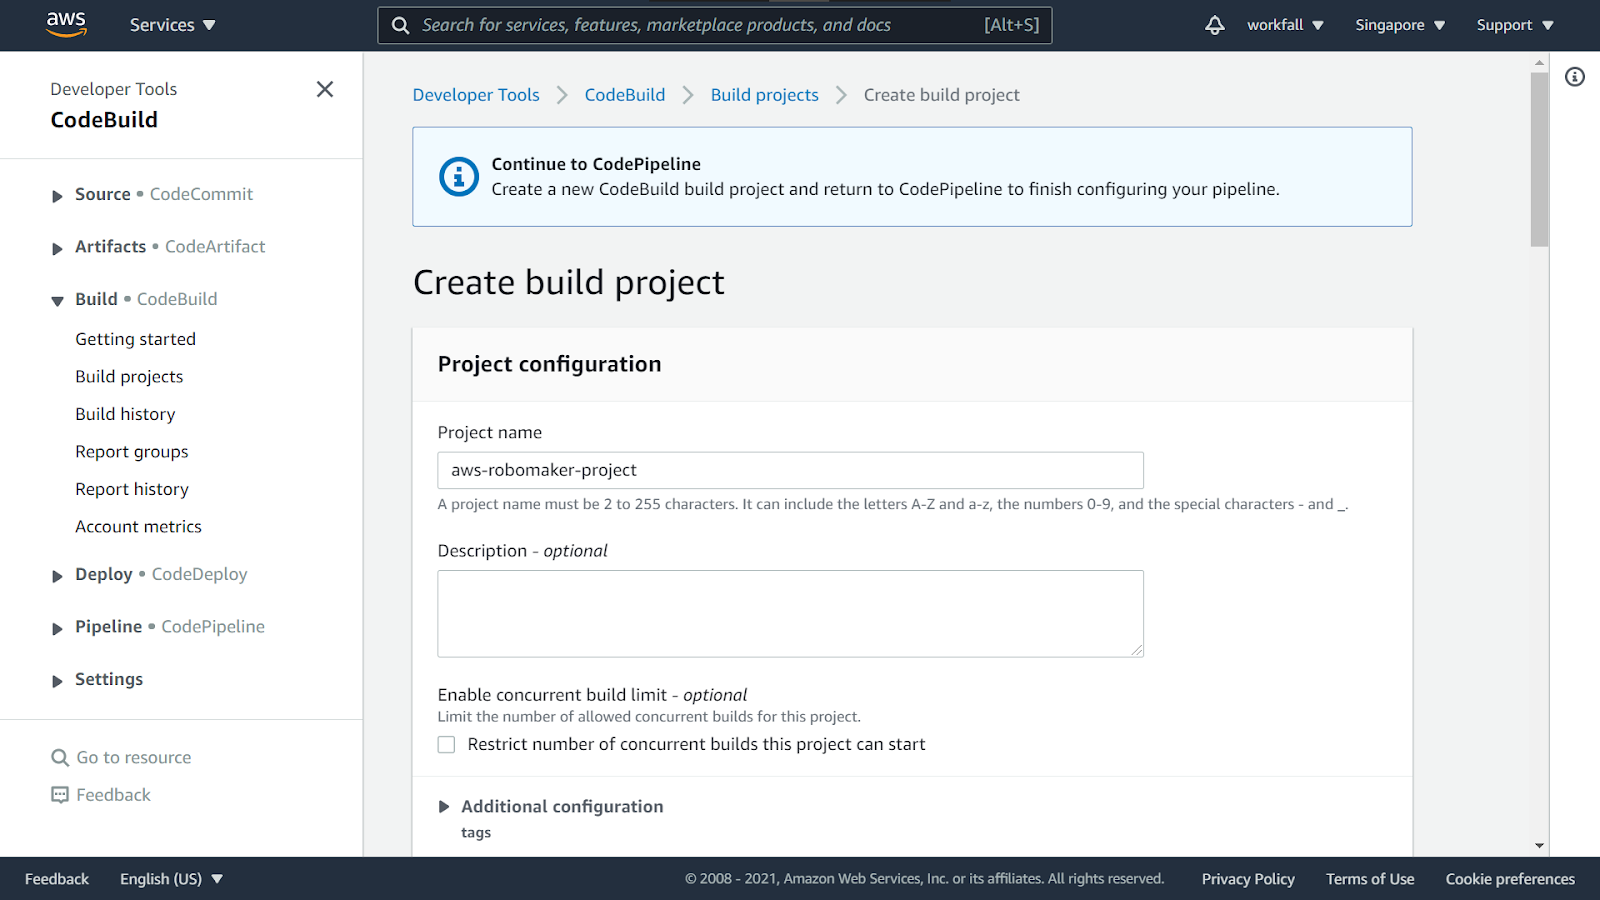
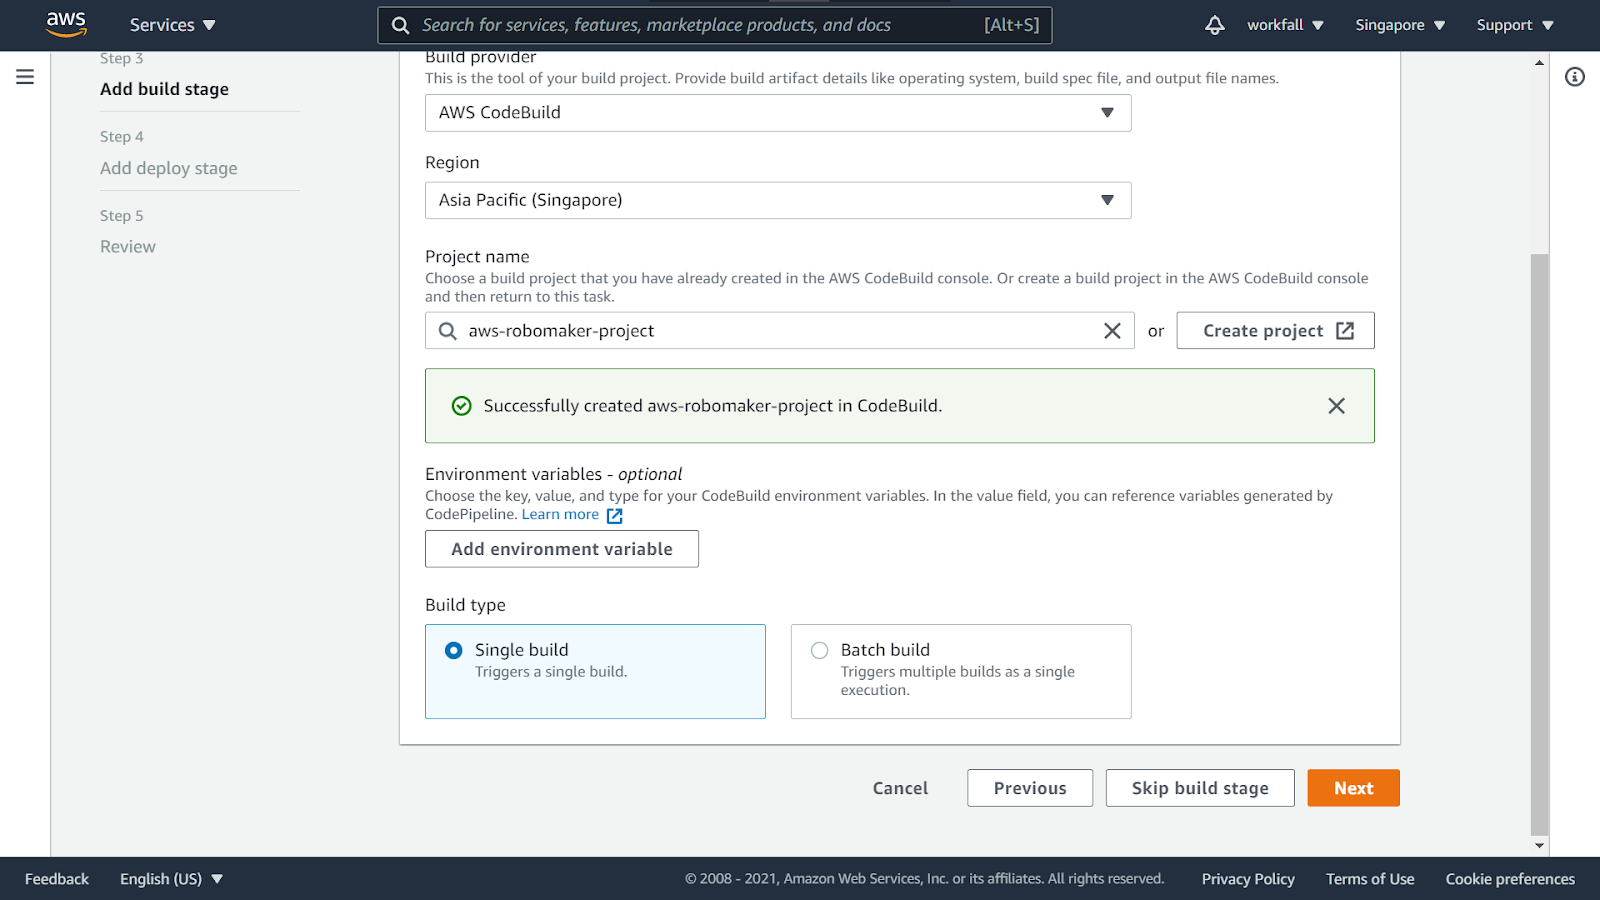
Select AWS CodeBuild as the build provider. Select the region that you are using and press Create project. A pop-up will open with CodeBuild configuration settings.

In the pop-up, type in a name for the build project.
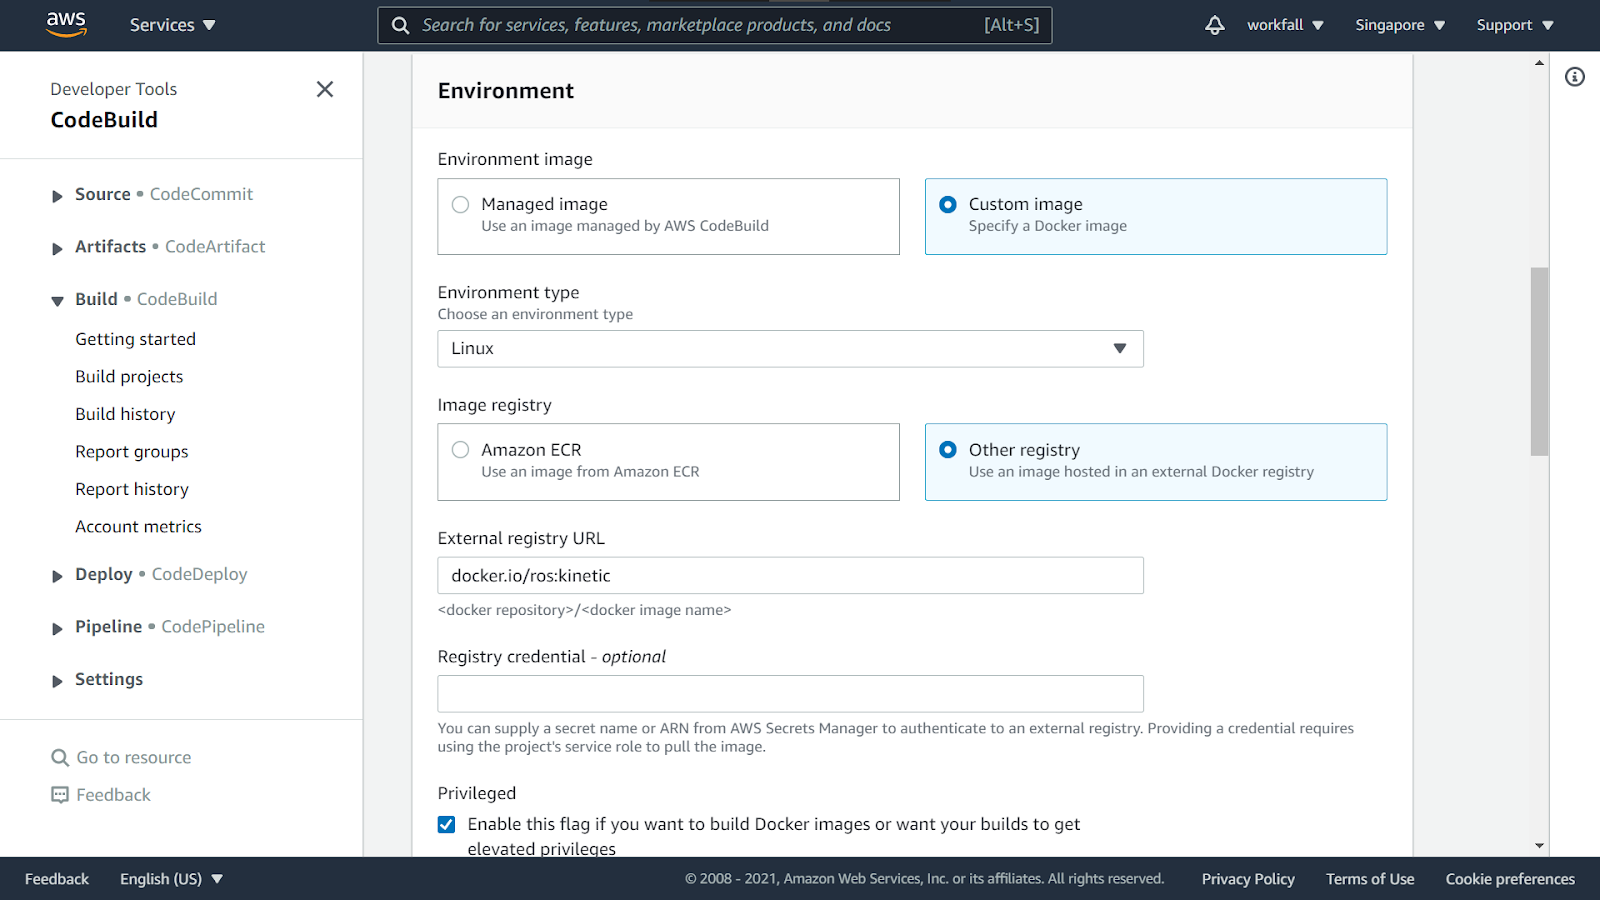
In the Environment section, select Custom Image. Set the Environment type to Linux and the Image Registry to Other Registry. Type in docker.io/ros:kinetic in the external registry URL. In this case, we are using ROS Kinetic.
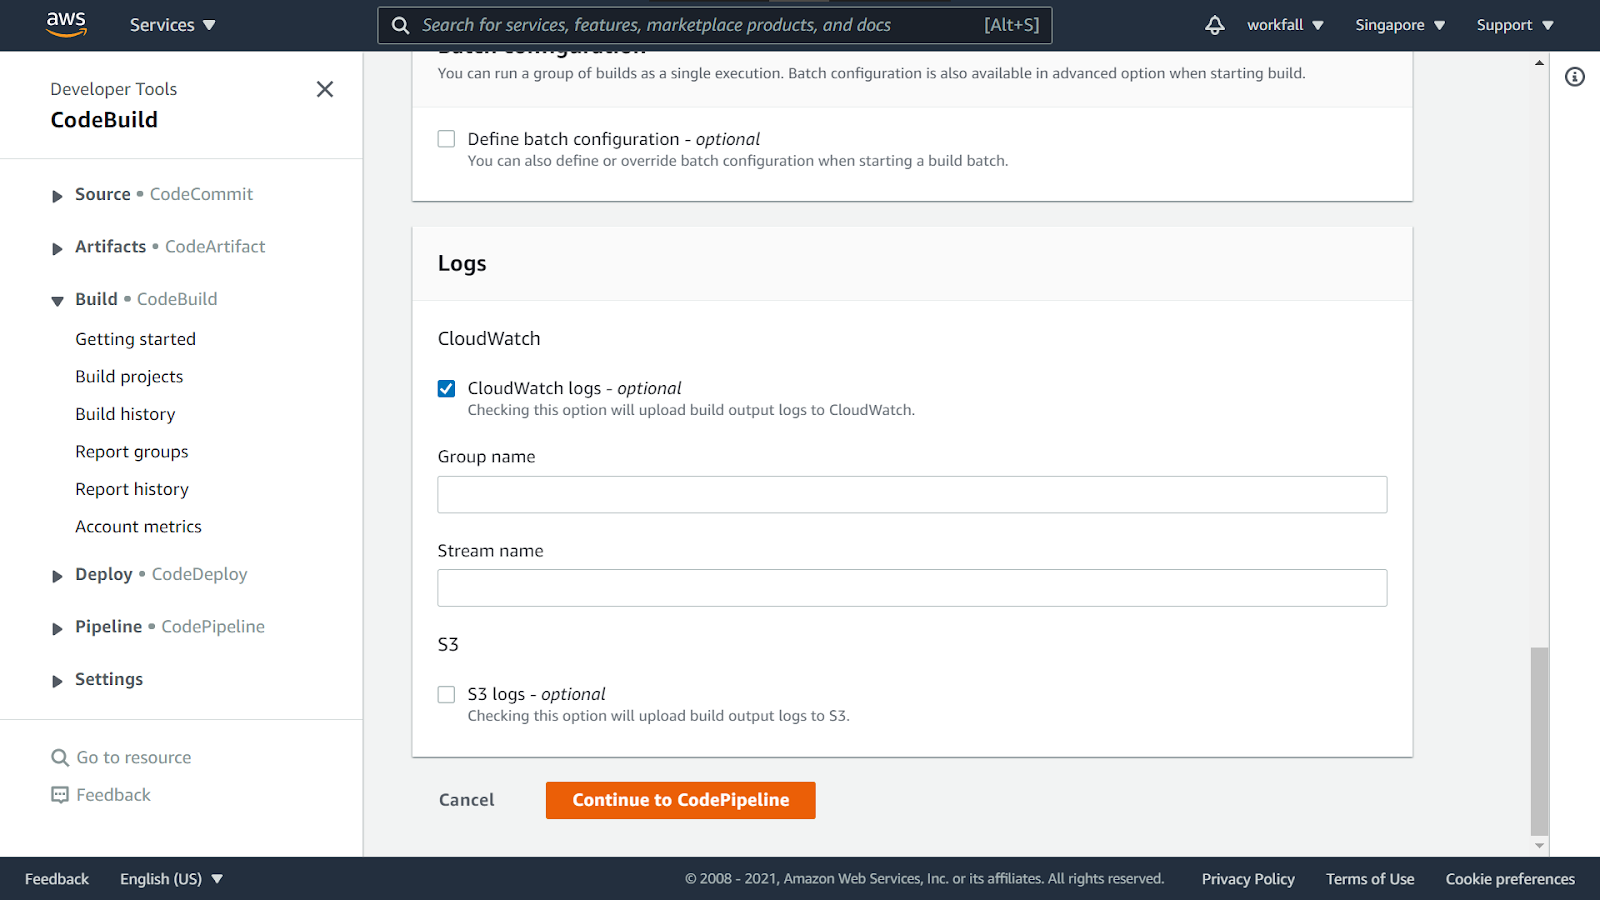
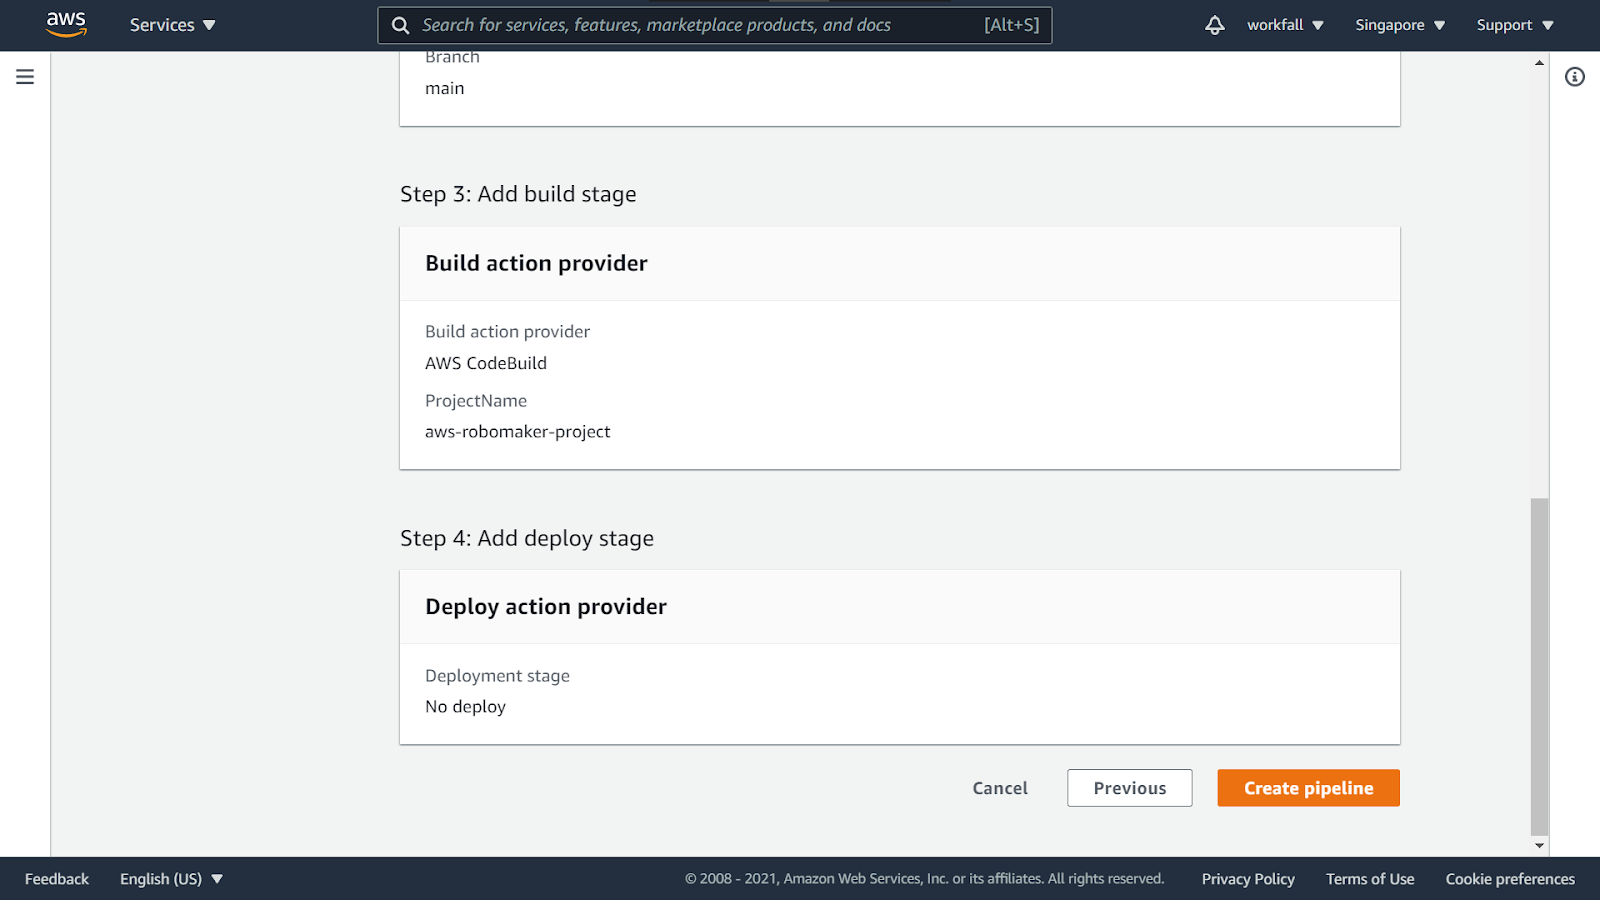
Press Continue to CodePipeline. This will close the pop-up and inject the CodeBuild project into the AWS CodePipeline wizard. Press Next.
Press Skip the deploy stage. Then Skip.
Review the CodePipeline configuration and press Create Pipeline.
Return to the AWS CodePipeline console and open your newly created pipeline.
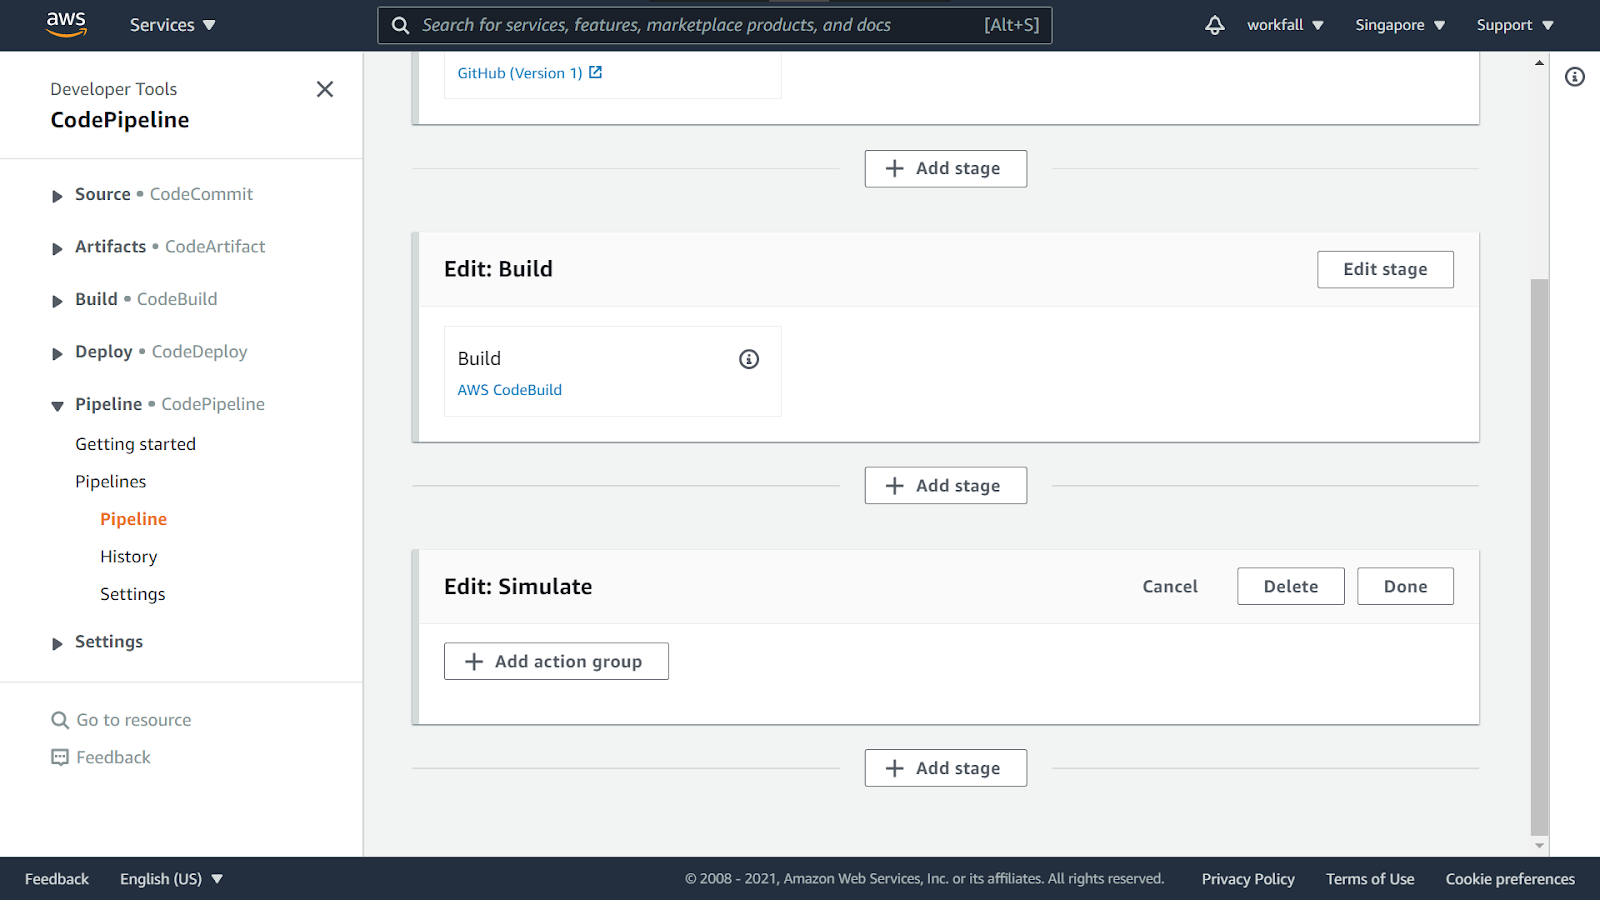
Press Edit in the CodePipeline console page.

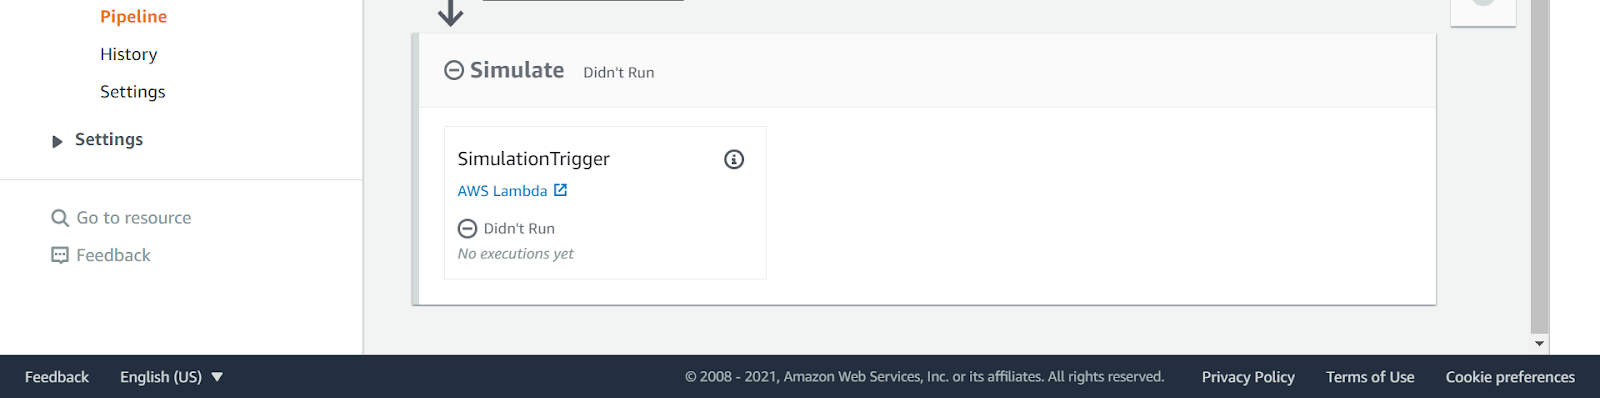
After the Build Stage, press + Add stage.

Type Simulate as the name for the new stage.
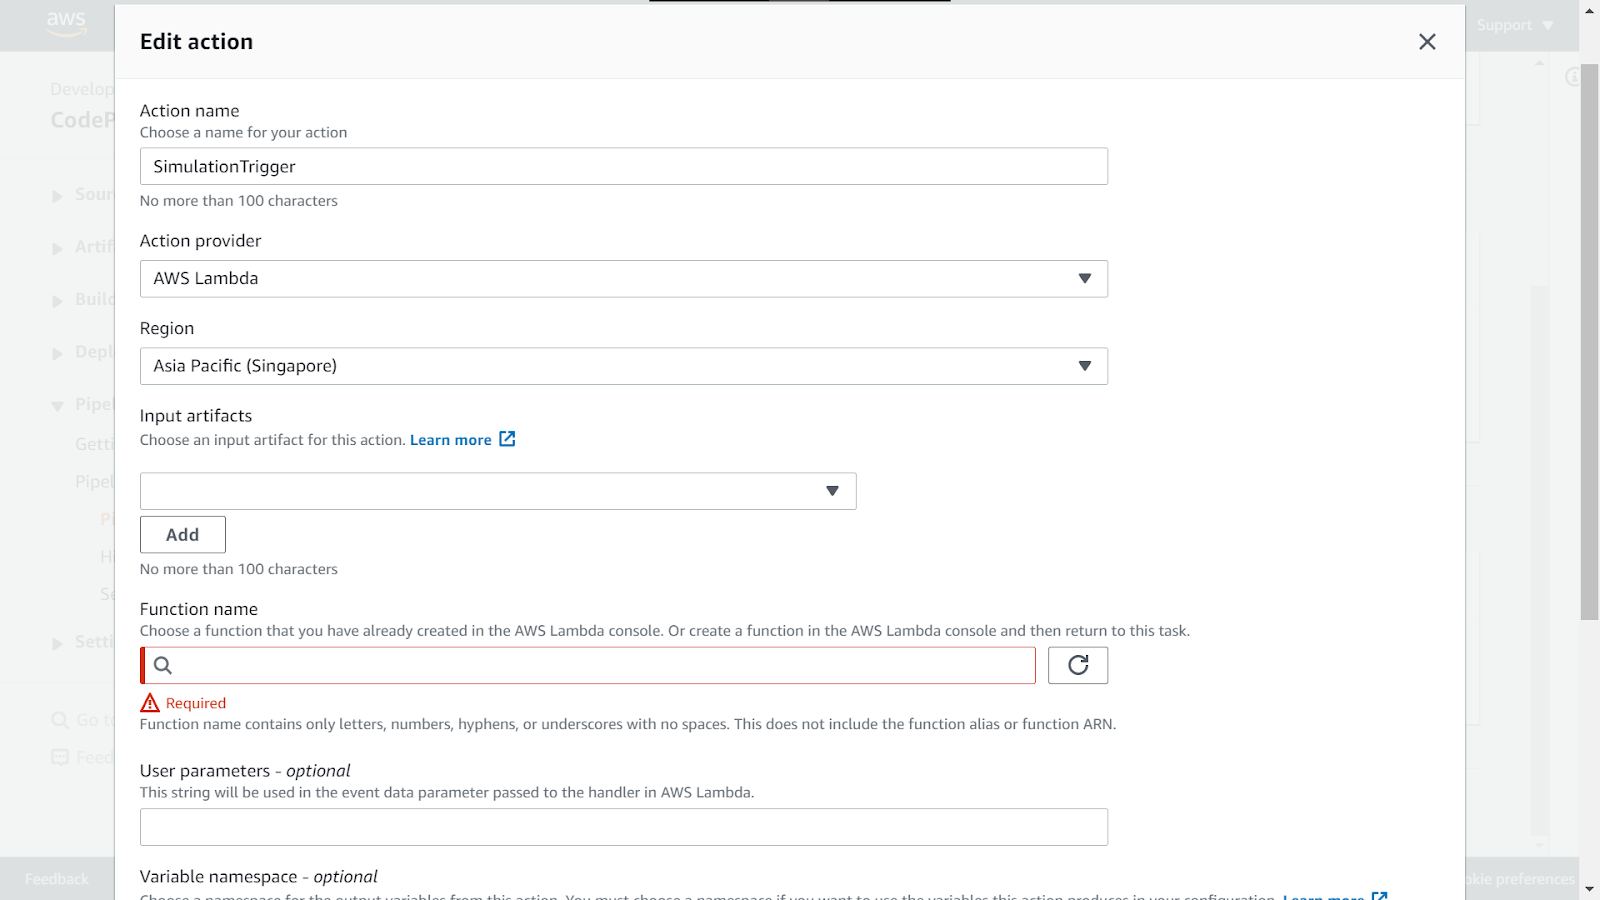
Press Add action group. Type in SimulationTrigger as the Action Name. In the action provider dropdown, select AWS Lambda. In the input provider dropdown, select Source Artifact. Select the Lambda function and then scroll down and click Done.
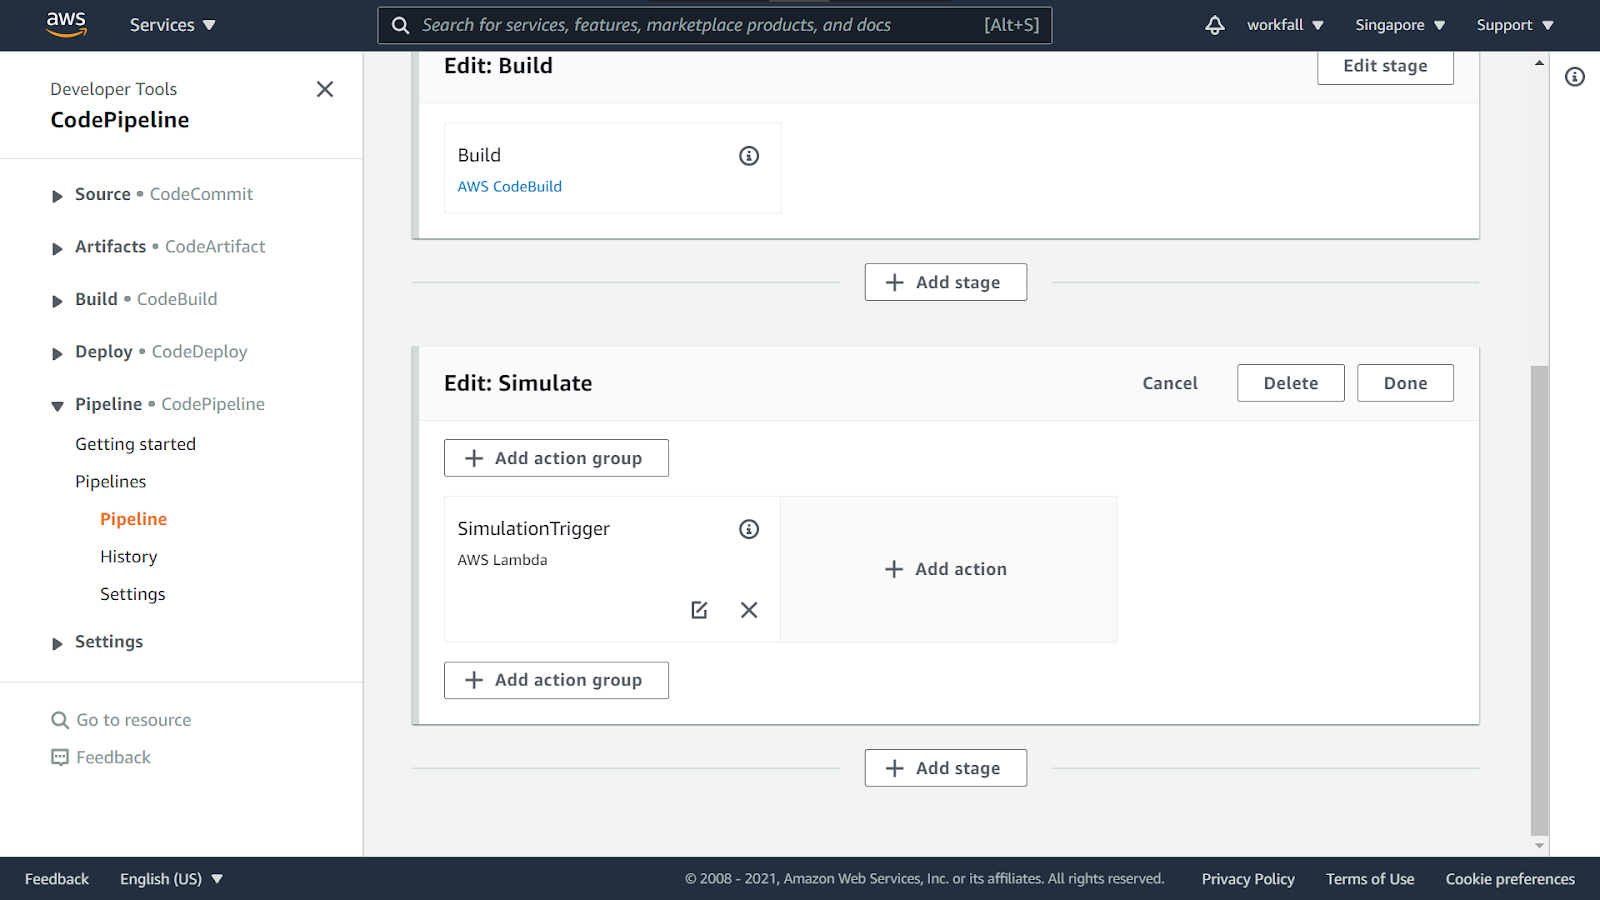
Verify the changes as shown in the image below. Scroll up to the top.
Then, press Save on the top right corner. Click on Save.

You now have a fully configured ROS CI Pipeline.
Conclusion:
In this blog, we saw how we can make use of the AWS Robomaker service to create a ROS CI pipeline. We had a look at how we can create a new development environment. Cloning the code files, we then executed a set of commands. After the command execution, we created multiple scenarios in a JSON file, created a new S3 bucket, configured the simulation launcher, and created a builspec.yml file for the configuration. Finally, we created a CodePipeline and added a simulation trigger as an action group to link AWS Robomaker with CodePipeline. We will discuss more use cases of AWS Robomaker and its integration with other services in our upcoming blogs. Stay tuned to keep getting all updates about our upcoming new blogs on AWS and relevant technologies.
Meanwhile …
Keep Exploring -> Keep Learning -> Keep Mastering
This blog is part of our effort towards building a knowledgeable and kick-ass tech community. At Workfall, we strive to provide the best tech and pay opportunities to AWS-certified talents. If you’re looking to work with global clients, build kick-ass products while making big bucks doing so, give it a shot at workfall.com/partner today.