Ever imagined how difficult it can be to manage your infrastructure on AWS with many services created? It can be pretty challenging and at times can be pretty time-consuming too. We will have to start focusing more on managing the infrastructure rather than focusing on developing applications. To solve this problem, AWS provides an amazing service – AWS CloudFormation. It simplifies the creation and management of resources on AWS all within a single stack. You can create and model your infrastructure with ease without having to perform actions manually. In this blog, we will see how we can create resources with just a few clicks via Amazon CloudFormation templates and manage all the created resources in one place.
In this blog, we will cover:
- What is AWS CloudFormation?
- How AWS CloudFormation works?
- Features and benefits of AWS CloudFormation
- Why use AWS CloudFormation for Provisioning Architecture
- Companies using AWS CloudFormation
- Hands-on
- AWS CloudFormation vs. Terraform
- Conclusion
What is AWS CloudFormation?
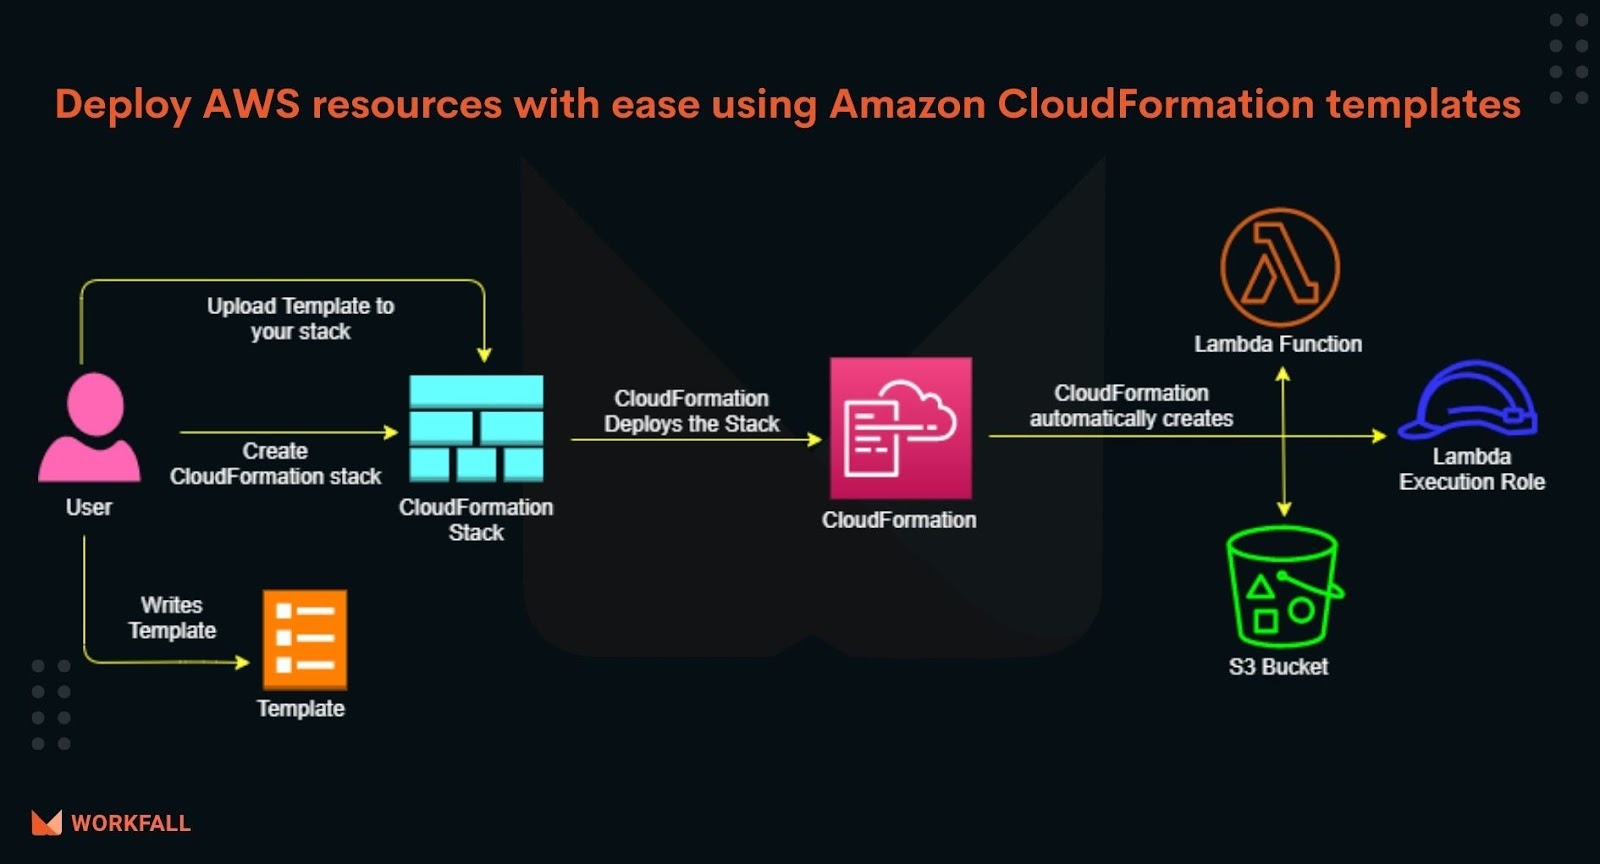
AWS CloudFormation is an IaC tool that helps in managing the AWS infrastructure resources by assisting in simple modeling and setting up with ease in an orderly manner. It is easier to build a CloudFormation using a template design that can be designed with respect to user preference. For example, a template can be defined as what the application requires like an Amazon Elastic Compute Cloud (EC2) instance.
The major advantage is that the user needs not to assess the dependencies or complexities of the infrastructure services that are uploaded to the CloudFormation portal, with that of the application running on top. Once the template is designed, it is vetted and validated, and the CloudFormation analyses and contemplates the resources users define.
A template and a Stack are the two important aspects of AWS CloudFormation –. Together they complement each other.

AWS CloudFormation Template
A template is a simple text file that contains the declaration either in JavaScript Object Notation (JSON) or in a YAML Standard which can be edited using a normal text editor or even a CloudFormation editor. These templates can be managed in the source control system.
AWS CloudFormation Stack
In AWS CloudFormation multiple related resources are managed in a single unit called Stack. One can delete, create and update a resource in a stack. These stacks are clearly defined by the stack’s template in AWS CloudFormation.
How AWS CloudFormation works?
- Build a template based on various requirements and save it in the system.
- Use the AWS CloudFormation to create a stack on the template defined.
- AWS CloudFormation then diagnoses the template design and the configuration to verify the template on dependencies and validate as well as analyze before provisioning the template for the resource.
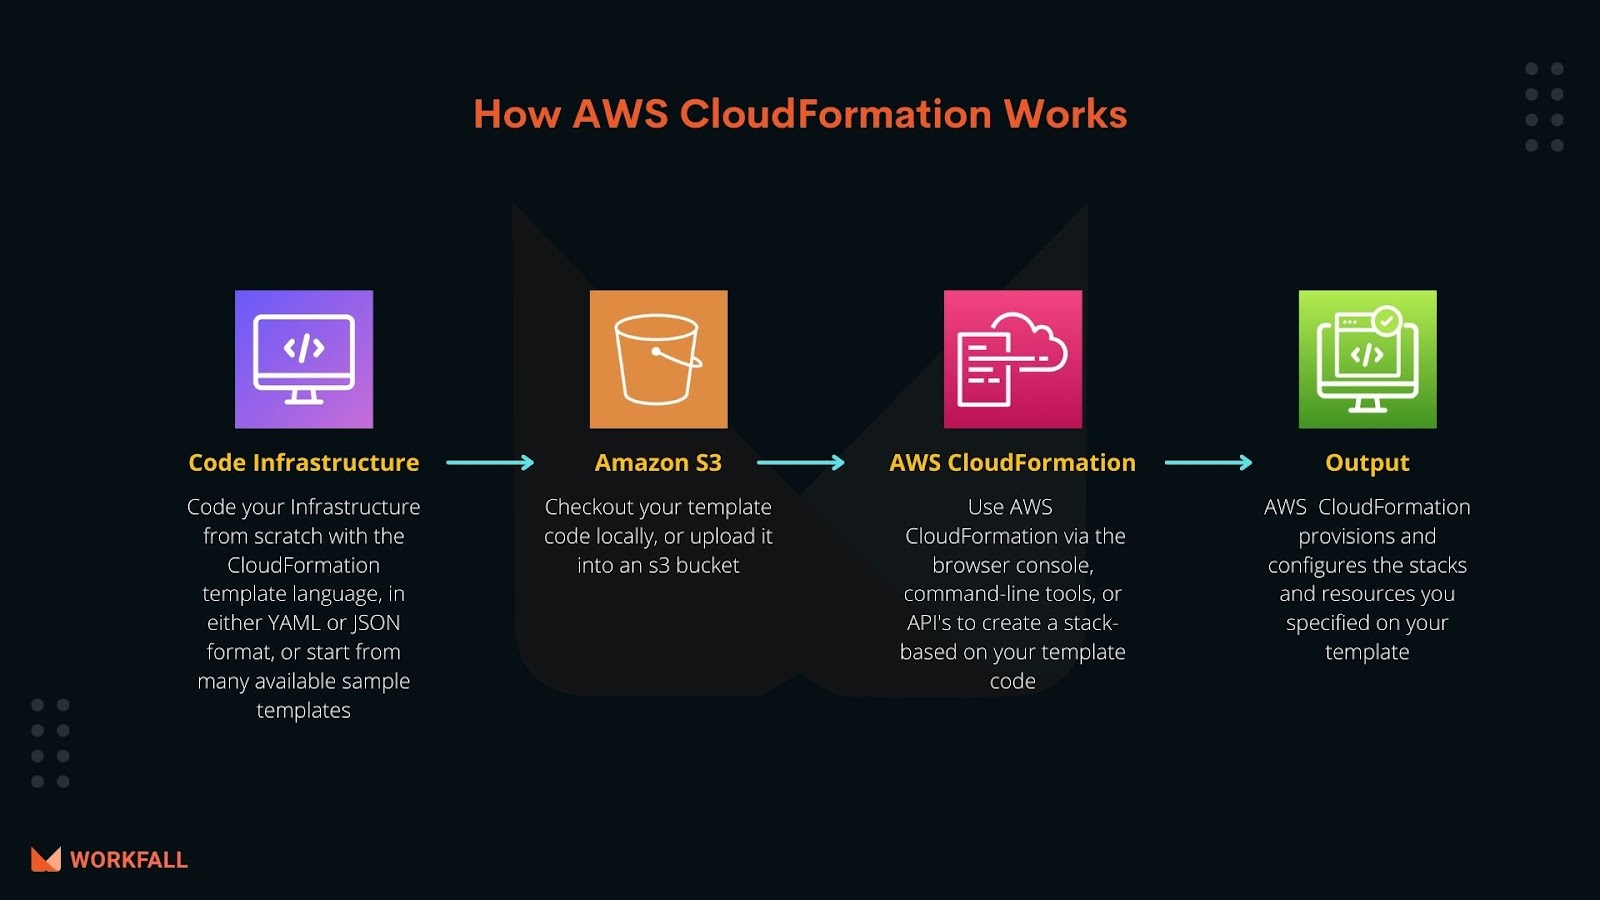
AWS CloudFormation gives us an easy way to model a collection of related AWS and third-party resources, provision them quickly and consistently, and manage them throughout their life cycles, by treating infrastructure as code.
A CloudFormation template describes our desired resources and their dependencies so we can launch and configure them together as a stack.
We can use a template to create, update, and delete an entire stack as a single unit, as often as we need to, instead of managing resources individually. We can manage and provision stacks across multiple AWS accounts and AWS Regions.
AWS CloudFormation Features
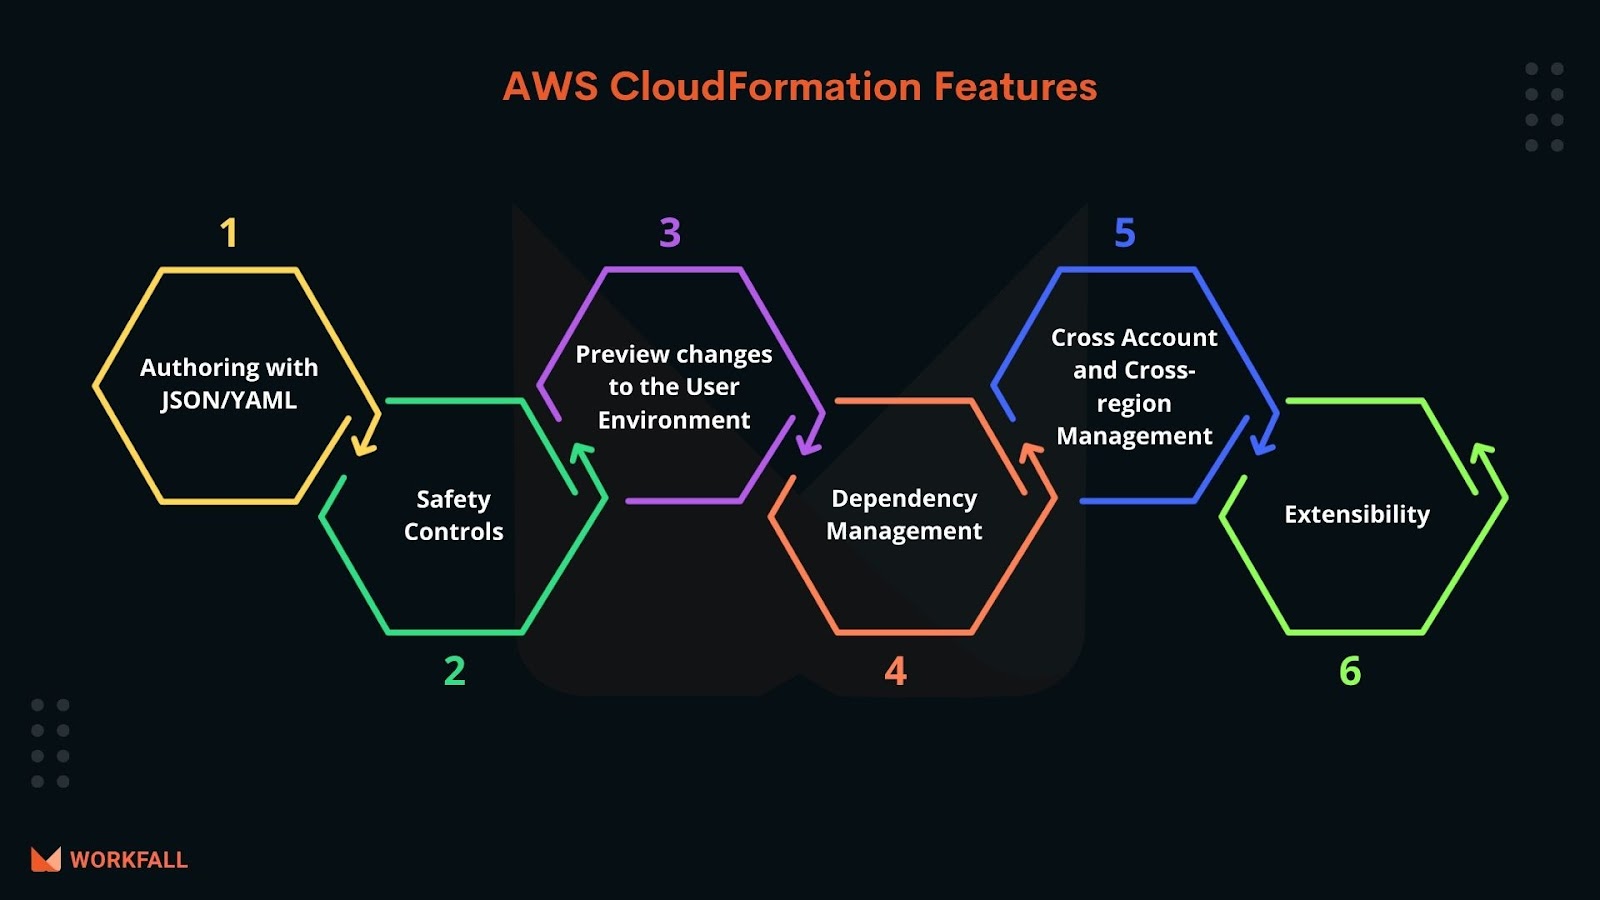
Using AWS CloudFormation to deploy infrastructure as code gives us lots of benefits. Major benefits are:
Automatable: The templates are completely reusable and can be built as well as rebuilt any number of times without any scripting.
All in One: One can model all resources in a single text file and can be used invariably anywhere.
All it is a Code: The template is just a code and can be easily maintained and version controlled as per usage.
No Extra Charges: As AWS CloudFormation comes along with the AWS Resources, no extra charges have to be paid.
Benefits of AWS CloudFormation

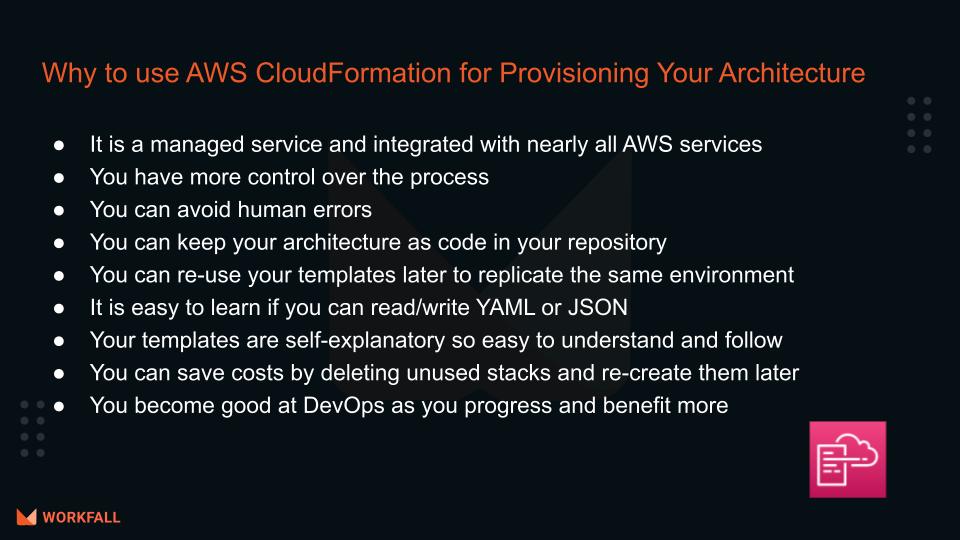
Why use AWS CloudFormation for Provisioning Architecture?
Managing your infrastructure as code is one of the key DevOps practices, and AWS CloudFormation is your service on AWS to realize it. By managing your infrastructure as code, you can save time, and bring quality to your process by starting to prepare your CloudFormation templates!
Here are a few reasons for using AWS CloudFormation and automating the provisioning of your infrastructure.
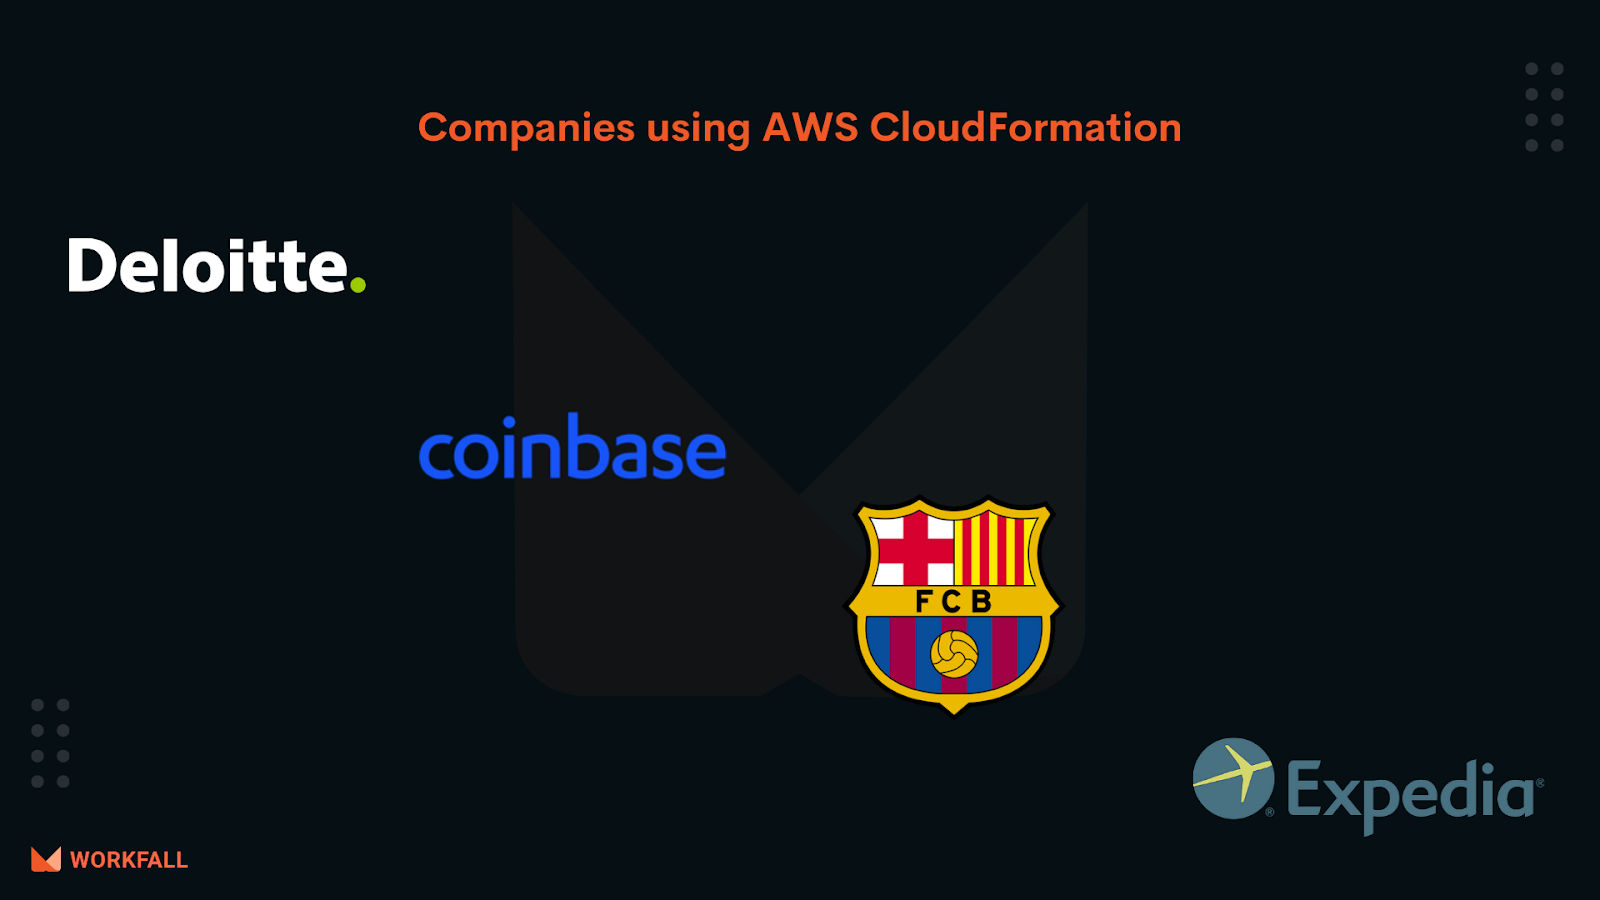
Companies using AWS CloudFormation
Hands-on
In this hands-on, we will see how we can deploy the needed resources at a faster pace thereby eliminating the use of the AWS console and utilizing the Amazon CloudFormation templates. Amazon CloudFormation provides us with a lot of templates that we can use to write down the configuration or mention the resources that we need to deploy. It makes things easier for us to manage all the deployed resources all together in one place. In a case wherein we deploy multiple resources and once the work is done, we plan on deleting all the created resources but we often forget to delete some. CloudFormation simply makes use of a stack that manages all the created resources under it. Once the work is done, you can simply delete the stack and all the resources deployed within it via the template file you uploaded, will be automatically deleted.
You can clone this repository to get the complete source code for this implementation:
https://github.com/workfall/CloudFormation-AWS.git
To implement this, we will do the following:
- Login to your AWS account and navigate to Amazon CloudFormation to create a new stack.
- Prepare a template in JSON or YAML format with the resources that you need to deploy.
- Upload the template file on the CloudFormation console while creating a stack.
- View your template in the Designer mode for the resource flow and creation clarity or to make any changes if needed.
- Complete the configuration and create a stack.
- Verify the creation of the stack.
- Verify the creation of all the resources you mentioned in your template file.
- Navigate through the different tabs on the CloudFormation stack dashboard.
- Delete the stack and the resources deployed within via the template file you uploaded.
Sign in to your AWS Console.
In the search bar, search for ‘CloudFormation’ service and click on it.

You will be navigated to the Amazon CloudFormation Dashboard. On the dashboard, click on ‘Create stack’.

On the ‘Create stack’ dashboard, under the ‘Prerequisite – Prepare template’ section, select ‘Template is ready’.

Now, switch to an editor on your local machine. Clone the below repository to use the template.json file that we used for this hands-on.
https://github.com/workfall/CloudFormation-AWS.git
Under the ‘Specify template’ section, select the radio button next to ‘Upload a template file’, since we will be uploading template.json file to deploy resources.
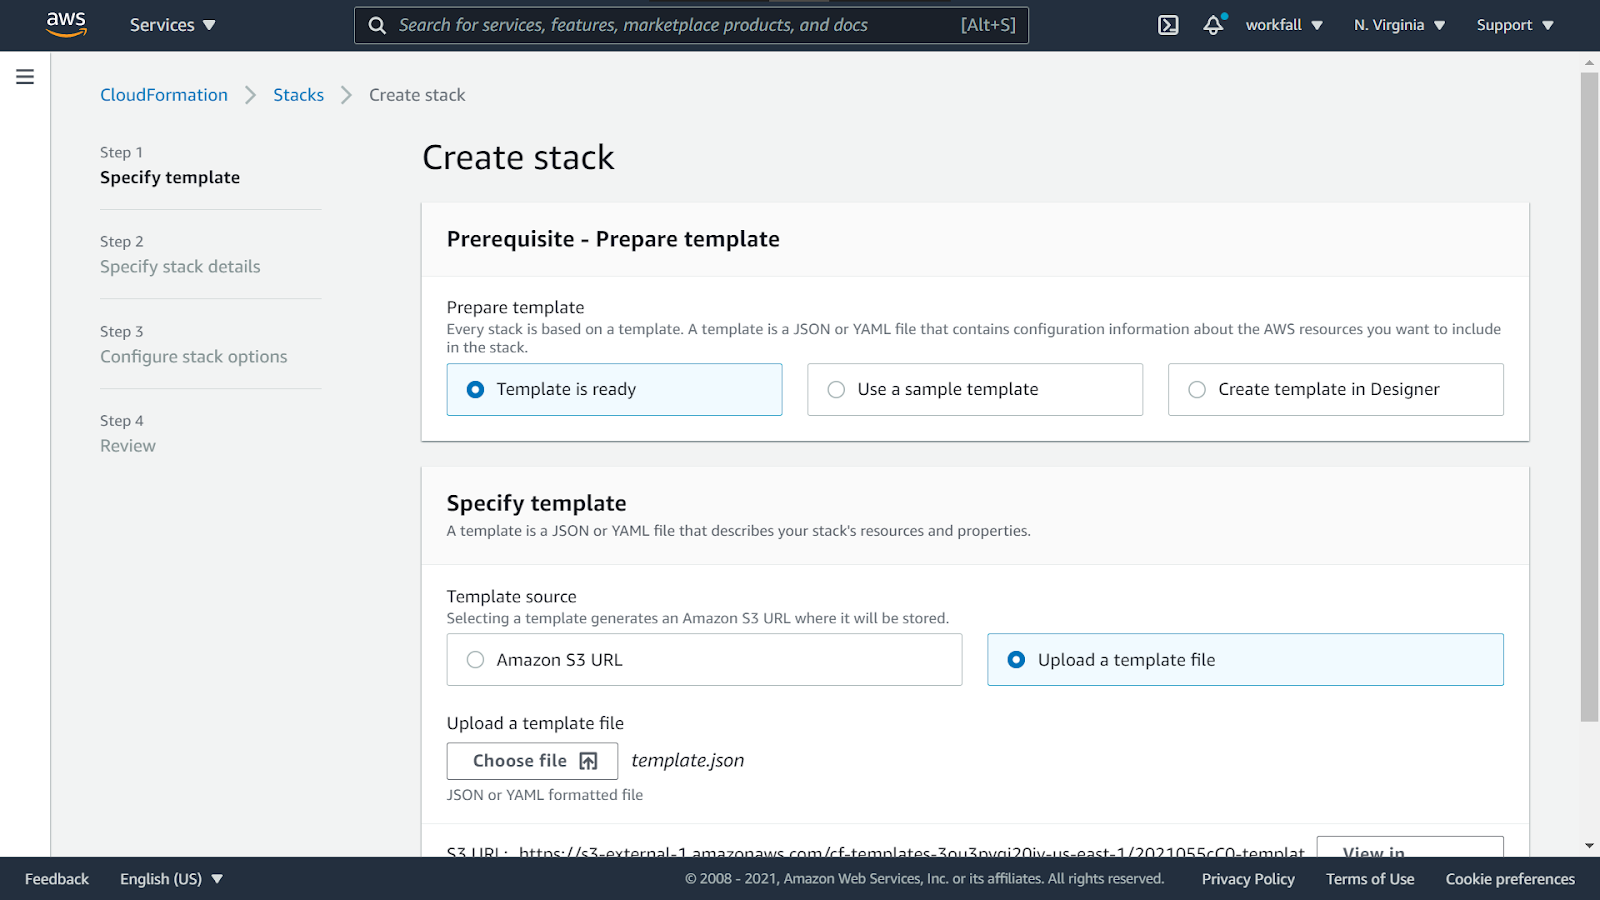
Click on ‘Choose file’ under ‘Upload a template file’ and select the template.json file from your local machine and wait for the file to be uploaded.
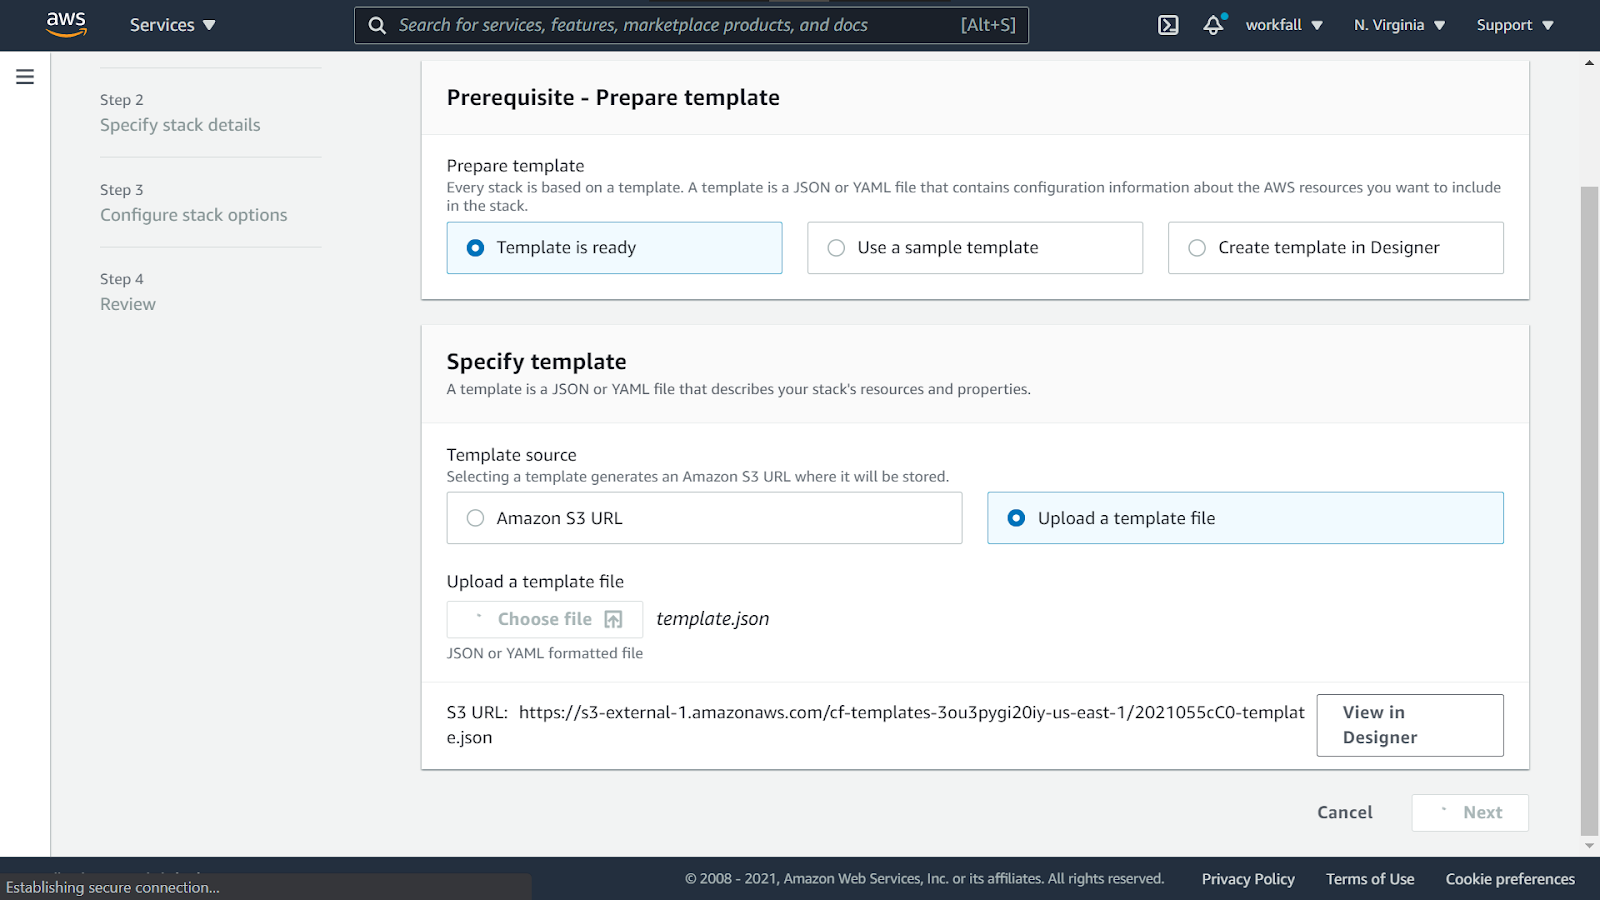
Once the file is uploaded, you can click on ‘View in Designer’ beside the uploaded file to view the resource flow or add or remove any resources.

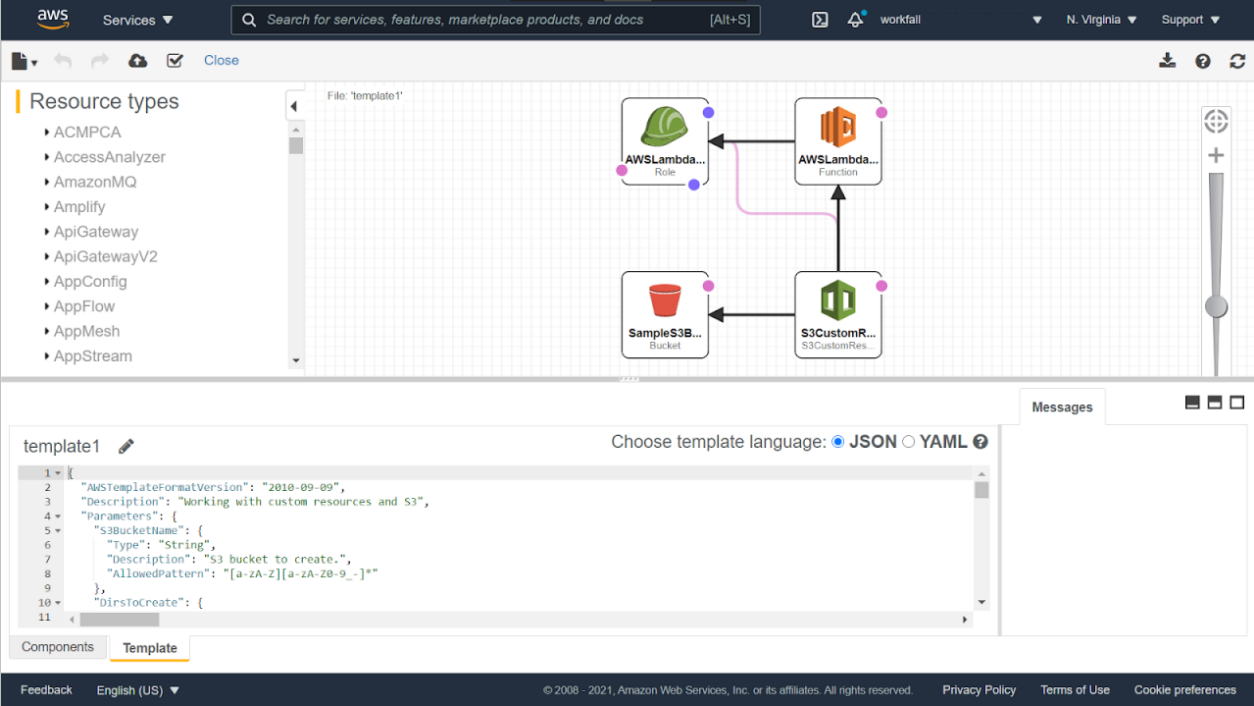
You will view the layout plotted for the resources you will be deployed using the template.json file. For the same file, at the bottom of the screen, you will be able to view the entire template in JSON format. New resources can be added from the left navigation pane under the ‘Resource types’ section.
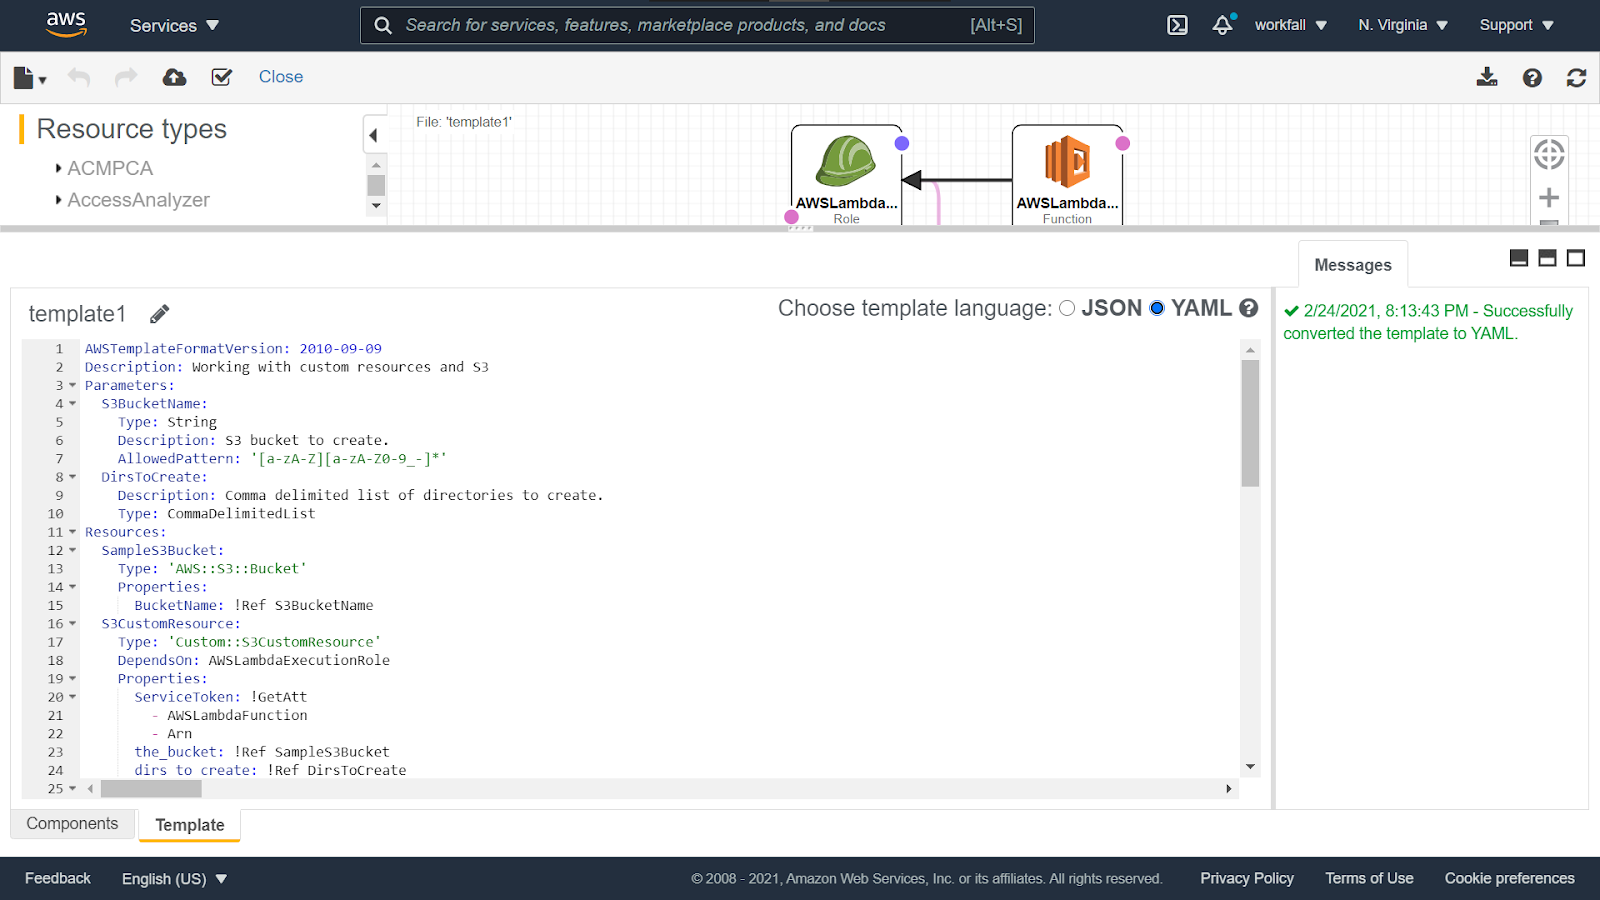
To view your uploaded template file in YAML format, select the radio button on the left of the YAML option and you will be able to view the new changes.
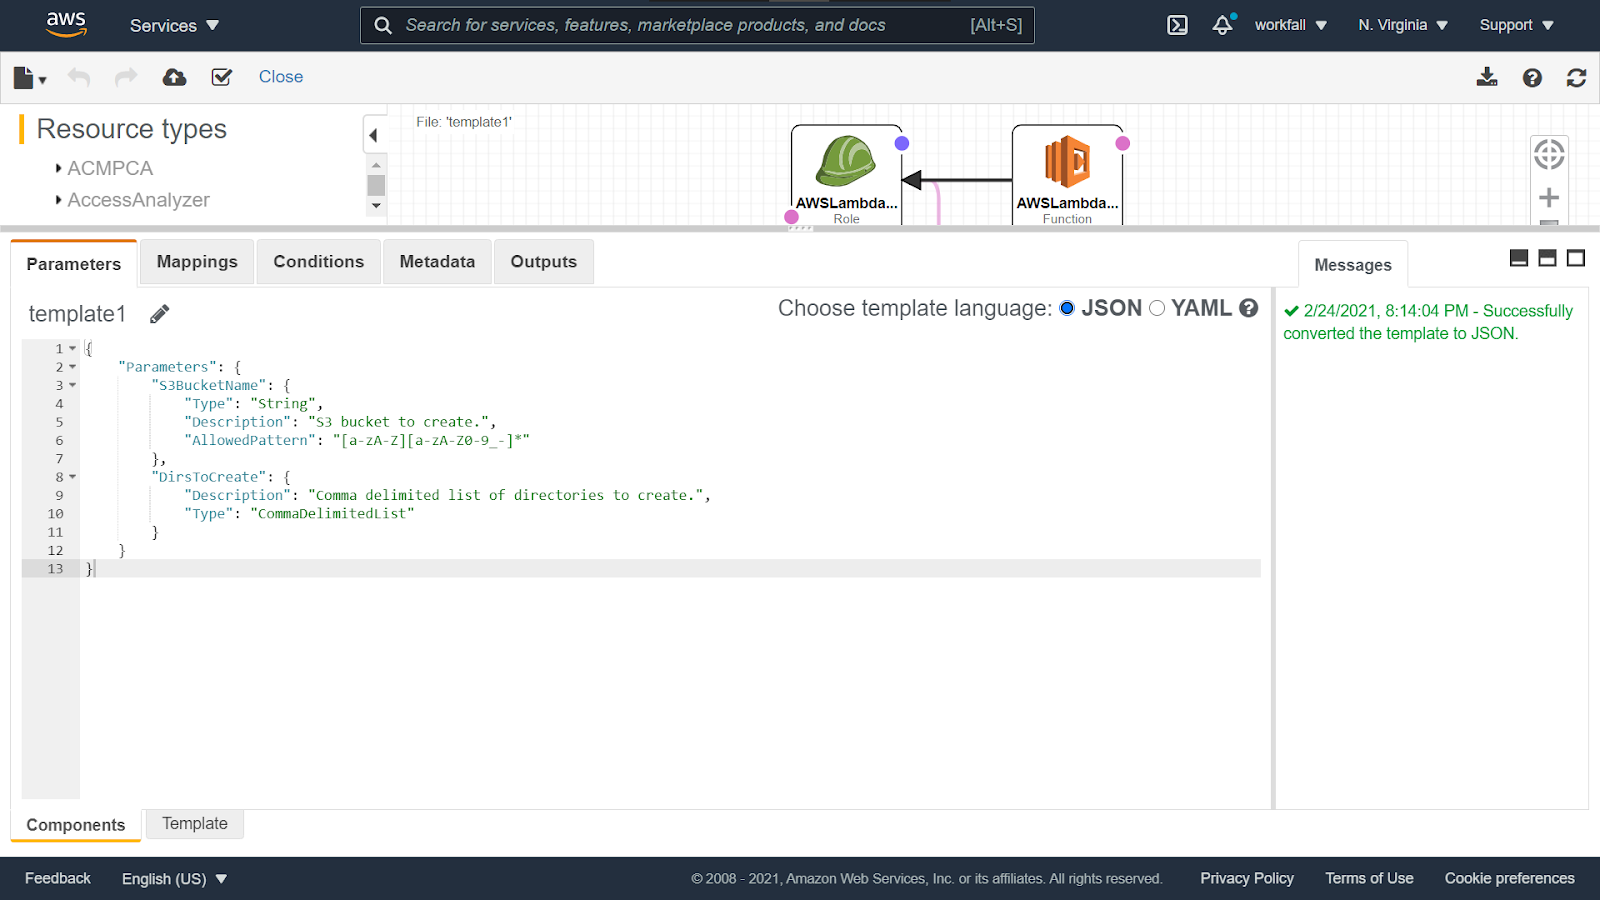
Now, to view the components that are going to be deployed, click on the ‘Components’ tab at the bottom of the screen.
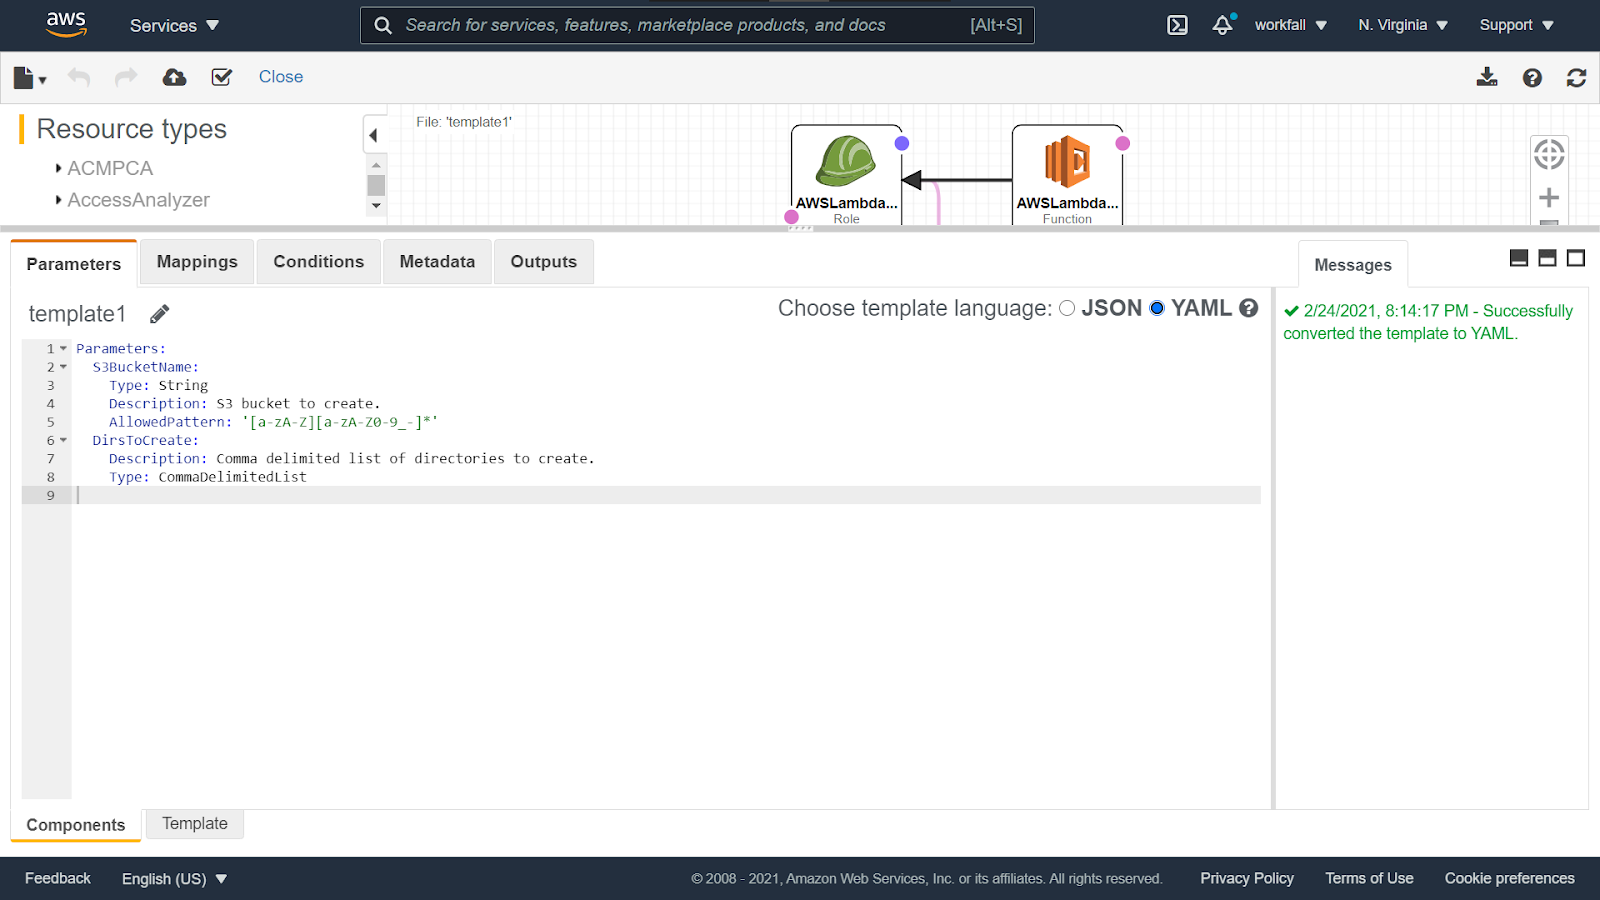
To view the same file in YAML format, click on the radio button on the left of the YAML option and you will see the file as shown below.
Now, navigate back to the ‘Create stack’ dashboard and click on Next. You will then be asked to ‘Specify stack details’ in Step 2. Enter a stack name for your stack. Under the ‘parameters’ section, under ‘DirsToCreate’ you can enter the directories you want to create in the S3 bucket that you will be deploying via the uploaded template. Under ‘S3BucketName’, enter a name for your bucket. Once done, click on ‘Next’.

In Step 3, under ‘Configure stack options’, add a tag for your stack and resources to be deployed.
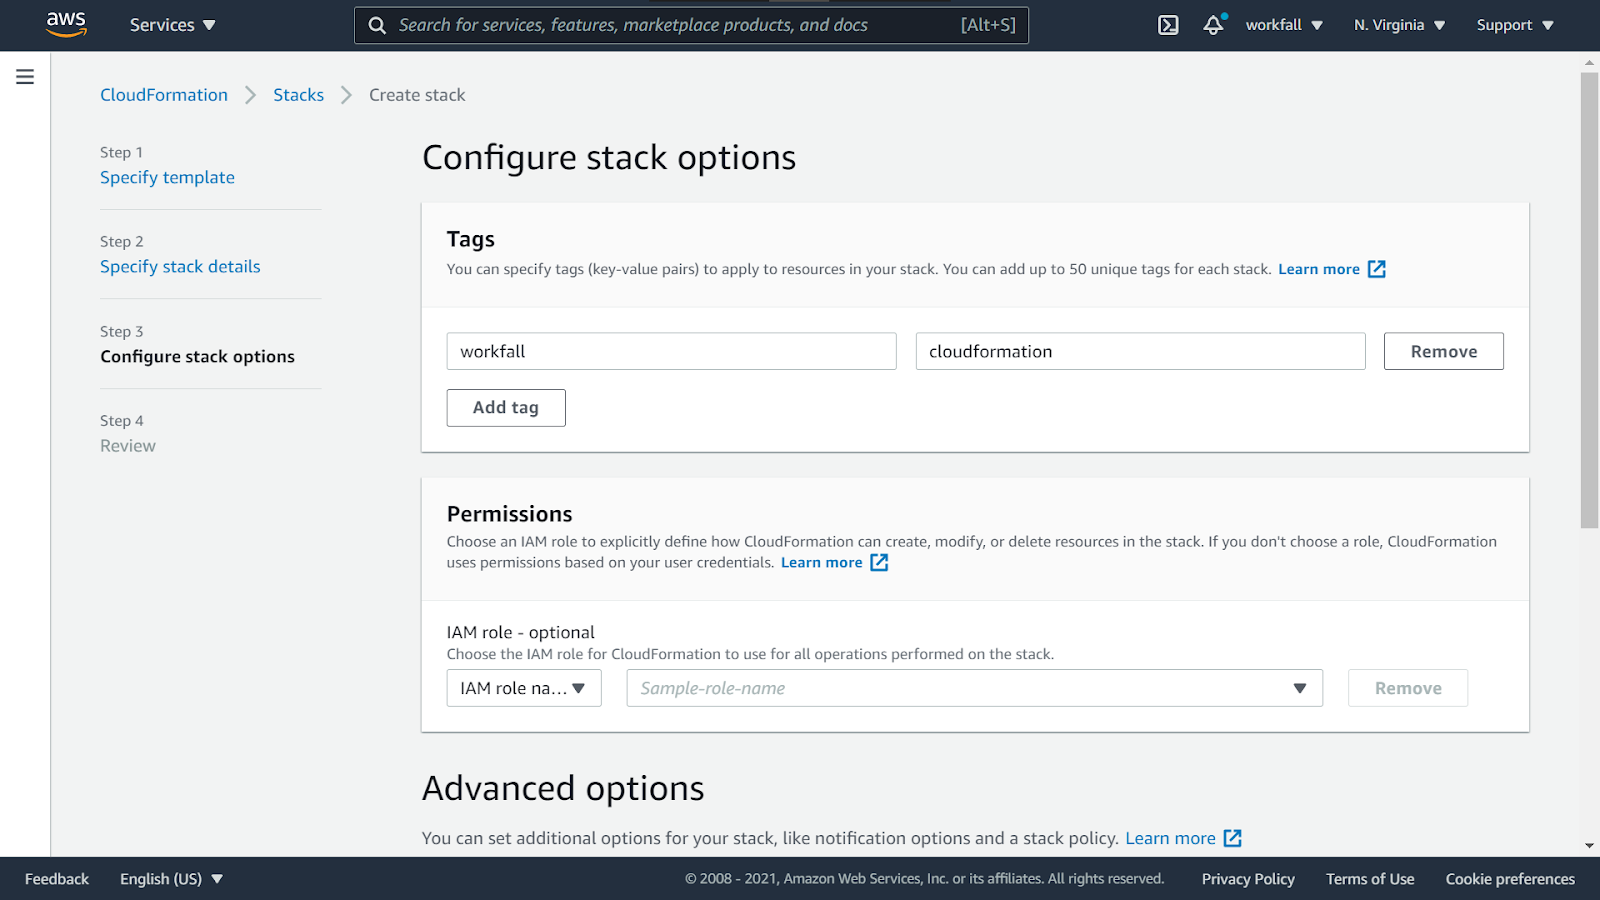
Scroll down to the bottom of the form and click on ‘Next’.
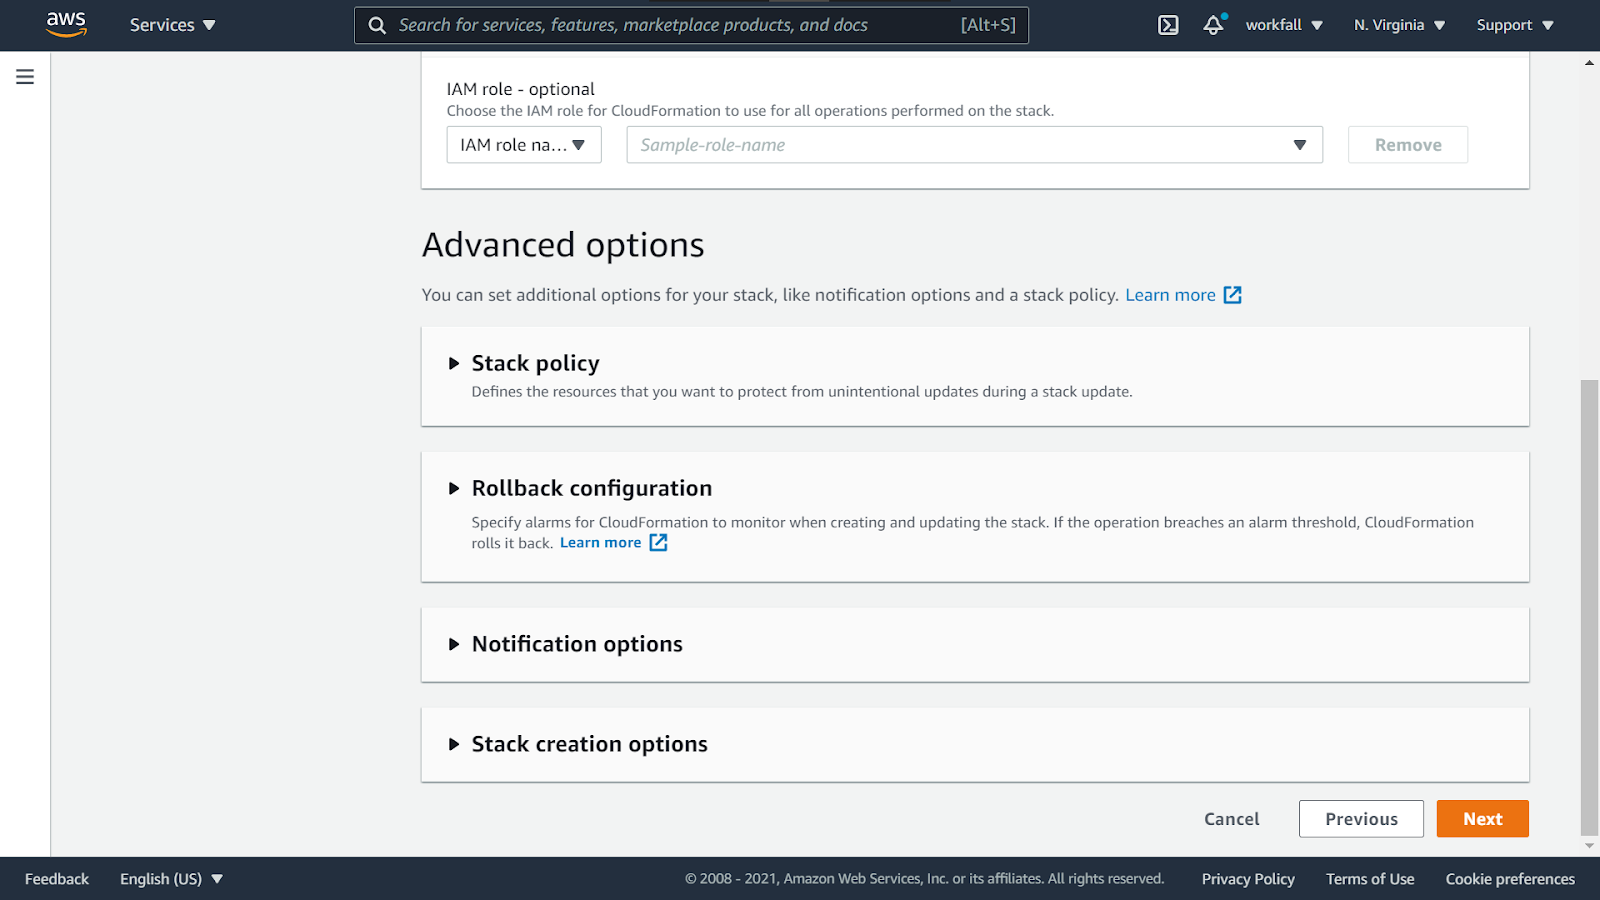
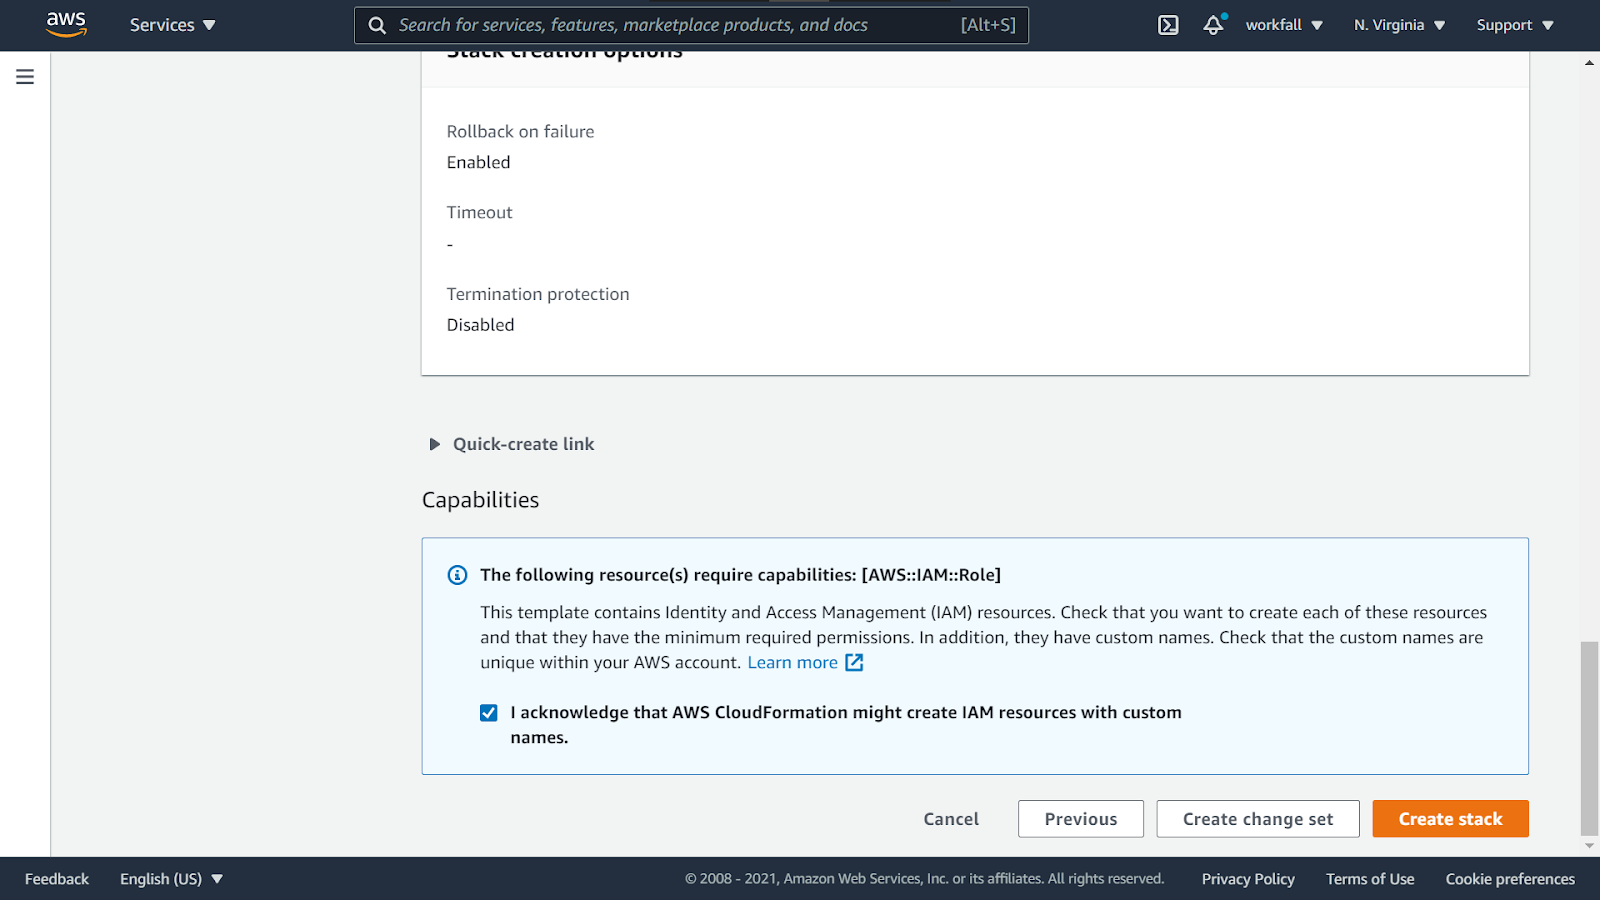
In Step 4, review all the details for your stack.

Once done, scroll down to the bottom and click on ‘Create stack’.
It might take a few minutes for processing and deploy your stack and all the resources in it. Initially, you will see the status as ‘Create_In_Progress’ under the Events tab.

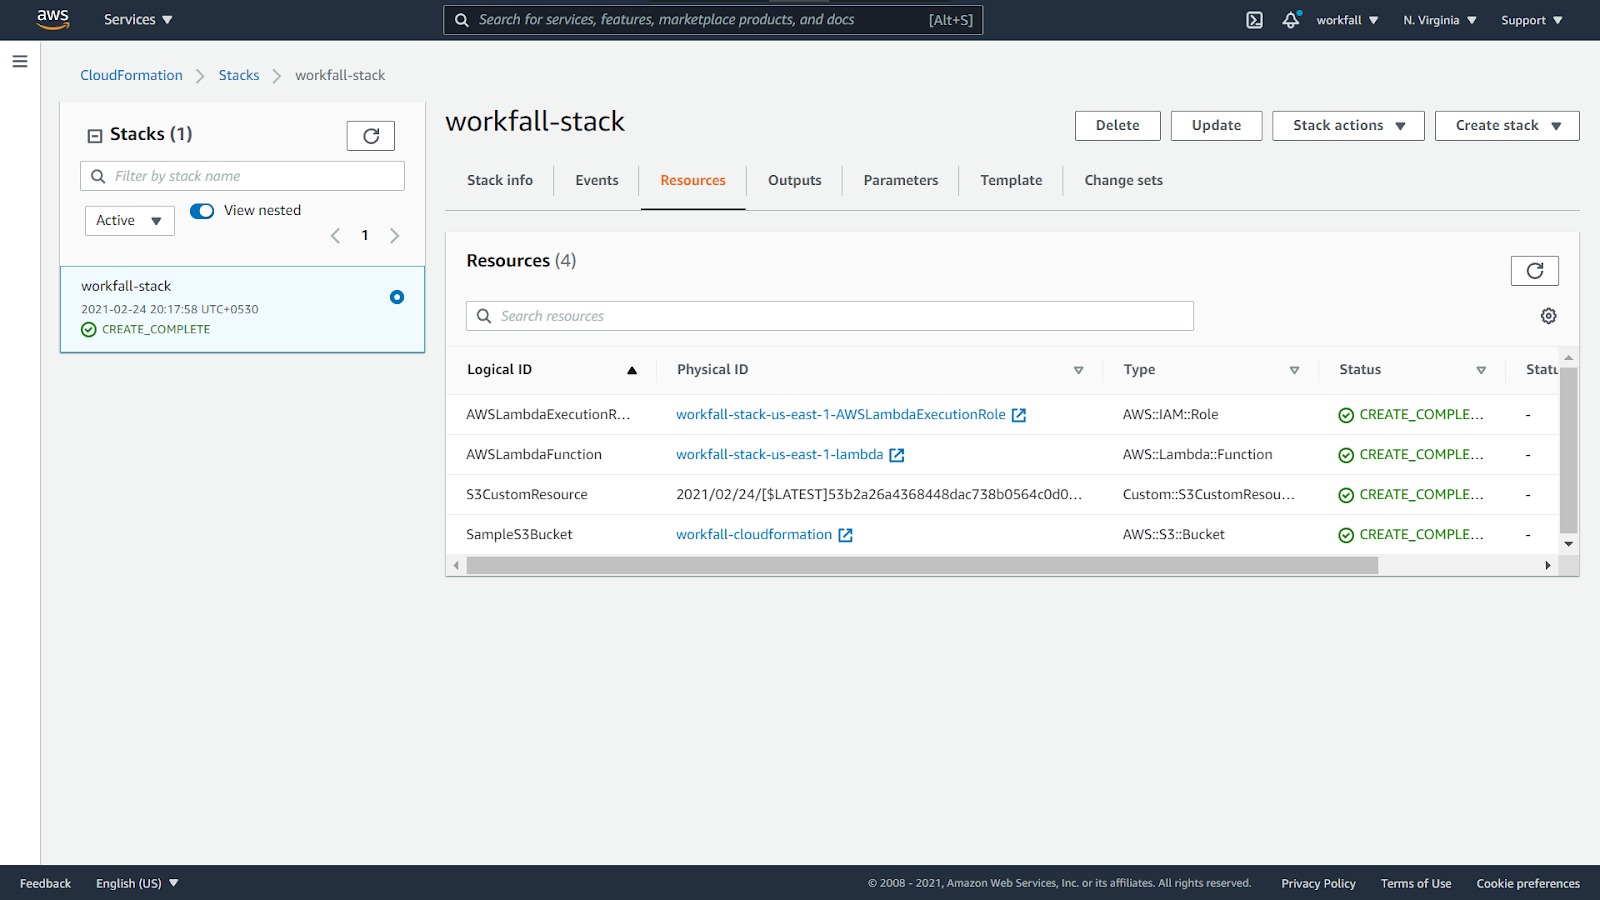
After a few minutes, you will view all the resources along with their statuses that you mentioned in your template and which are to be deployed under the Events tab. Once the stack has been successfully created, click on the ‘Resources’ tab to view the resources deployed.

You will view a list of all the resources you mentioned in your template.json file along with the statuses. Now, if you used the same template as we used for this blog, click on the ‘Physical ID’ of the ‘AWSLambdaExecutionRole’ logical ID.
You will be navigated to the IAM console of AWS. Thus, the creation of a new execution role can be verified.
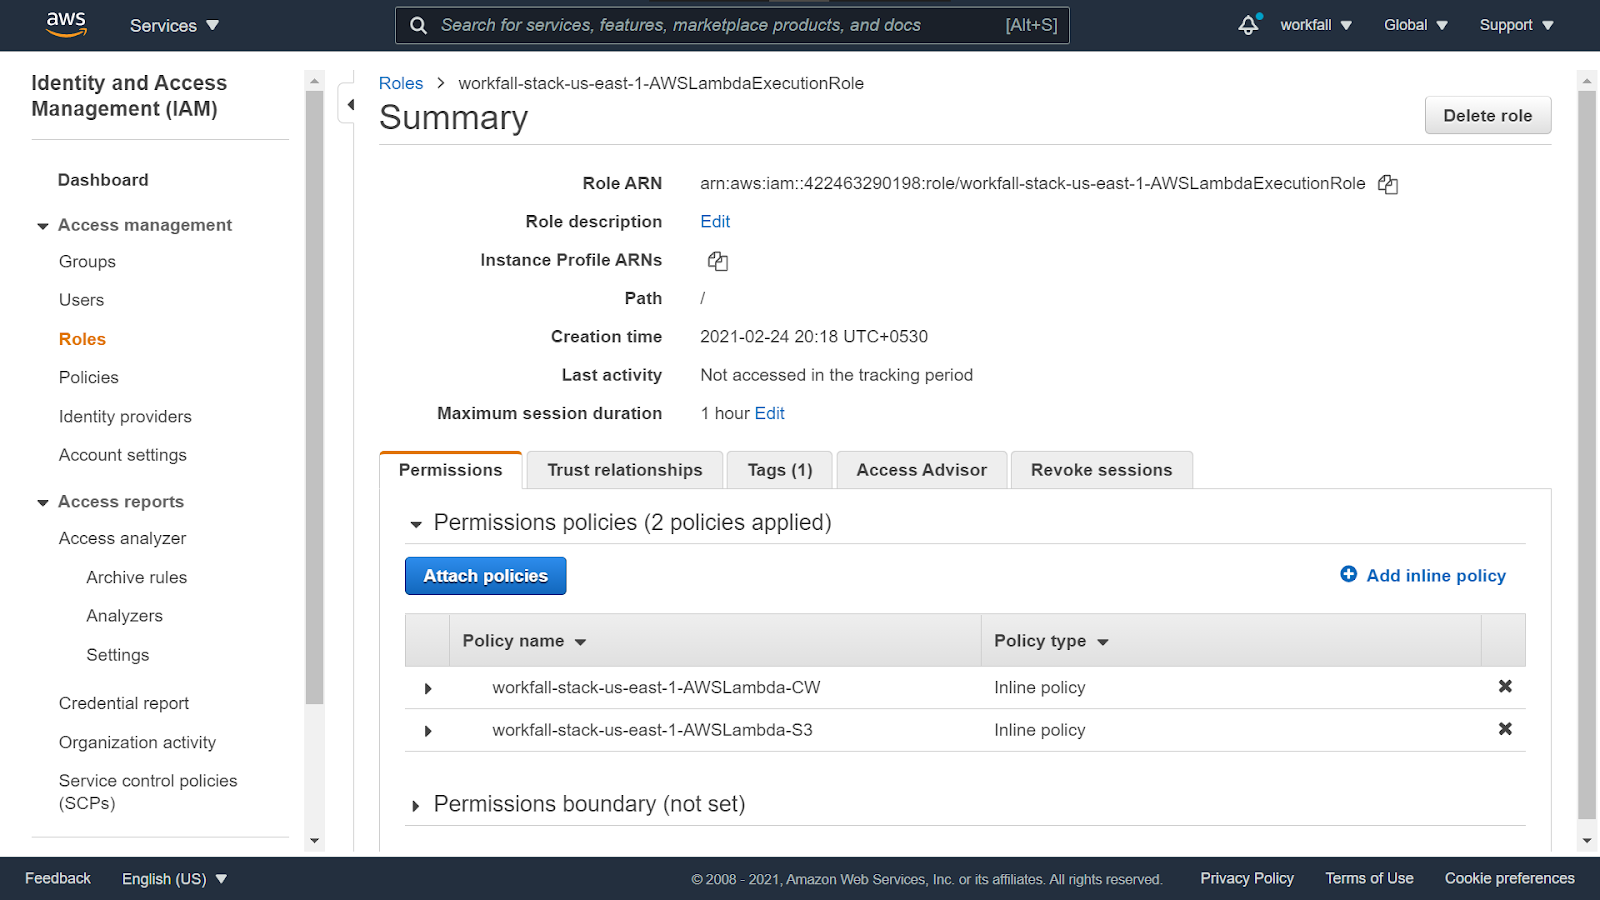
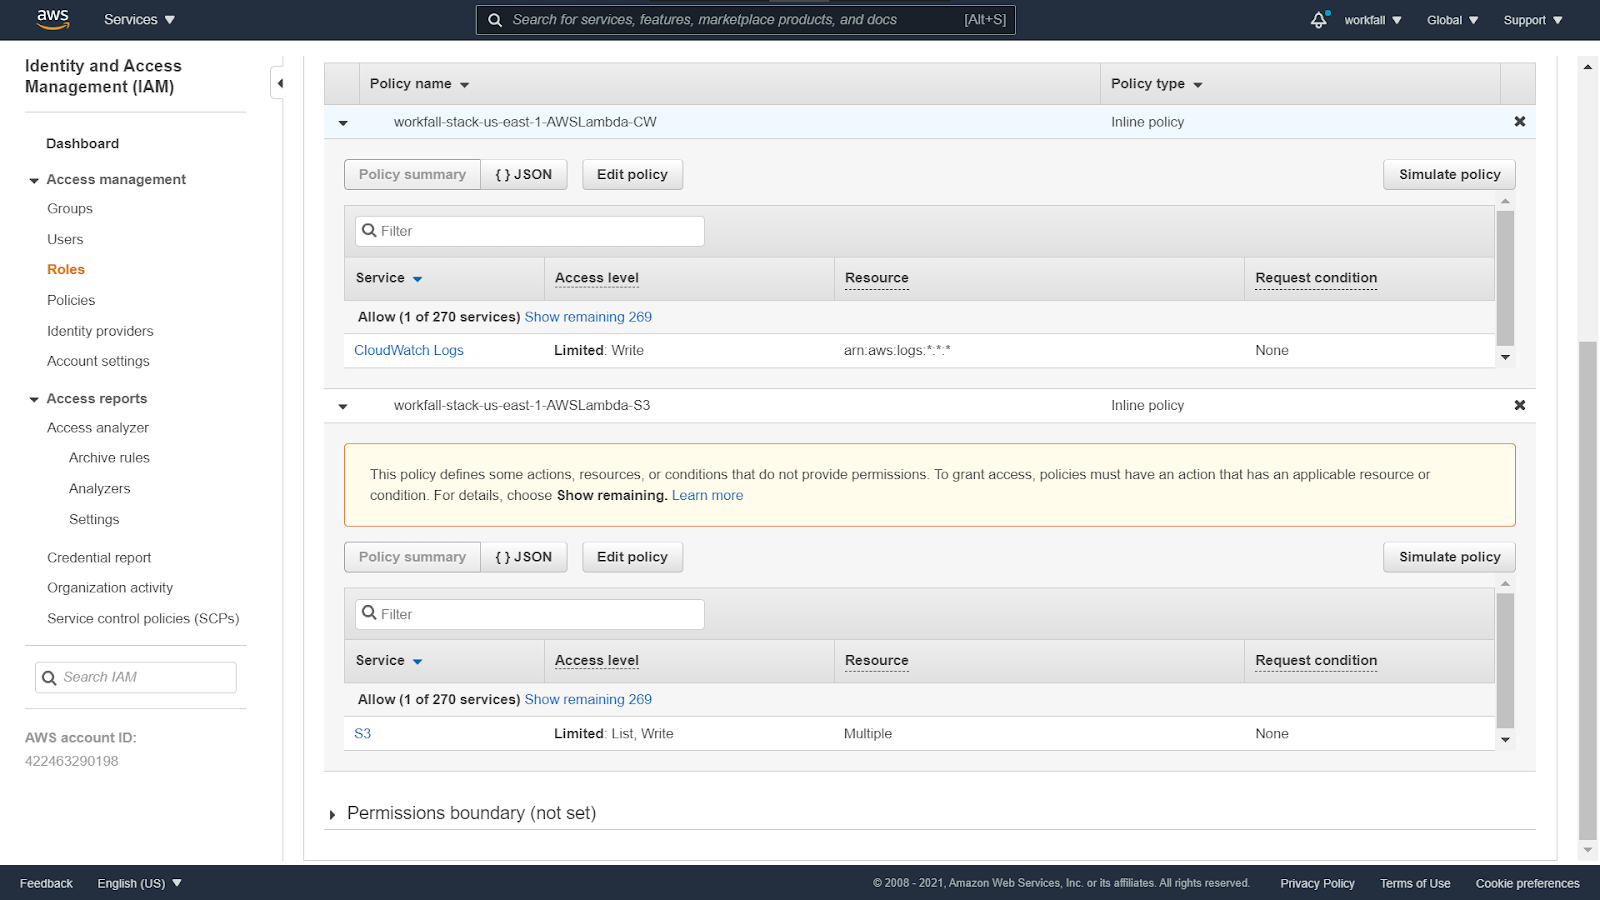
You can view and verify the policies attached by expanding each of the policies attached by clicking on the arrow beside them.
Now, navigate back to the CloudFormation stack dashboard to view the other resources.
Click on the ‘Physical ID’ for the deployed Lambda function and you will be navigated to the Lambda dashboard inside the function deployed. Thus, the creation of the Lambda function can be verified.

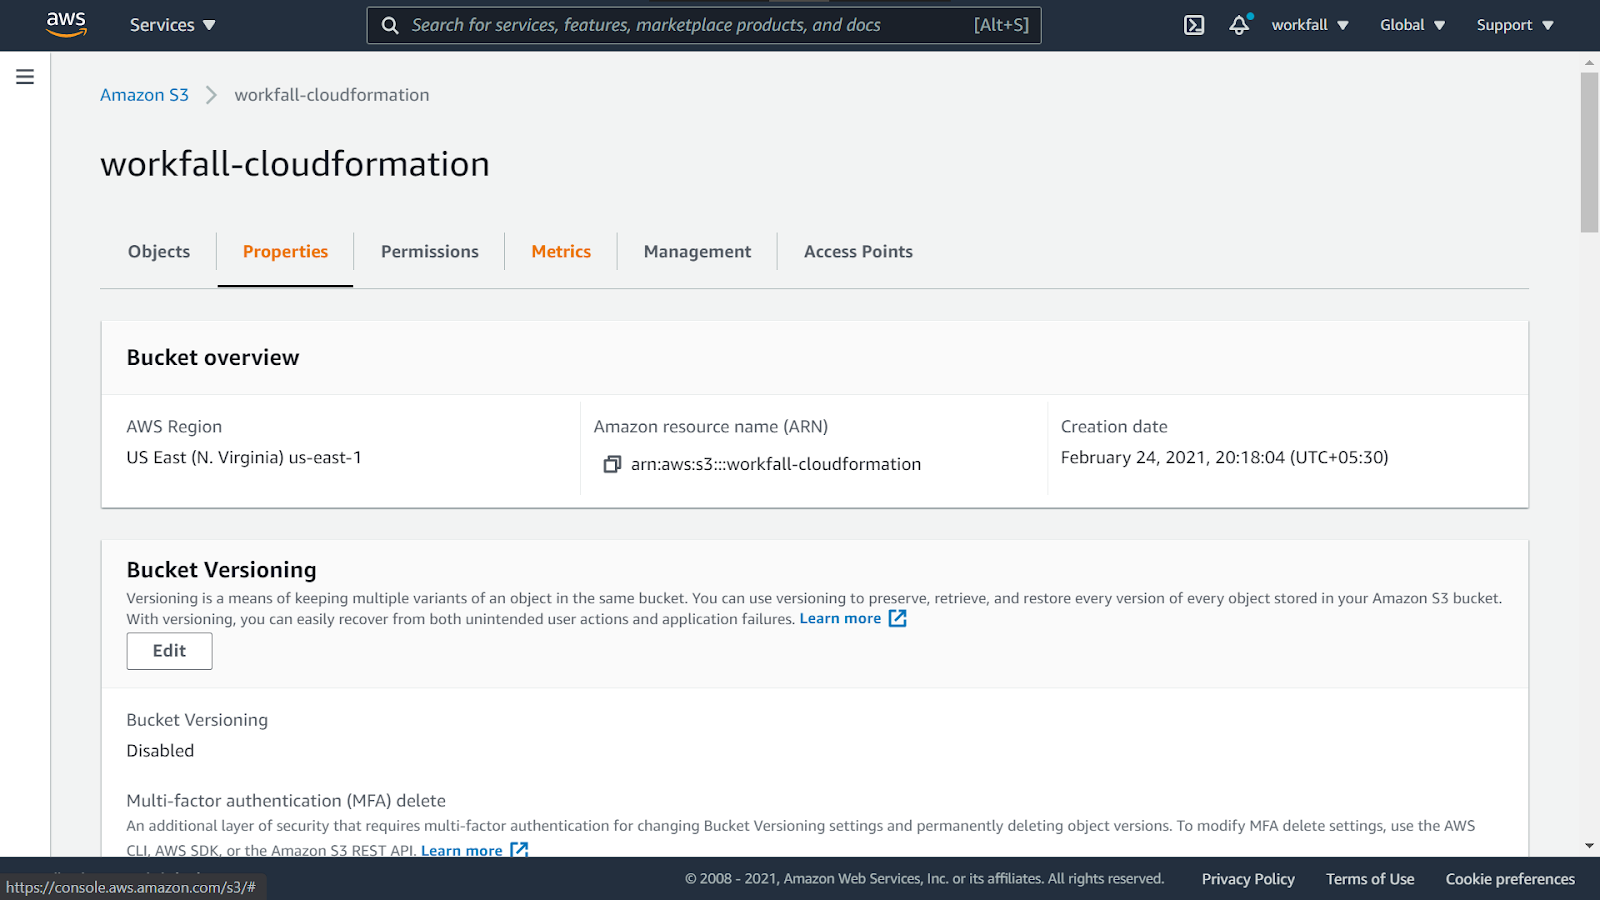
Navigate back to the CloudFormation stack dashboard and lastly click on the deployed S3 bucket to verify its creation.
You will be navigated to the S3 console on AWS. If you remember, we created two directories above to be created inside our S3 bucket. You can view the two directories we mentioned above in the image below in our newly created S3 bucket.

Click on the ‘Properties’ tab and verify the Creation date for your bucket.
Scroll down and you will see the tag you added above while creating the stack under the ‘Tags’ section.

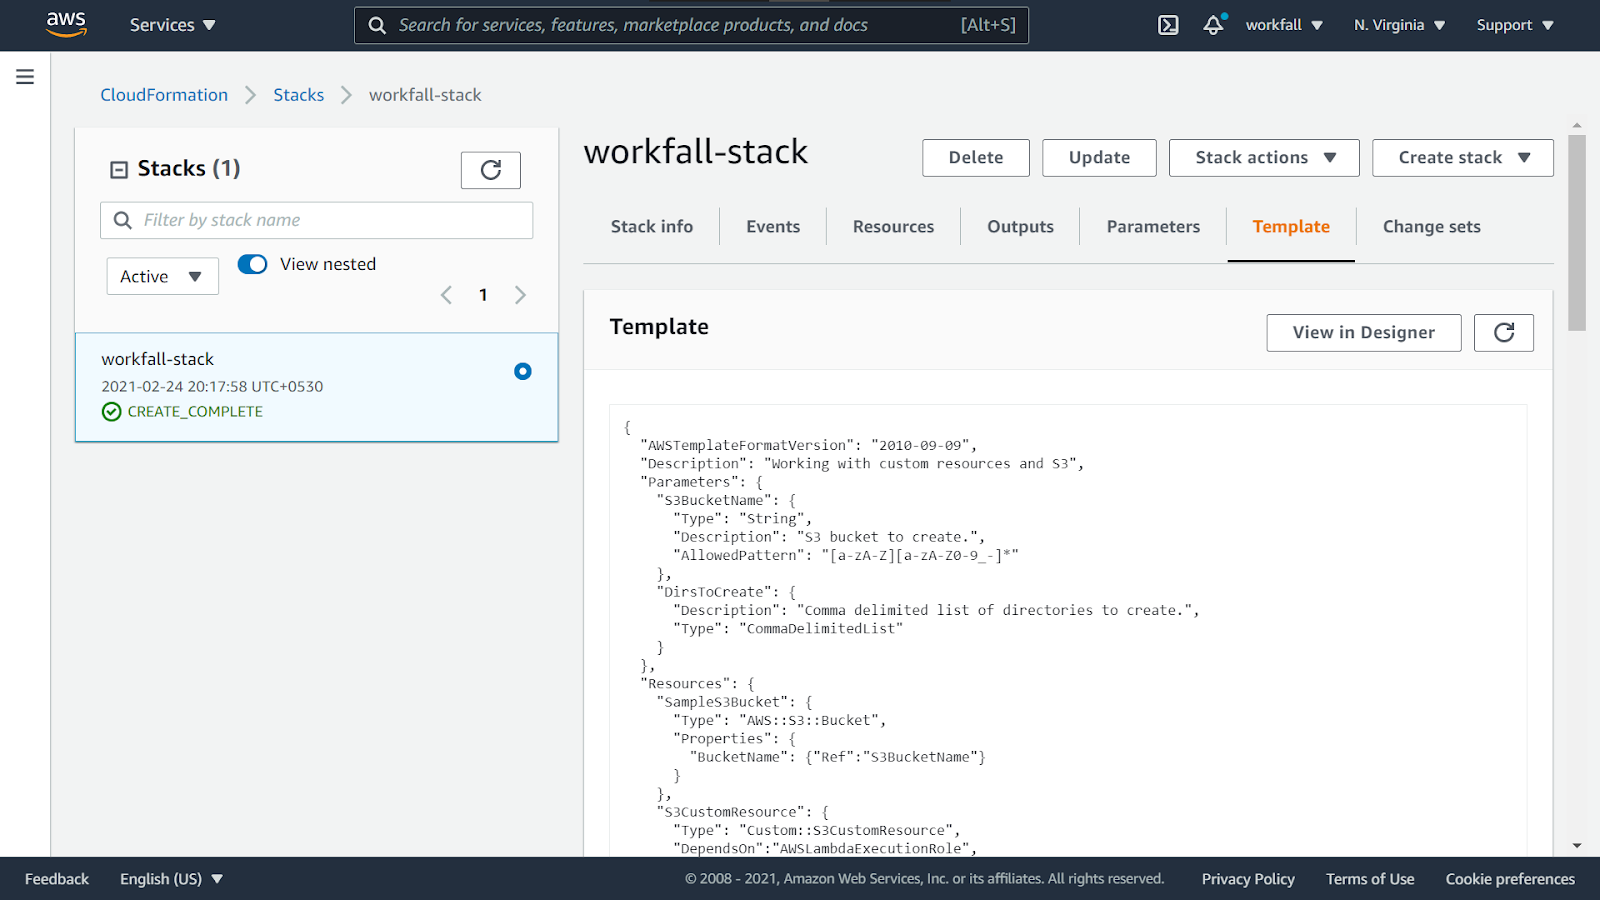
To view your template in designer, navigate back to the CloudFormation dashboard and click on the ‘Template’ tab. Over there, you will see an option ‘View in Designer’ so you can click on that and view the same.
To update the stack you just deployed, you can click on ‘Update’ on the stack dashboard. You will see that there are three options to do so. Based on your preference, you can select one and proceed to update your existing template following the same configuration stacks as above.

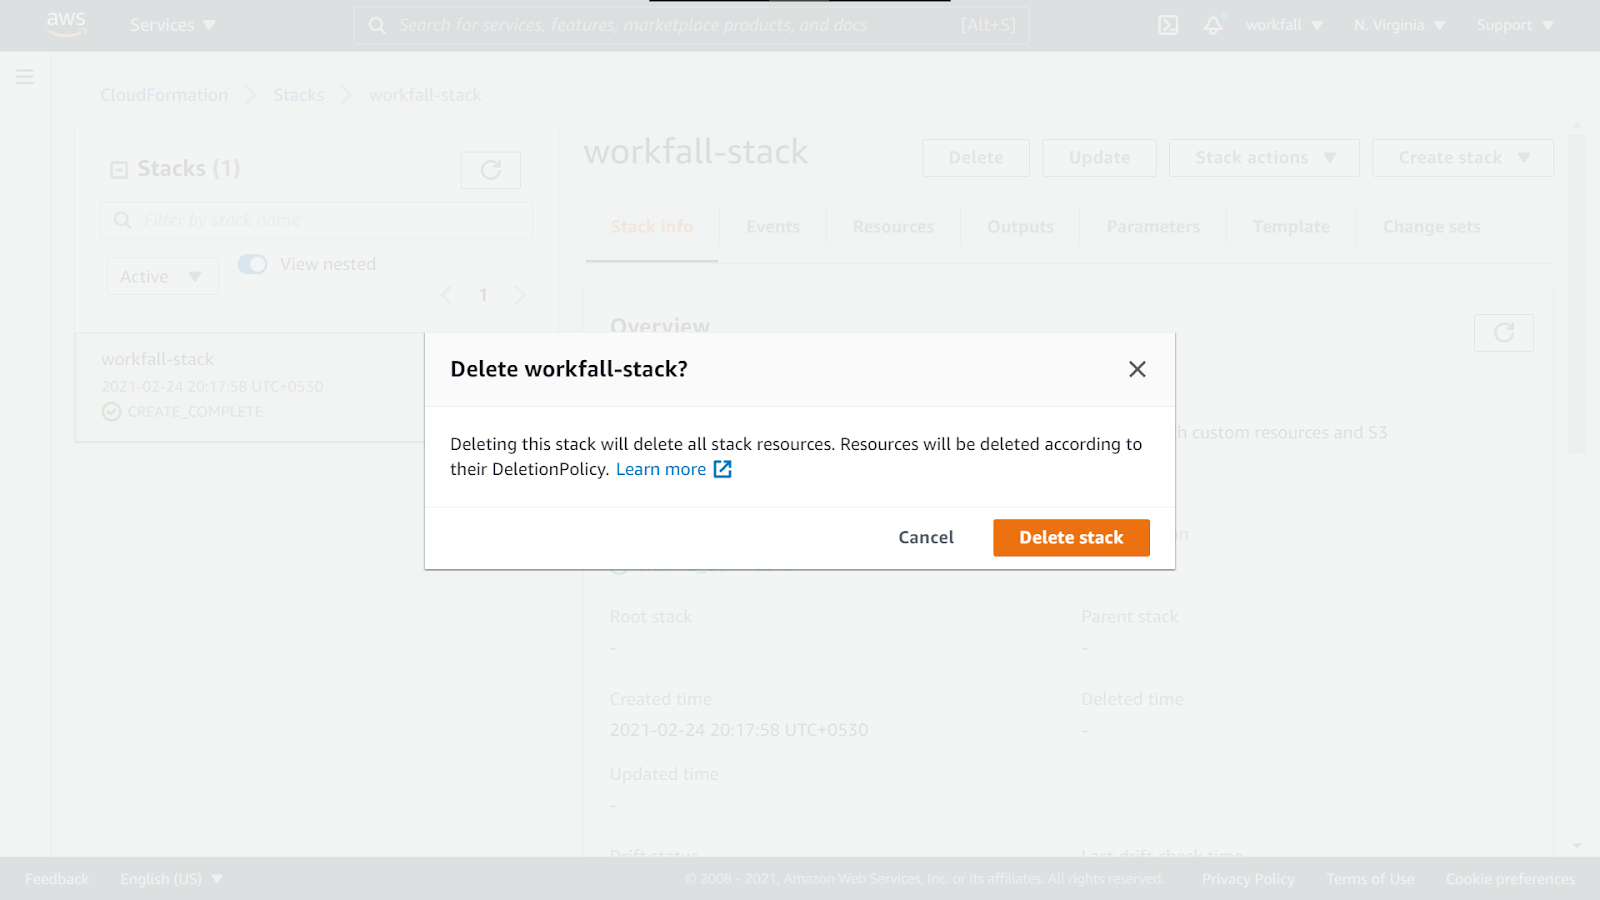
Now, navigate back to the stack dashboard. Remember that deleting the stack, will delete all the resources you mentioned in the template that you used while creating the stack. Click on ‘Delete’ to delete the stack and the resources deployed.
A modal will appear to confirm the action to be performed. Click on ‘Delete Stack’ to confirm the action.
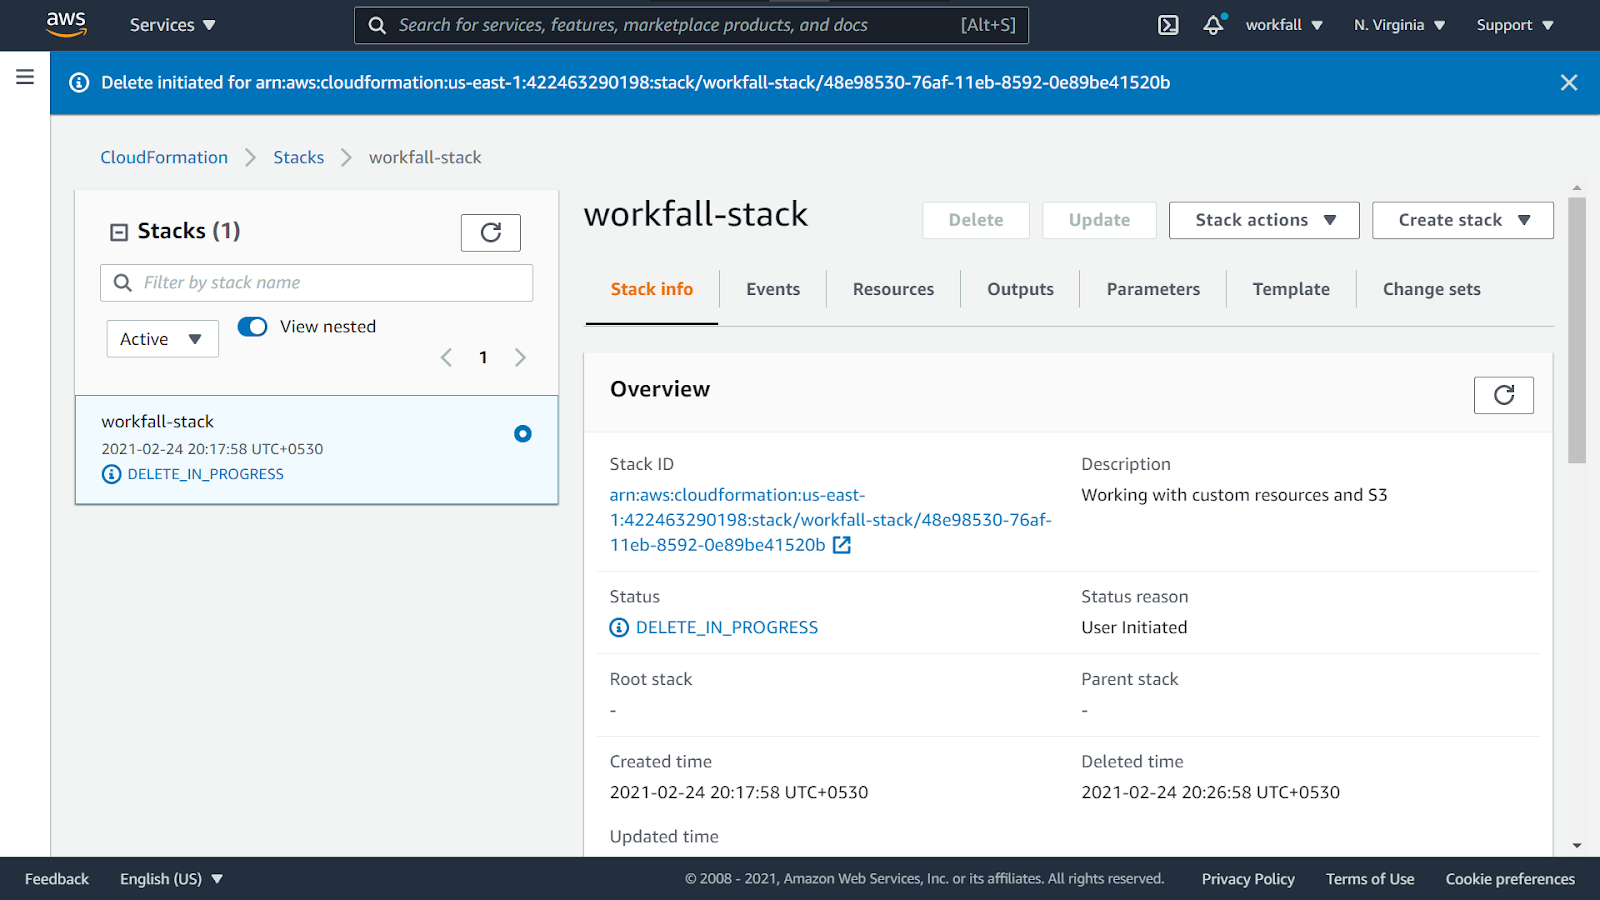
It might take a few minutes for deleting the entire stack and for deleting all the resources deployed. Initially, you will see the status for the stack under the ‘Stack Info’ tab as ‘Delete_In_Progress’ along with the other stack details.
After a few minutes, click on the ‘Resources’ tab and you will see that all the resources deployed were successfully deleted as well as the stack and the status for the same will change to ‘Delete_Completed’.

CloudFormation Vs. Terraform
The most reliable way to automate creating, updating, and deleting your cloud resources is to describe the target state of your infrastructure and use a tool to apply it to the current state of your infrastructure. In our previous blog, we discussed Terraform and in this blog, we discussed ClodFormation as an IaC tool. Both are powerful cloud infrastructure management tools.
Now, definitely questions will be in your mind like which one is better? When to use what? The answer is very simple! If you’re already on AWS and using all AWS tools, CloudFormation may be more convenient. However, if you’re looking for additional flexibility from a cloud-agnostic platform that integrates with AWS services, Terraform might be of greater utility for your organization. It’s important to not only look at what is working currently – but what the future state of any infrastructure might be.
There are long-term benefits with both toolsets, and the final decision may come down to simple usability and developer comfort. Whichever choice you make, using either of these, you have to be assured that AWS infrastructure is sure to increase productivity, portability, and efficiency!
Conclusion
In this blog, we explored how we can make use of AWS CloudFormation templates to create resources thereby eliminating the need of using the console to create the resources. We will discuss more AWS CloudFormation and how it can be used to ease the task of creating and managing all the created resources in just one place in our upcoming blogs. Stay tuned to keep getting all updates about our upcoming new blogs on AWS and relevant technologies.
Meanwhile …
Keep Exploring -> Keep Learning -> Keep Mastering
This blog is part of our effort towards building a knowledgeable and kick-ass tech community. At Workfall, we strive to provide the best tech and pay opportunities to AWS-certified talents. If you’re looking to work with global clients, build kick-ass products while making big bucks doing so, give it a shot at workfall.com/partner today.