To know about what’s new in Amazon Redshift Serverless, refer to Part 1 of the blog here:
What’s new in Amazon Redshift – Serverless?
Hands-on
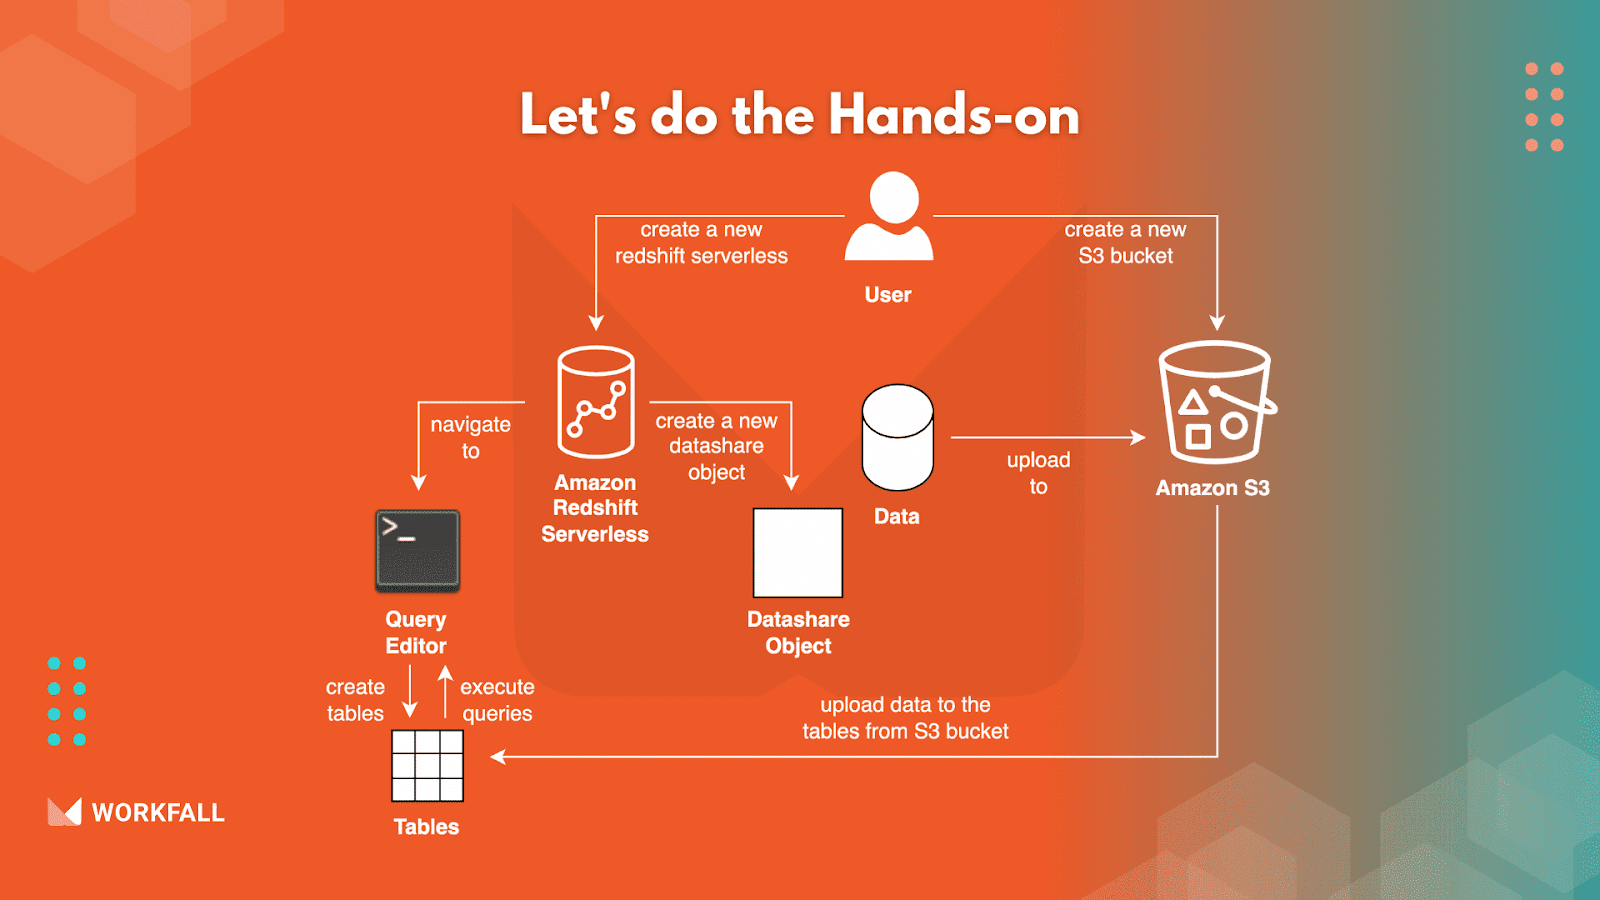
In this hands-on, we will see how we can analyze data and run the different queries using Amazon Redshift Serverless without the need of managing the infrastructure using the Serverless capabilities.
We will first login to the AWS console and navigate to the dashboard.
Changing the region we will navigate to the Amazon S3 bucket Service and create a new bucket. We will then create a new workgroup traversing to the Amazon Redshift Serverless dashboard.
While configuring the Redshift serverless, we will create a new IAM role for the newly created bucket to be able to access it. After the successful setup, and opening up the query editor, we will run the different queries to create the tables.
We will then download the sample data and unzip the files, we will upload the files in the newly created S3 bucket. Once done, we will move the data in the newly created tables via the query editor running the different commands.
We will then start with executing a basic query to check if the data has been successfully moved in the tables. Post that, we will run a complex query to get the required data.
Finally, testing out the query editor and the data is retrieved, we will then explore the namespace configuration dashboard to look at how we can enable encryption, create data backups, create datashare objects, etc.
Exploring the dashboard, we will then create a datashare object selecting the tables whose data can be shareable.
To implement the same, we will do the following:
- Log in to the AWS console and navigate to the dashboard.
- Change the region to be able to use Amazon Redshift Serverless.
- Navigate to the Amazon S3 dashboard and create a new bucket.
- Traverse to the Amazon Redshift dashboard and create a Redshift Serverless with the shown configurations.
- Create a new IAM role for the Redshift Serverless selecting the newly created S3 bucket.
- Navigate to the Query editor to create tables, add data, and run queries.
- Run the different table creation queries to create the tables.
- Download the sample data and upload the data to the S3 bucket.
- Copy the data from the S3 bucket to the newly created tables using the copy command in the query editor.
- Traverse to the table via the file structure and run select queries to check if the newly created tables have the data that we copied from the S3 bucket.
- Run the shown query in hands-on to test out the output of a complex query.
- Explore the namespace configuration dashboard to see how we can add security, encryption, configure data backups, create datashare objects, etc.
- Navigating to the Datashare object, we will then create a new datashare object selecting the tables that can have the data that can be shared.
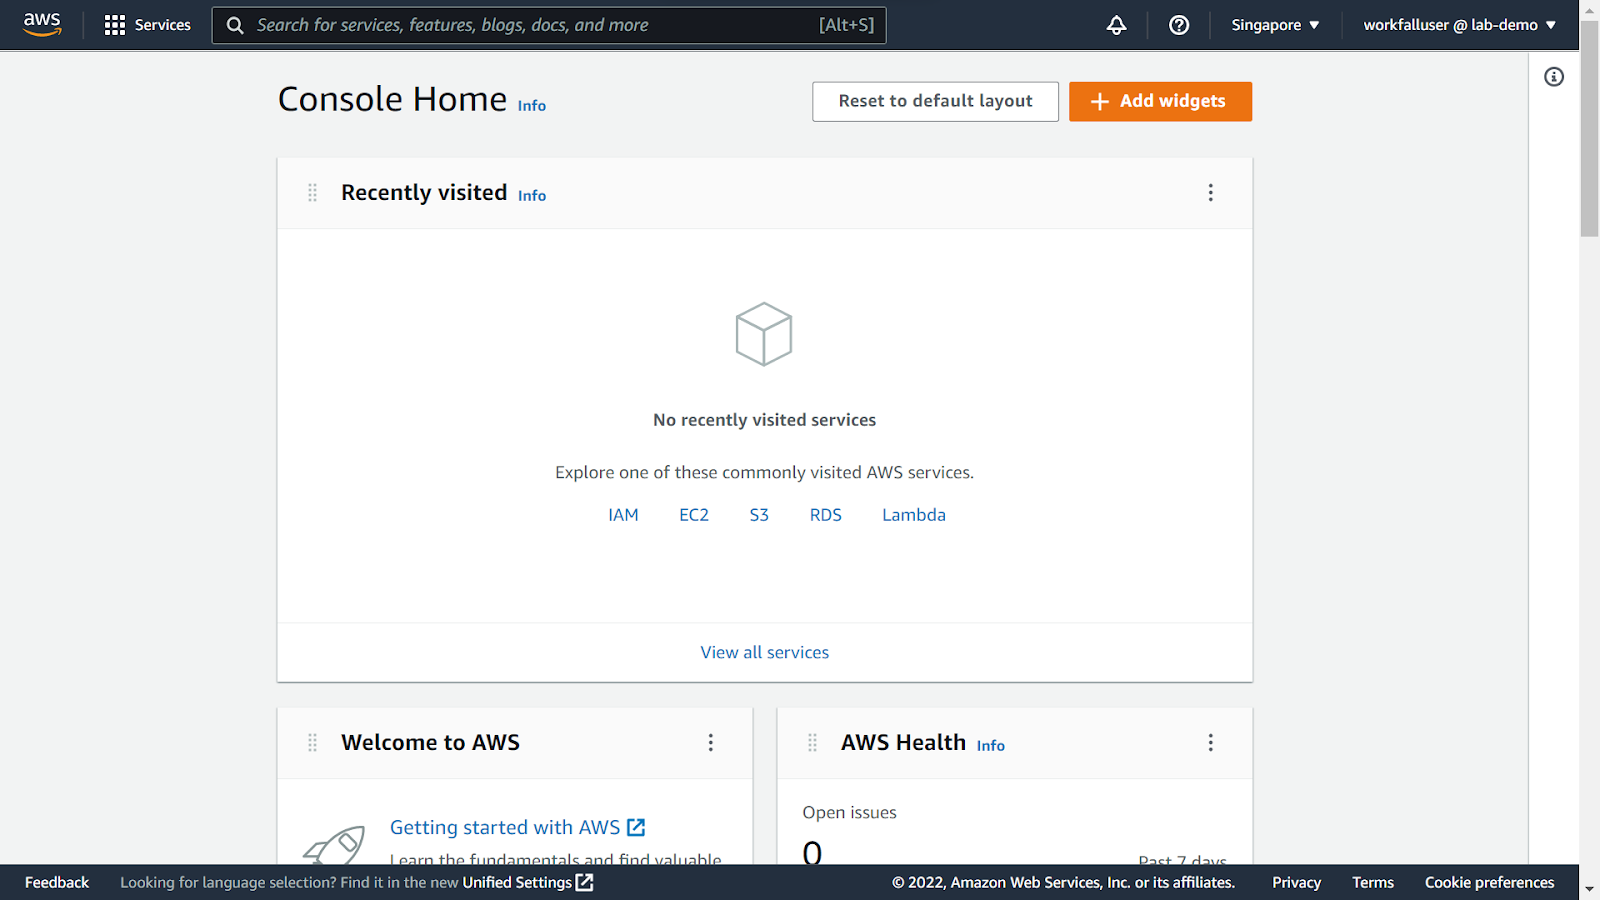
Log in to the AWS console and navigate to the dashboard.
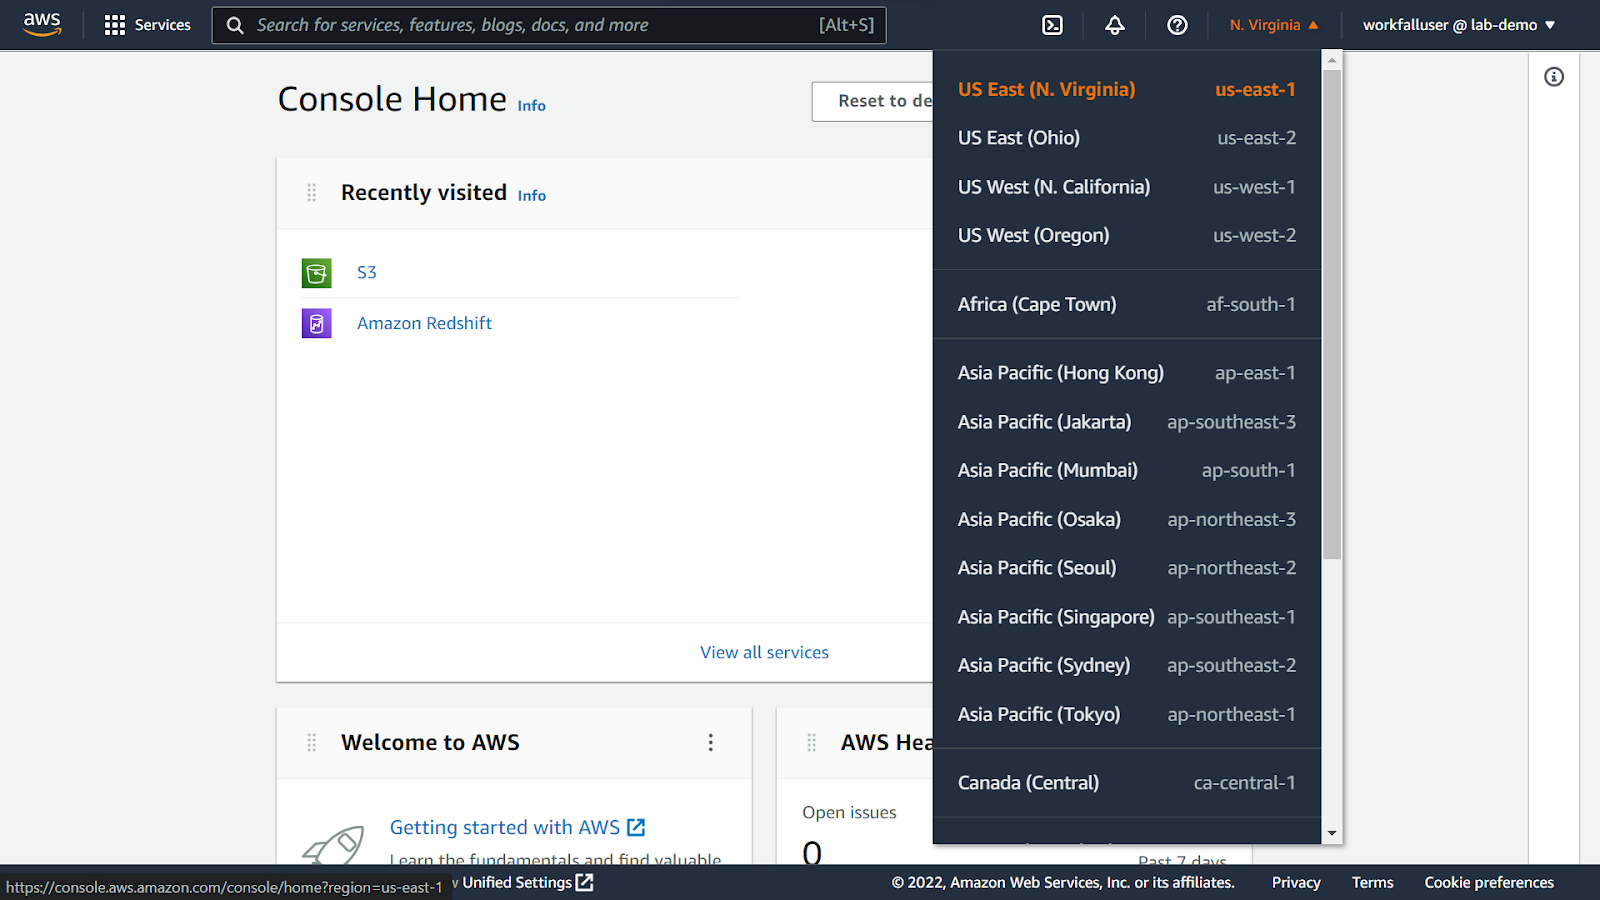
Before proceeding with the implementation, we need to change the region since Redshift Serverless is only available in some regions.
Once done, search for the S3 service.

On the S3 dashboard, click on Create bucket.

Enter a name for the bucket and select the AWS region.

Keep the box checked for blocking all public access.

Leave the other settings as default.

Click on Create bucket scrolling to the bottom.

On success, you will see the screen as shown in the image below.

Now, search for the service Amazon Redshift.

You will then be navigated to the Amazon Redshift dashboard.

In the left navigation pane, select Redshift Serverless.

Select use default settings for the demo purpose.

Leave the namespace configuration as default.

Come to the Associated IAM roles section and click on Manage IAM roles.

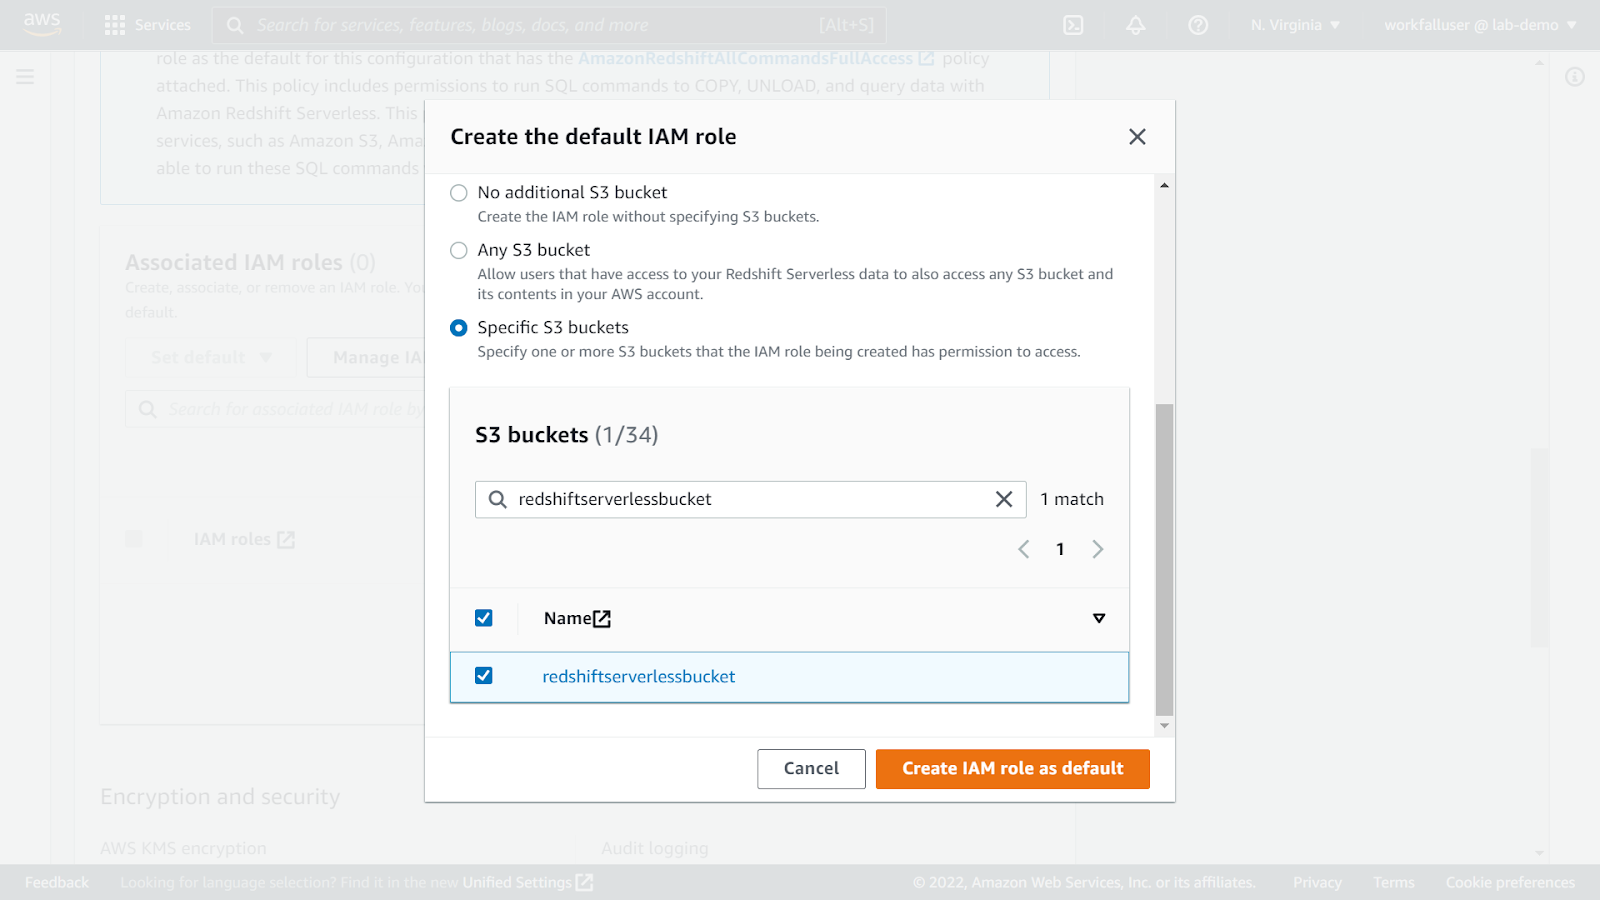
Select Create IAM role.

Select a specific S3 bucket option and select the bucket that we created above. Click on Create IAM role as default.
On success, you will see the new role in the list as shown in the image below.

Navigate to the bottom and click on save the configuration.
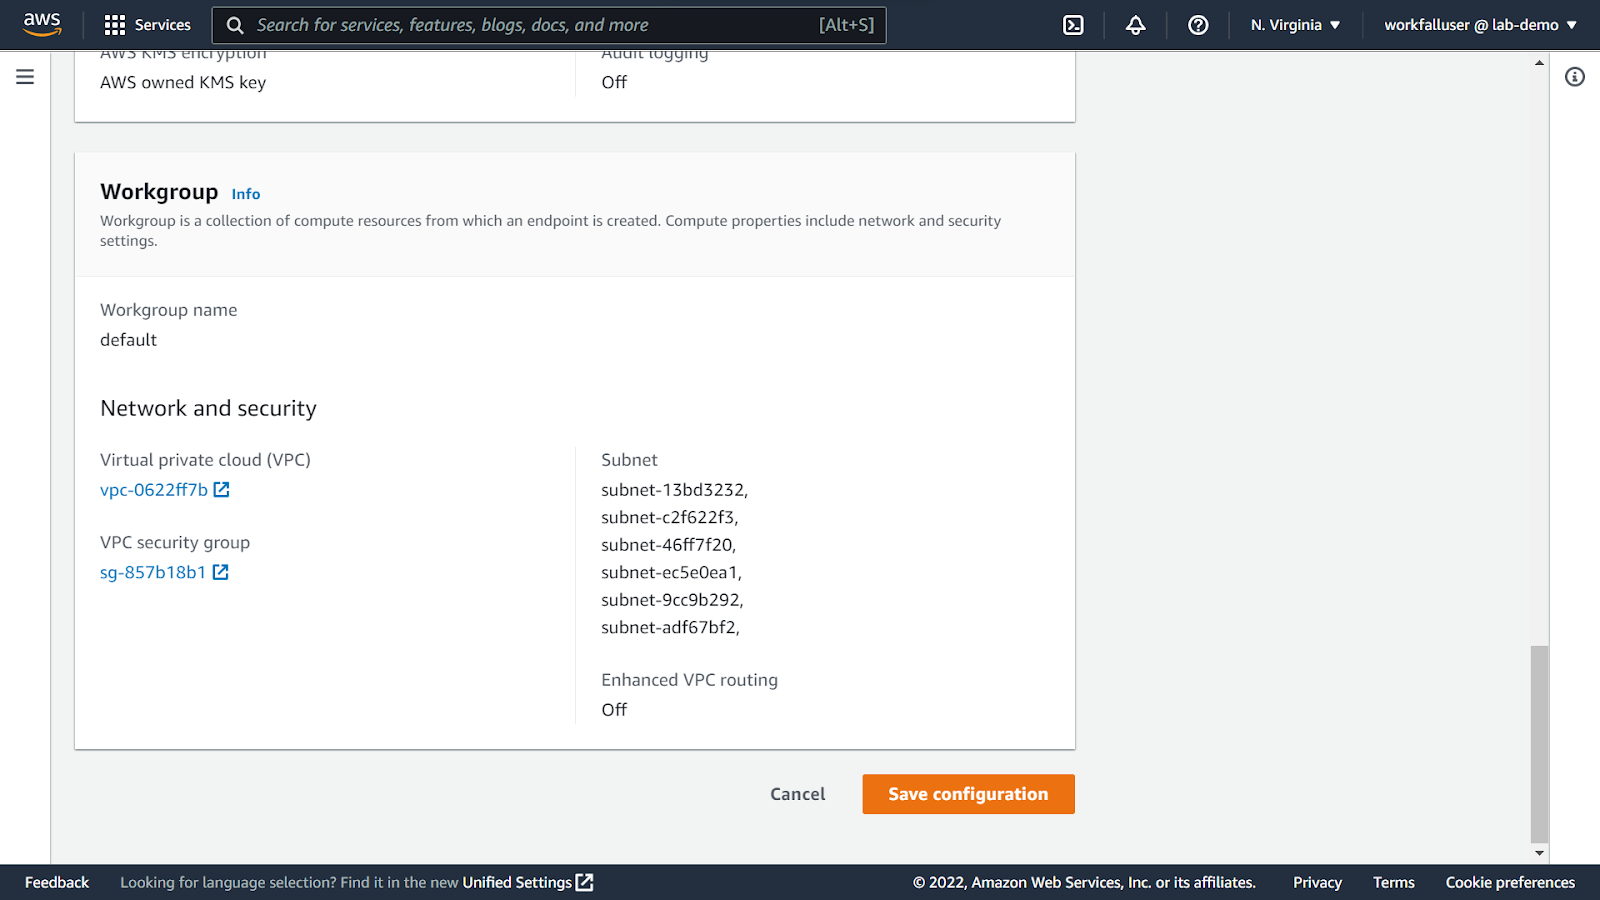
The setup might take a few minutes and you can know the progress by looking at the progress bar.

On completion, click on Continue.

On success, you will see the screen as shown in the image below. Now, click on Query data.

You will then be navigated to the query editor window.

We will be using the default data provided by aws. Navigate to the below link to get the schema creation query for the demo data.
https://docs.aws.amazon.com/redshift/latest/gsg/rs-gsg-create-sample-db.html
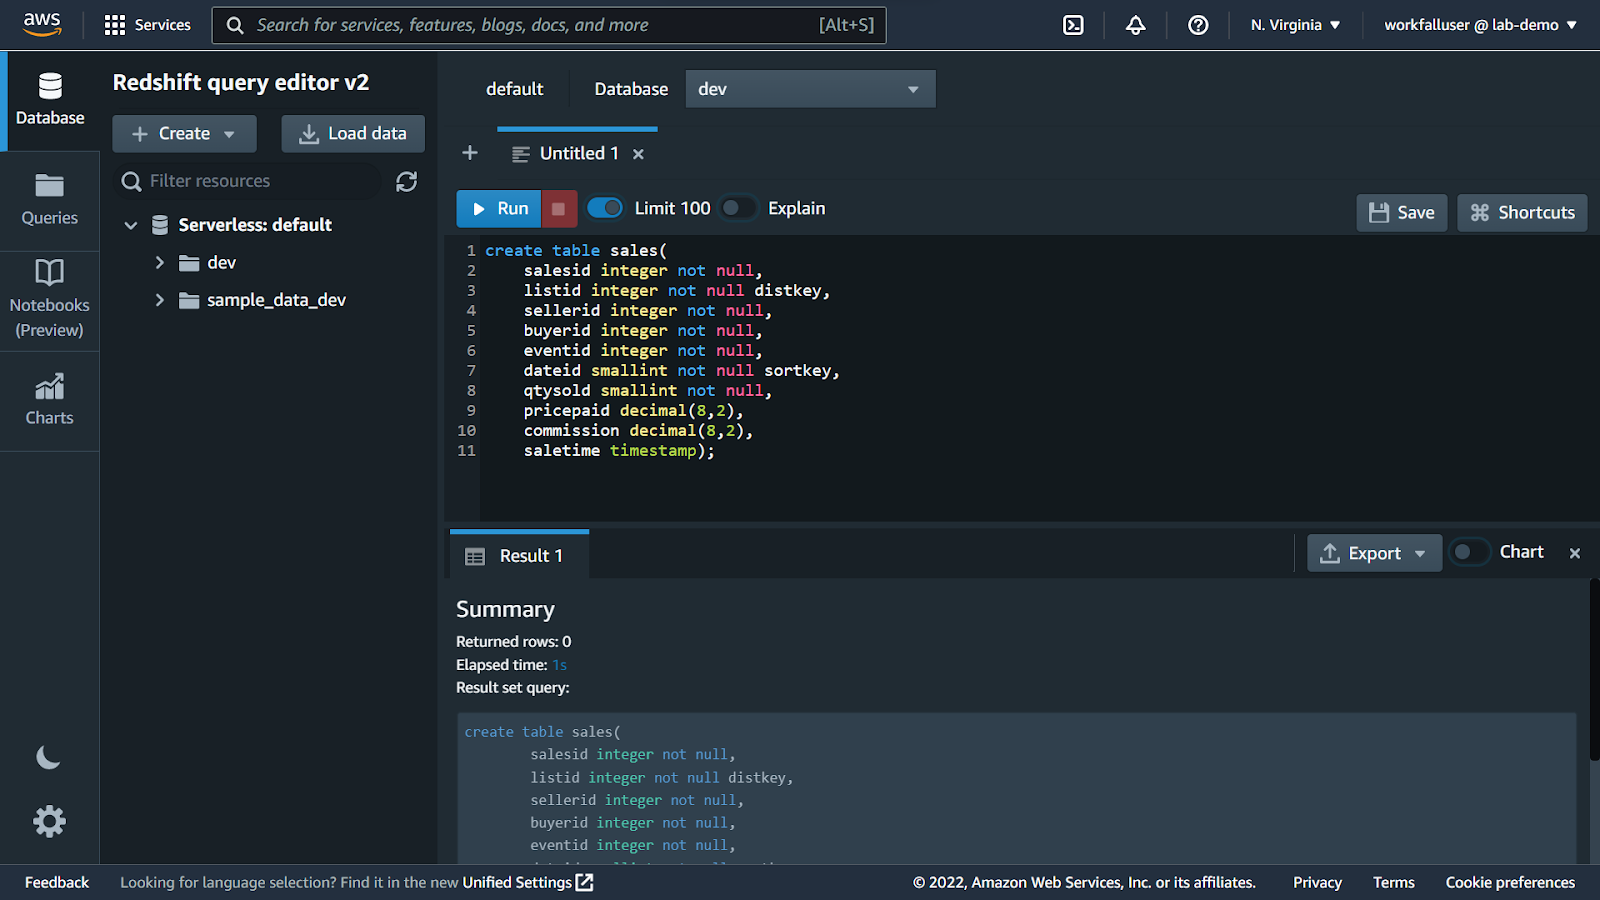
Copy the user’s schema creation query and paste it into the editor. Click on run.
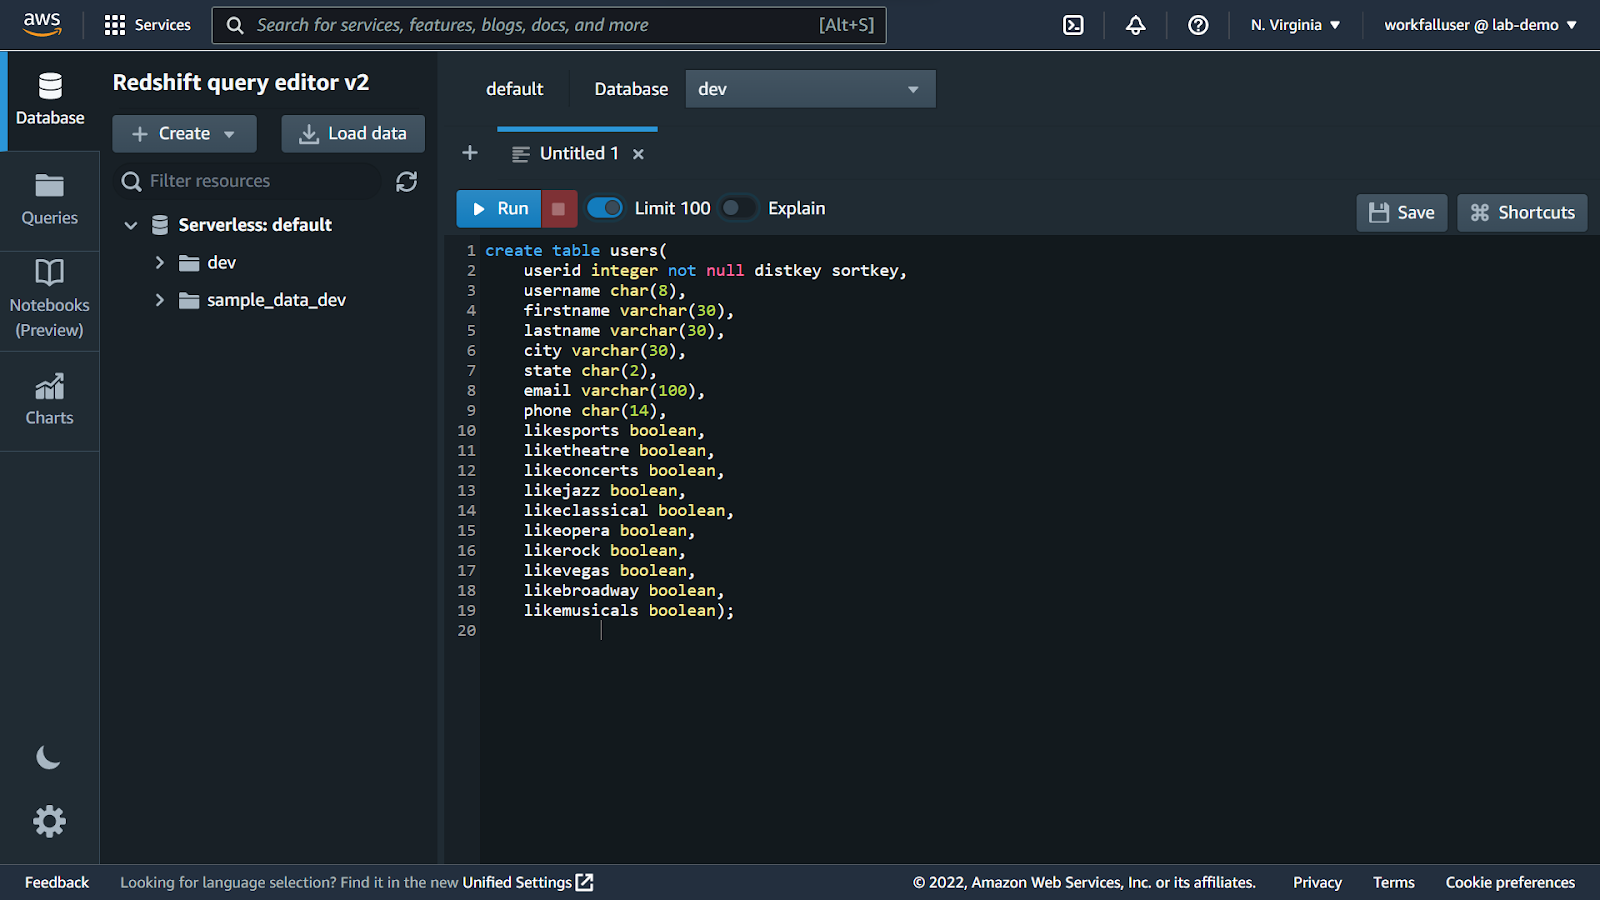
On success, you will see the screen as shown below.

Copy and run the venue schema.

Similarly, copy and run the query for the category table.

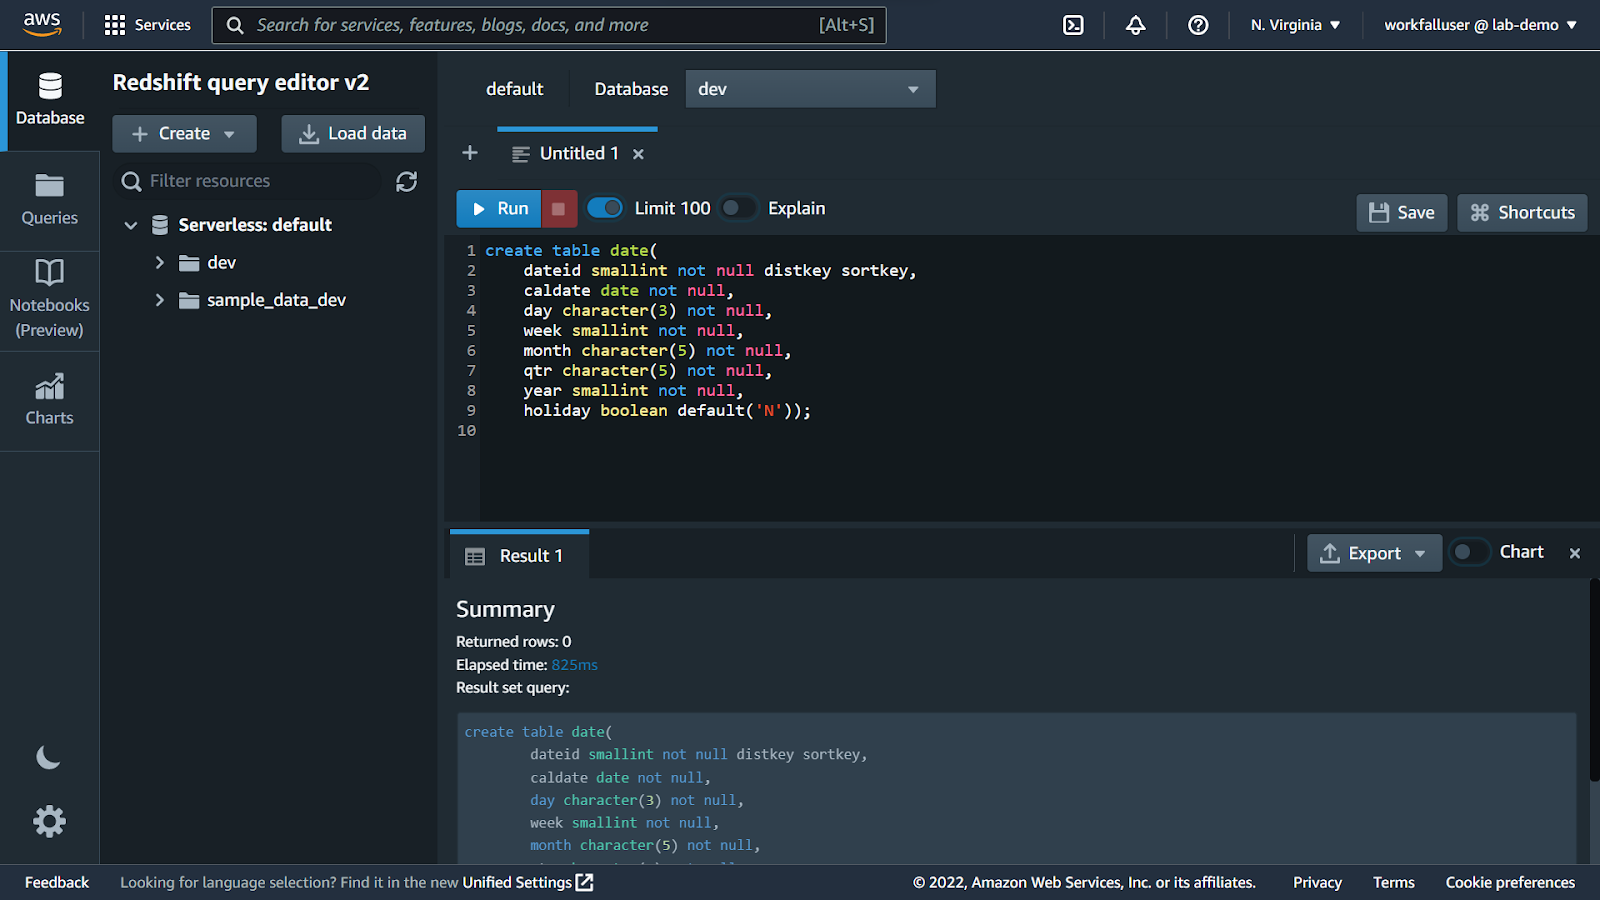
Then, run the table creation query for the date.
Followed by that, we will run the table creation query for the event.

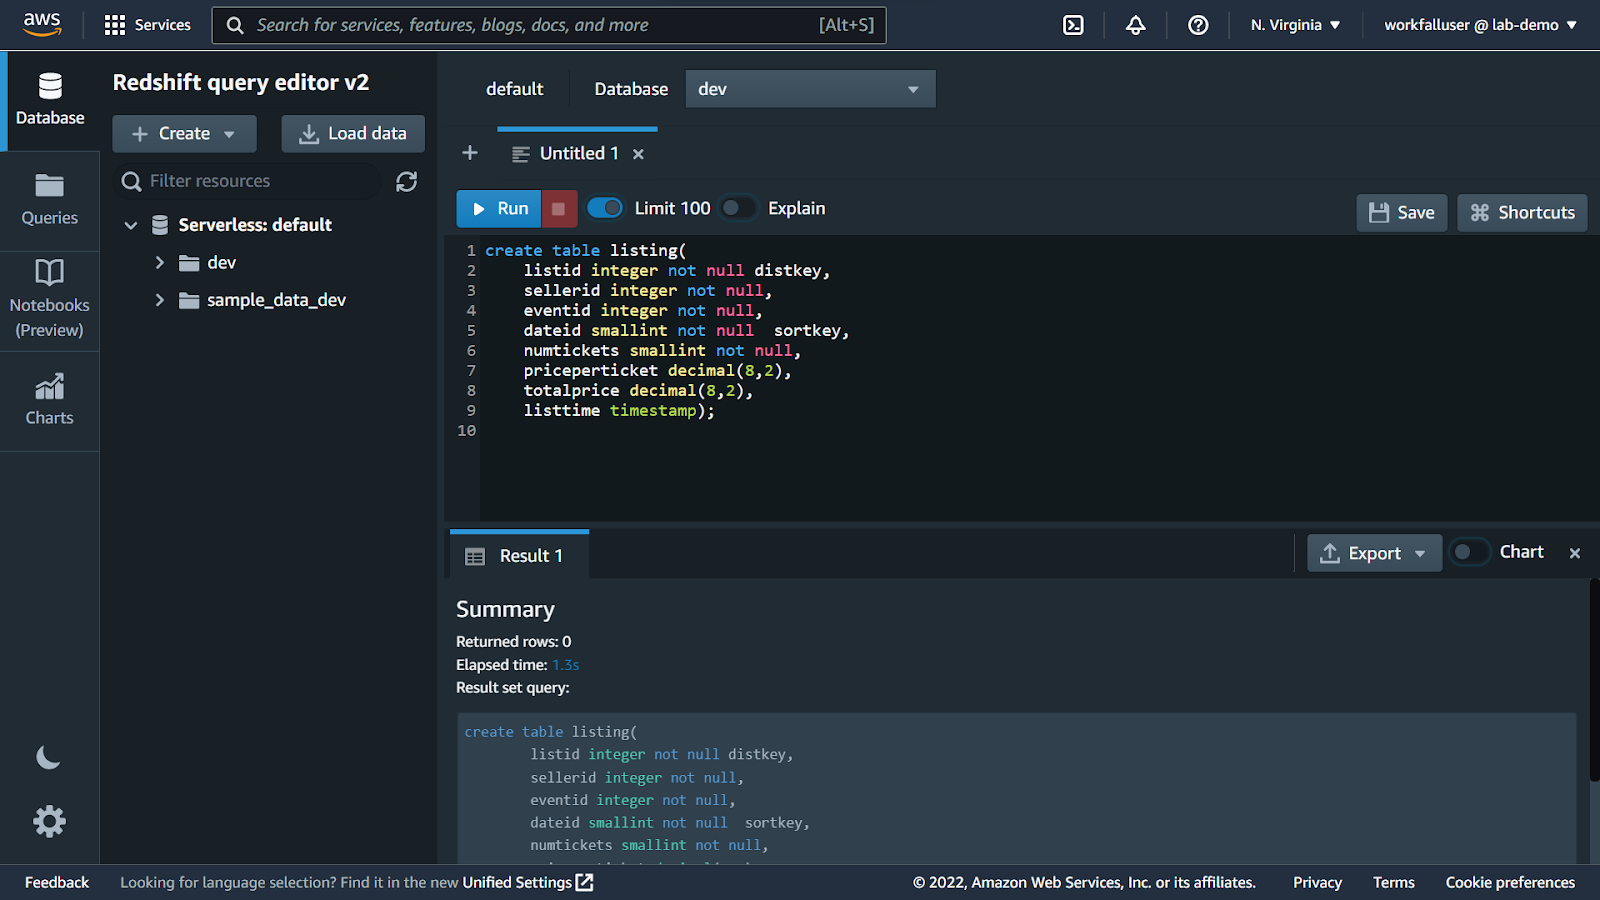
The listing will be the table that will contain the event listings.
Finally, we will run a query for table creation for the sales table.
Now, we need to import data into those tables. To do so, click on the link below and download the sample data.
https://docs.aws.amazon.com/redshift/latest/gsg/samples/tickitdb.zip

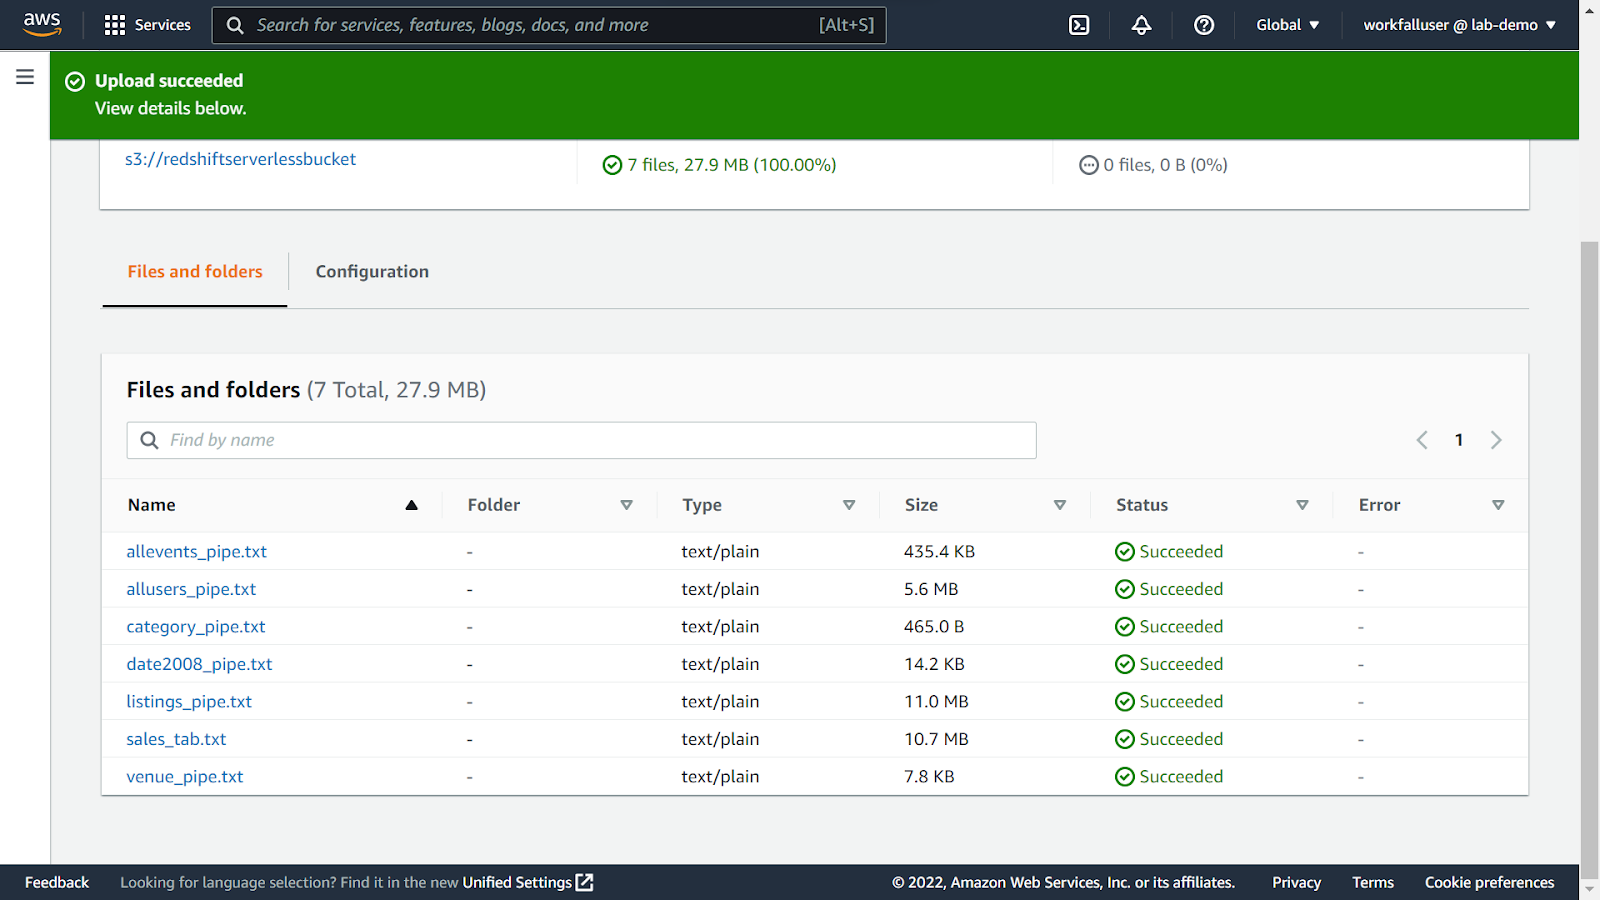
Navigate to the newly created S3 bucket dashboard. Click on upload and select the unzipped files from the above download.

On successful upload, you will see the message as shown in the image below.
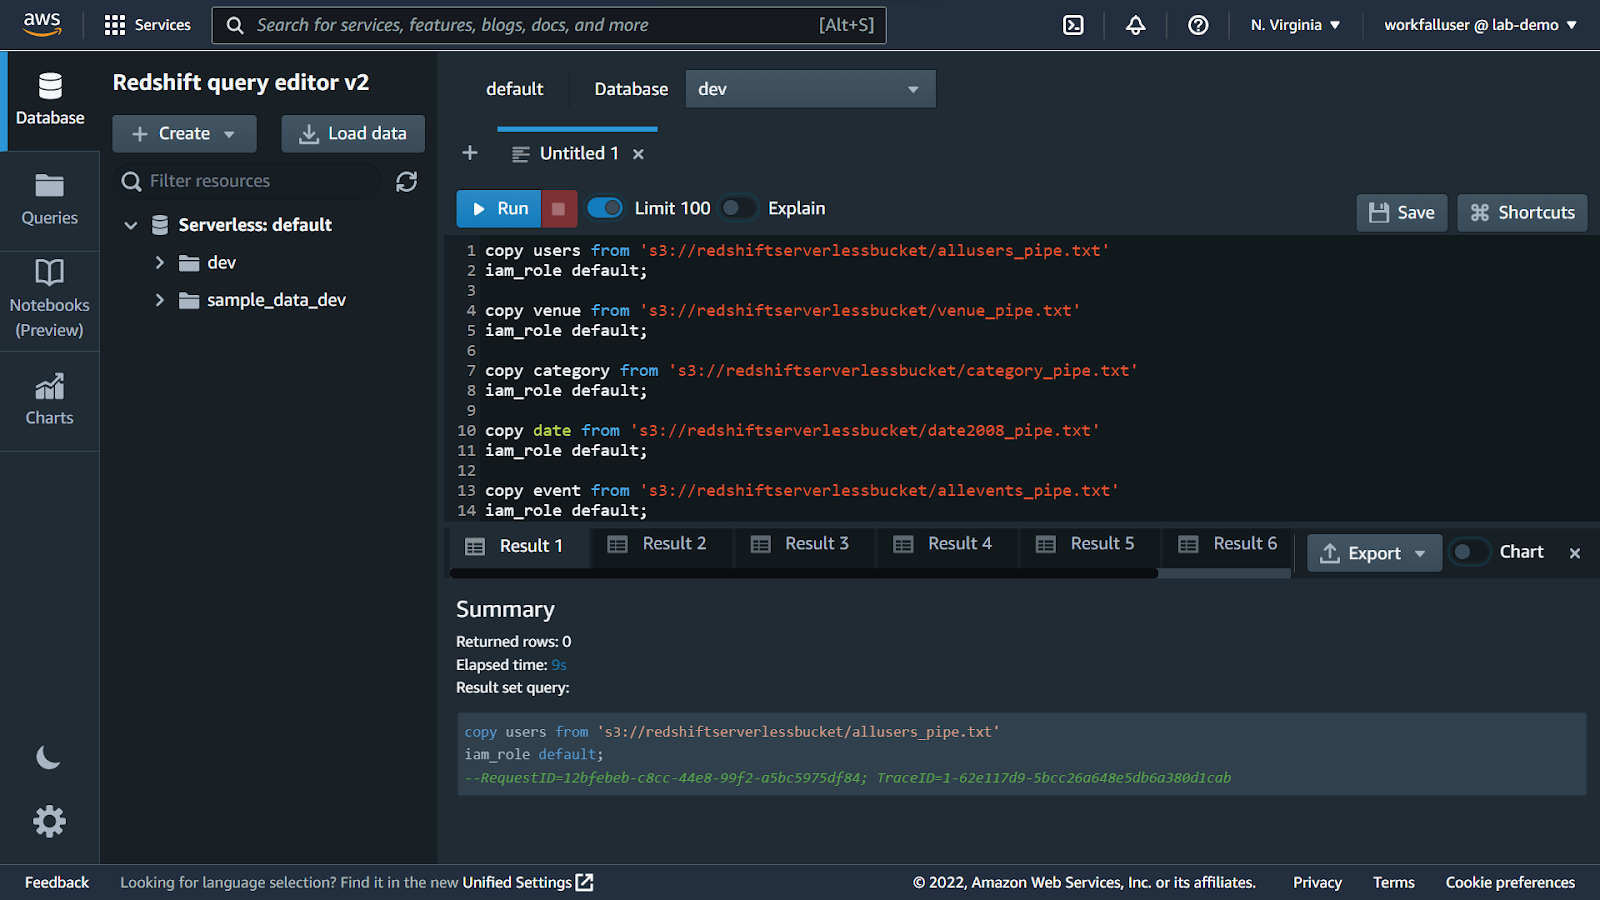
Navigate back to the query editor dashboard. Now we will move the data from the files uploaded in the bucket to the tables we created above. To do so, use the below commands for the same.

Execute the commands and on success, you will see the result as shown below.
Now, in the left navigation pane, navigate to the Tables section.
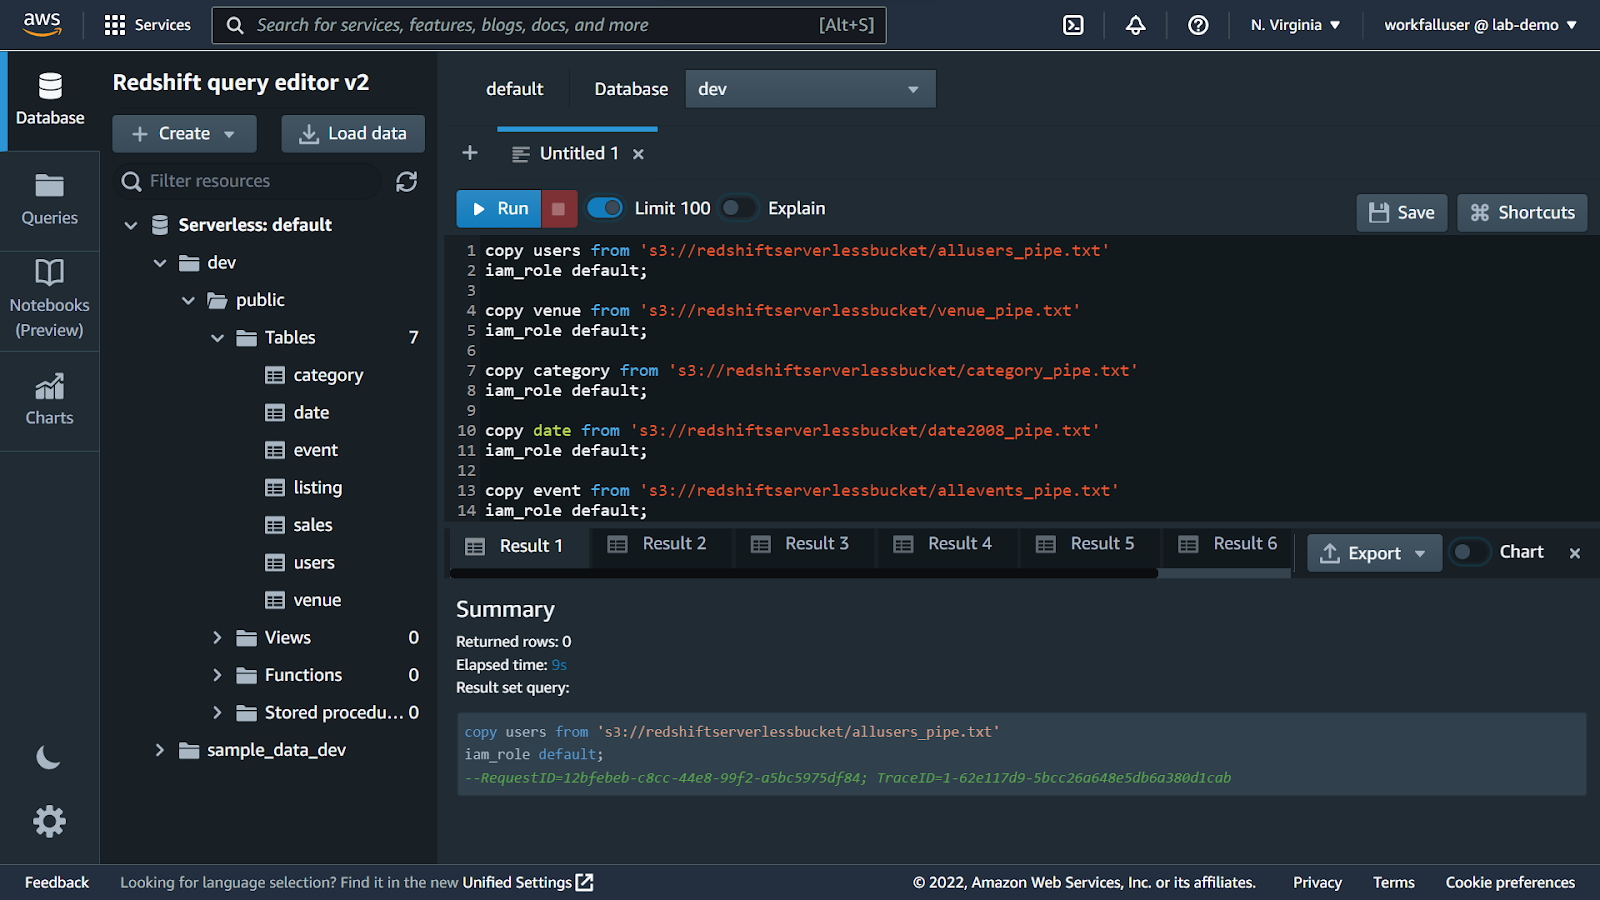
Double click on any of the tables and run the select query. You will see the output as shown below.

Now, run the below query in the query editor to view the output for the same.

To explore the Namespace configurations, click on Namespace configuration in the left navigation pane. Click on default.

On the details page, if you navigate to the Data backup section, you will be able to create snapshots as per your requirements.

Under security and encryption, you will see the details of the encryption and the permissions attached to the namespace.

Under the datashare option, you will get to see the process of how it works. Click on Create datashare.

Select Datashare and enter a name for the same. Select the Database name. Leave other settings to default.

Under datashare objects, click on Add.

In the modal that pops up, select the details as shown below.

Select the tables whose data does not contain any Personal Identifiable Information and click on Add.

Once done, you will see the details as shown below.

Scroll to the bottom and click on Create datashare.

On success, you will see the datashare object created. You can now share the data for the selected tables in the datashare object.

Conclusion
In this hands-on, we saw how we can analyze data and run the different queries using Amazon Redshift Serverless without the need of managing the infrastructure using the Serverless capabilities. Changing the region we navigated to the Amazon S3 bucket Service and created a new bucket. We then created a new Serverless capability for accessing a query editor traversing to the Amazon Redshift Serverless dashboard. While configuring the Redshift Serverless, we then created a new IAM role for the newly created bucket to be able to access it. After the successful setup, opening up the query editor, we executed the different queries to create the tables. We then downloaded the sample data and unzipped the files, we uploaded the files in the newly created S3 bucket. Once done, we moved the data in the newly created tables via the query editor running the different commands.
Then we executed a basic query to check if the data had been successfully moved in the tables. Post that, we executed a complex query to get the required data. Finally, testing out the query editor and the data being retrieved, we explored the namespace configuration dashboard to look at how we could enable encryption, create data backups, create datashare objects, etc. Exploring the dashboard, we finally created a datashare object selecting the tables whose data could be shareable. We will come up with more such use cases in our upcoming blogs.
Meanwhile …
If you are an aspiring AWS Enthusiast and want to explore more about the above topics, here are a few of our blogs for your reference:
Why developers and businesses should go with the serverless architecture?
How to build a Serverless Workflow with AWS Step Functions?
Stay tuned to get all the updates about our upcoming blogs on the cloud and the latest technologies.
Keep Exploring -> Keep Learning -> Keep Mastering
At Workfall, we strive to provide the best tech and pay opportunities to kickass coders around the world. If you’re looking to work with global clients, build cutting-edge products and make big bucks doing so, give it a shot at workfall.com/partner today!