AWS Backup enables you to centralize and automate data protection across AWS services. AWS Backup is a low-cost, fully managed, policy-based solution that makes data protection at scale even easier. AWS Backup also assists you in meeting your regulatory compliance duties and business continuity objectives. In this article, we’ll look at how to use the AWS Backup console to create an Amazon RDS backup and restore it. On the AWS Backup panel, we’ll also go over the various choices for creating on-demand backups.
Refer to part 1 of the blog here.
Hands-on
In this hands-on, we will see how we can make use of the AWS Backup console to create a new role, choose an existing role, or select the default role for the backup job with just a few clicks. With AWS Backup, you can create backup policies called backup plans. You can use these plans to define your backup requirements, such as how frequently to back up your data and how long to retain those backups. By simply labeling your AWS resources, AWS Backup allows you to apply backup plans to them. The backup plan that you defined is then used by AWS Backup to back up your AWS resources automatically. Exploring the console and configuring the same, we will see how to create an on-demand backup job of an Amazon RDS database, how to use a backup plan to backup Amazon RDS resources, and how to add resources to an existing backup plan using tags.

To implement this, we will do the following:
- Login to your AWS Account and navigate to the AWS RDS console.
- Create a MySQL database that you wish to create a backup for.
- Choose Easy Creation of the database creation method to quickly get started.
- Navigate to the AWS Backup dashboard.
- Automate Amazon RDS backup and restore.
- Configure an on-demand AWS Backup job of an Amazon RDS database.
- Create a new role, choose an existing role or select the default role for the backup job.
- Create a new backup vault for your backup process.
- Configure the services and toggle the resources you wish to backup.
- Navigate to AWS Backup Plans and create a new backup plan for an Amazon RDS database.
- Create a new role, choose an existing role or select the default role for the backup plan.
- Assign resources to the backup plan.
- Navigate to the backup faults and open the latest created backup.
- Restore the backup of the Amazon RDS database.
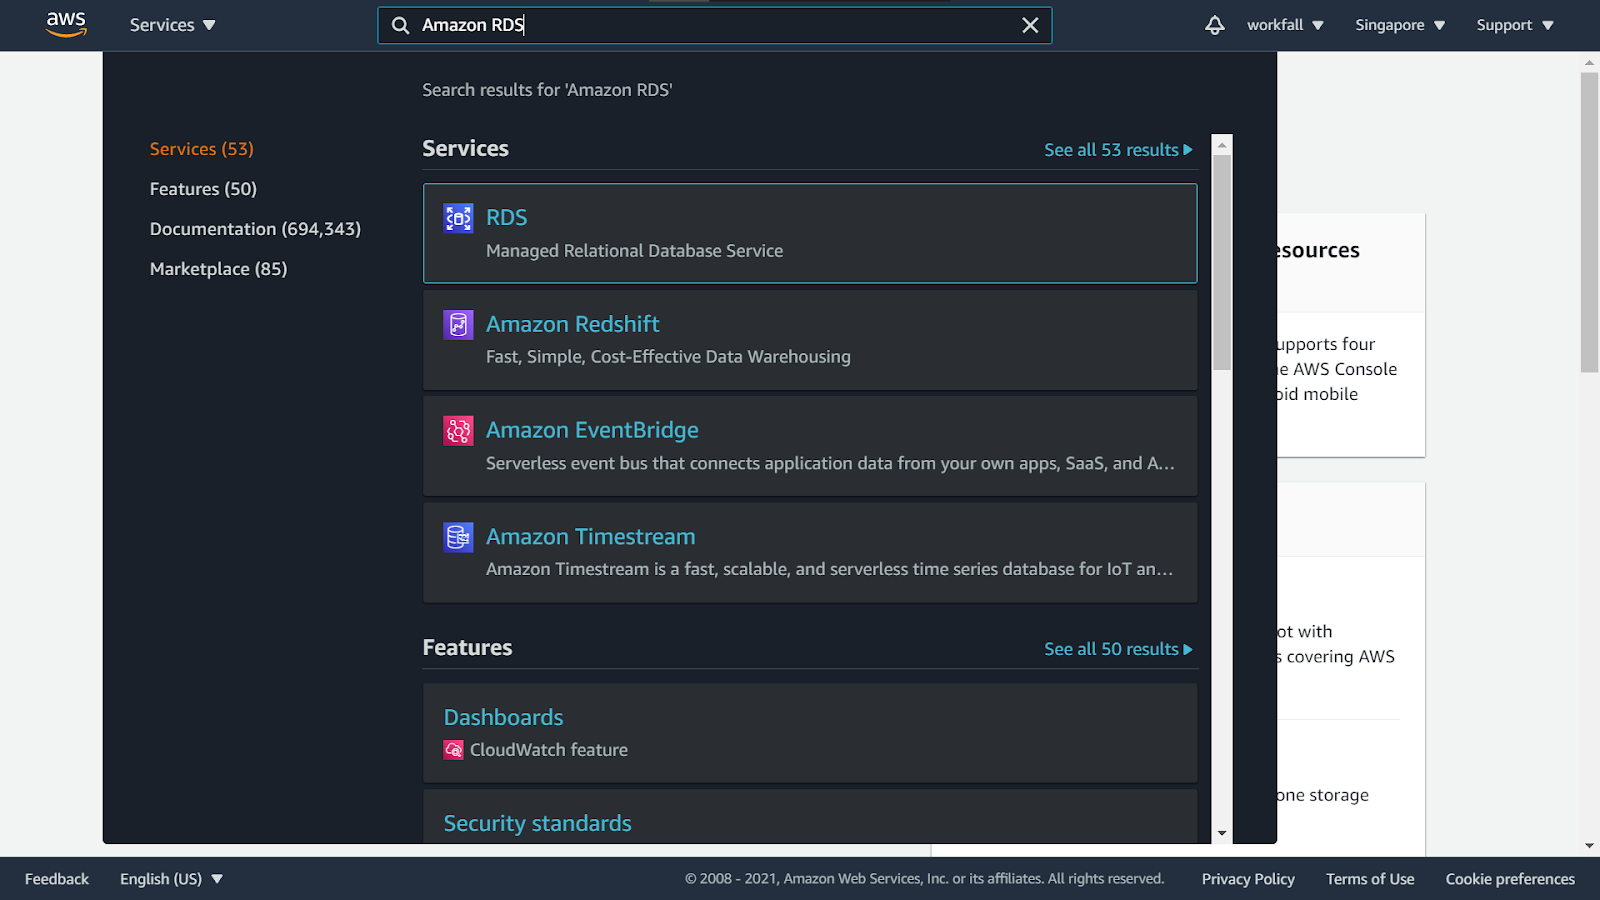
Navigate to the AWS console and search for Amazon RDS. Click on RDS to navigate to the RDS console.
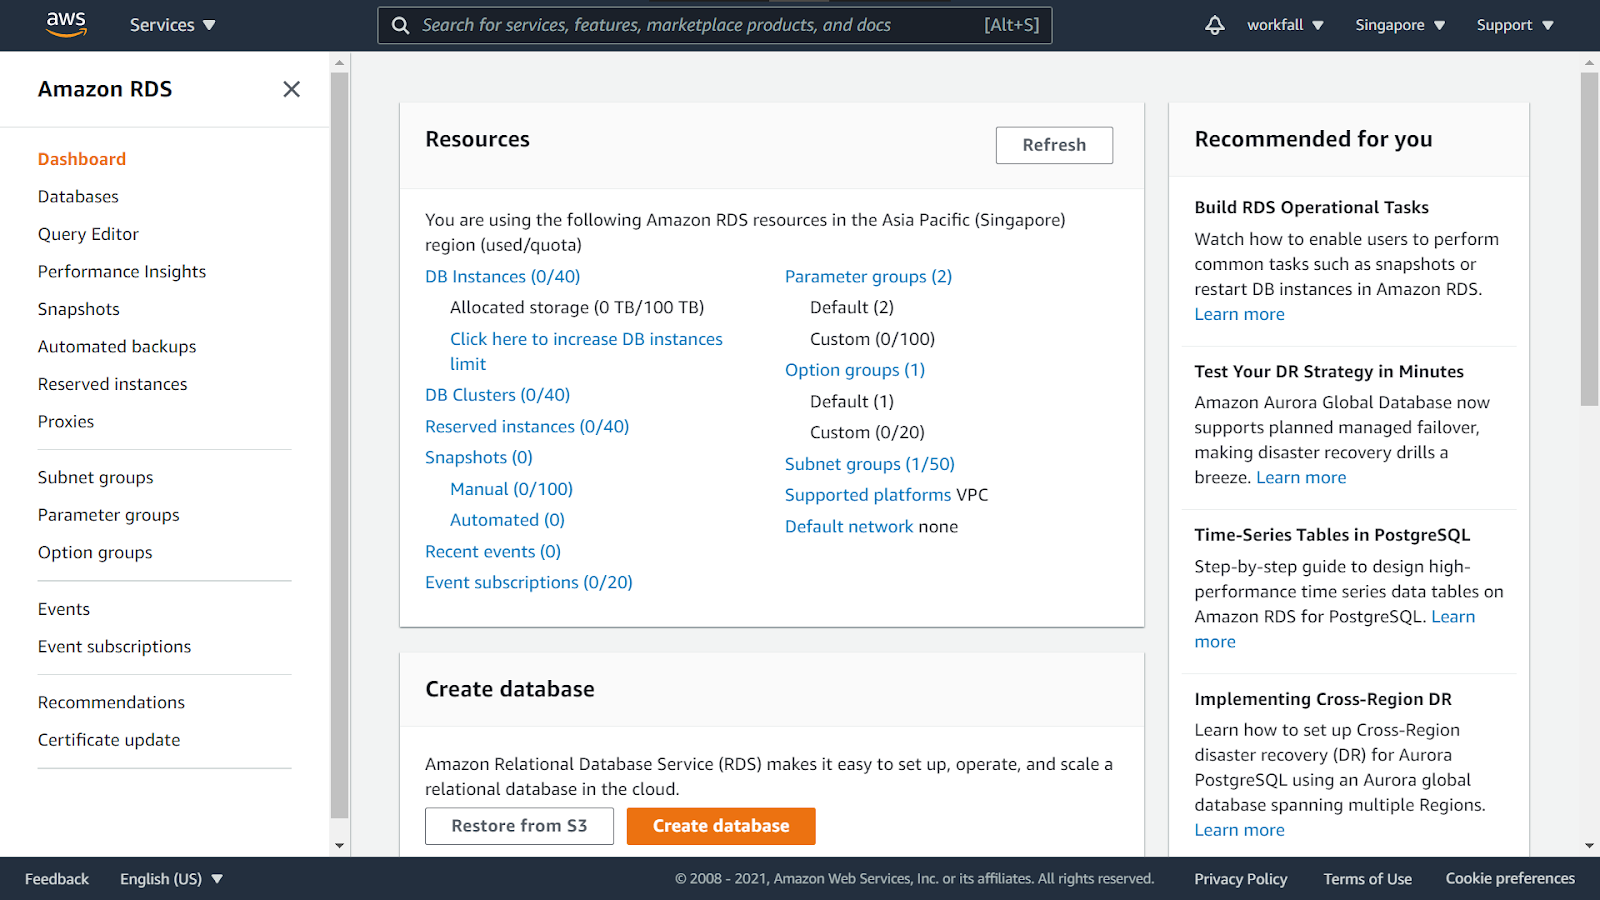
You will be navigated to the Amazon RDS console. Let’s create a database. Click on Create database.
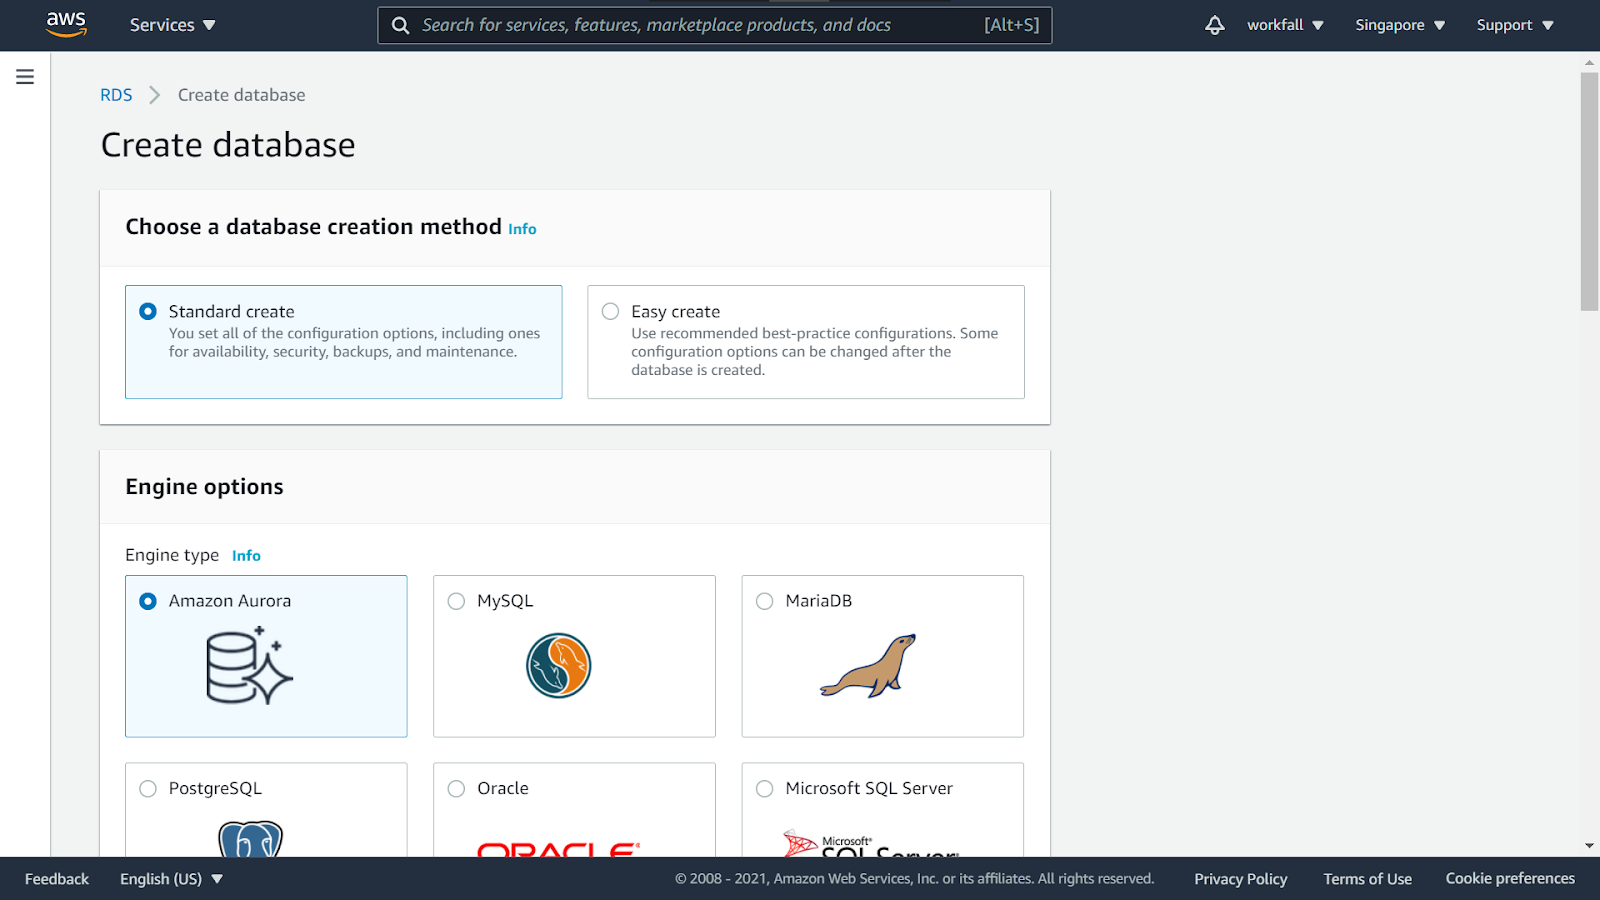
On the create RDS dashboard, you can either choose to create the database as a Standard create or Easy create to quickly start with it.
Click on the Easy create option. For this tutorial, we will create a database quickly so that we can quickly get started with AWS Backup.

In the configuration section, select the engine type as MySQL. For DB instance size, you can select the one based on your requirements. For this tutorial, we will use the free tier DB instance.

Scroll down, enter a name for the DB instance identifier, and enter a username under the Master username text box.
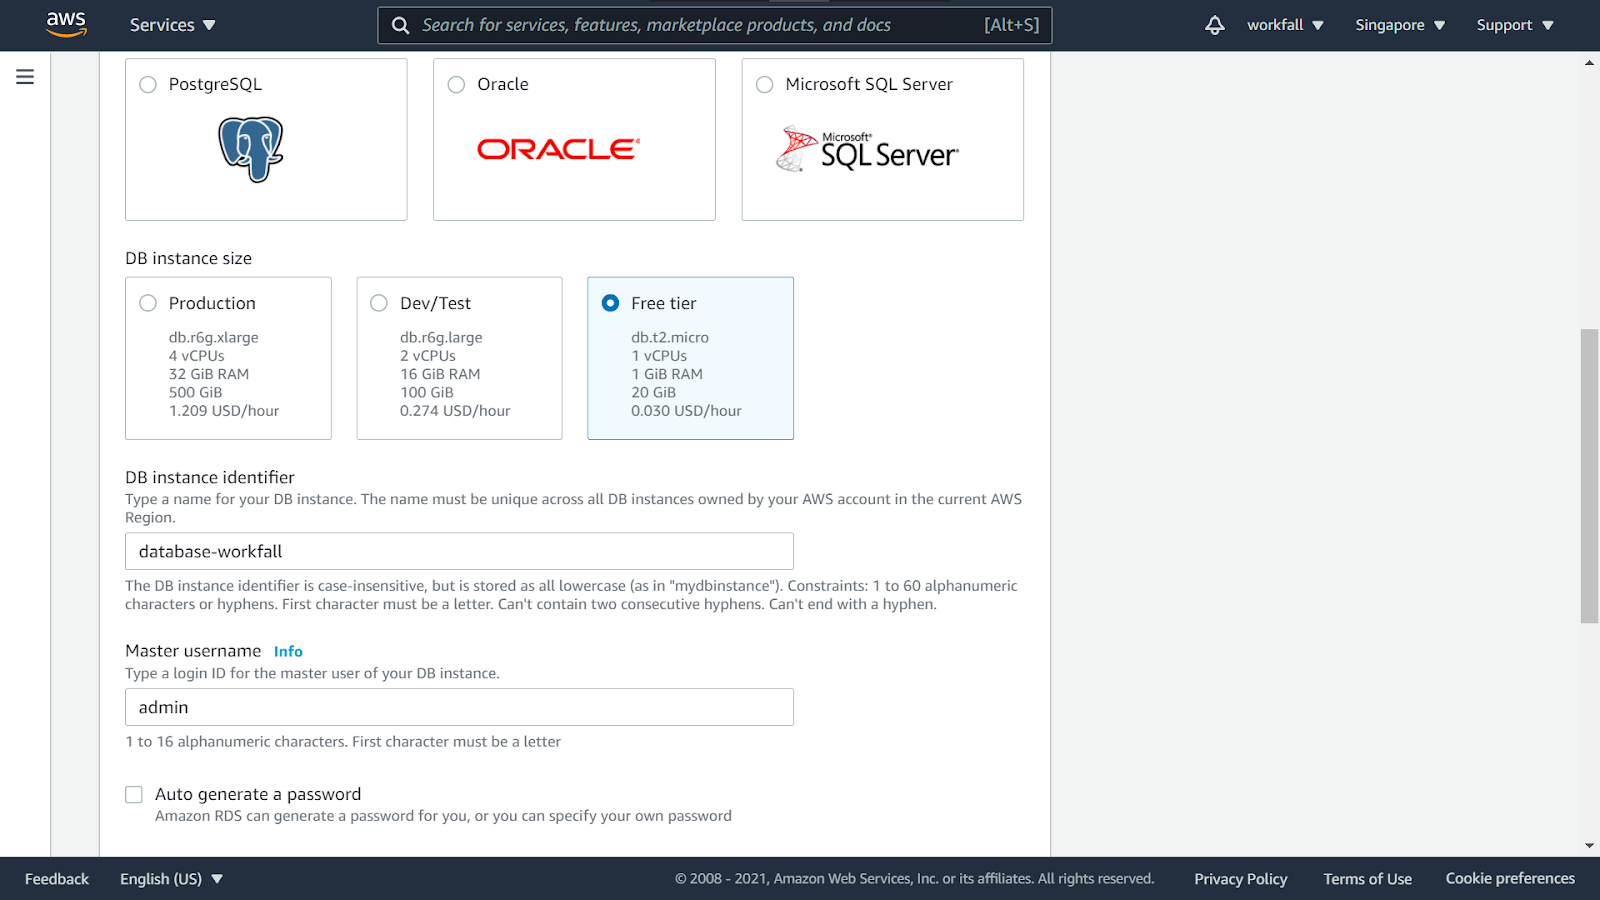
For the password for your database, you can either choose to auto-generate the password or set your own password.

To set your own password, uncheck the Auto-generate password checkbox and enter a password. In the Confirm password text box, re-enter the password.

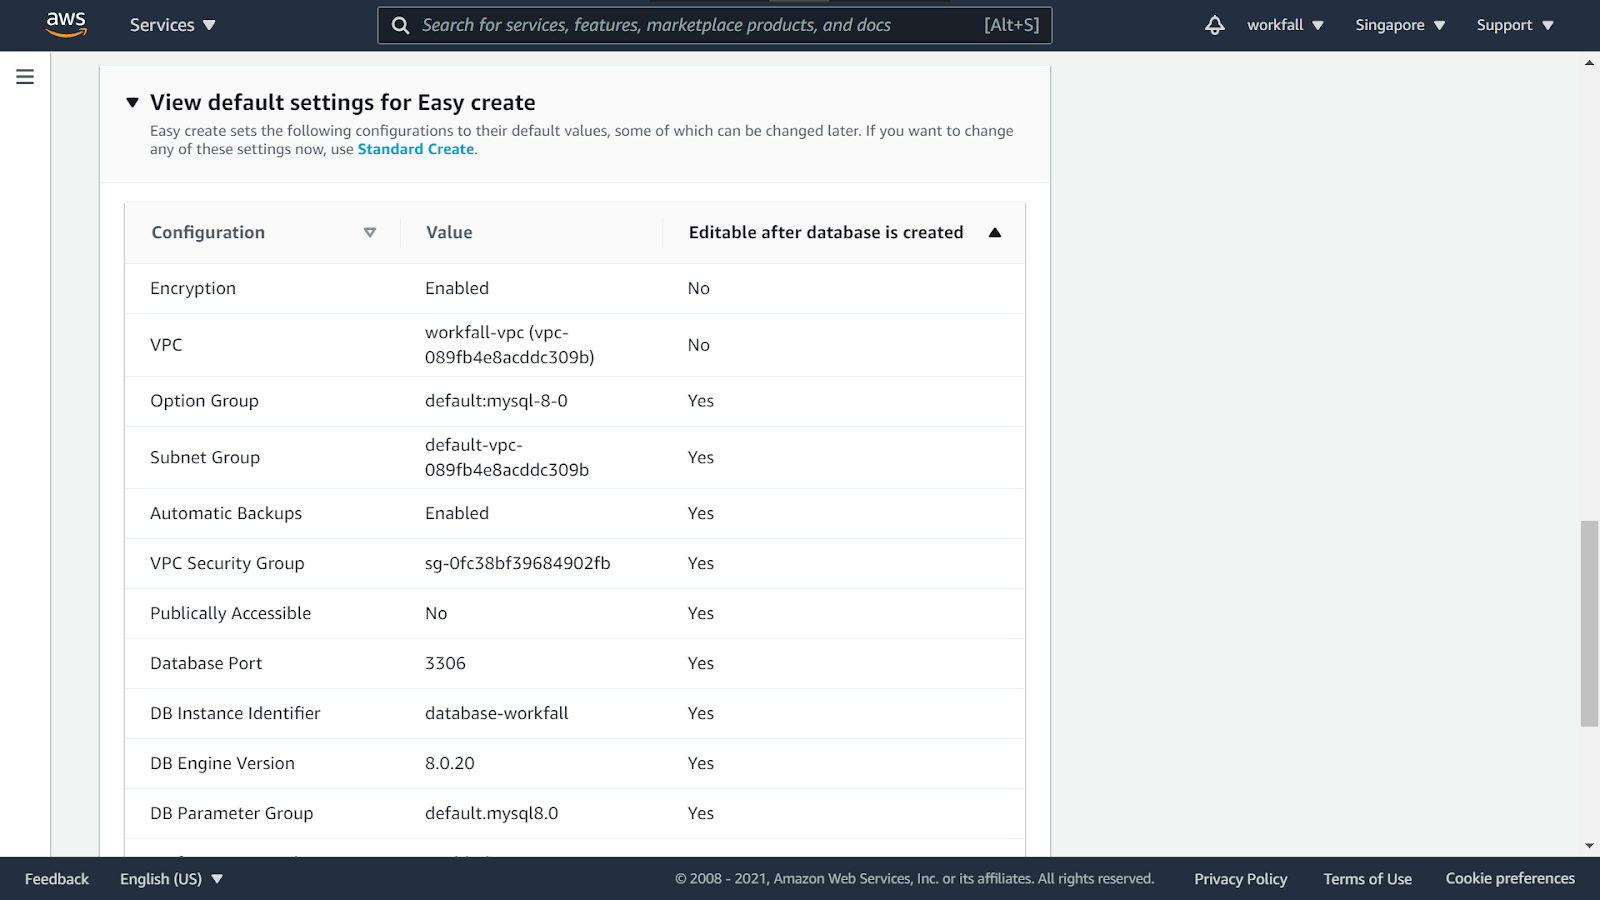
Expand the View default settings for Easy create to verify the settings you configured.
Scroll down to the bottom of the page and click on Create database.

Once done, you will see the message as shown in the image below. Now, configuring the database might take some time.

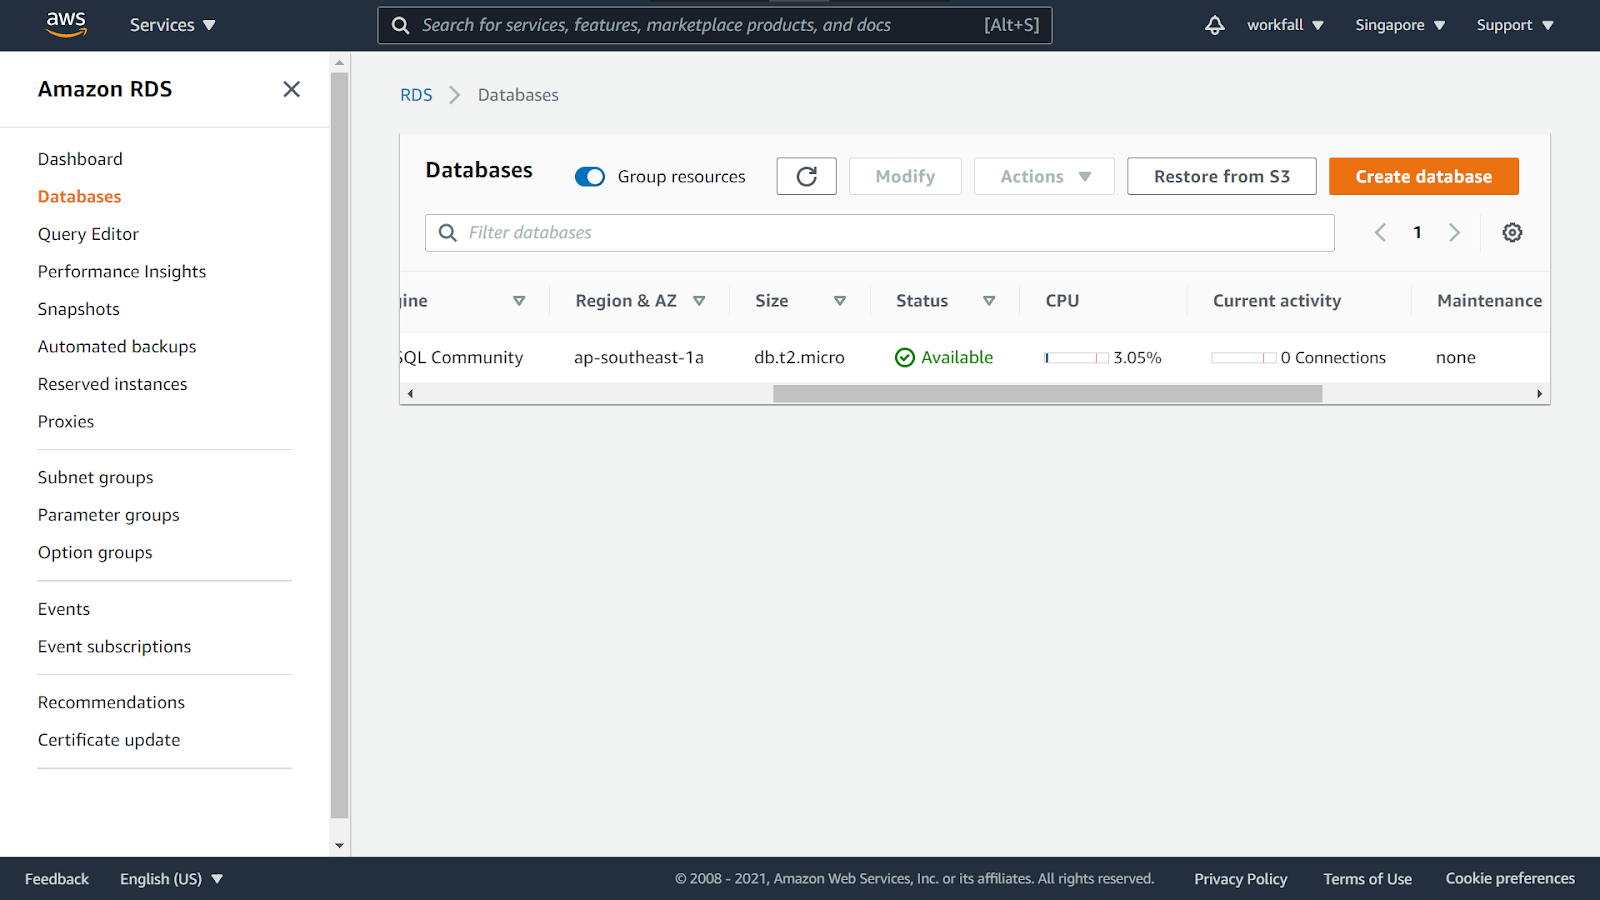
Keep checking the status of the database to confirm if it’s created.

After a few seconds, you will see the status as shown in the image below.

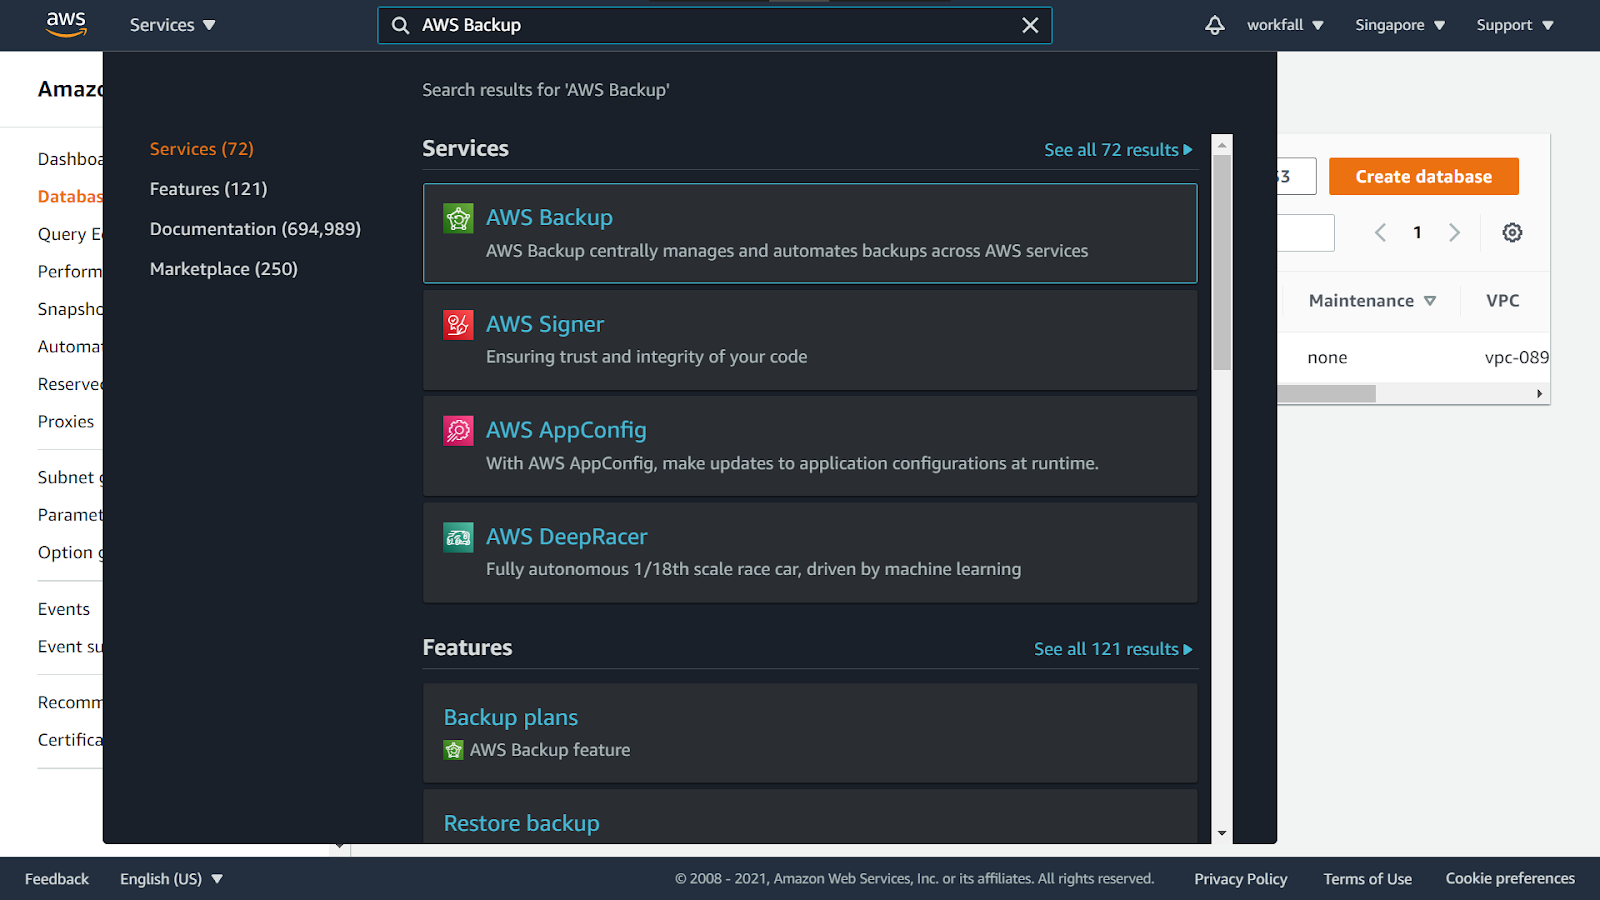
Once the database is created, the status will be shown as Available. Click on the search bar on the console.
Search for AWS backup and click on the service.
You will be navigated to the dashboard as shown below.

Choose Settings from the navigation pane on the left side of the AWS Backup dashboard, under My account.
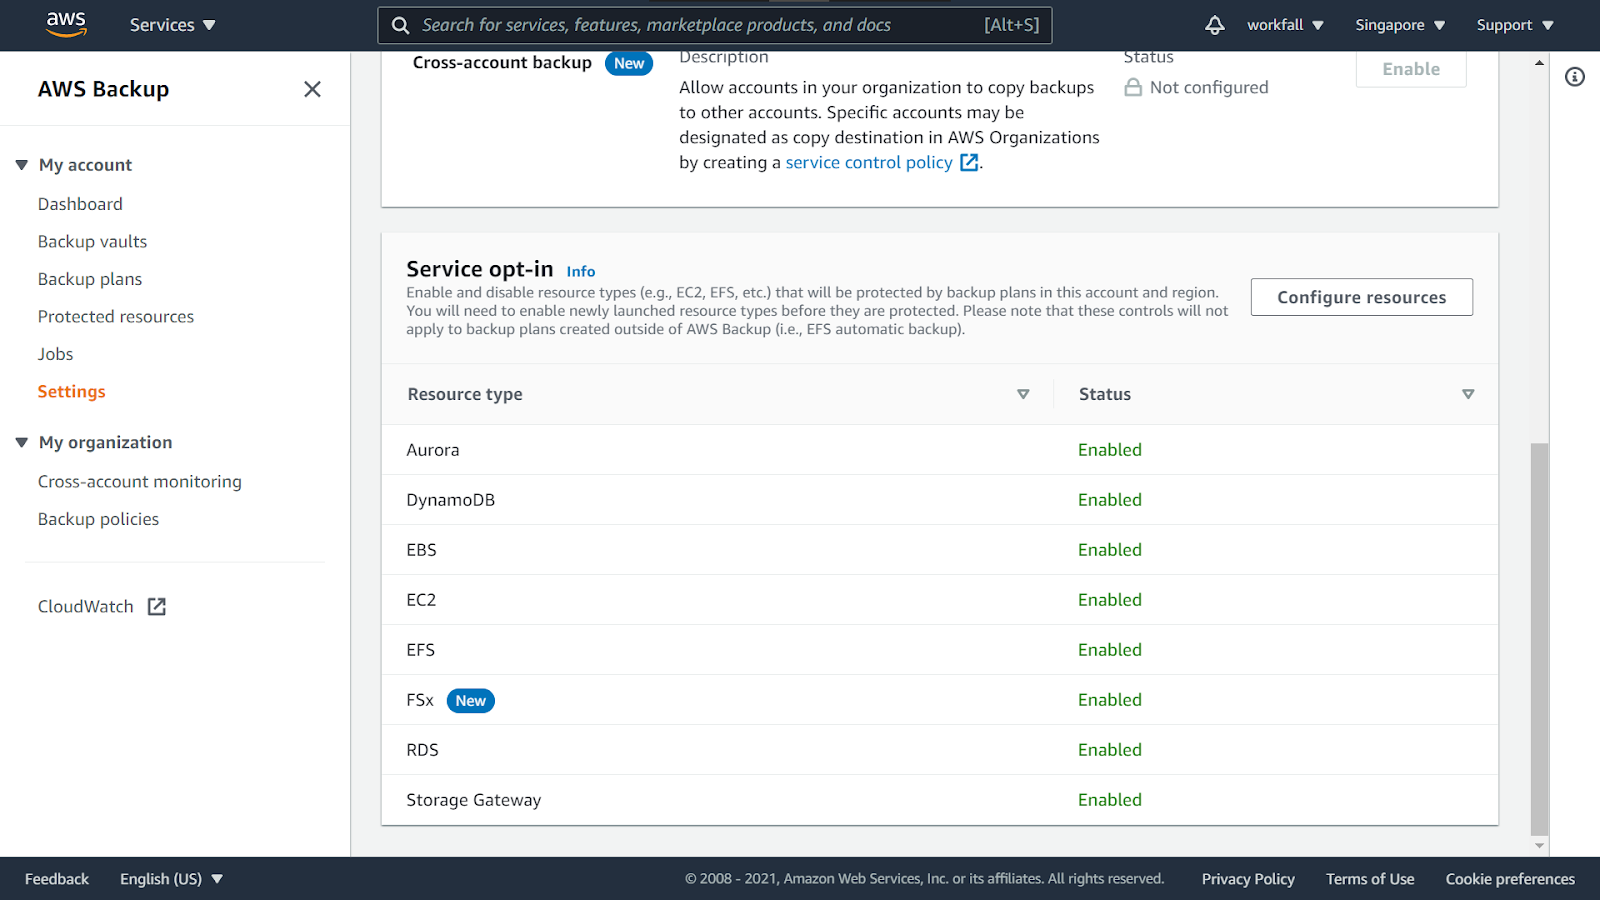
Choose Configure resources from the Service opt-in page.
Back in the AWS Backup console, under My Account on the left navigation pane, select Protected resources.

Choose the Create on-demand backup option from the dashboard.

On the Create on-demand backup page, choose the resource type that you want to back up; for example, choose RDS for Amazon RDS. Choose the database name or ID of the resource that you want to protect, for example, database-workfall.
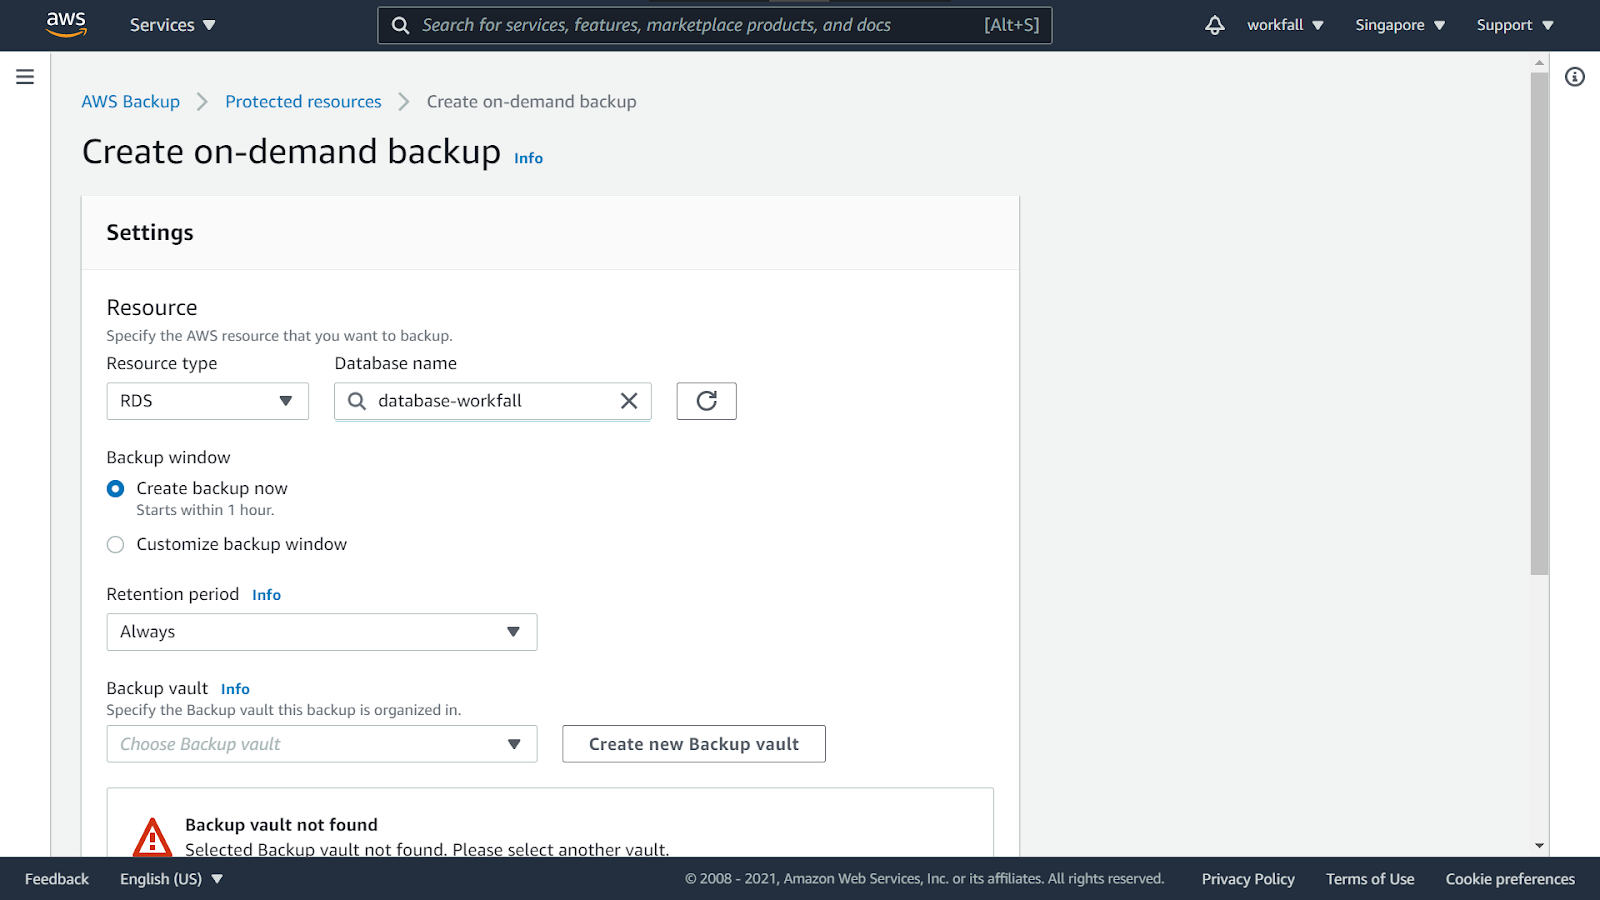
Ensure that Create backup now is selected. This starts your backup process right away, allowing you to see your stored resource on the Protected resources page sooner. Select Days from the dropdown under Retention period. The number of days, choose as per required.

Choose an existing backup vault. When you select Create new Backup vault, you will be taken to a new page where you can create a vault before returning to the Create on-demand backup page.

A new modal will open for you to create a new vault.

Enter a name for the backup vault name. Select the encryption key as the default encryption key.

Add a tag for your vault (if needed) as shown in the image below. Once done, click on Create Backup Vault.

Under the IAM role, choose the Default role. Expand the Tags added to recovery points.

As seen in the image below, create a key-value tag pair (if needed). Select the Create on-demand backup button. This takes you to the Jobs page, where you will see a list of jobs.

Select the Create on-demand backup button. This takes you to the Jobs page, where you will see a list of jobs.

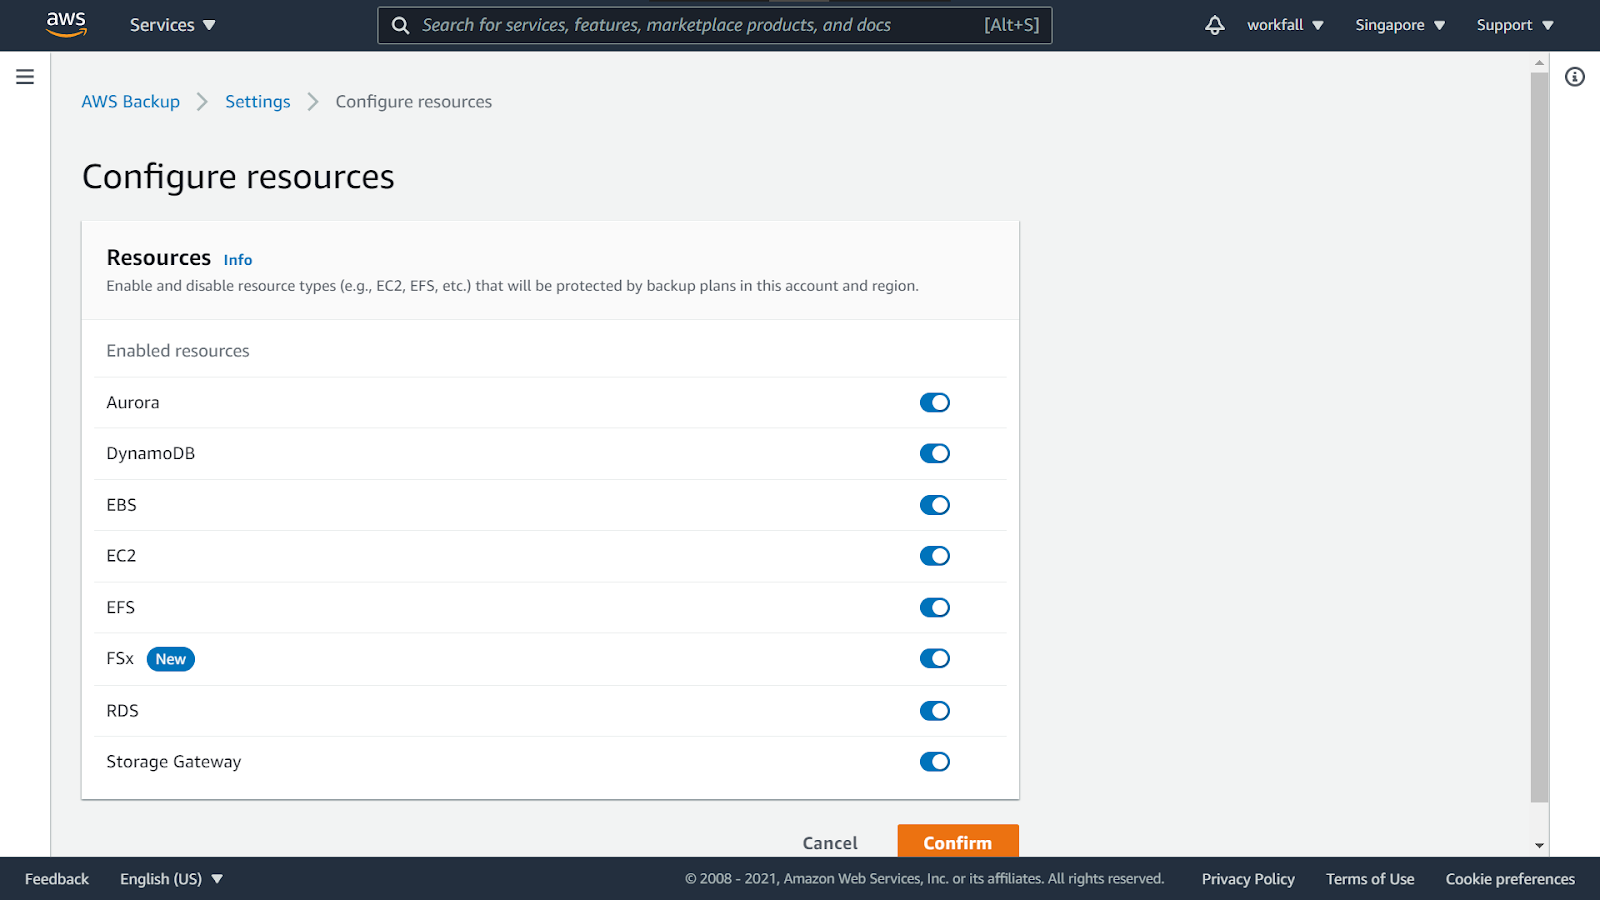
Back on the left navigation pane in the AWS Backup console, under My account, choose Settings. Choose Configure resources from the Service opt-in page.

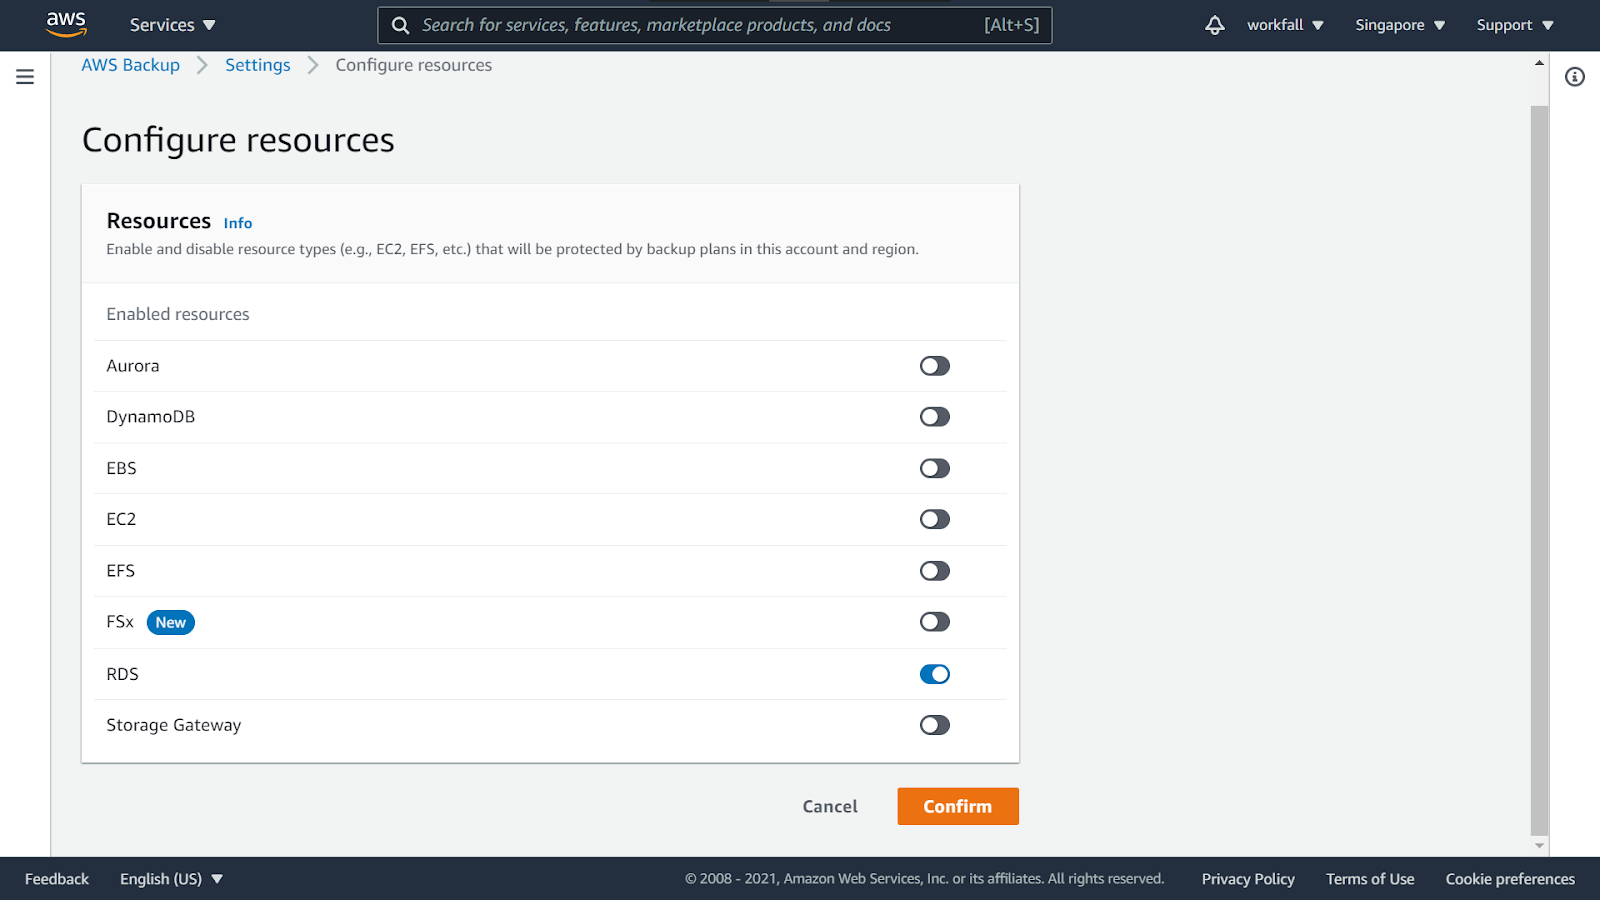
Use the toggle switches on the Configure resources page to enable or disable the AWS Backup services. When you’ve finished configuring your services, click Confirm.
Confirm the settings you just configured on the settings dashboard.

In the AWS Backup console, select Backup plans on the left navigation pane under My account, and then Create Backup plan.

You will be navigated to the Create Backup plan dashboard.

You can create a new backup plan by specifying each of the backup configuration details. Select Build a new plan.

Under the Backup Vault, select the newly created vault from the dropdown.

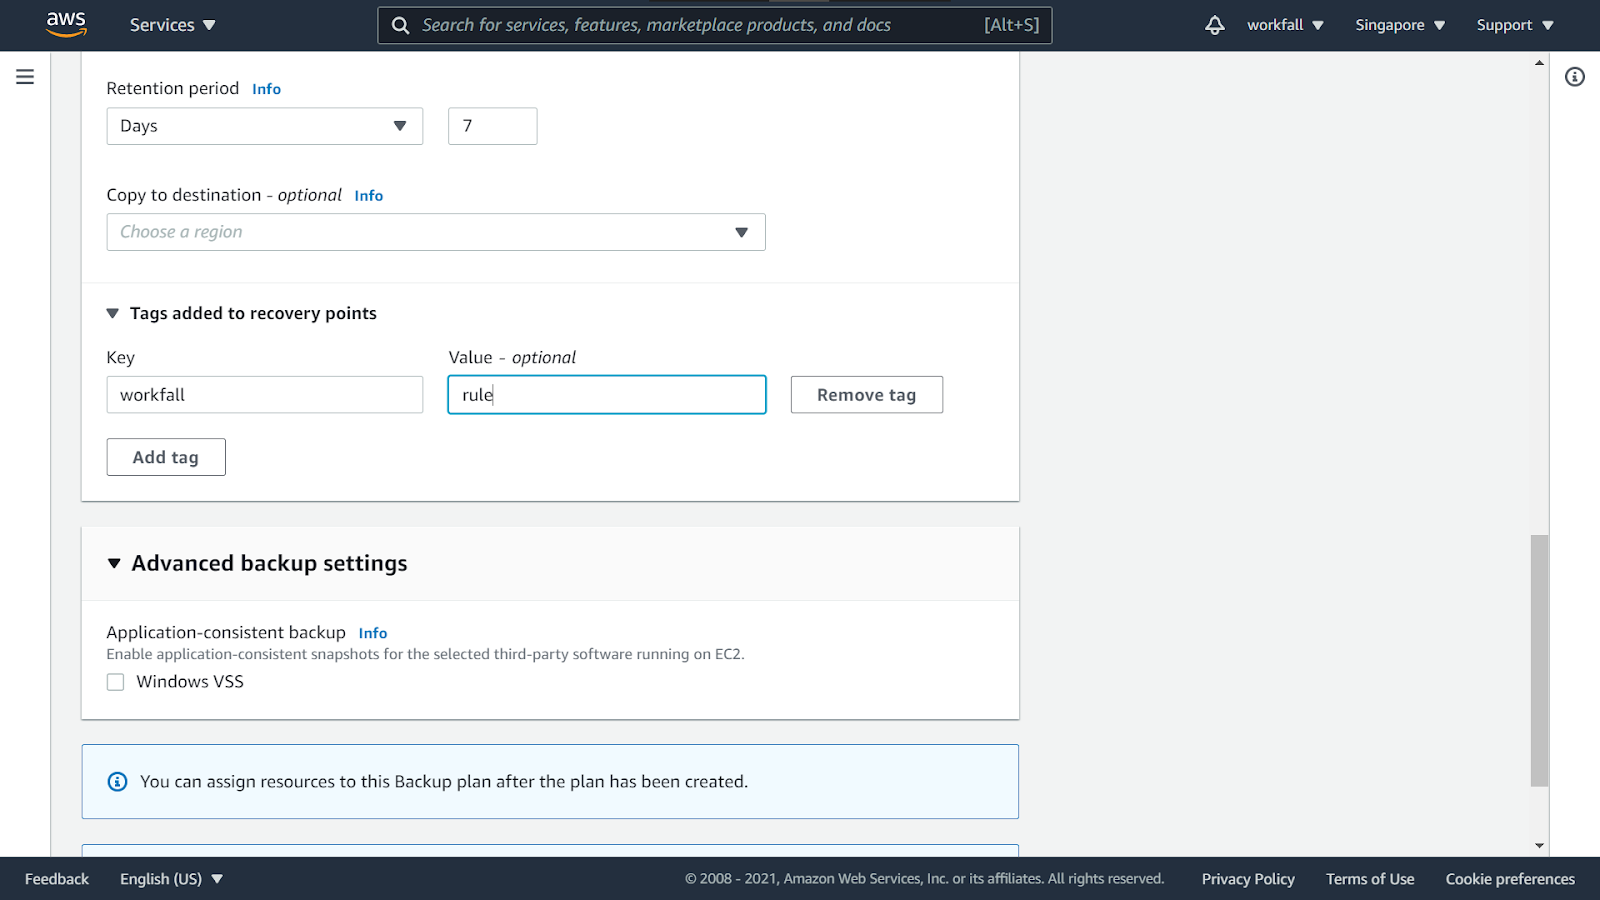
Select the Backup frequency as Daily. Select the Backup window as Use backup window defaults. Select the retention period as 7 days or as required.

Expand Tags added to recovery points and add a tag (if needed) as shown in the image below. Once done, click on Create Backup Plan.
On success, you will see a message as shown in the image below. Click on Assign resources.

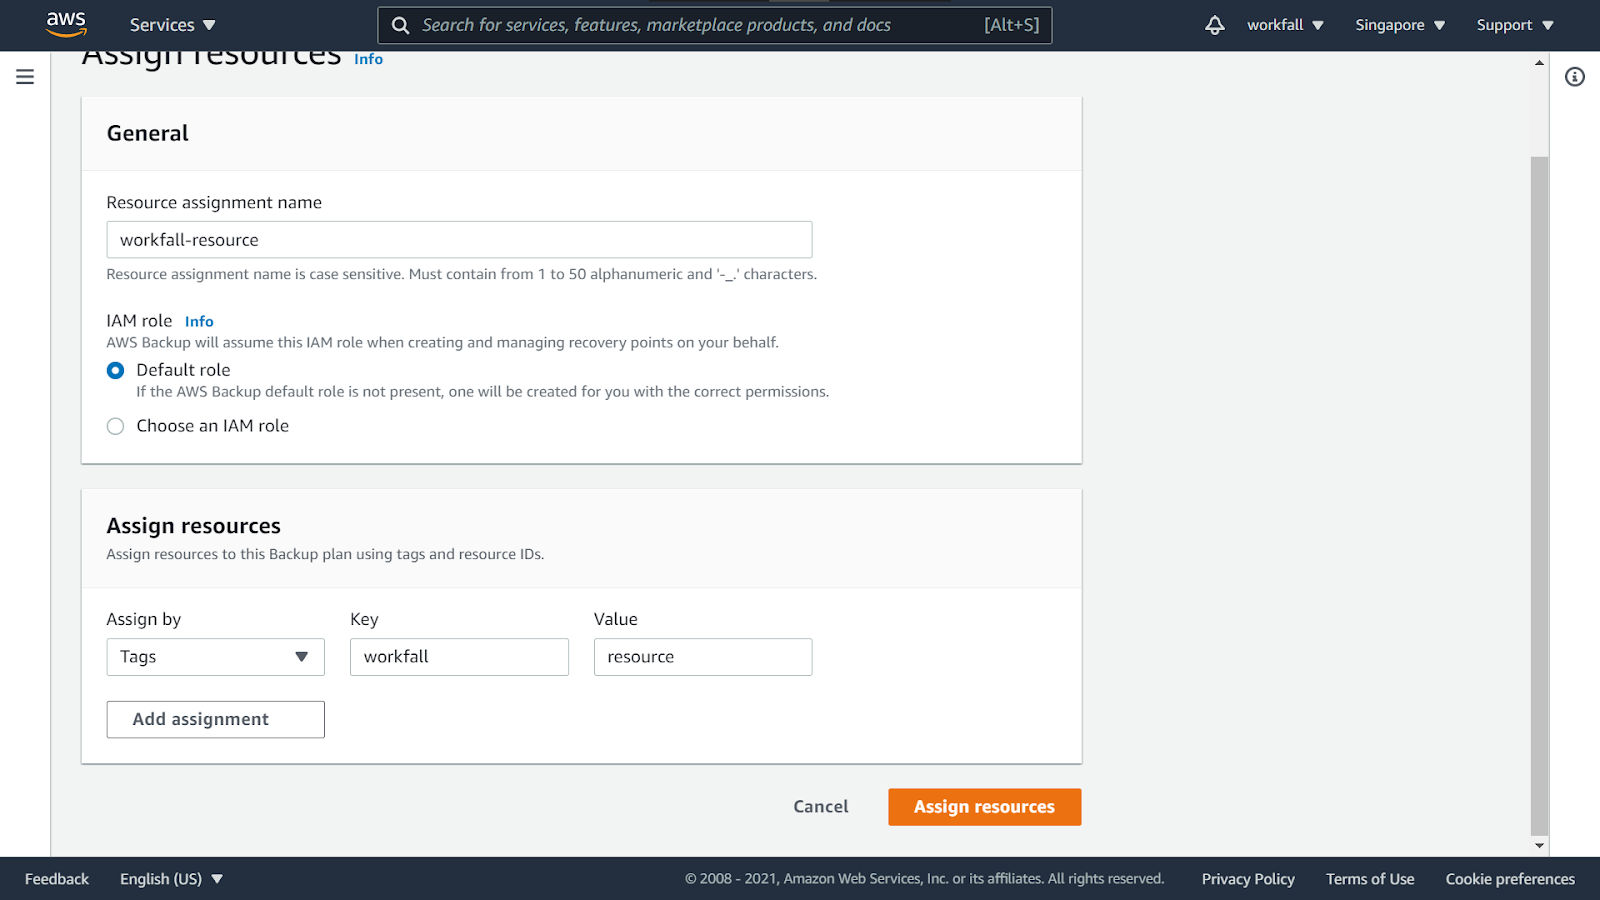
Enter a name for the resource assignment. Keep the IAM role as the default role.

Under Assign Resources, select Tags under Assign by and enter a key-value pair. Once done, click on Assign resources.
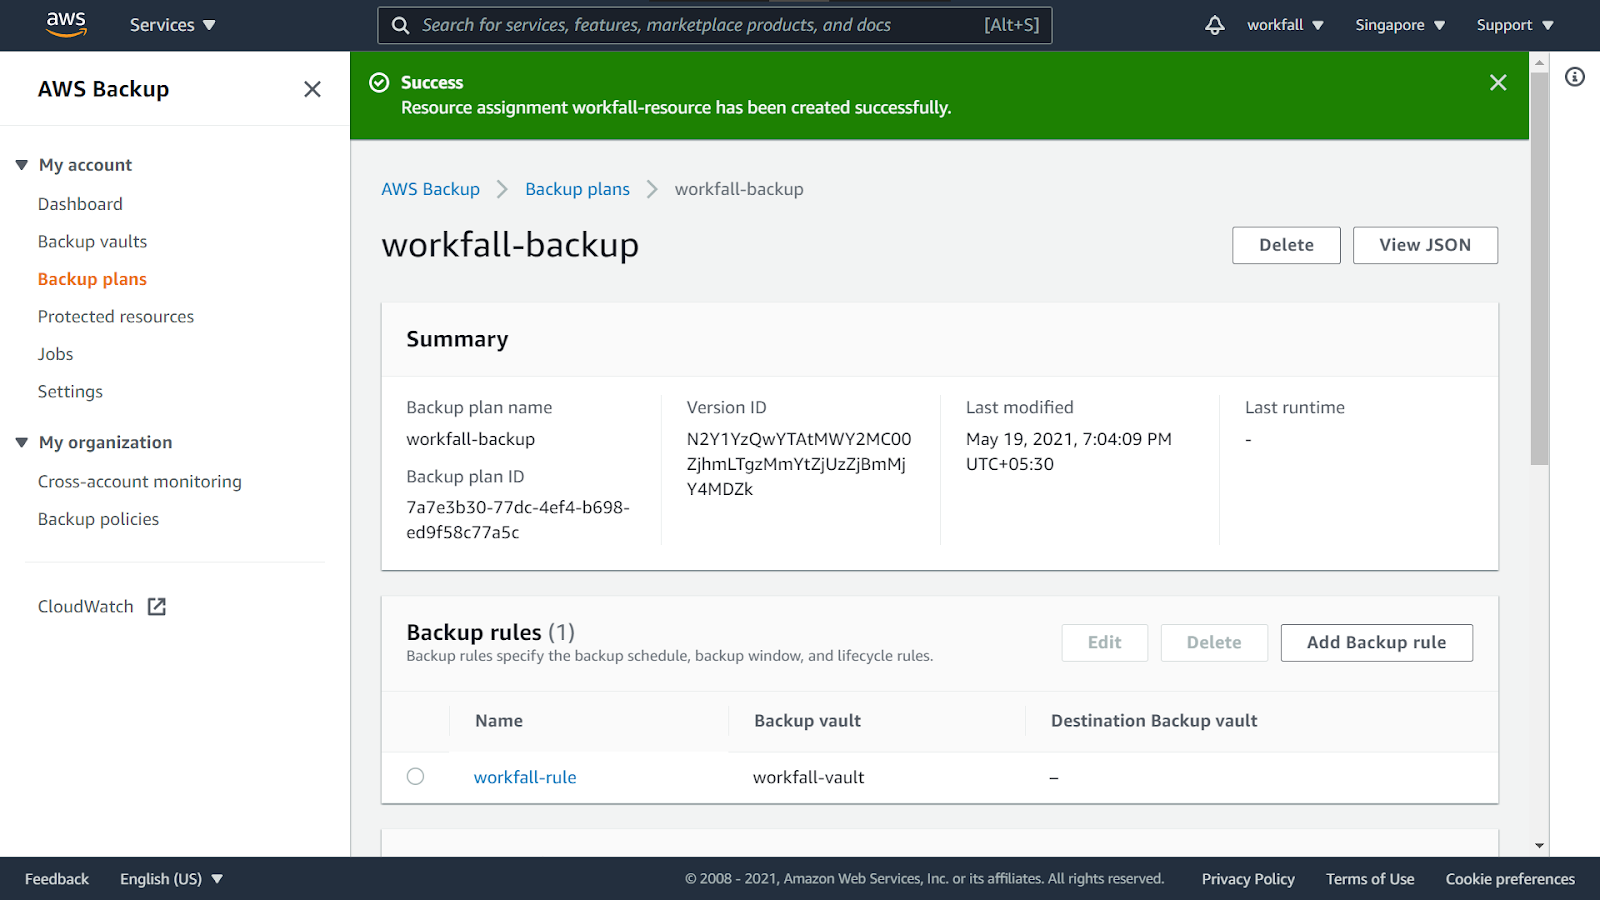
On success, you will see the message as shown below and make sure that the backup plan has the resources assigned to it.
Navigate to the AWS Backup console and the backup jobs will be seen under Jobs. Scroll to the right and check the resource ID assigned to it.

Scroll to the left and click on the first entry that is created under Backup vaults. Click on it to open it and restore the backup.
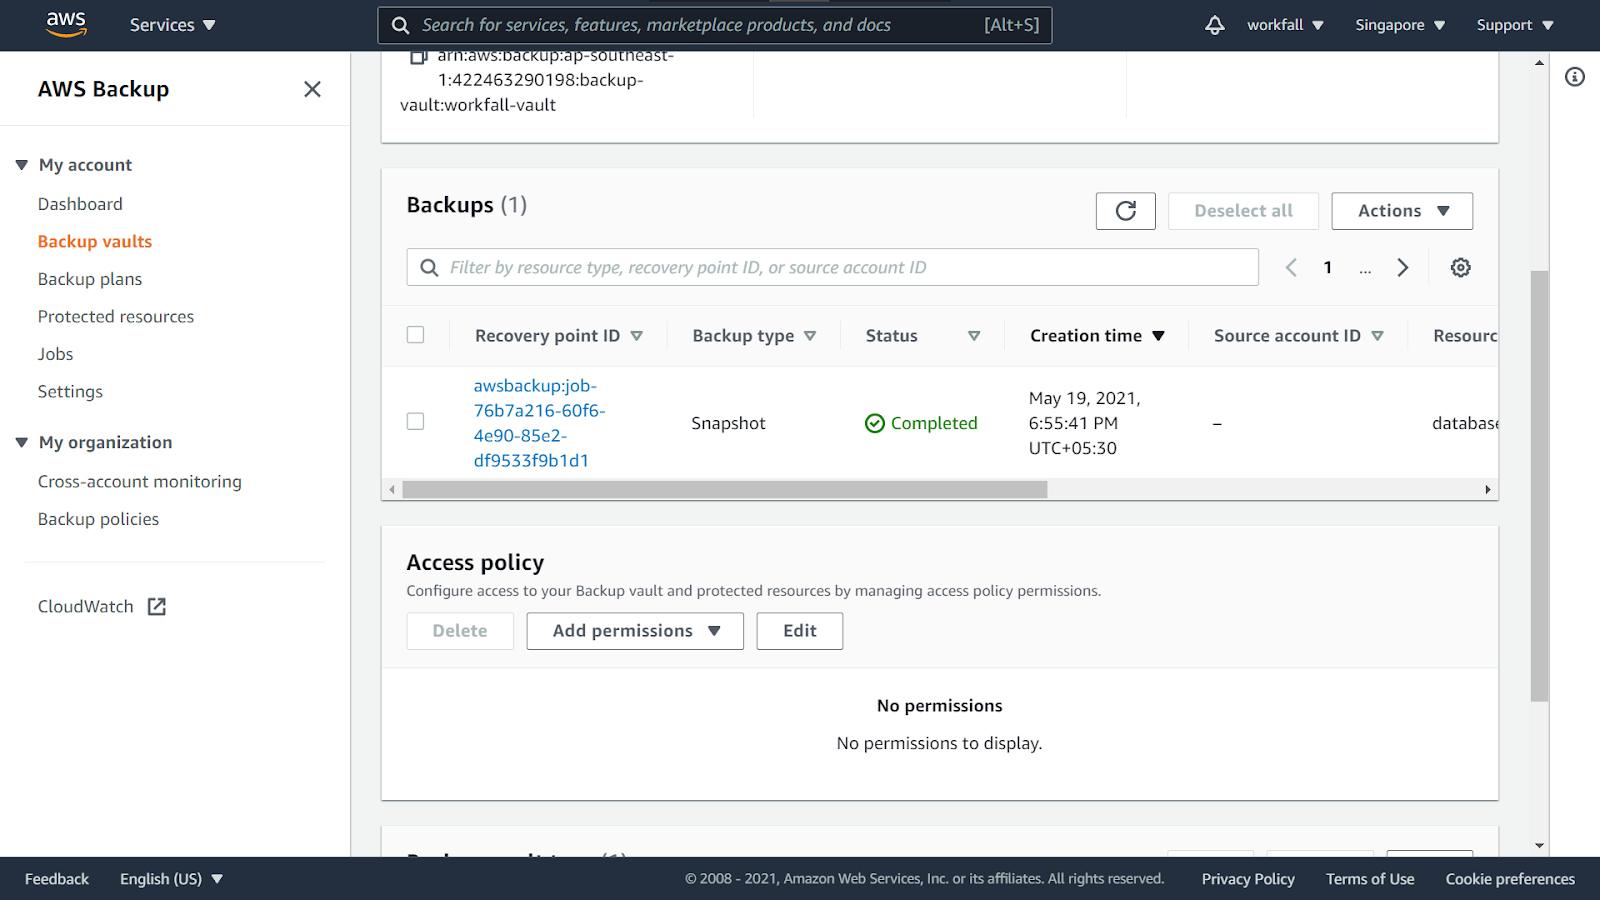
Navigate to the backup vault that was selected in the backup plan and select the latest completed backup. To restore the database, click on the recovery point ARN and select Restore.

The restore of the ARN will bring you to a Restore backup screen that will have Instance specifications and configurations for the Amazon RDS database. Select the DB engine, License Model, and DB instance class as shown in the image below.

Change the DB instance class as shown in the image below.
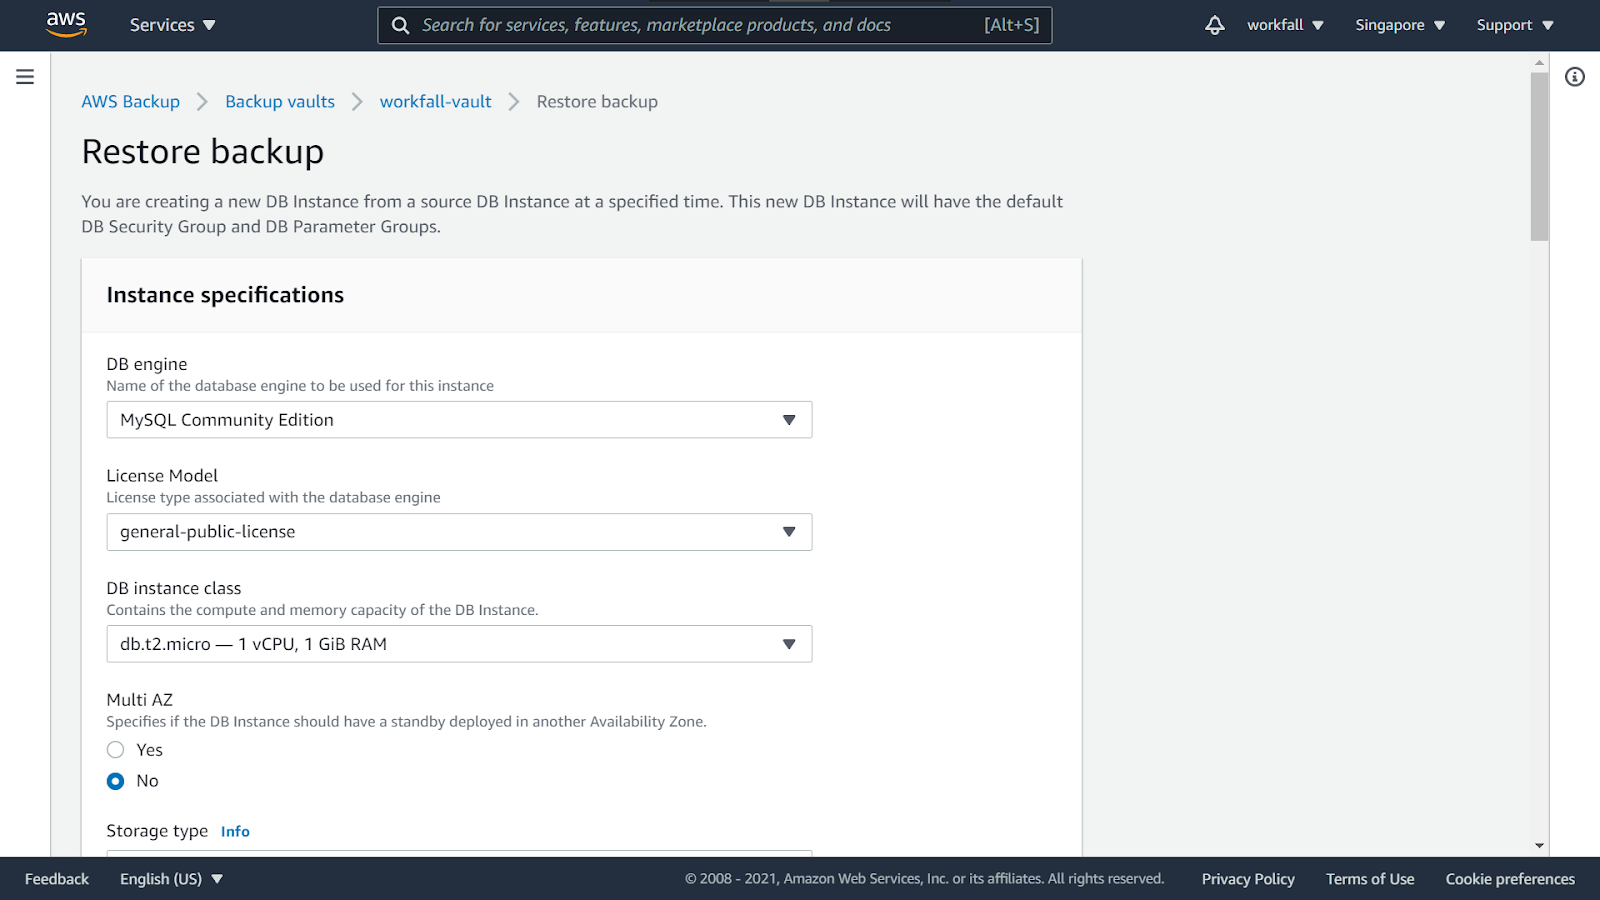
Type a name for the DB instance that is unique for your account in the Region that you selected. Select the VPC where the database needs to be restored. Select the subnet group in the VPC where the database needs to be restored.

Make the changes under the Database options as shown in the image below.

Scroll back down to the bottom of the dashboard and click on Restore backup.

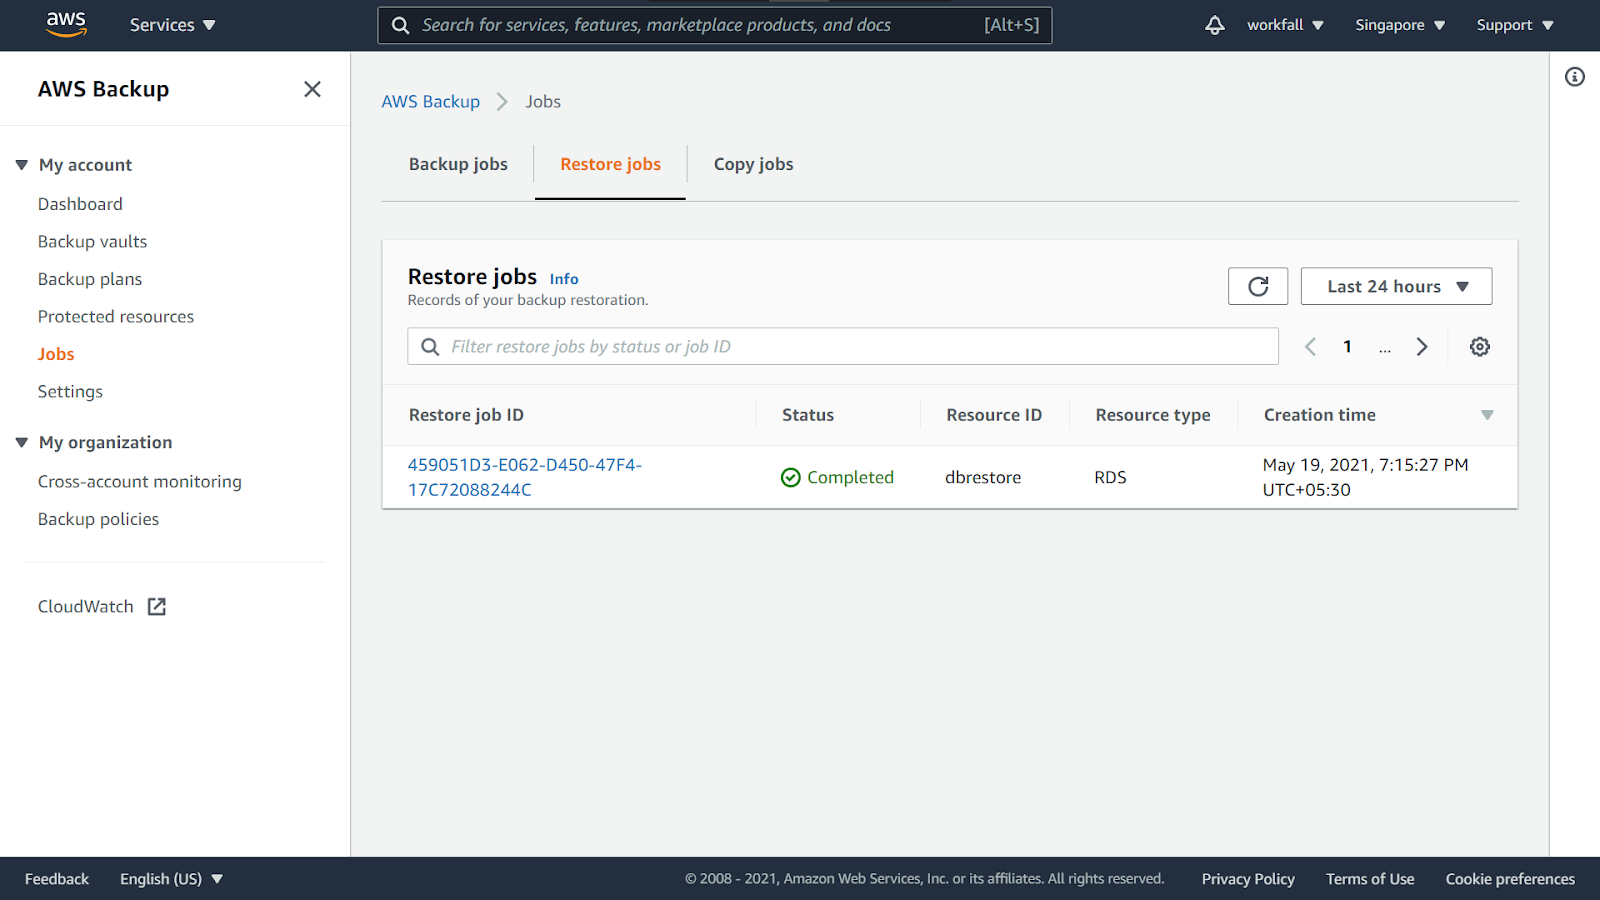
On success, you will see the message as shown below. While in process, the status will be shown as Pending.

On successful restore, the status will change to Completed which states that the backup has been successful.
Conclusion
In this blog, we saw how we can configure the AWS Backup service to create a backup for Amazon RDS. We also saw how to create an on-demand backup job of an Amazon RDS database, how to use a backup plan to backup Amazon RDS resources to automate your backups on a schedule, and how to add resources to an existing backup plan using tags. We will discuss more use cases of AWS Backup in our upcoming blogs. Stay tuned to keep getting all updates about our upcoming new blogs on AWS and relevant technologies.
Meanwhile …
Keep Exploring -> Keep Learning -> Keep Mastering
This blog is part of our effort towards building a knowledgeable and kick-ass tech community. At Workfall, we strive to provide the best tech and pay opportunities to AWS-certified talents. If you’re looking to work with global clients, build kick-ass products while making big bucks doing so, give it a shot at workfall.com/partner today.