Currently, 95% of enterprises use Active Directory for authentication. Adopting cloud technology successfully necessitates taking into account on-premises IT infrastructure and applications. Active Directory architecture that is both reliable and secure is a vital IT infrastructure basis for businesses that run Windows applications. The directory service can be hosted in the on-premise data centers, but it is not more elastic and doesn’t provide high availability. It also requires a skilled person to monitor and manage the computing of Active Directory Domain Services. Implementing Microsoft Active Directory services in the AWS cloud can help us to connect with Multiple workloads hosted in AWS and reduce latency in authenticating Domain users and other AWS services. In this blog, we will demonstrate how to Authenticate Windows EC2 Instance using AWS Managed Microsoft Active Directory.
In this blog, we will cover:
- What is Active Directory?
- What is AWS Directory Service and how does it work?
- Benefits of hosting Active Directory in the AWS Cloud
- Creating a Windows EC2 Instance
- Creating Active Directory in AWS
- Joining Windows EC2 instance to Active Directory Domain
- Managing Directory Services from Windows Instance
What is Active Directory?
Active Directory (AD) is a directory service developed by Microsoft for Windows domain networks, using which we can manage computers and other devices on a network. It also allows to set up and configuring of domains, access rights, users, and groups. The IT team uses AD to organize the company’s complete hierarchy from which computers belong on which network, to what your profile picture looks like, or which users have access to the database server. For example, when a user logs into a computer that is part of a Windows domain, Active Directory checks the password and determines whether the user is a system administrator or a normal user.
What is AWS Directory Service and how does it work?
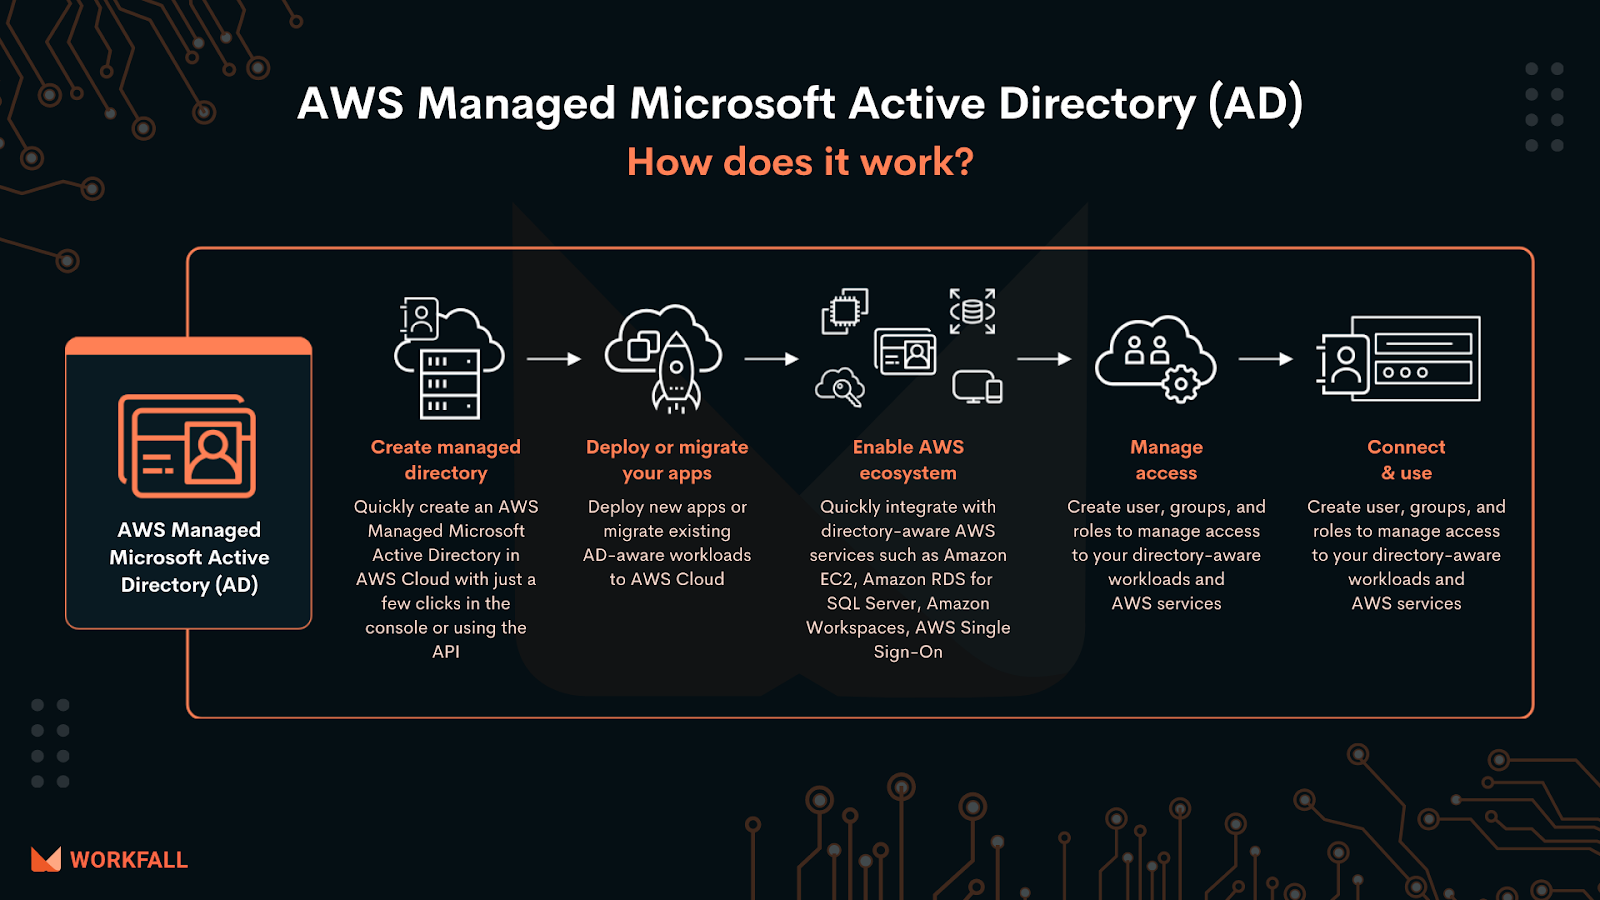
AWS Managed Microsoft AD is based on a real Microsoft Active Directory, so you won’t have to synchronize or replicate data from your local Active Directory to the cloud.AWS Managed Microsoft Active Directory (AD), enables your directory-aware workloads and AWS resources to use managed Active Directory (AD) in AWS. You can quickly join Amazon EC2 and Amazon RDS for SQL Server instances to your domain with AWS Managed Microsoft AD, and leverage AWS End-User Computing (EUC) services like Amazon WorkSpaces with AD users and groups. In this blog, we will demonstrate how to join an EC2 instance to the active directory domain. You can refer to the following image to understand how does it work:
Benefits of hosting Active Directory in the AWS Cloud
The following are the benefits of hosting AD in the AWS Cloud.
- All the workloads that depend on Active Directory can be easily migrated to AWS Cloud.
- Centrally manages the authentication and authorization in the Cloud.
- It’s highly available.
- It helps avoid the complexity of replicating and synchronizing data across multiple directories.
- It helps in setting up users, groups, and policies to quickly authenticate AD-related workloads.
- AWS provides FSx for Windows File servers which is highly scalable and requires AWS Managed Microsoft Active Directory for Authentication.
Hands-on
As we are going to set up an AWS-managed Active directory service, we should check for the following:
- VPC with public and private subnets
- Running Windows EC2 Instance
Once we have set up the VPC with the subnets and the Windows EC2 instance running within the VPC. We will go ahead and create an active directory service in AWS and join the Windows EC2 Instance with it.
Creating Active Directory in AWS
From the AWS console, below security, identify, & compliance, select Directory Service.

And you will see the following screen.

Click Set up directory and then AWS Managed Microsoft AD as the directory type.

and click Next
Microsoft AD is available in two editions.
Standard Edition: These editions are used for small and medium-sized businesses.
Enterprise Edition: For large businesses, Enterprise Edition can be used.
Choose the edition as per your requirement.
For this implementation, we are choosing Standard Edition.

For Directory DNS names, we need to provide a fully qualified domain name which should be able to resolve within the VPC.
These DNS names do not need to be publicly available.

Optionally, we can provide a name for the networking service (NetBIOS name), if we don’t provide it, it will automatically pick the first part of the Directory DNS name.
Then, we need to set up admin passwords.
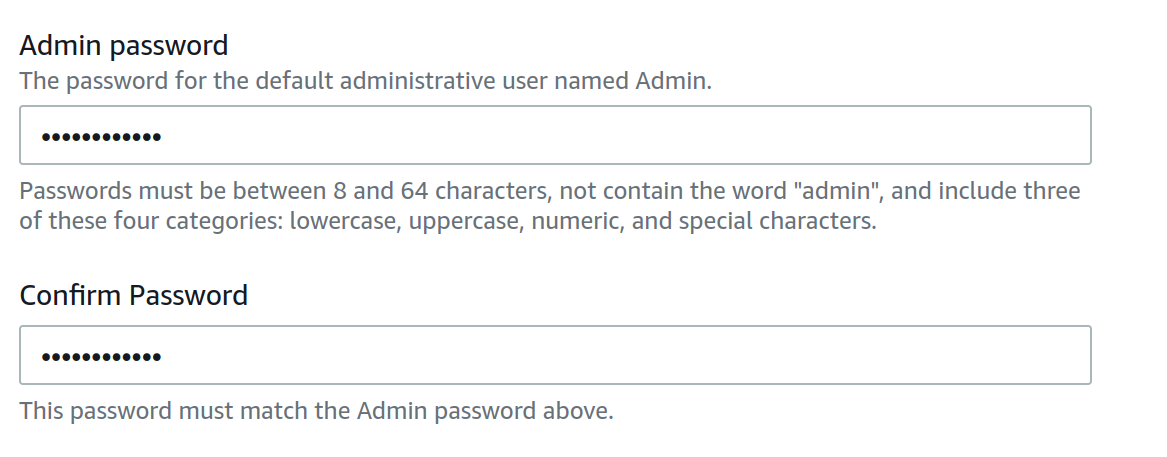
Click Next
Under Choose VPC and subnets, define where the directory service should be created.
For this, we must need at least two subnets that are of different availability zones in a VPC.
Choose the VPC and the preferred subnets.

Choose next, review the configurations and then select Create directory.
The AD is in the creating state, it will take up to 20-45 minutes.
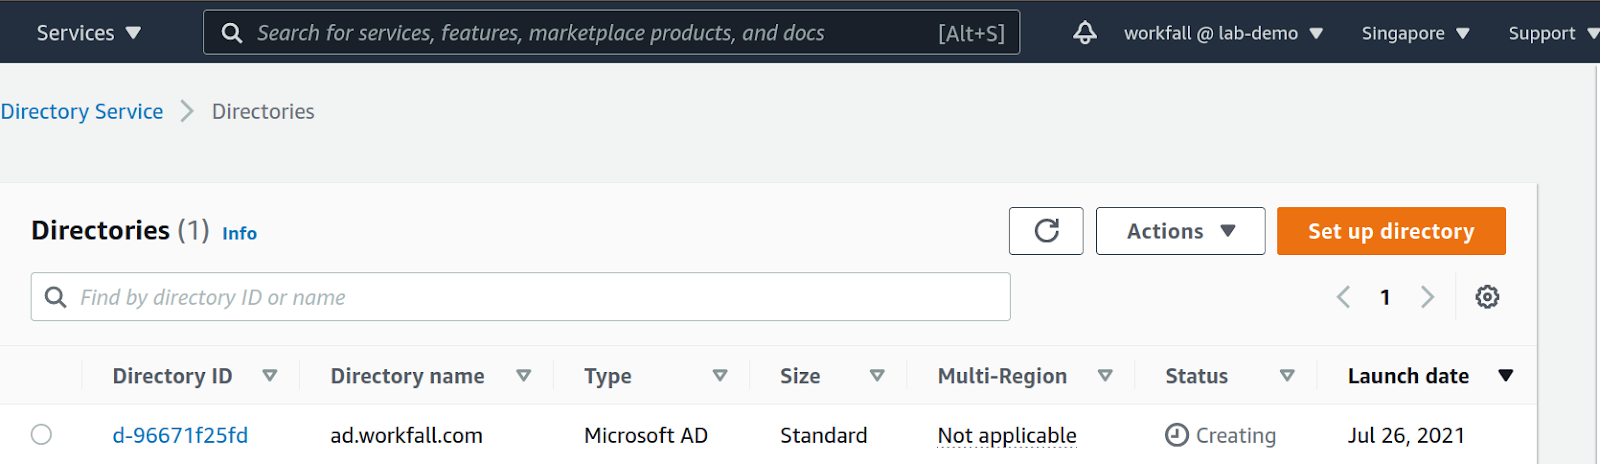
Directory service is implemented and is Active.

Click the Directory ID to find information like DNS name, DNS addresses, etc.
The next step is to create and join the Windows EC2 instance to the Active Directory domain.
Creating Windows EC2 Instance
To create a Windows EC2 instance, log in to EC2 Console.
In the navigation pane, choose Instances
Choose Launch Instance.
Step 1: Choose an Amazon Machine Image (AMI) page that displays the lists of AMI’s, that serves as a template for the EC2 instances.
AMI is an operating system such as Ubuntu, CentOS, Windows, etc…
For this implementation, select the AMI of the Windows OS.

Step 2: Choose the preferred Instance Type, we should choose the hardware configuration of the Instance such as CPU, memory.

Click Next: Configure Instance Details
Step 3: Configure Instance Details, select the VPC and the subnet to launch the windows instance.
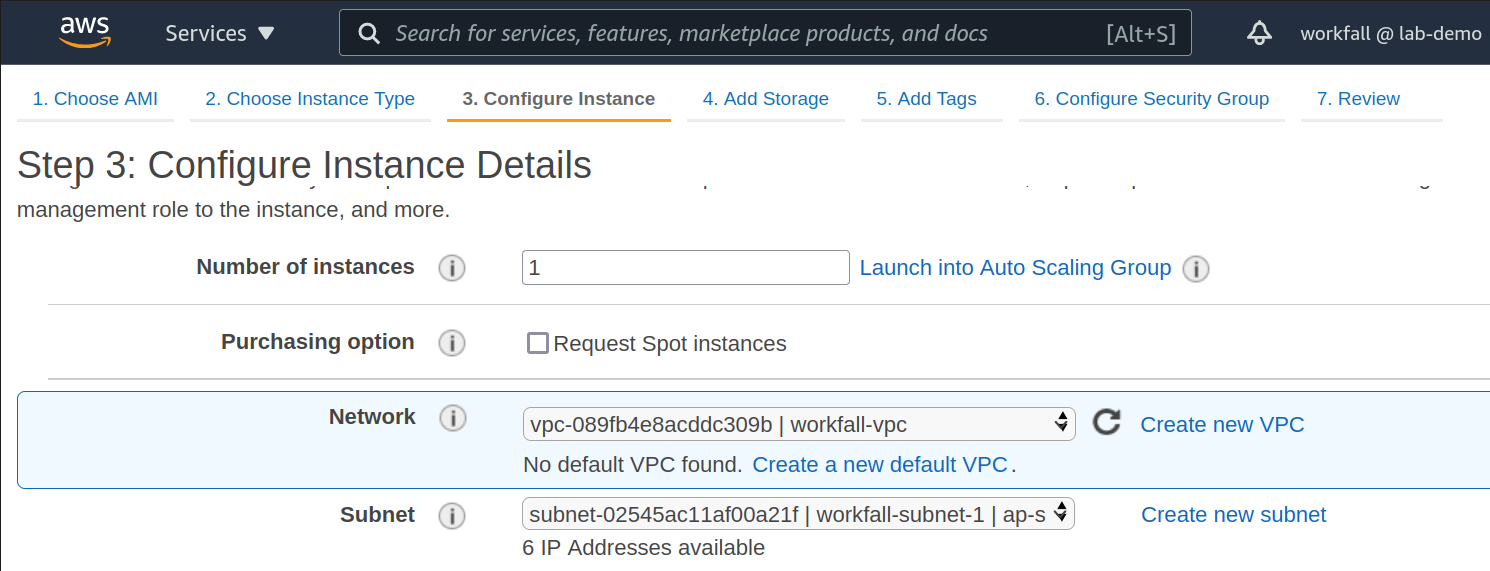
and click Next: Add Storage
Step 4: Add Storage, enter the Storage size and Volume type to be used for the Windows Instance.
If required we can attach an additional volume with the Instance during launch.

and click Next: Add Tags
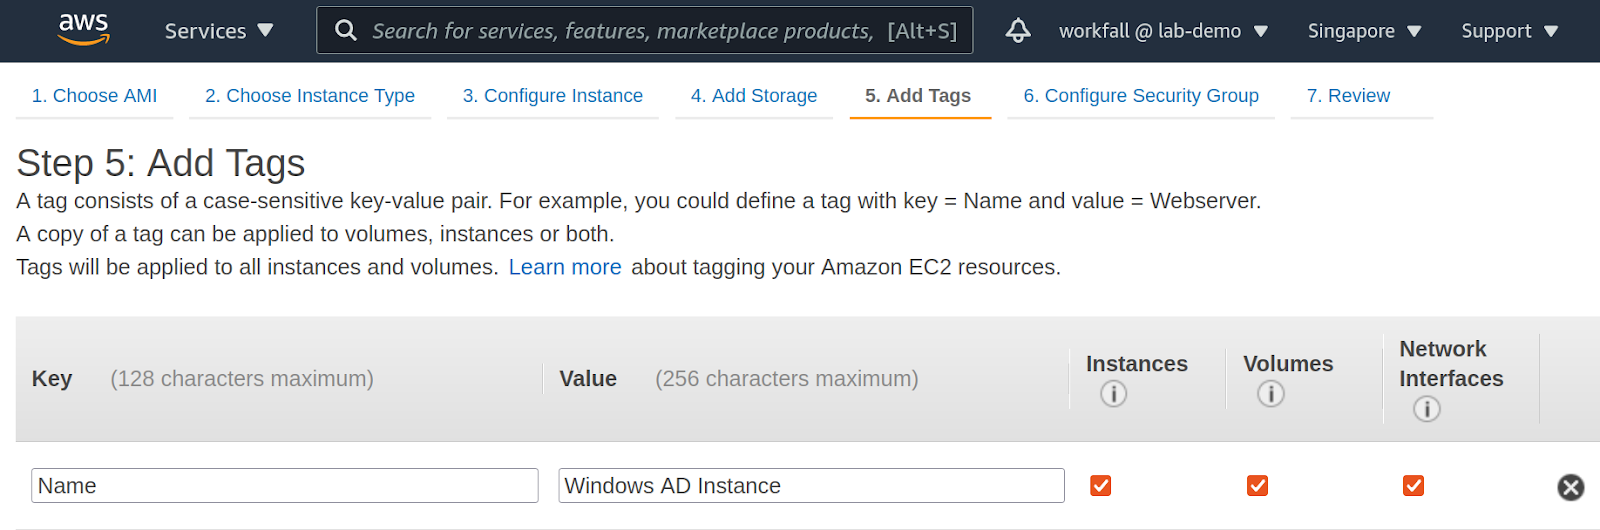
Step 5: Add Tags
Provide a Key and Value, for example, Name: WindowsOS
Click Next: Configure Security Group
Step 6: Configure Security Group, a security group is a firewall rule which will control incoming traffic to the instance.
We can allow specific ports for the instances, after launching the instance, to login to the Windows EC2 instance, we need to allow port 3389 (RDP).
Also, provide names for the security group to manage security groups easily.

A security group can be modified at any time, post launching the instance as well.
Click Review and Launch
Step 7: Review Instance Launch, here is the review of all the configurations for the EC2 instance, once you validate, choose Launch
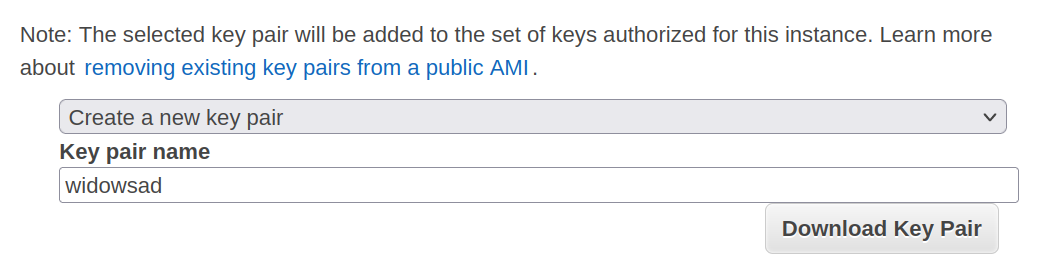
If you are launching an instance for the first time, you should set up a key pair using which you can log in to the server.
If you have a key pair already. It can be used.
Choose to Create a new key pair
Enter the key pair name and press Download Key Pair
The .pem file will be downloaded to the local system.
and click Launch Instances
The instance has started creating, which has its own instance ID.

Click View Instances
The instance is successfully created and is running.
We should be able to RDP into the instance.

The instance is ready to be added to the Active Directory Domain.
Joining Windows EC2 Instance to the Active Directory Domain
Login to the EC2 instance using the RDP client such as Remmina as a Local administrator.
To connect to the Windows EC2 Instance, check the Instance and click Connect and then select RDP client.

To get the password of the Instance, click get the password and upload the .pem which was downloaded while creating the EC2 instance.
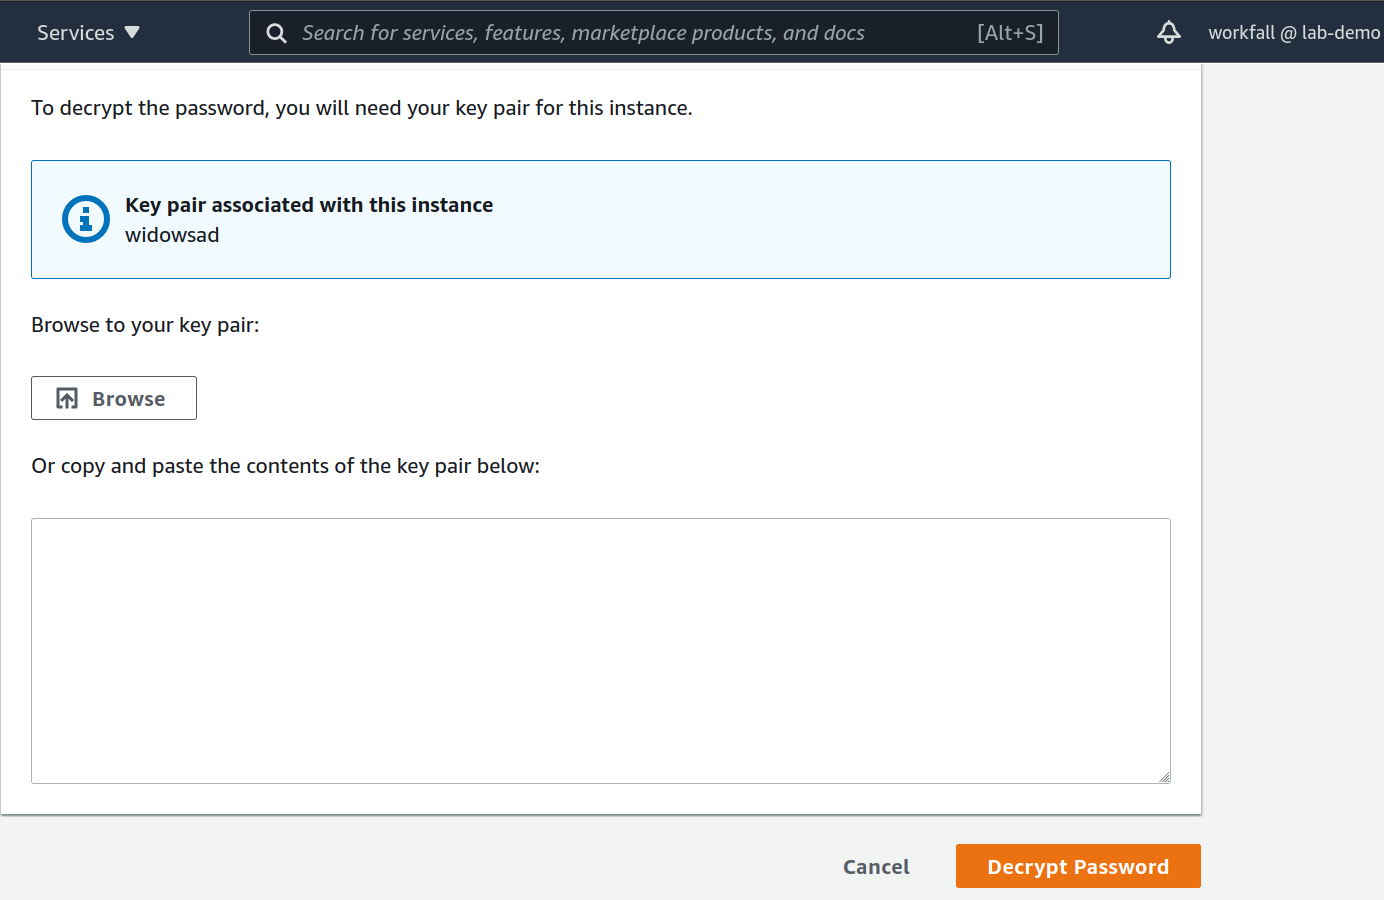
Click Browse and upload the .pem file and click Decrypt Password.
You can see the password now, make a note of it.
Now open the Remmina or any RDP client from the Local system and provide the Instance Public IP Address and the username and Password.
You will be connected to the Windows EC2 Instance as Administrator.
Let’s join Windows EC2 Instance to the Active Directory Domain service.
We need to configure the DNS of the Windows EC2 Instance with the DNS addresses of the Active directory domain service.
To do this, in the search box, type run, open it, and then ncpa.cpl and click OK.
Which will open the Network Connections where we can see the network adapters.
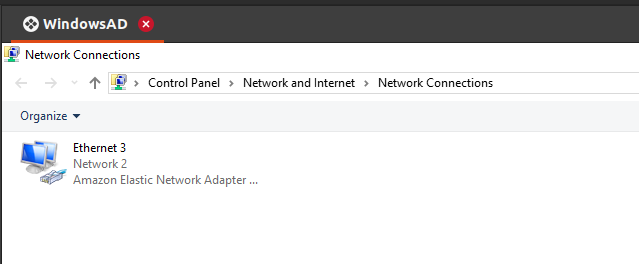
Right-click on that, and then choose Properties.

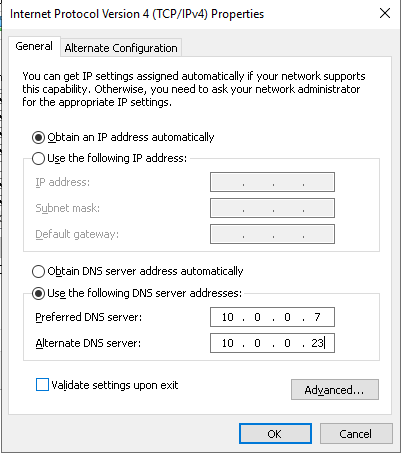
Select Internet Protocol version 4 (TCP/IPv4) and choose Properties.

Select, use the following DNS server addresses and enter the DNS addresses of the Active Directory domain service.
Click OK.
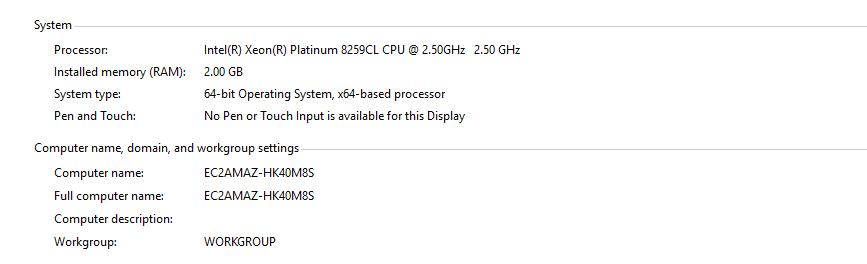
Now, open File Explorer.
Right-click This PC and select Properties.

To add an instance to Domain, click Change Settings.
and under Computer Name, select Change, choose Member of Domain, enter the DNS name (ad.workfall.com) of the directory service, and Press OK.

Which requires the directory service’s Admin username and Admin password.
Enter the credentials and click Okay.
You will be greeted as,
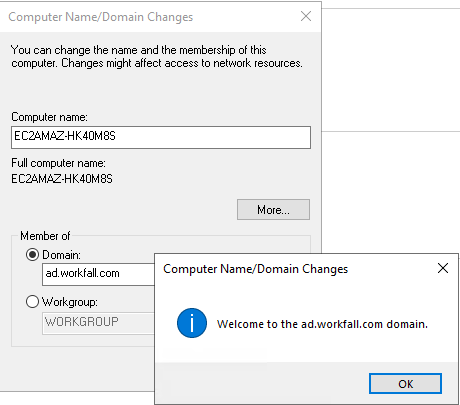
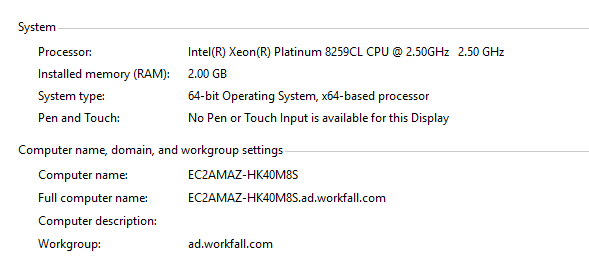
The Windows EC2 instance successfully joined the Active Directory domain services.
Restart the EC2 instance for the changes to take effect.

After reboot, we can RDP to the instance as Directory Service Admin instead of using the credentials of Local Admin credentials.
How to Manage Active Directory Services?
From the AWS Directory services console, we don’t have many options to manage users, groups, computers of the Active Directory.
We will be using the same instance to manage the AWS Managed Directory Service.
Search and open the Server Manager.
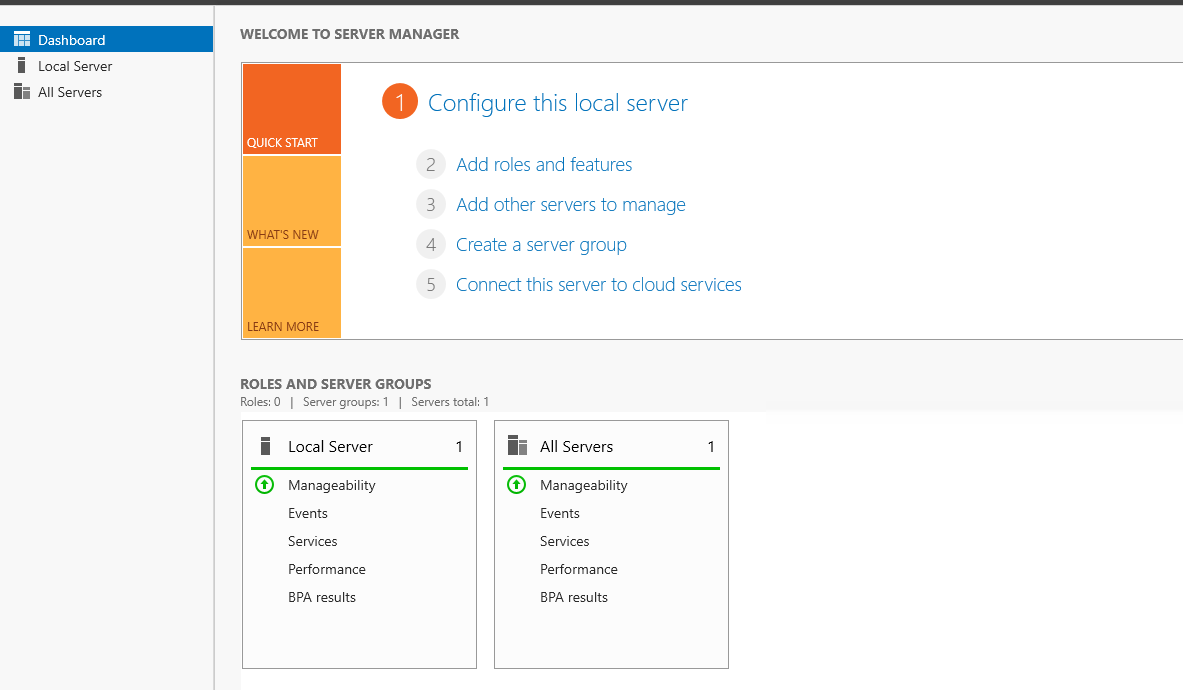
Click add roles and features, click Next.
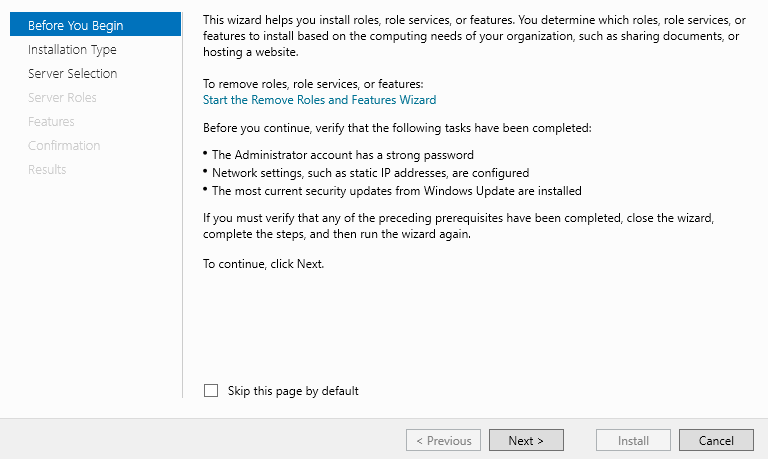
Installation type, choose role-based or feature-based installation, and select Next.

For the Server Selection, the same instance will be used for the installation of features and roles.
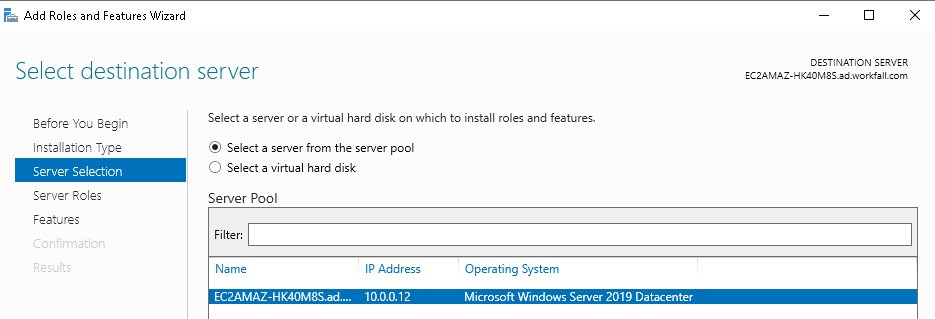
and click Next
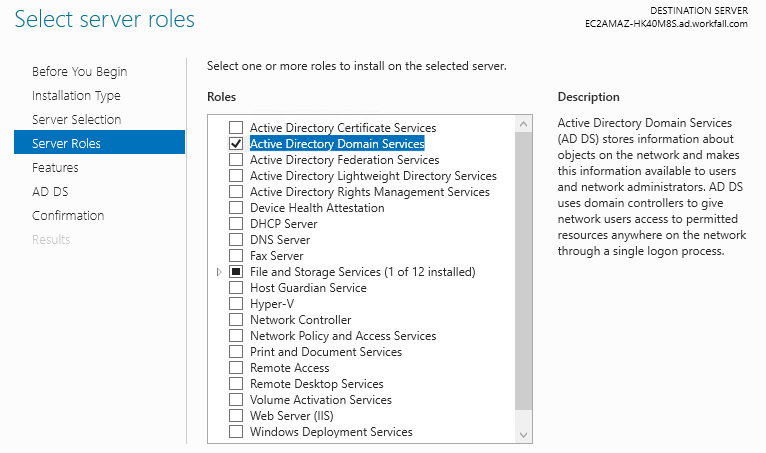
For Server Roles, no Role installation here.
Click Next, for Features
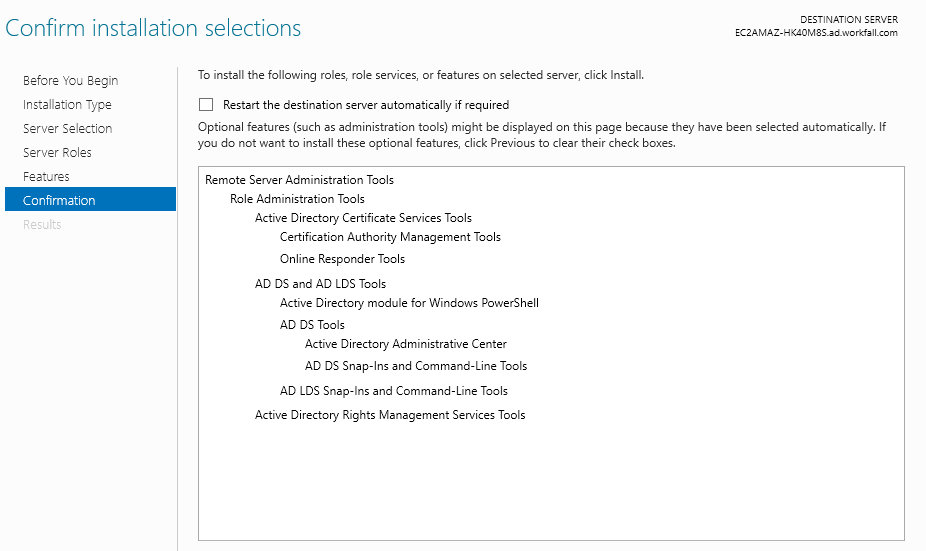
Choose Remote Server Administration Tools, and select Role Administration tools
Check AD DS and AD LDS tools
Make sure Active directory-related features are chosen.

and click Next and click Install.
The installation of features has started.

Now the feature installation is successfully completed and click Close.

To avoid features based Installation, we can perform Role-based installation for AD.
Simply choose Active Directory Domain Services, install it.
Which will install directory service-related features on the system.
Under Windows Administrative tools,

Choose Active Directory Users and Computers.
You will see the following screen.

No other user except Admin is peasant on the Active Directory Domain.
It is not recommended to delete the Admin user.
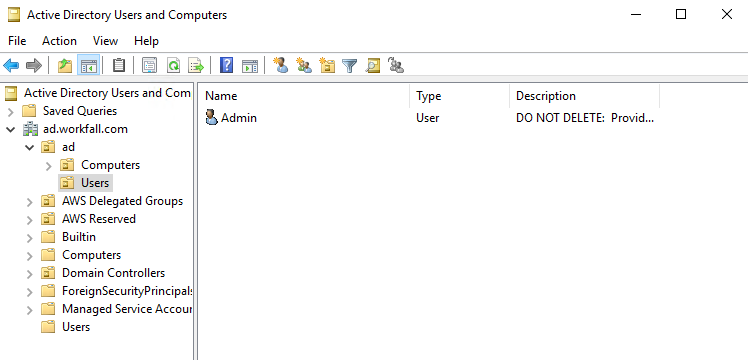
From this console, we should be able to manage computers, domains, users, groups, access rights, etc.
To create a User, choose New and select User.

Set a username and password under the Domain: ad.workfall.com
The User is successfully added to the Domain. To authenticate as the Domain user, log in to the Windows system using the domain credentials.
Conclusion
In this blog, we have successfully implemented AWS Managed Microsoft Active Directory Domain Services and we have also launched a Windows EC2 Instance and joined the Instance with the AD Domain. Also, we have seen how to set up users in the Active Directory and how users can make use of domain credentials to log in to the system. In the upcoming blogs, we will see how we can make use of the AWS Managed Directory service to authenticate FSx for the Windows File server. Stay tuned to keep getting all updates about our upcoming new blogs on AWS and relevant technologies.
Meanwhile …
Keep Exploring -> Keep Learning -> Keep Mastering
This blog is part of our effort towards building a knowledgeable and kick-ass tech community. At Workfall, we strive to provide the best tech and pay opportunities to AWS-certified talents. If you’re looking to work with global clients, build kick-ass products while making big bucks doing so, give it a shot at workfall.com/partner today.