Lightsail is an easy-to-use virtual private server that offers everything which is needed to build a cost-effective website with a monthly plan. This approach is suitable for prototyping and test environments as well for blogs, custom sites, and e-commerce applications. In this blog, you can explore everything about Amazon Lightsail including a business scenario to spin up a WordPress site quickly with a customized look and feel, least configuration efforts, and minimal costs.
In this blog, we will cover:
- What is VPS?
- Types of VPS
- What is Amazon Lightsail
- What is a Lightsail Instance?
- Amazon Lightsail features
- Available Lightsail plans
- How is Lightsail different from EC2?
- Benefits of using Lightsail.
- Significance of Amazon Lightsail.
- How is Lightsail better than its competitors?
- Fulfill high-performance WordPress requirements
- Business Scenario – Spin up a WordPress site for a company Workfall to maintain the blogs with the least configuration efforts and minimal costs quickly.
What is VPS?
Virtual Private Server i.e. VPS is software that represents a physical server, which can be used in allocating computed resources for a job while staying abstracted from the present physical server layer.
Types of VPS
There are two main categories of Virtual Private Servers –

What is Amazon Lightsail?
Amazon Lightsail is an Amazon cloud service that offers a variety of cloud computing functions while also making it simple to use with built-in memory for novice or inexperienced cloud users.
Amazon Lightsail comes with a slew of tools to help customers convert their ideas into reality with minimal effort. Lightsail proves to be a one-stop shop for all cloud service needs thanks to its well-designed VPS.
What is a Lightsail instance?
A virtual private server (VPS) in the AWS Cloud is referred to as a Lightsail instance. Lightsail instances can be used to store data, run code, and create web-based applications or webpages. Both public (Internet) and private (VPC) networking options are available for connecting your instances to other AWS services. From the Lightsail console, you can simply create, manage, and connect to instances.
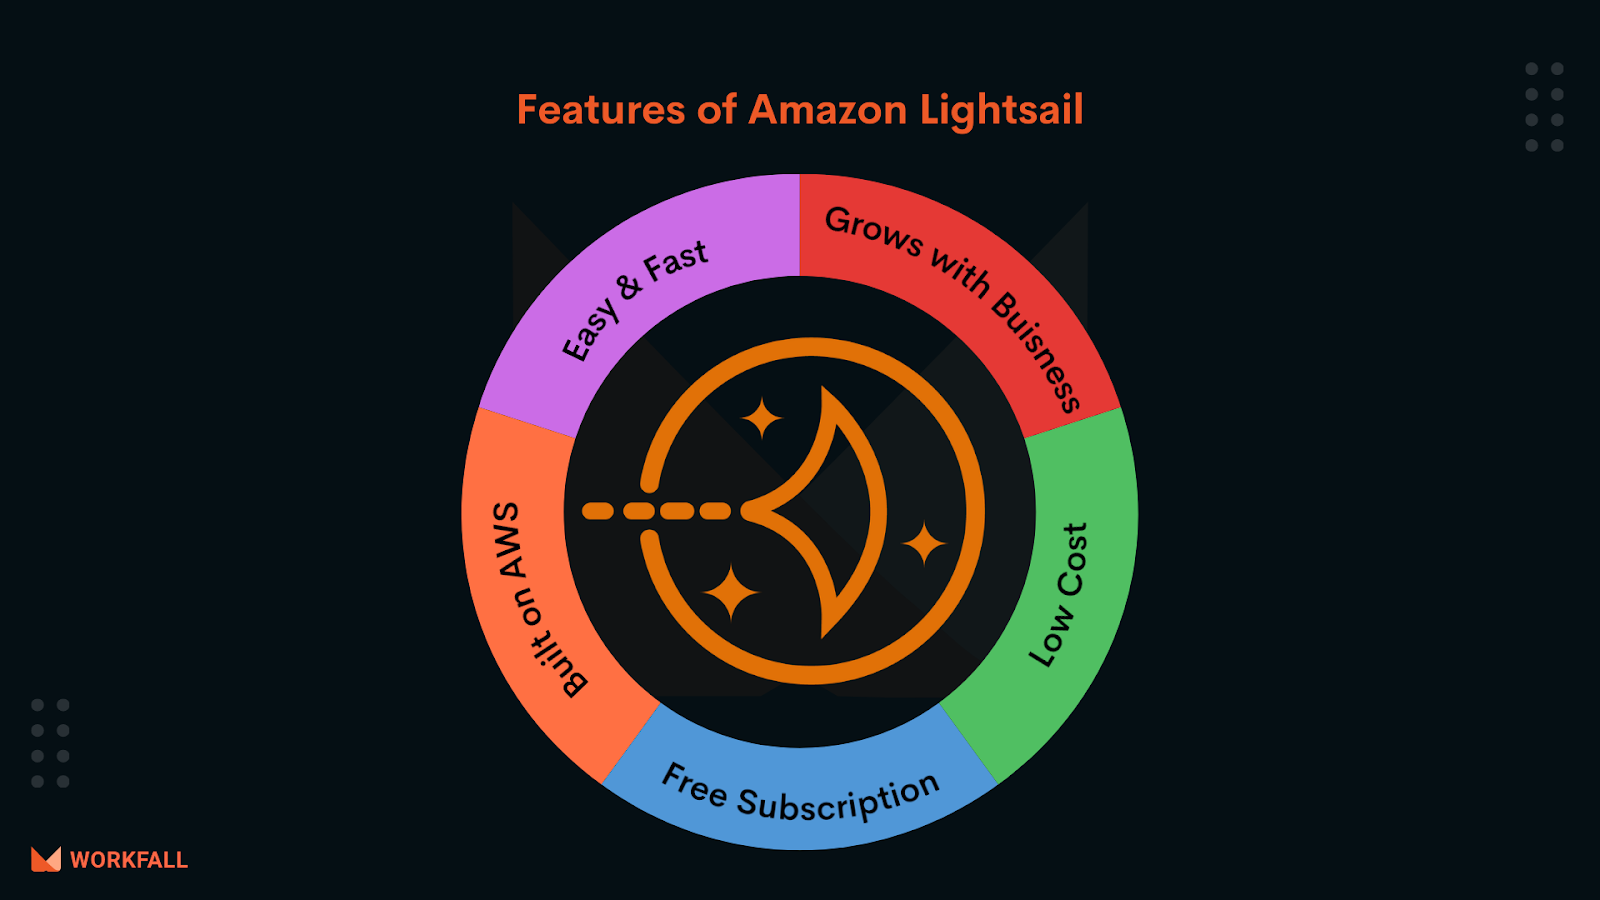
Amazon Lightsail Features
- Snapshots for protecting your information
- Lightsail virtual private server
- Simplified load balancing
- Secure networking. Configuring the details of the network through AWS is easy and secure. It can be accessed by IP address, DNS, firewall, and other methods.
- Access to a secure shell (SSH). Lightsail offers a cloud-based console for SSH connections.
- Access to other AWS services. It’s simple to connect Lightsail to AWS services such as managed databases, CDNs, and more.
- An application programming interface (API): Amazon provides a powerful API with which to develop your applications or integrate with external applications
Amazon Lightsail plans
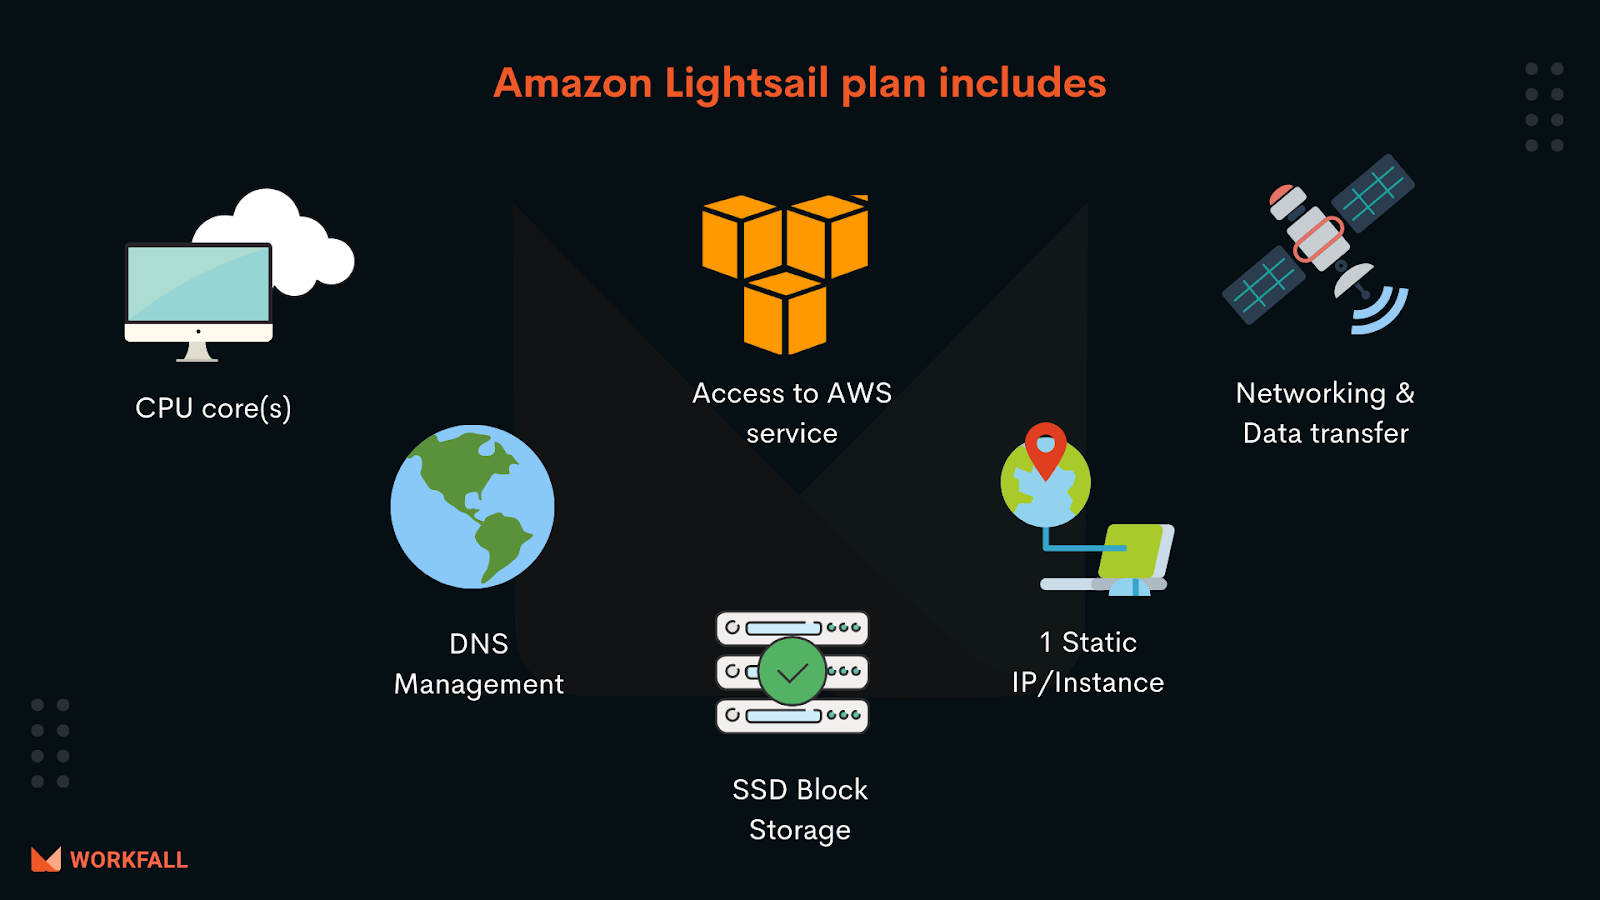
- Memory sizes range from 512 megabytes to 8 gigabytes;
- Single-core or dual-core processors;
- A solid-state drive with a storage capacity of 20 to 80 GB;
- Data transfer allowances of 1 to 5 TB;
- Prices from $5 to $80 per month.
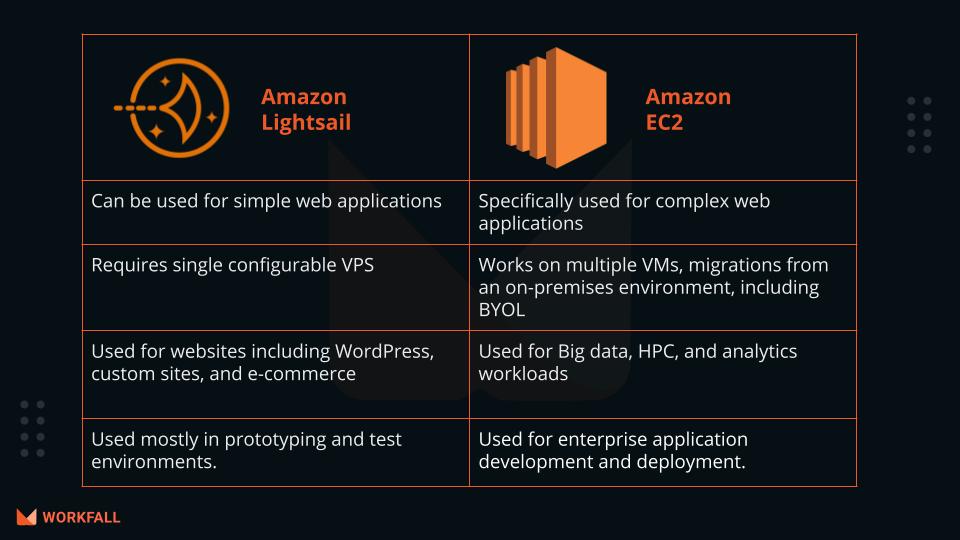
How is Lightsail different from EC2?
Benefits of using Lightsail
Let’s dive into some of the major benefits of Amazon Lightsail:
- User-friendly and simple for first-timers.
- The subscription is free for the first month. Plan prices start at only $3.5 per month.
- Take advantage of AWS’s extensive features.
- It will be more appealing to developers and businesses who use Amazon Lightsail for web hosting and application development.
- Because the services are delivered through Amazon’s infrastructure and data centers, there is rarely a need for replacement.
Significance of Amazon Lightsail
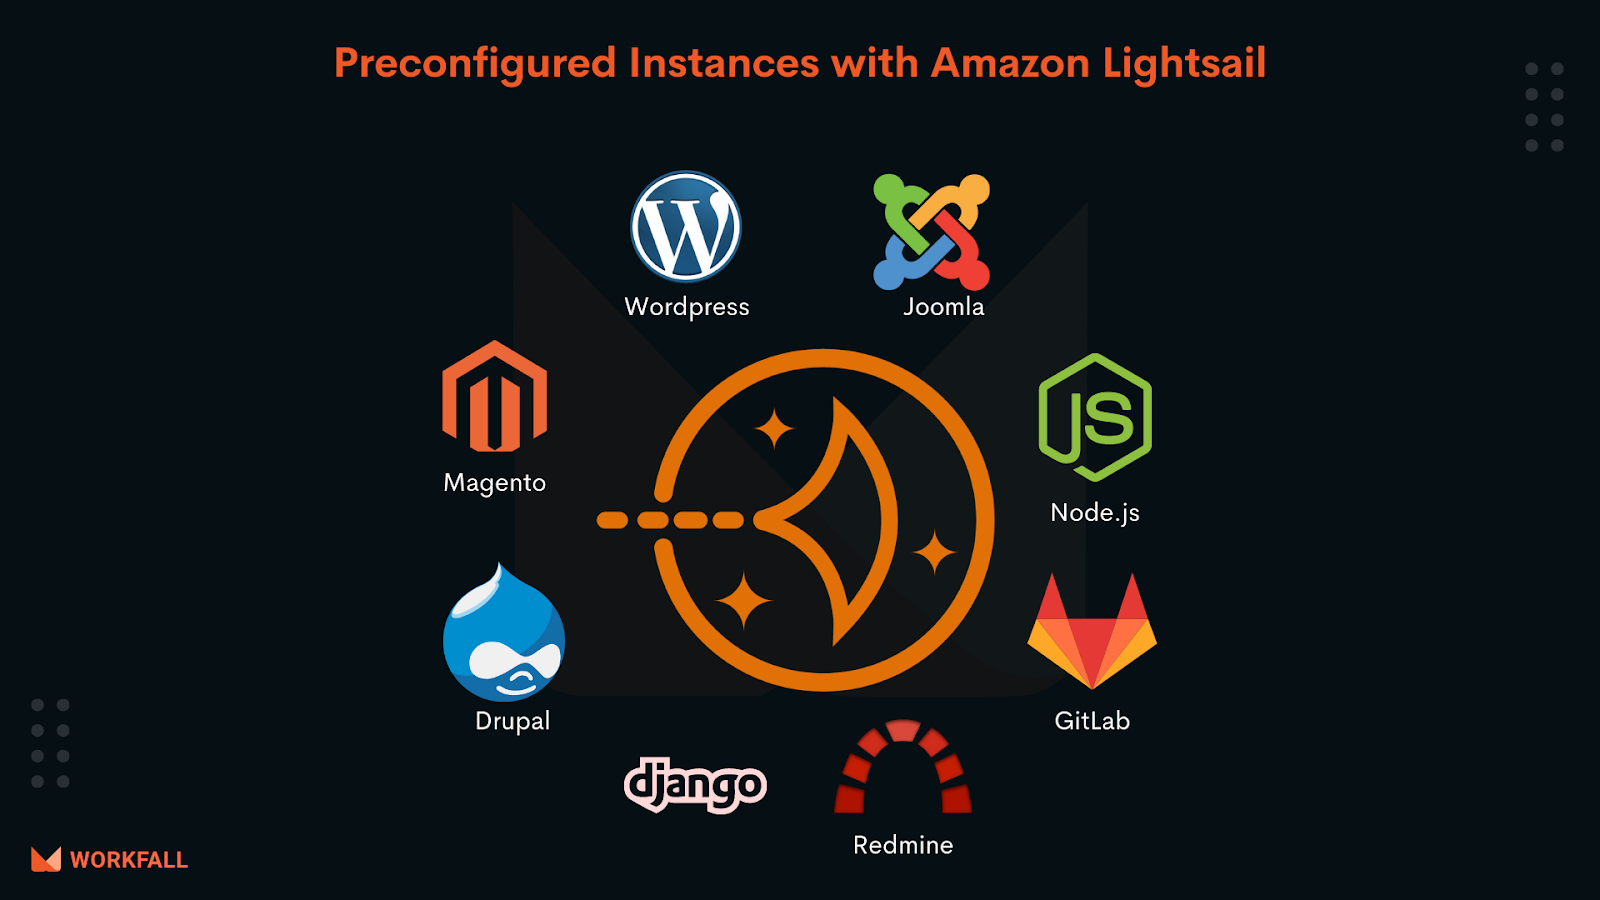
- Website: WordPress, Magento, Plesk, and Joomla are among the configured apps. Create and personalize your blog, e-commerce site, or personal website with ease.
- Dev/test Environments: Create dev sandboxes and testing environments apart from your production environment so you may test without fear of breaking anything. In a little time, you may join up for a developer or test environment. And, once it’s done, destroy them when you feel like it.
- Web applications simplified – Web application deployment has never been easier. It is simple to bring your web application online using pre-configured development stacks such as LAMP, Nginx, MEAN, and Node.js.
- Build your business – Lightsail helps you quickly launch your line-of-business software, like file storage and sharing, backups, financial and accounting software, and much more.
How is Lightsail better than its competitors?
- Even with shared hosting, Lightsail is delivering pricing that none of its competitors can match.
- That implies Amazon Lightsail should be a top choice for anyone searching for a more cost-effective alternative to shared hosting.
- At the same time, Lightsail offers enterprise-level tools and services for pricing that rivals the cheapest of the cheap when it comes to WordPress hosting.
It can be considered as a step up from Bluehost and GoDaddy, and the ugly duckling when it comes to VPS and cloud hosting solutions. But no doubt in thinking that it’s a good middle-of-the-road product between where shared hosting and enterprise-level cloud hosting come into action.
Fulfill high-performance WordPress requirements
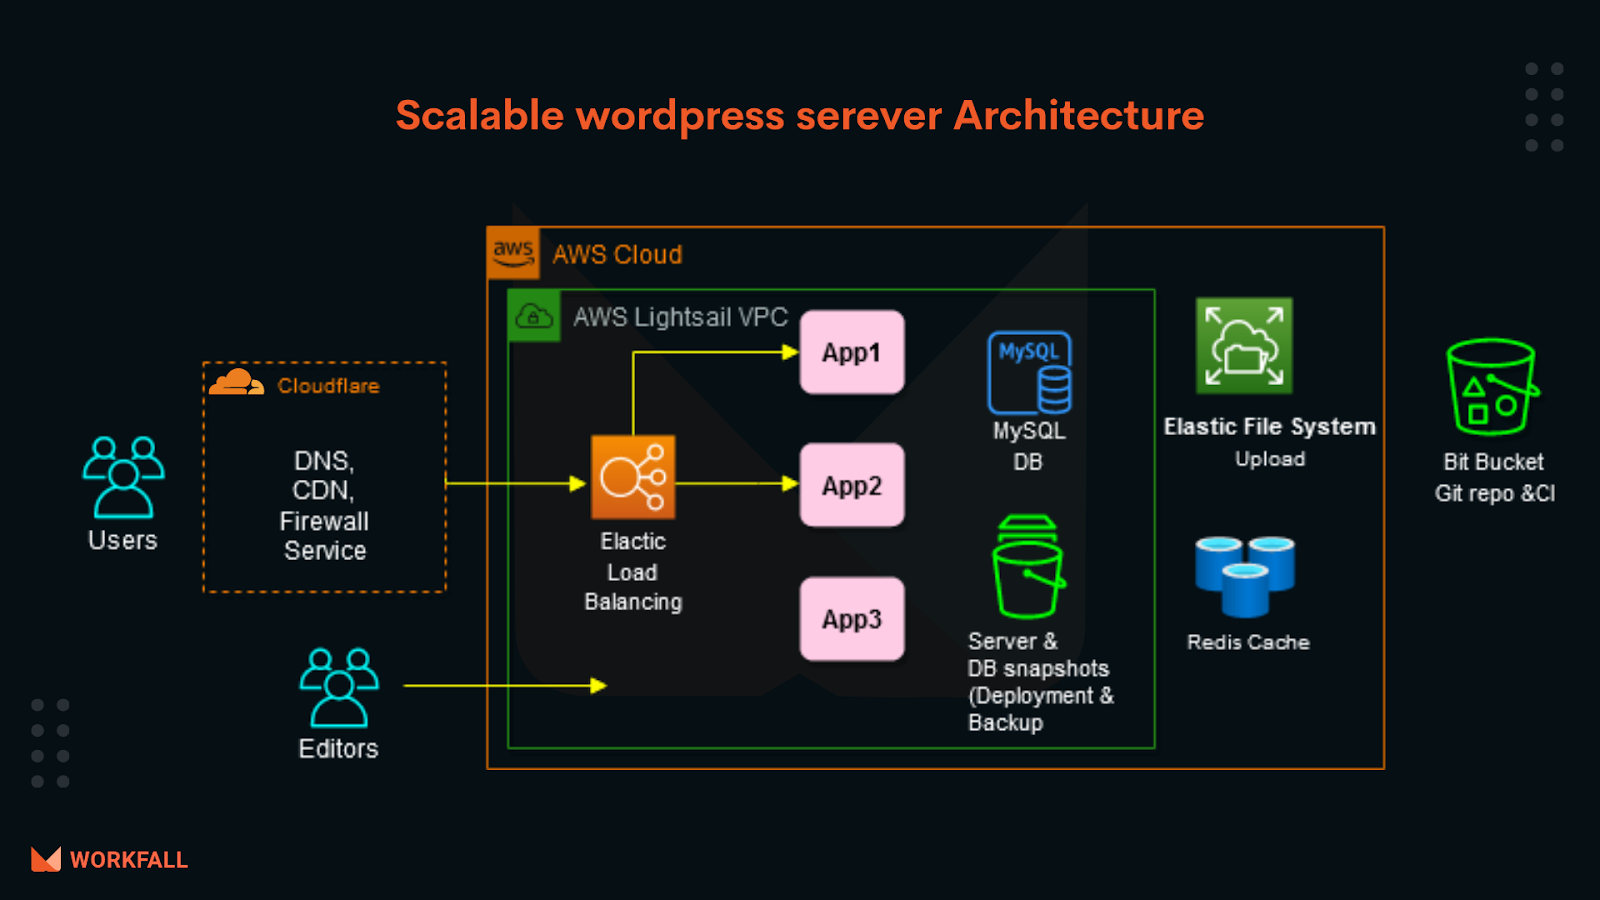
- Keeping the backend smoothly functioning regardless of the traffic.
- Minimal administrative management post setup.
- It is possible to set up a server with very little configuration.
- Deploy website updates with gits merge.
- Easy recovery from failure, and can quickly scale without any downtime.
Business Scenario
Let’s take an example of a company, Workfall wishes to preserve its blogs on a separate blog page that is handled by them. There is a pressing need to set up a blog site as quickly as possible with the fewest setups and lowest prices. For this reason, the internal team decided to use Amazon Web Services to get up and running swiftly. Based on the traffic estimates and configuration efforts, the internal team decides to use Amazon Lightsail to swiftly spin up their blog site with the least amount of configuration and cost.
To implement this, we will do the following:
- Go to the AWS dashboard and sign up for Amazon Lightsail.
- Create a WordPress instance from the options provided in Amazon Lightsail
- Connect to the newly created instance via SSH and get the password to access the dashboard of your WordPress site
- Sign in to the admin dashboard for your WordPress site and start using WordPress
- Customize your WordPress site
- Make a Lightsail static IP address and use it to connect your WordPress site to it.
- Create a Lightsail DNS zone for your WordPress site and map a domain to it.
To get started, log in to your AWS account and go to the Lightsail service in the AWS interface. You’ll be taken to the Amazon Lightsail control panel.
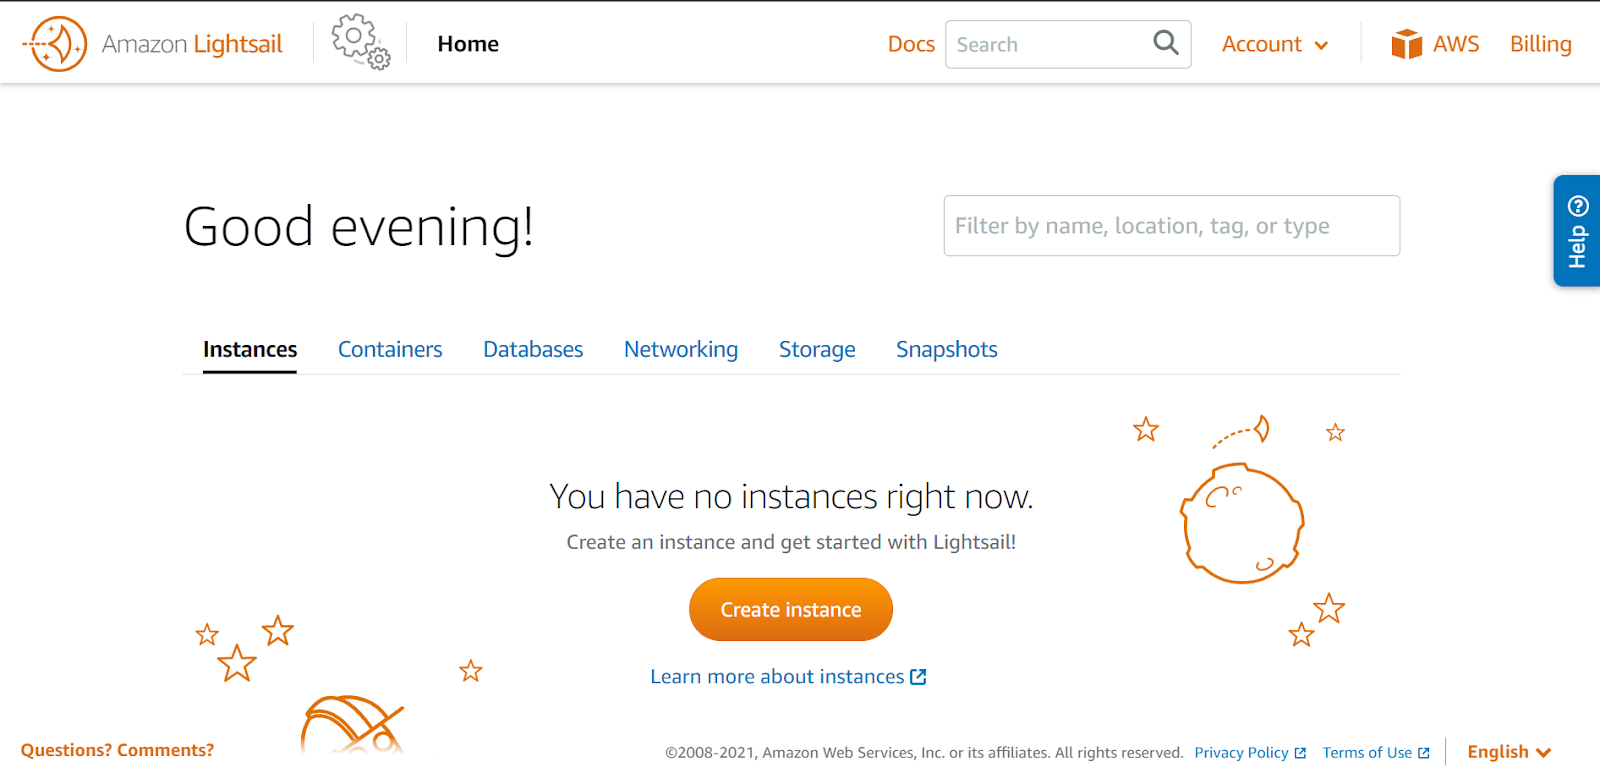
To create a WordPress instance for your site, click “Create instance.” Select your instance’s “AWS Region” and “Availability Zone.”

Select “Linux/Unix” as the platform in the “Pick your instance image” section, and “WordPress” as the blueprint in the “Select a blueprint” portion.

Scroll down to the “Choose your instance plan” section and select the instance plan that best meets your requirements. We’ll be using an instance plan of “$3.5 USD” for this blog, which includes a month of free service.

Now, scroll down to the “Identify your instance” area and give your WordPress instance a name, select a count for the number of instances, and add tags (if applicable) to it.
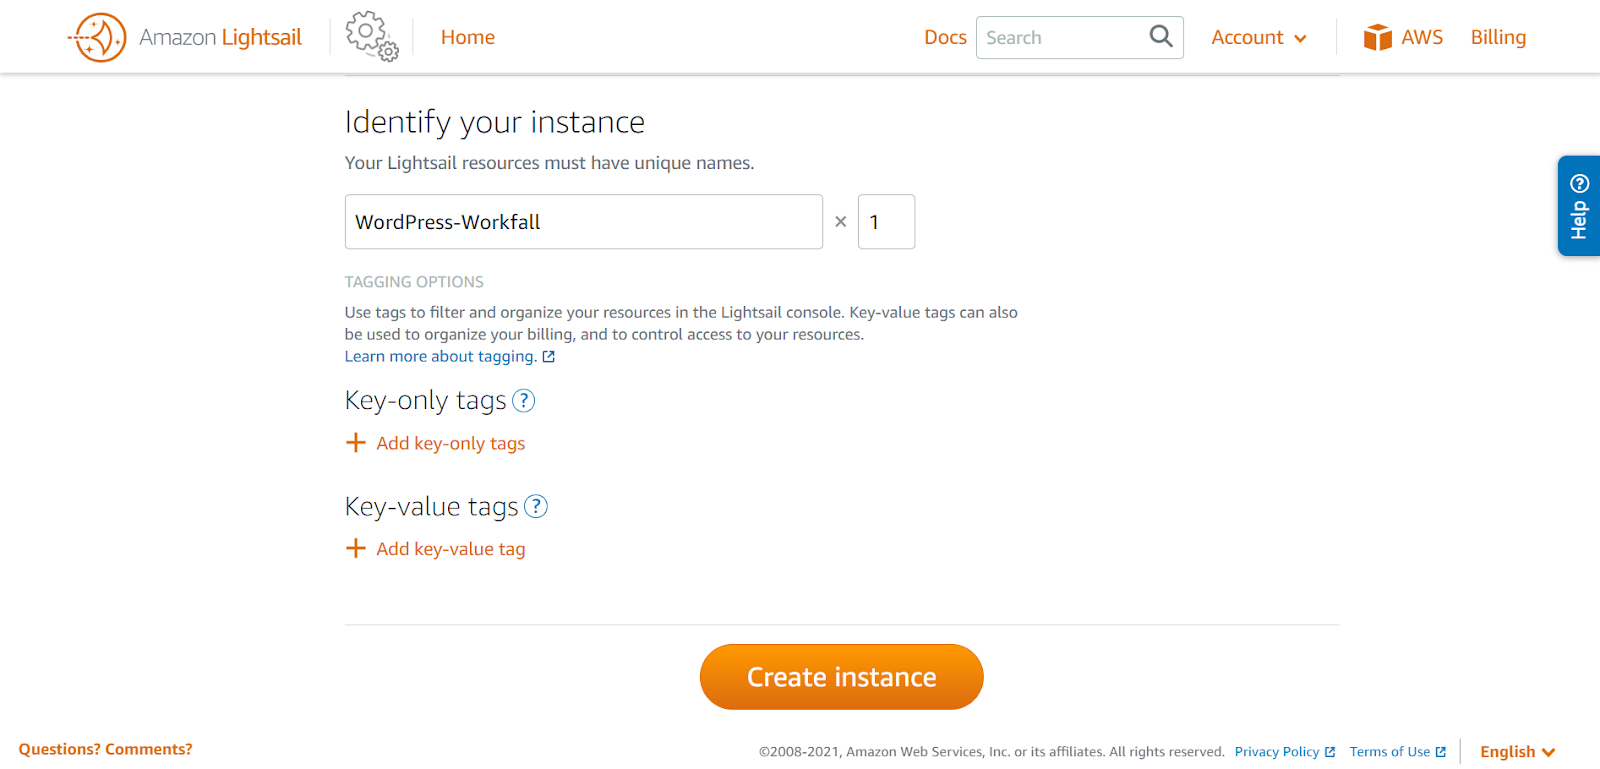
Finally, click “Create instance,” and Amazon Lightsail will start spinning up the new server, with the status set to “Pending.”
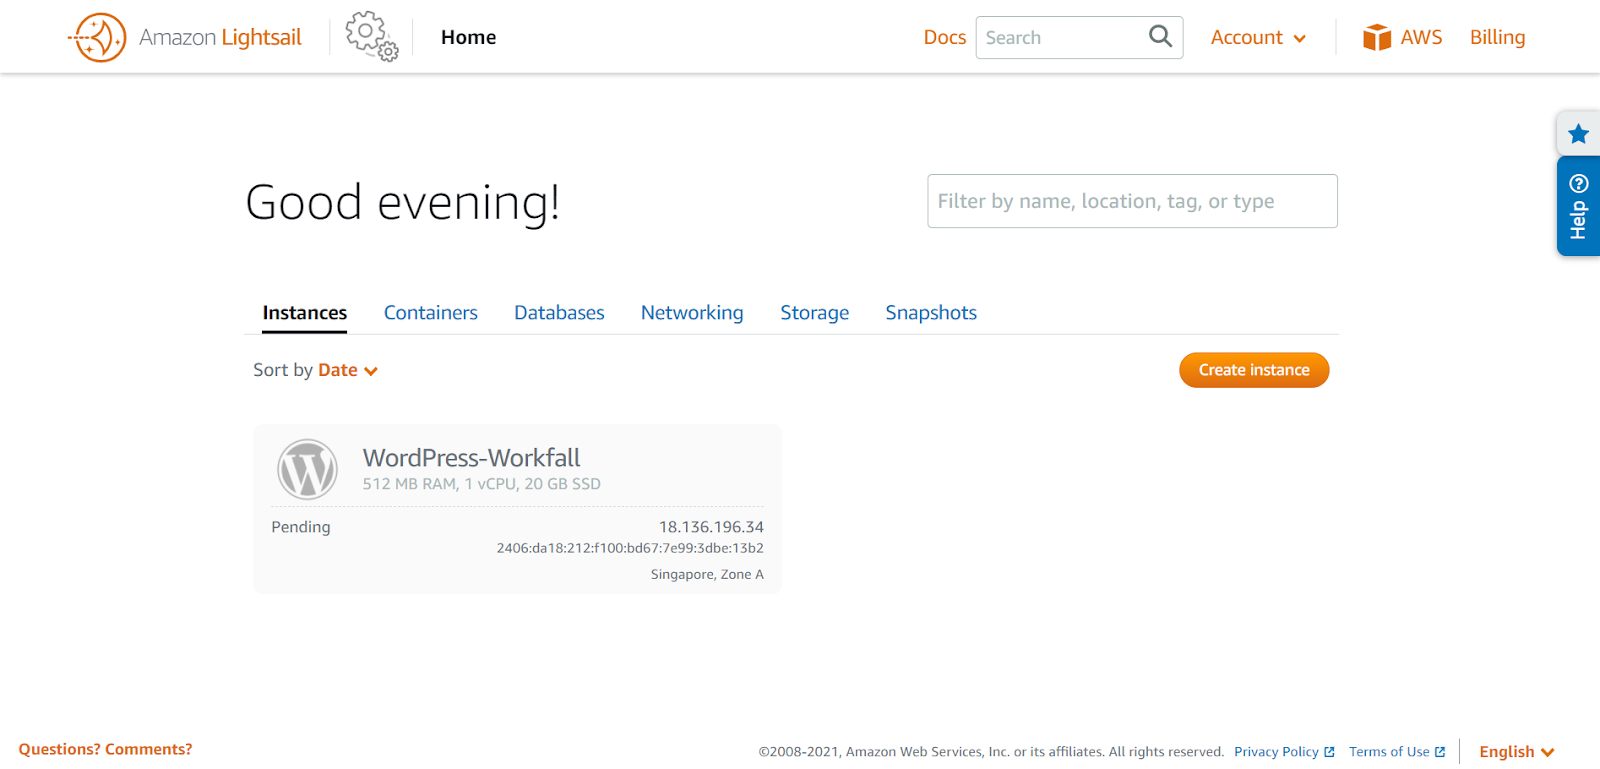
The state of your instance changes to “Running” within a few minutes, once the server has launched.

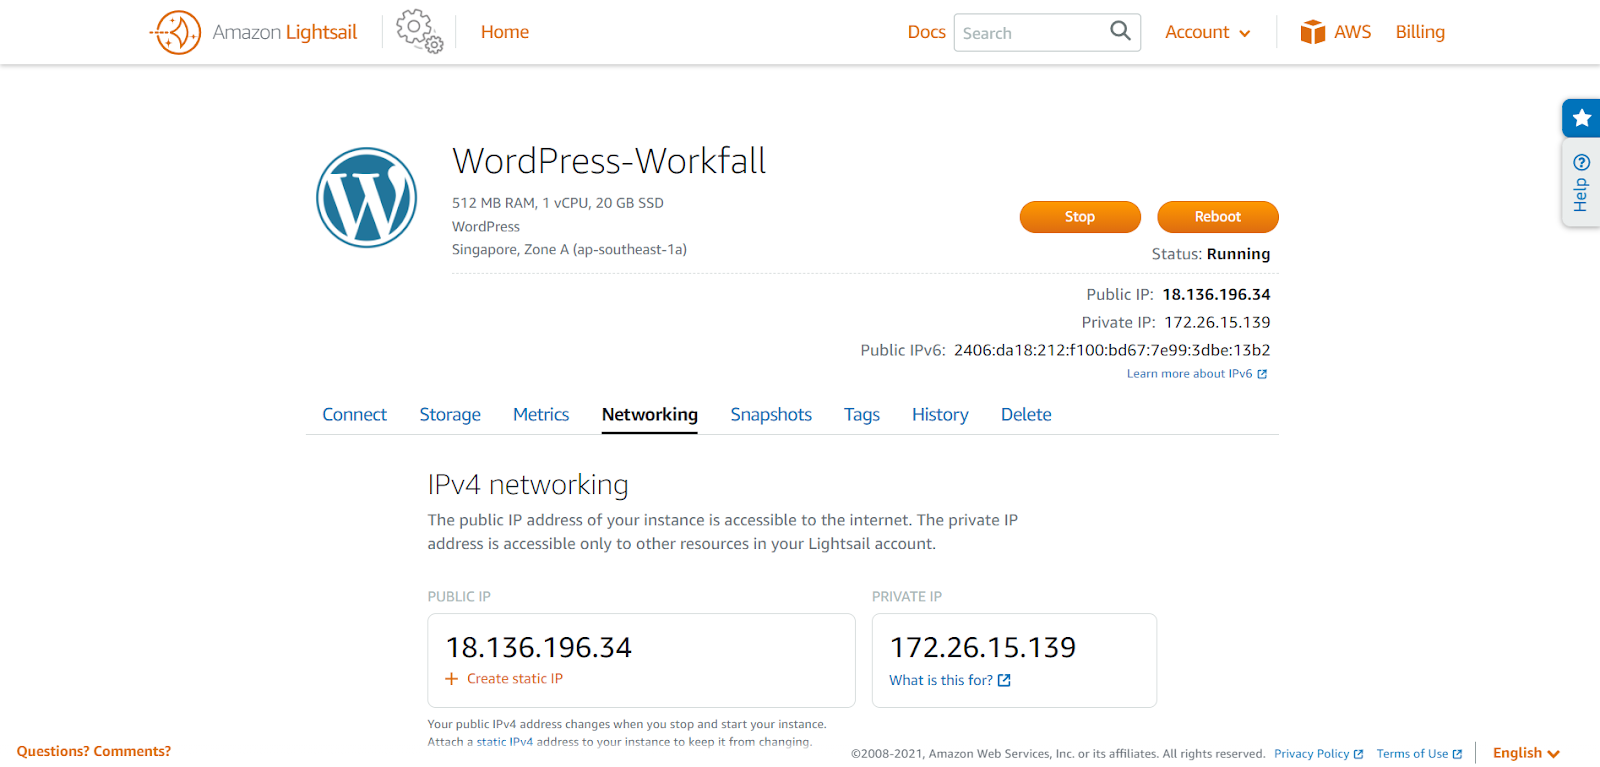
Now, click on the newly formed instance, and you’ll see options to “Stop” and “Reboot” it. Along with that, you’ll see the status “Running,” as well as the Public and Private IP addresses that you can use to access your WordPress site.
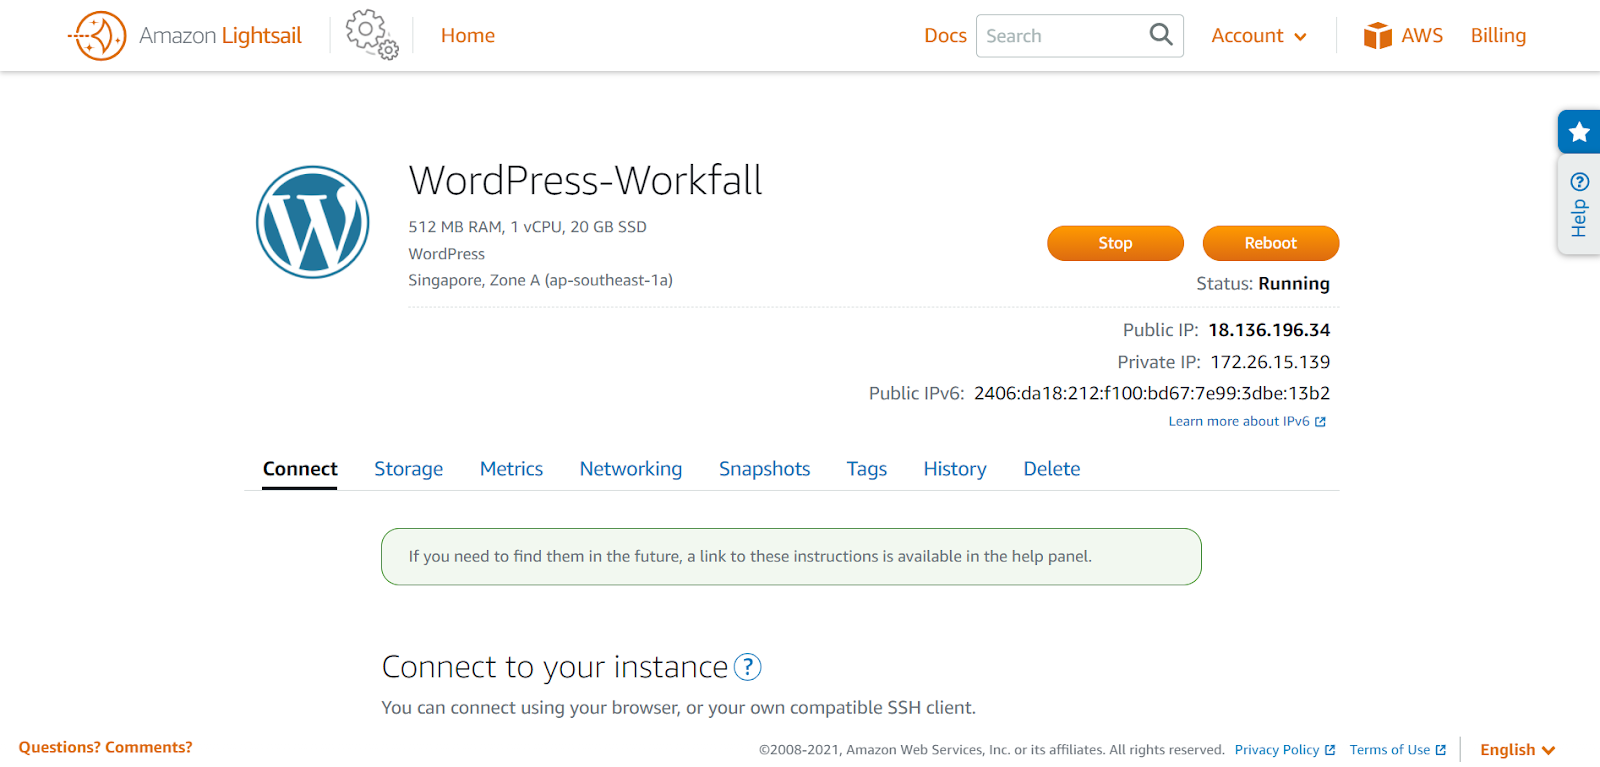
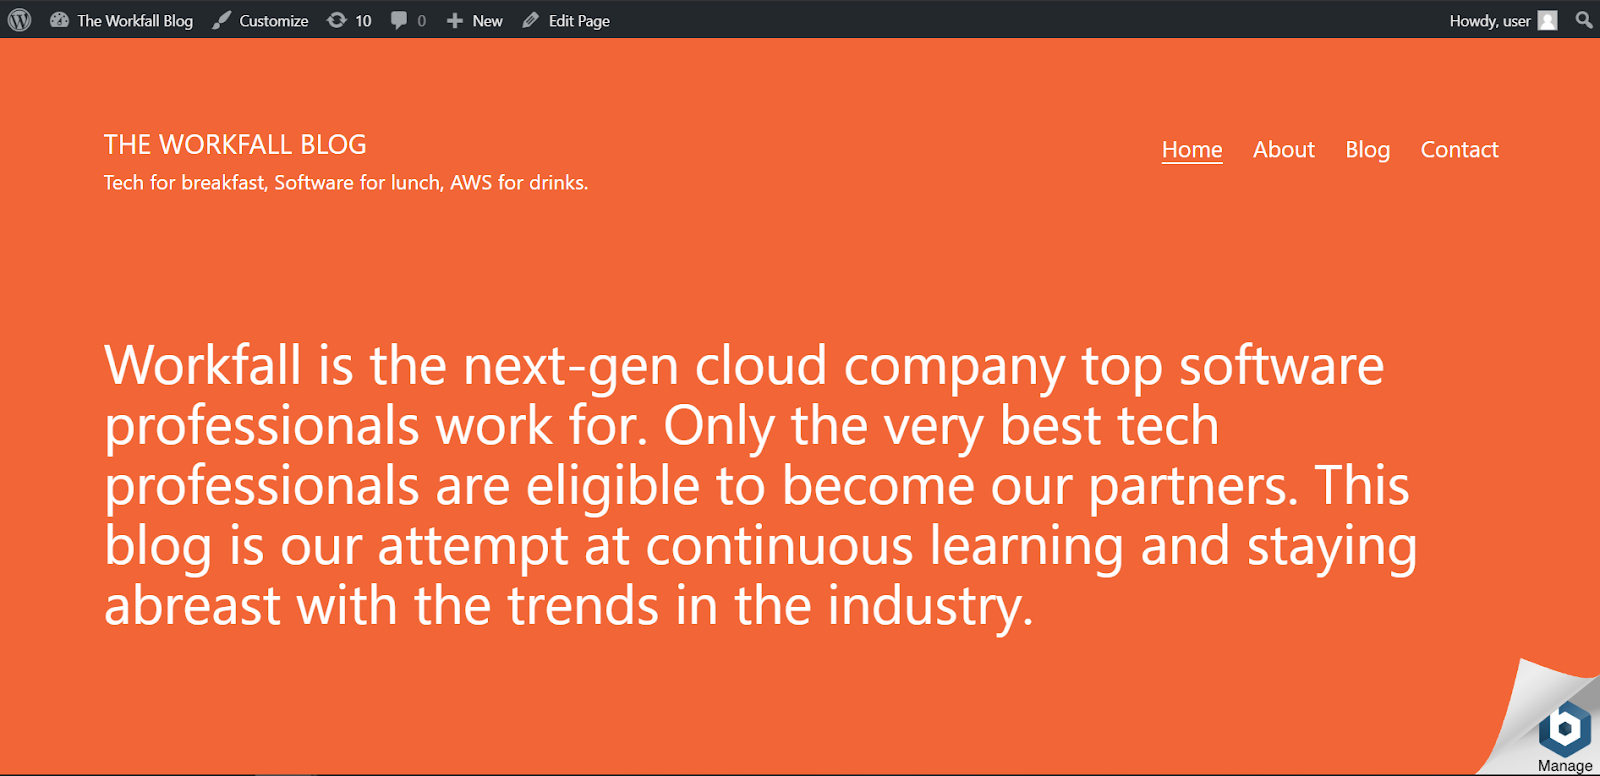
To view your freshly established WordPress site, copy the Public IP address, paste it into a new tab in your browser, and hit enter. Your blog page will appear when you access the Public IP in your browser, as seen below.

To personalize your WordPress site, you’ll need to connect to the WordPress admin interface with a username and password. Return to the Amazon Lightsail dashboard and go to the instance information page.

Select “Connect via SSH” from the drop-down menu. A new secure SSH connection to the server console is established in a new browser when you click.
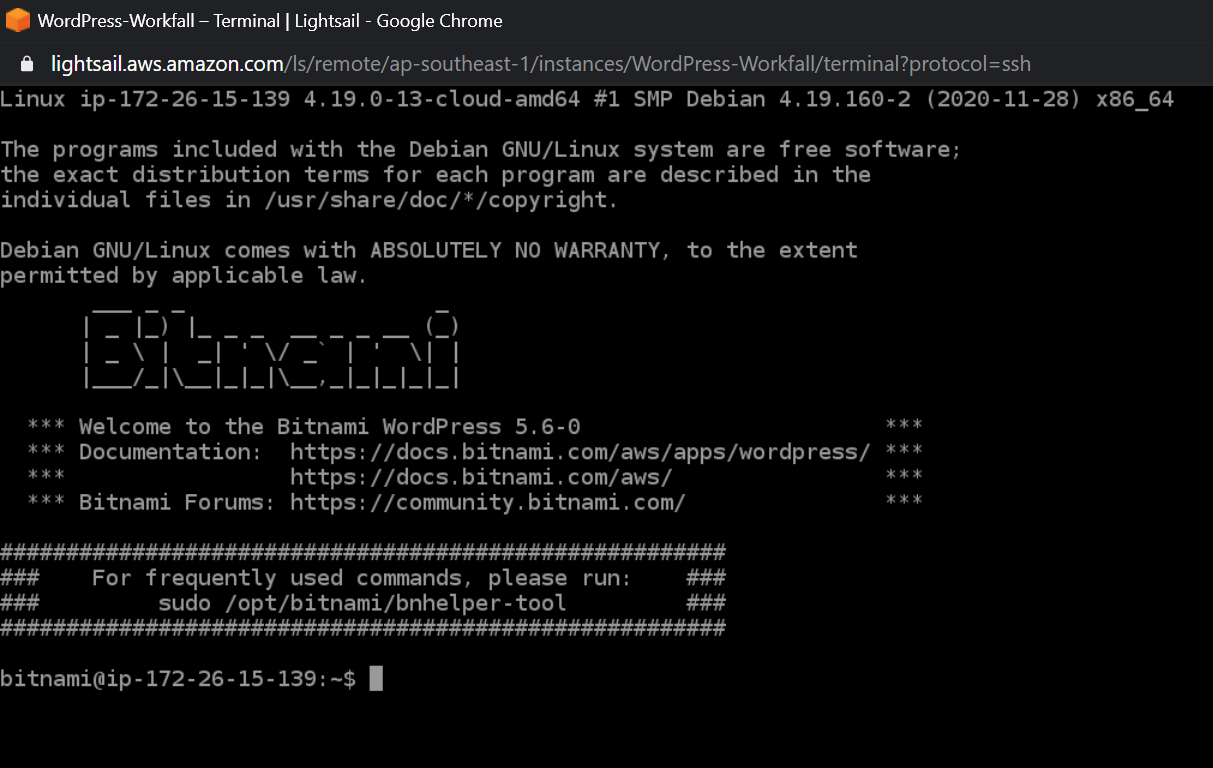
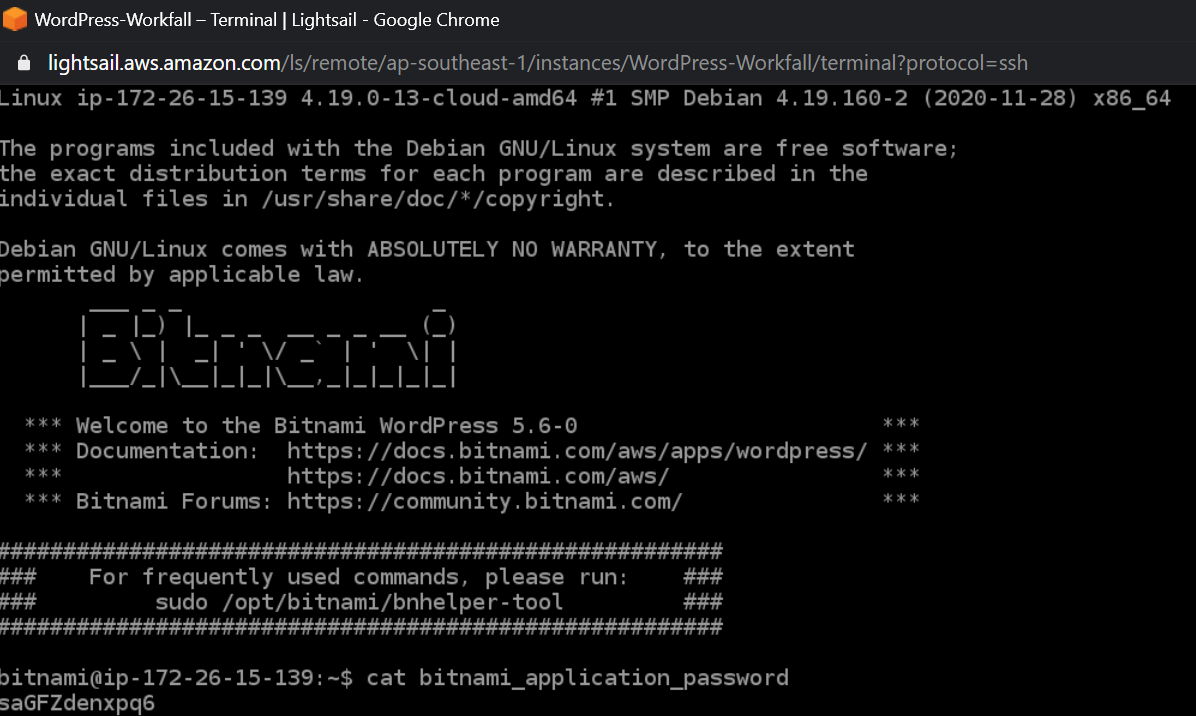
Now, on the server command prompt, type “cat bitnami application password” to see the password that will be used to login to your WordPress admin interface, which is kept in a file entitled bitnami application password in the home directory.
Return to the WordPress site you launched in a new tab in the browser and select “Manage” from the drop-down menu on the right side of the page.
To access the WordPress admin interface, you’ll be sent to a page with instructions.

Under the Access data for WordPress section, take note of the username that appears, and then click “Login.”
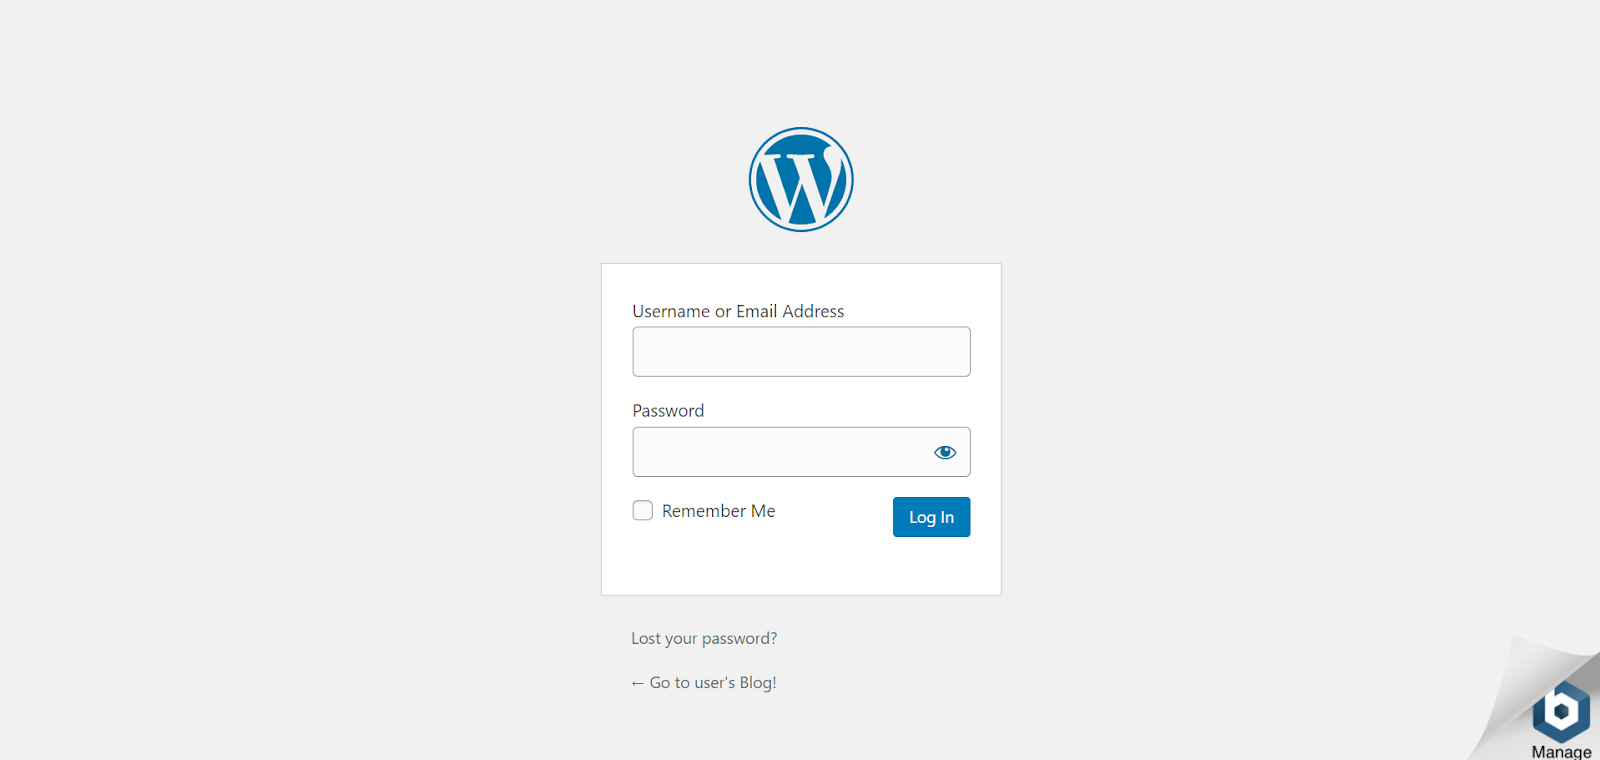
Copy the username and password from the server command prompt terminal and paste them here.
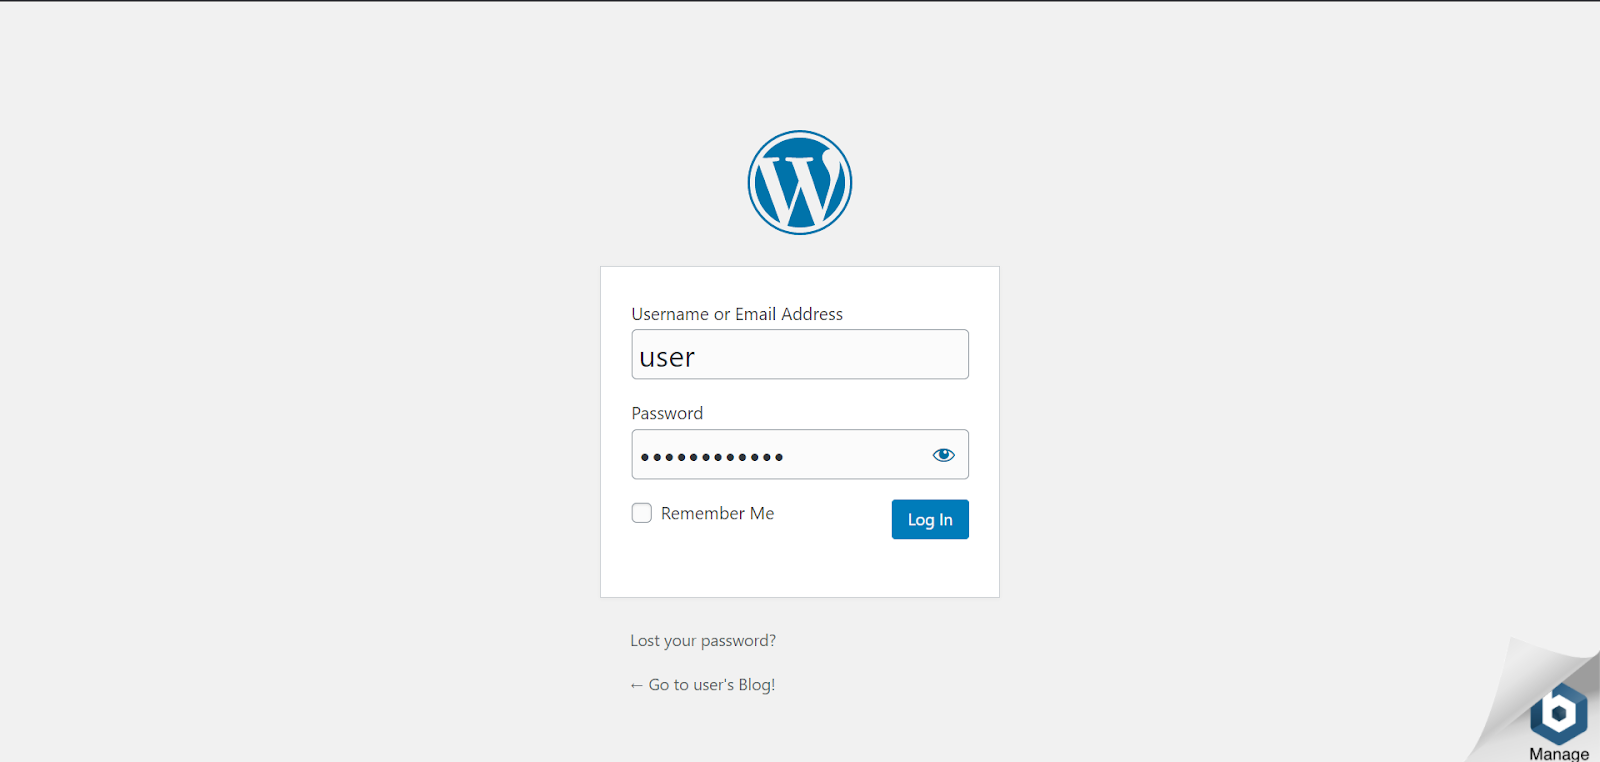
When you click “Log In,” you’ll be sent to your WordPress Admin Console.
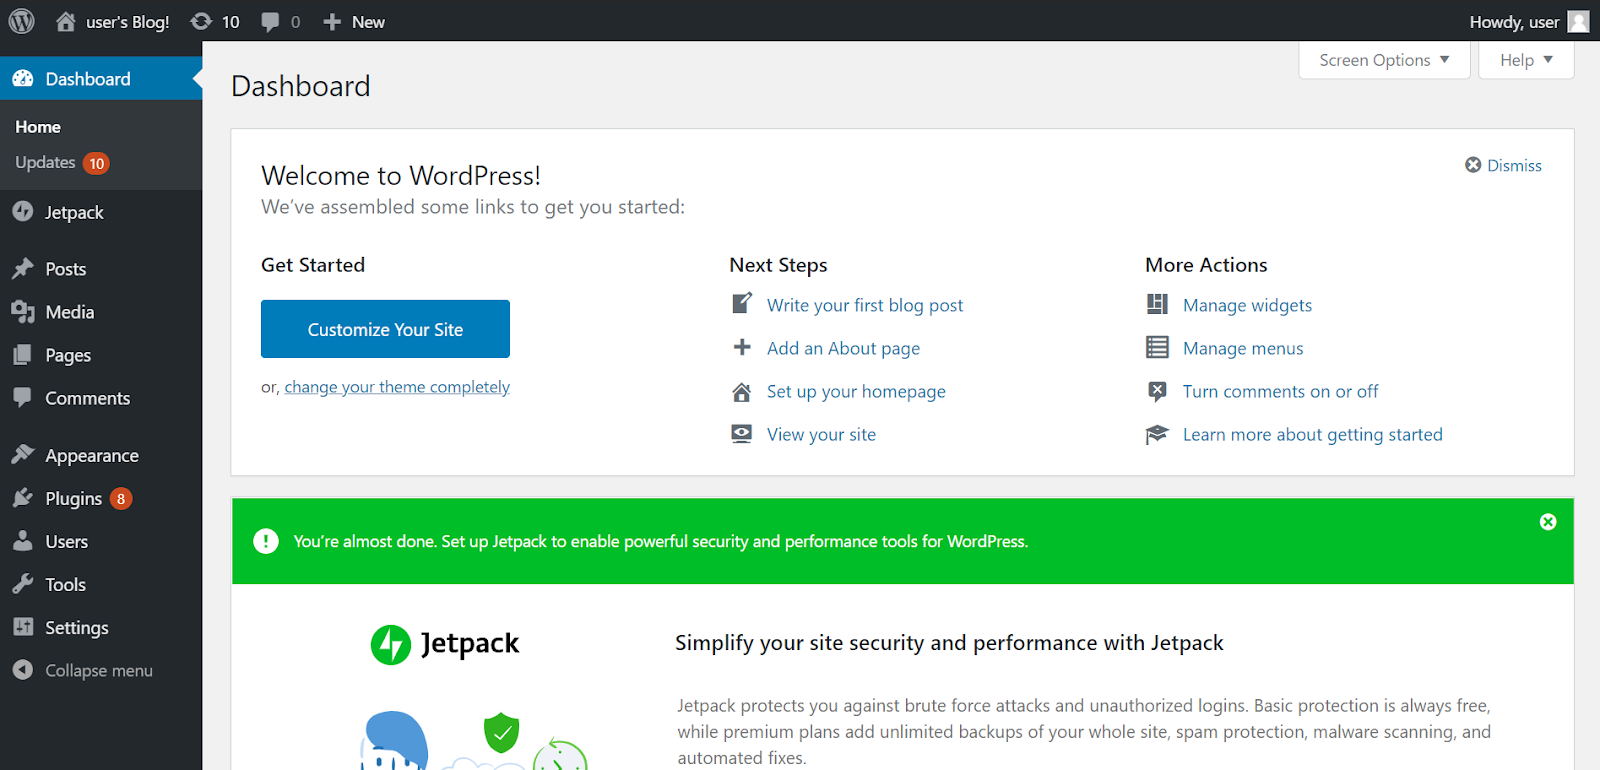
Click “Customize Your Site” to make changes to your WordPress site. Our homepage’s title, subtitle, and description have all been updated. Your WordPress site can have as many pages as you wish.
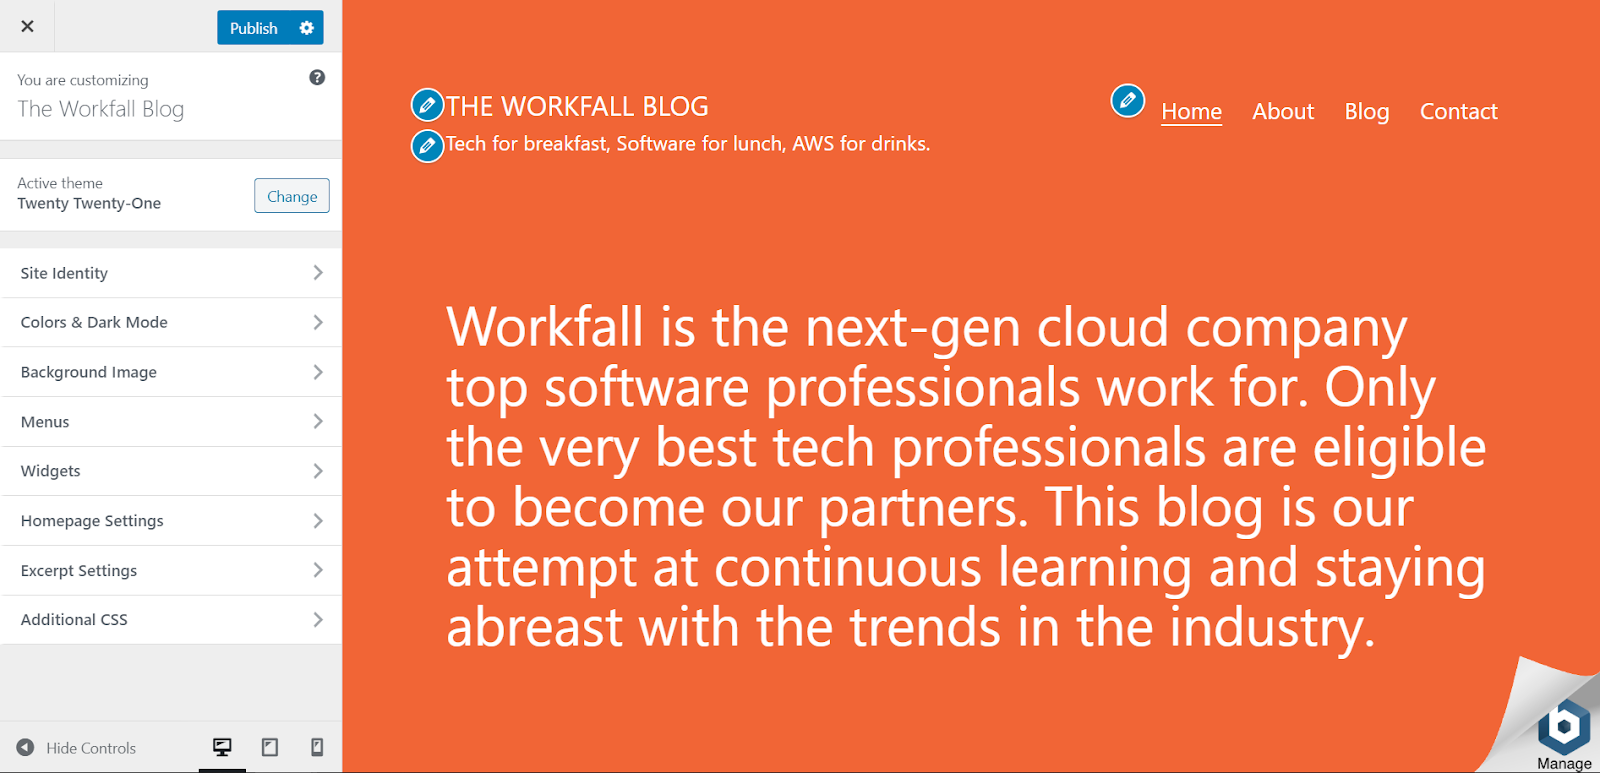
You can make changes to the style and feel of your WordPress site as needed. Click “Publish” after you’re finished.
Click “Posts” in the left navigation pane, then “Add New” to create a new post.

If you stop and start your WordPress instance, the default public IP for which you are currently viewing your WordPress site changes. So, every time you do so, you’ll have to access your site using the new public IP, however, if you use a static IP address and link it to your instance, it will remain the same even if you stop and start it.
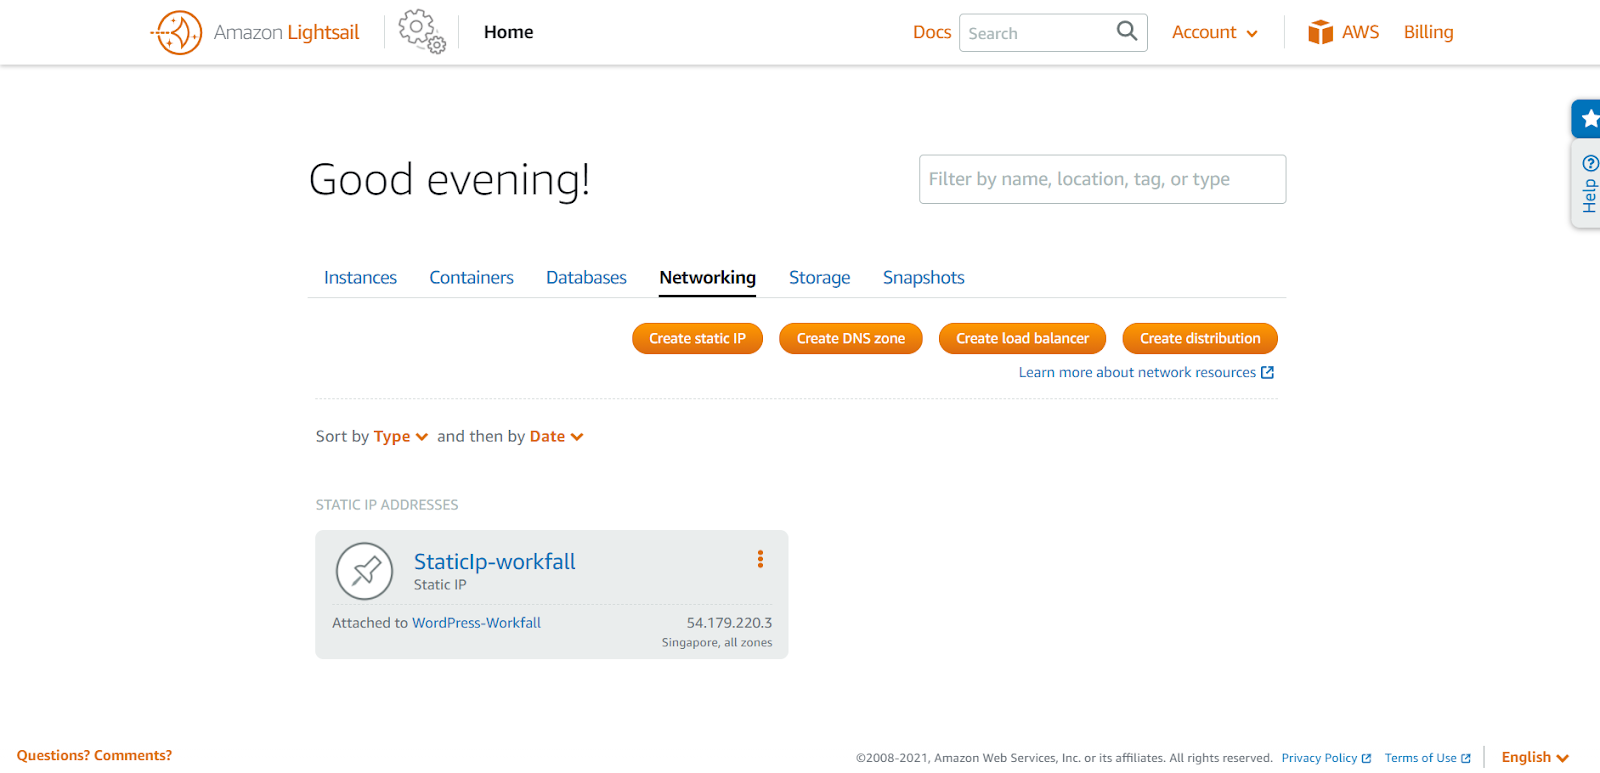
Return to the Amazon Lightsail console’s running instances details page and pick the ‘Networking’ option to create a Static IP for your WordPress site.
Select “Create static IP” from the drop-down menu. When you click, the Static IP address and the newly formed instance will be pre-selected. In the “Identify your static IP” section, give your static IP a name.

When you’re finished, click “Create” to go to the details page for your freshly created static IP.

Copy the page’s “Public static IP address,” paste it into a new tab, and push enter. You’ll be taken to your WordPress blog. You can also use the actions at the top of your site to edit the page.
You are now accessing your WordPress site using the created static IP, however, you can transfer management of your domain’s DNS records to Amazon Lightsail, allowing you to access your WordPress site via a domain name.
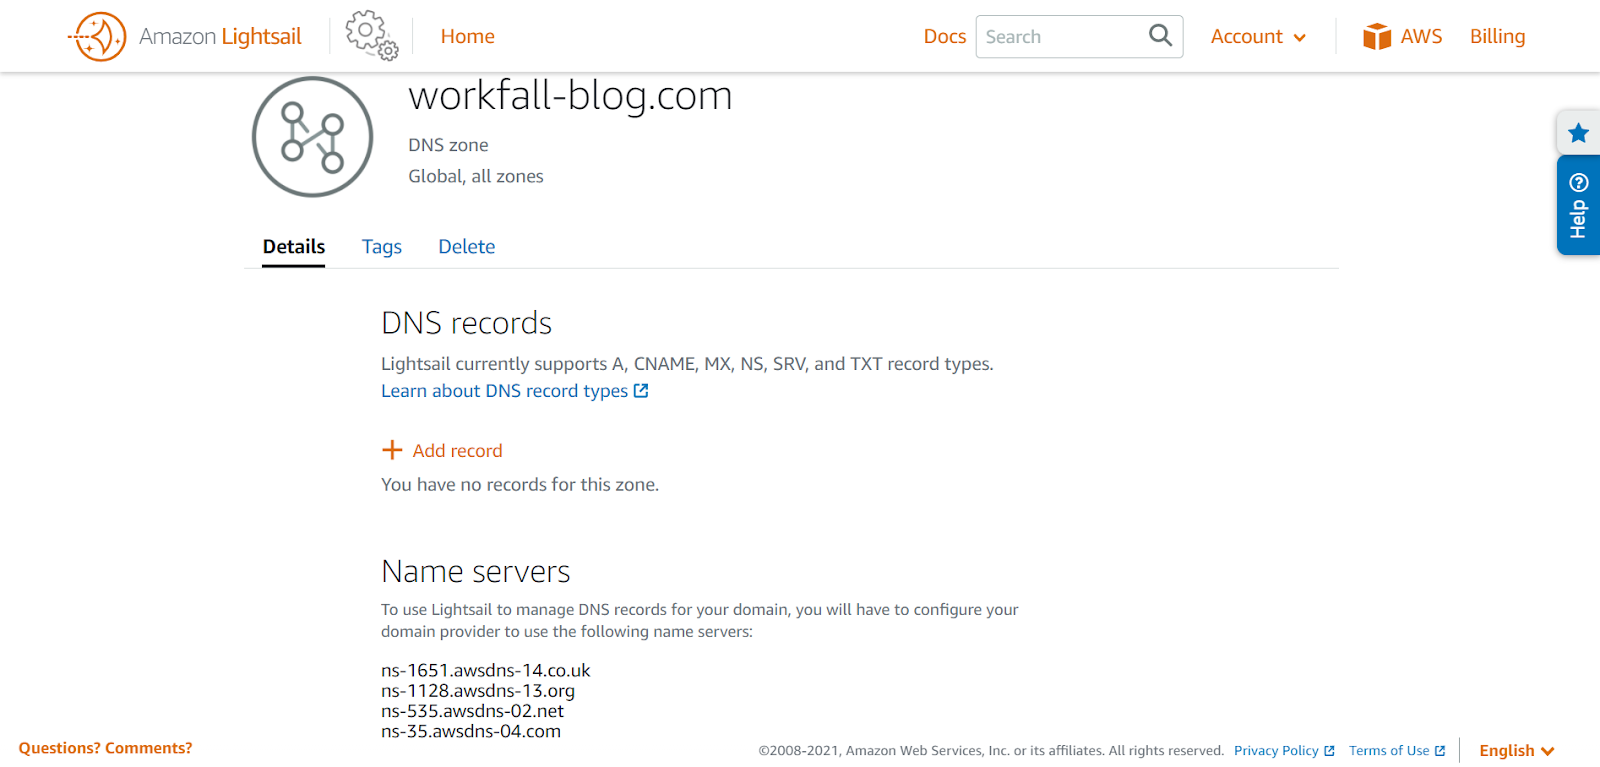
To create a DNS zone, go to the “Networking” tab on the Amazon Lightsail console’s main page.
Click on “Create DNS Zone”, enter a name for your DNS zone and click on “Create DNS zone”.

Note down the name server addresses listed on the page.
Add a new A record to point the apex of your domain to your WordPress instance once the control of your domain’s DNS records has been moved to Amazon Lightsail.
In the DNS zone, click “Add record” to create a new A record.
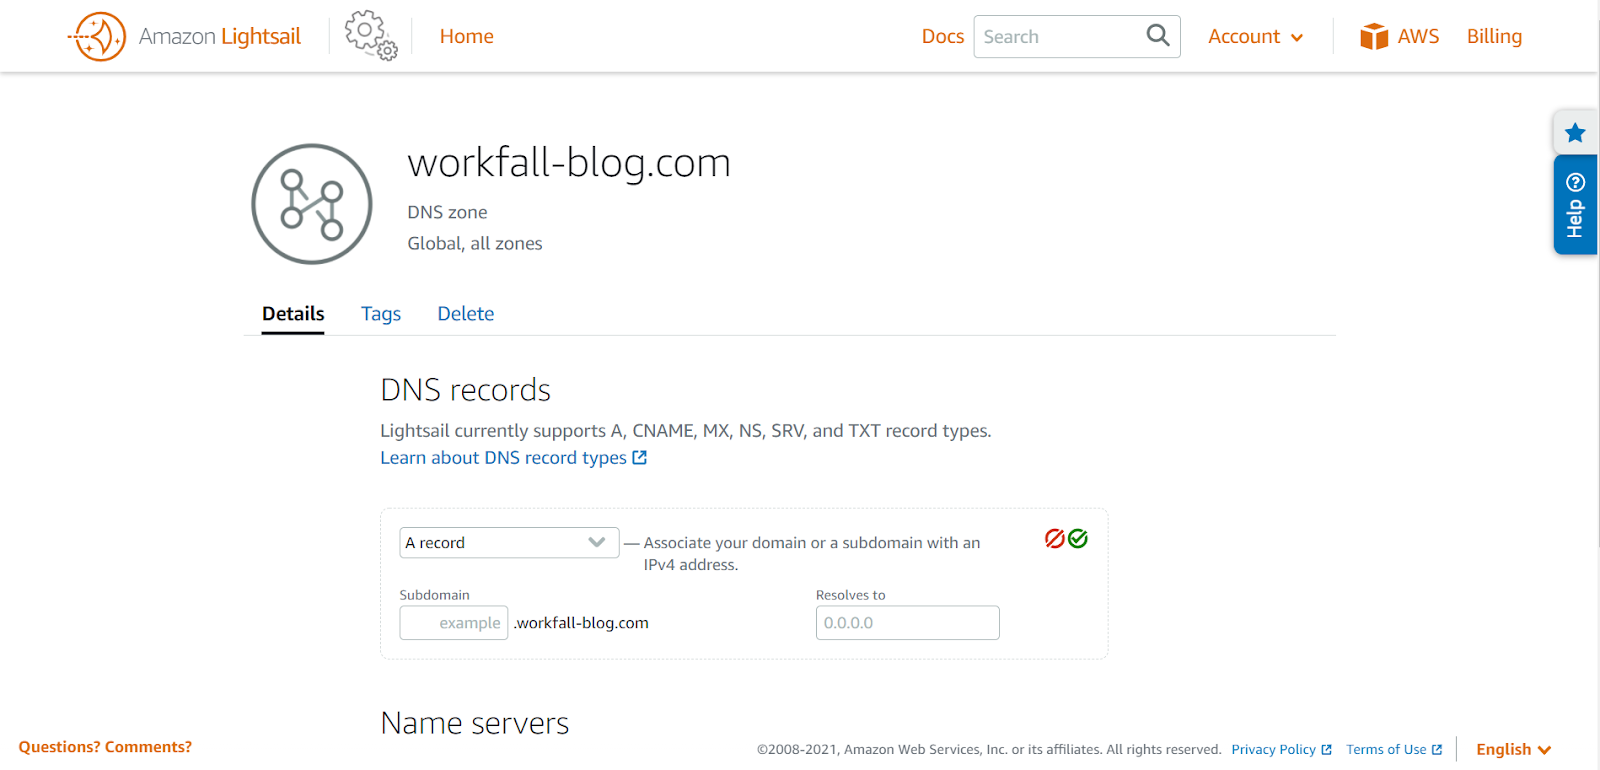
Enter a name for the subdomain that will map the apex of your domain to your instance in the “Subdomain” section, and choose the static IP that you assigned to the WordPress instance in the previous step in the “Maps to” section.
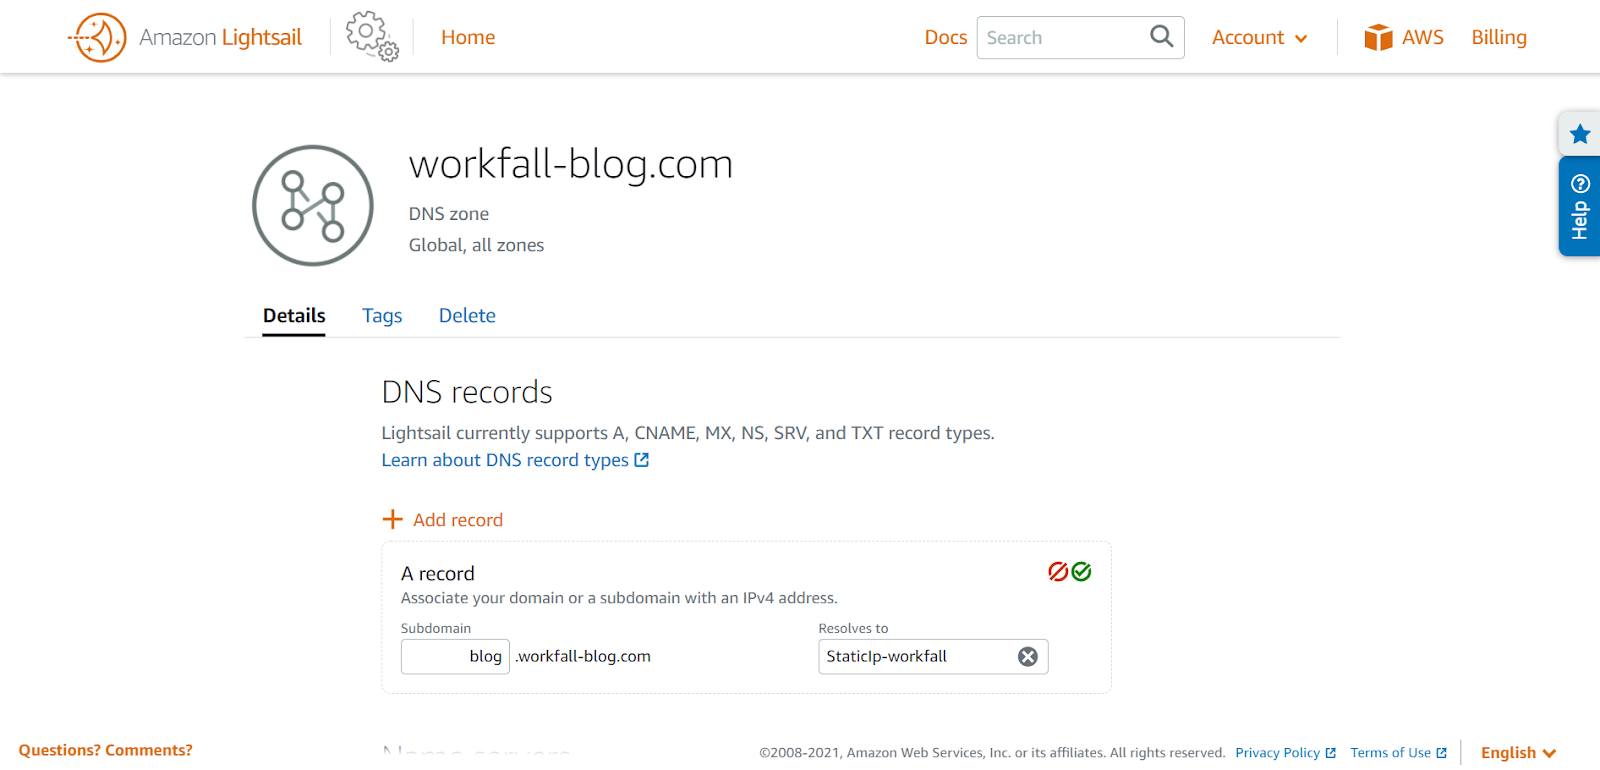
To save the A record, click the “green tick” when you’re finished.

Allow some time for the change to propagate through your internet’s DNS before your domain begins routing traffic to your WordPress instance after the A record has been created. After a few minutes, copy the subdomain you generated as an A record and paste it into a new tab in your browser. You’ll be taken to your WordPress blog.
Conclusion
In this blog, you have seen how we can make use of Amazon Lightsail to quickly spin up a WordPress site with the least configuration efforts and minimal costs along with the monitoring features for the WordPress instance to maintain the blogs We will discuss more of Amazon Lightsail and its flexibility to spin up other applications in our upcoming blog. Stay tuned to keep getting all updates about our upcoming new blogs on AWS and relevant technologies.
Meanwhile …
Keep Exploring -> Keep Learning -> Keep Mastering
This blog is part of our effort towards building a knowledgeable and kick-ass tech community. At Workfall, we strive to provide the best tech and pay opportunities to AWS-certified talents. If you’re looking to work with global clients, build kick-ass products while making big bucks doing so, give it a shot at workfall.com/partner today.