In our previous blog How to create and publish AR/VR Apps with AWS Sumerian (Part 1), we discussed Amazon Sumerian, its features, benefits, use cases, etc. In this blog, we will discuss a business scenario to create, configure and publish a Sumerian bot with proper gestures and text-to-speech conversation.
Let’s understand the following business scenario.
We Workfall, are a Singapore-based new-age internet company. We directly connect AWS Certified Professionals with clients. We go all the way in negotiating the best rate for our partners so they get the best value for their work.
We want to make partners across the globe, so we need to reach out to many AWS Certified Professionals. The coronavirus outbreak has changed the norms and we, as a new-age company, want to develop an AR/VR bot that can explain “How to become a partner with Workfall”. Once this AR/VR-based video is ready, we can share it with our prospects to give them a better visual experience. So let’s get started with the AR/VR bot!
To implement this, we will do the following:
- Login to your AWS Account and click on the link below.
- Select a template.
- Create a CloudFormation Stack.
- Gather collected AWS resource IDs (Cognito Identity Pool ID).
- Navigate to the created role on the IAM console and attach a new policy for Polly access.
- Navigate to the Amazon Sumerian Dashboard and create a new scene.
- Configure the Amazon Cognito Identity Pool in Your Sumerian Scene.
- Understand the host, skybox and lightning components.
- Add a new host.
- Explore the scaling and positioning features for the host.
- Understand the Speech component.
- Basic Speech Controls.
- Writing a new speech file.
- Creating a State Machine Behavior to Start the Speech.
- Create a Gesture Map and add it to the speech file.
- Auto Generating Gesture Marks.
- Test the Scene at a gist.
- Remove grids and import the skybox asset.
- Attach it to the skybox configuration.
- Publish the created scene.
- Test out the scene using the public link in a new tab to see the bot in action.
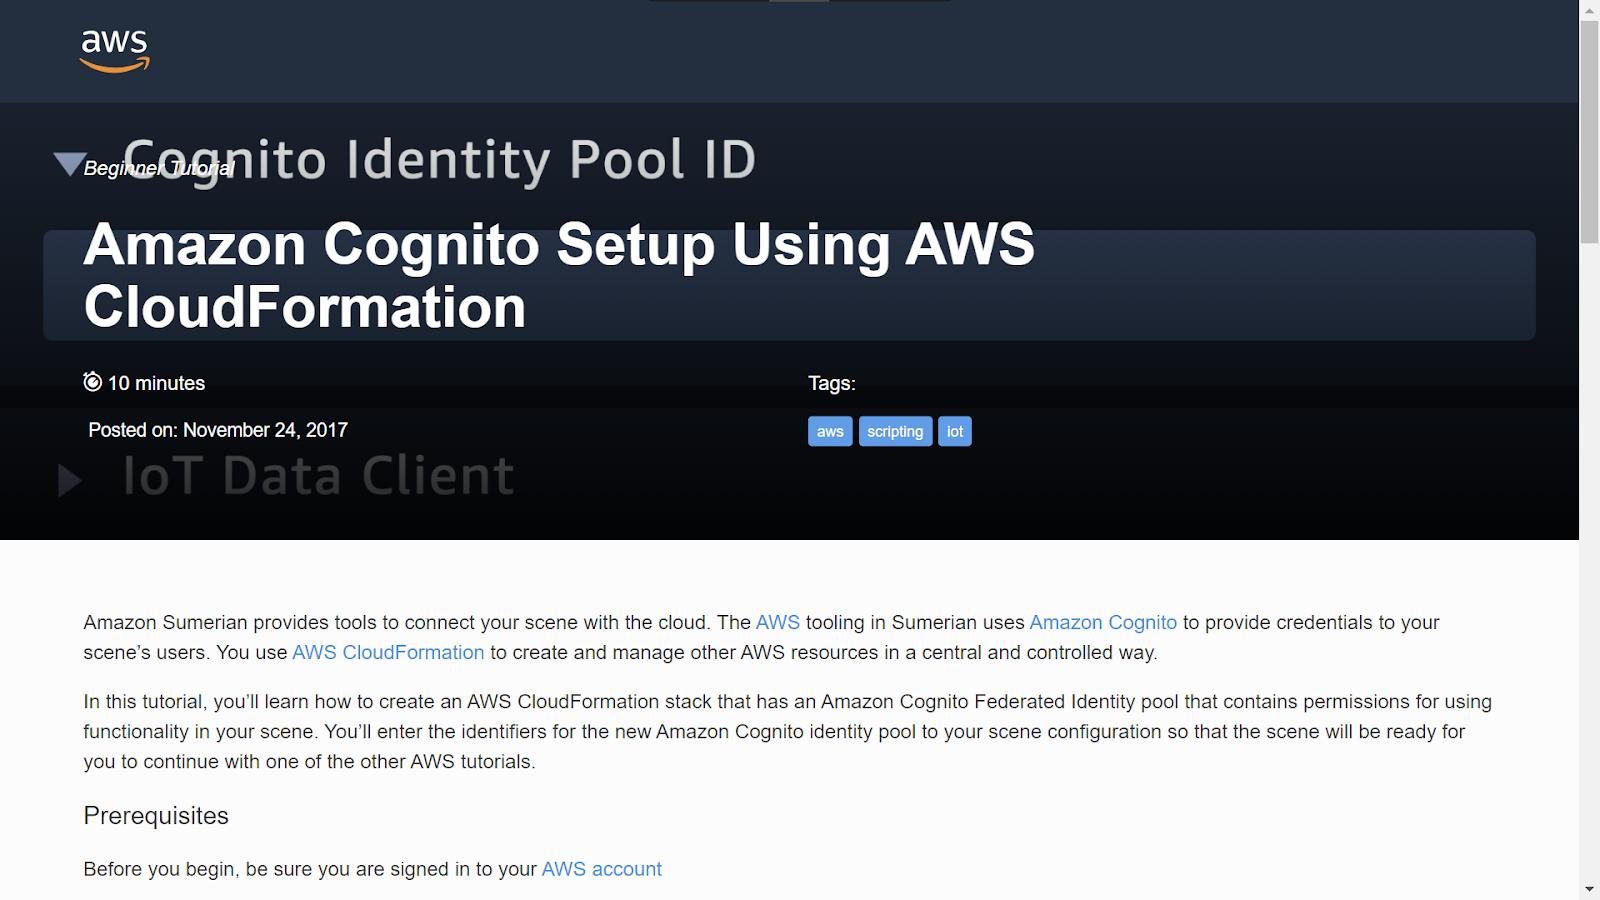
Login to your AWS account and click on ‘https://docs.sumerian.amazonaws.com/tutorials/create/beginner/aws-setup/’ to get started.
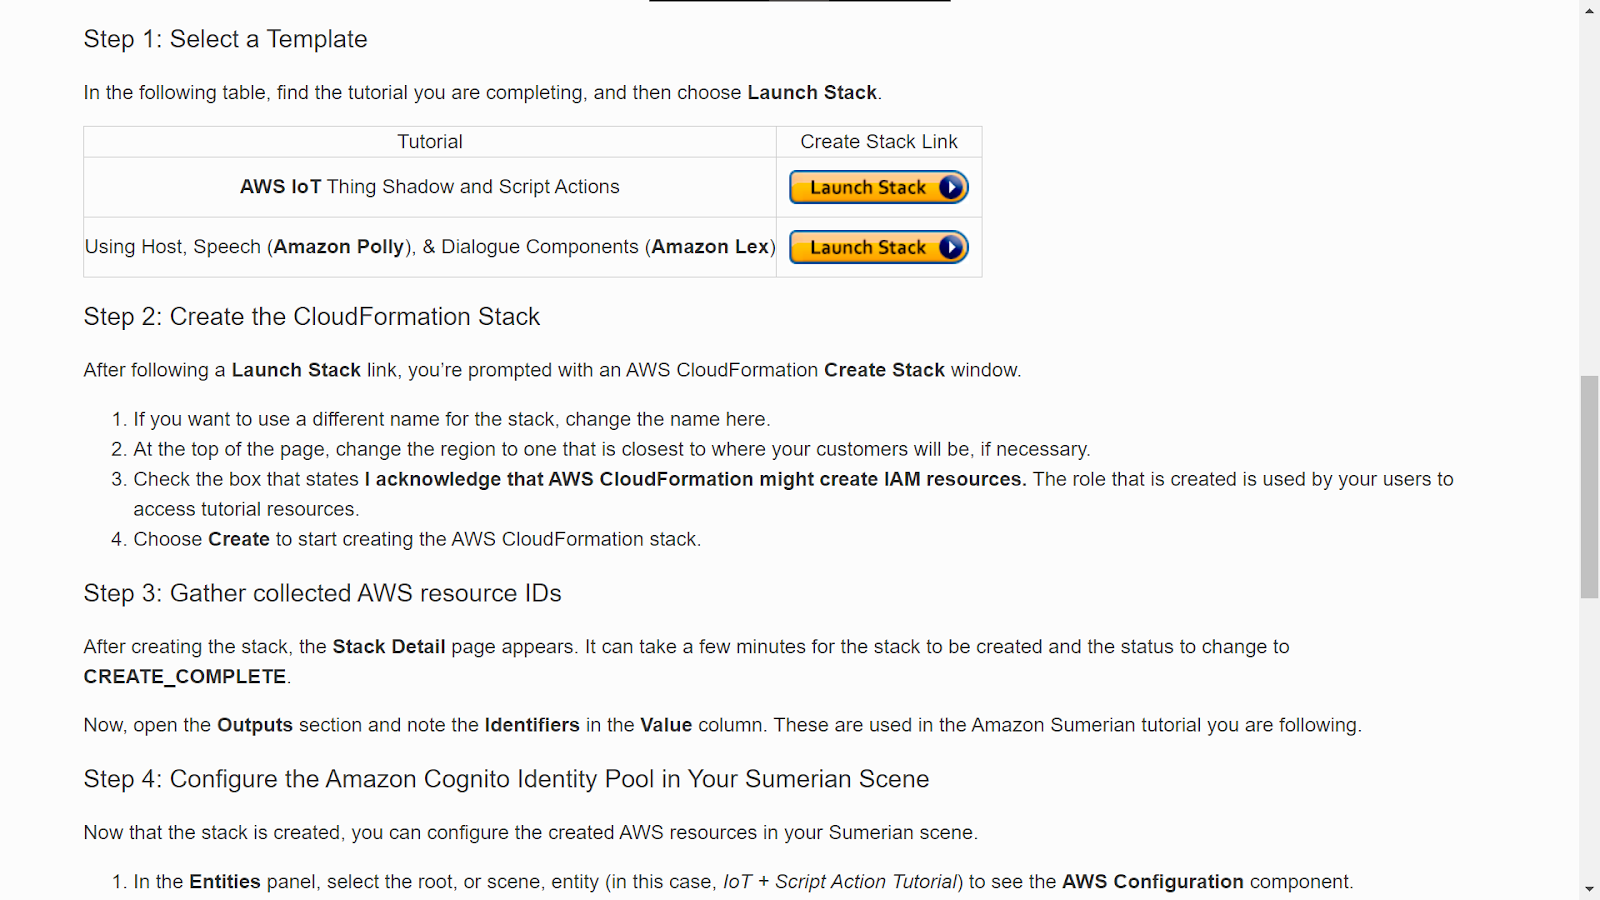
Scroll down on the page and click on ‘Launch Stack’ beside AWS IoT thing Shadow and Script Actions. This will help you create the proper policies required to begin.
Once navigated to the CloudFormation console, enter a name for the stack.

Scroll down and check the box for acknowledging the changes and click on Create stack.

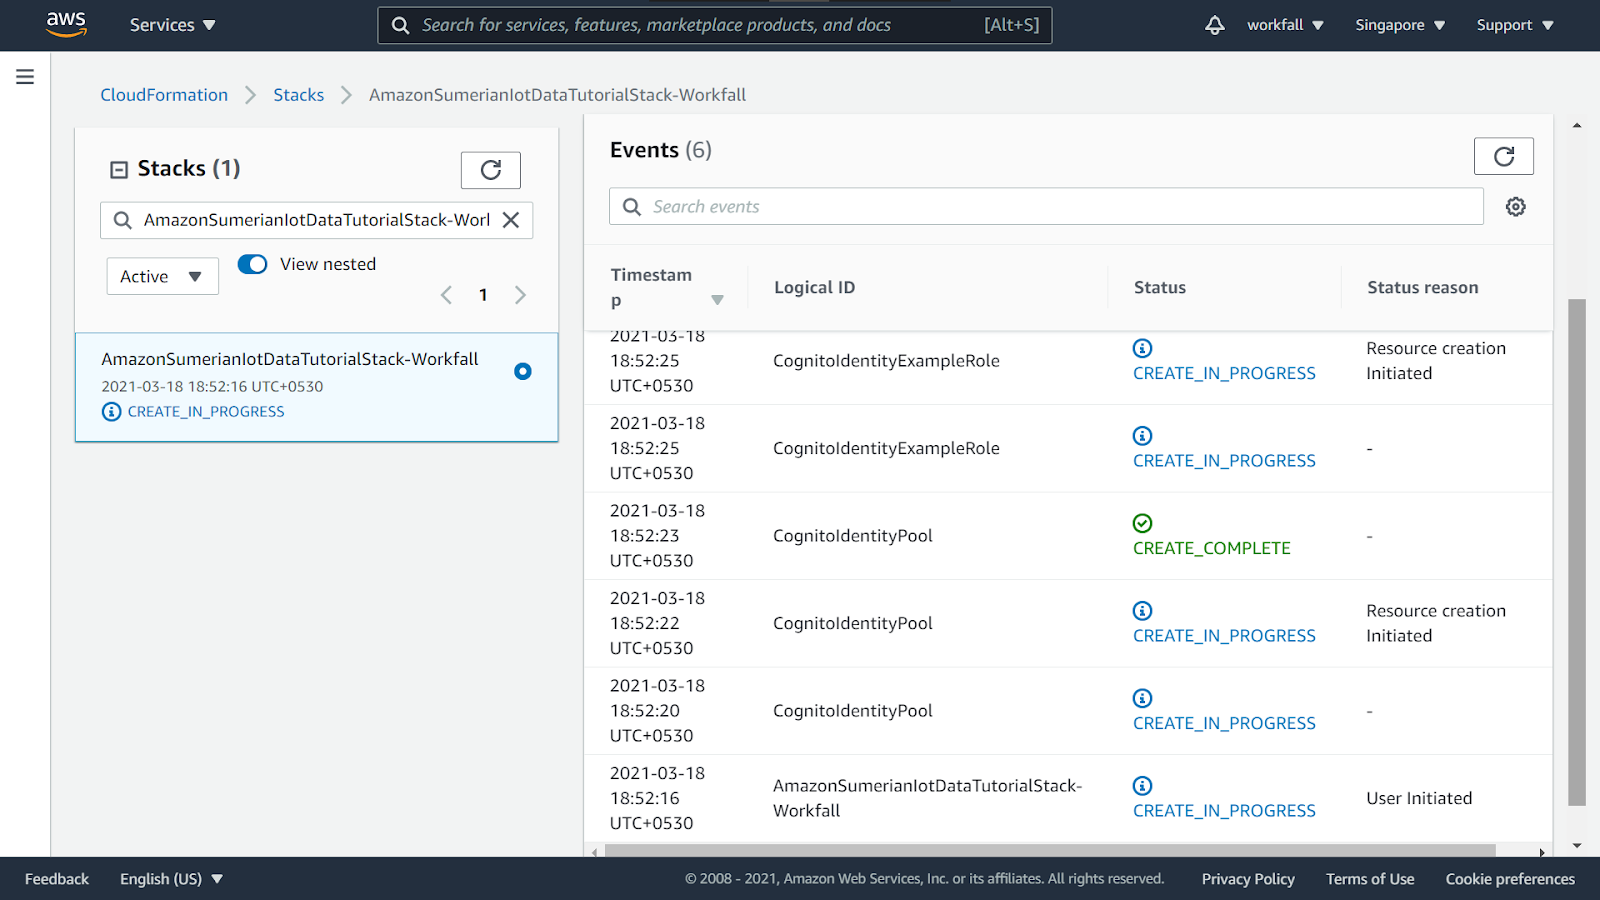
You will be navigated to the stack creation dashboard. Initially, you will see the status as Create in Progress. Wait for some time to finish the creation of resources.
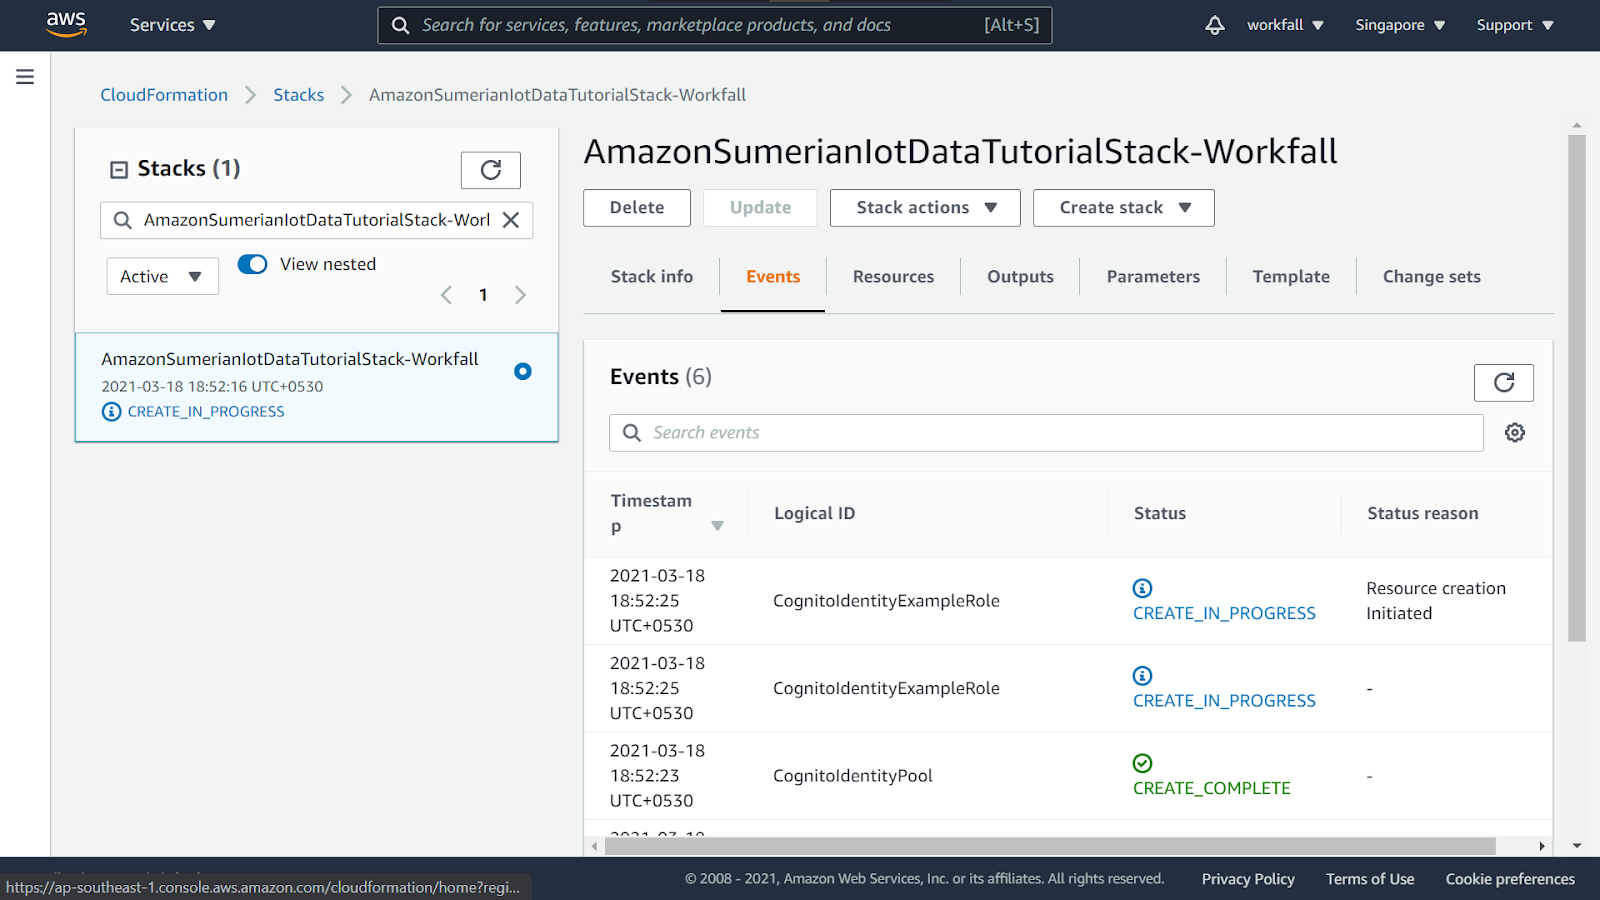
Under Events tab if you scroll down, you will get to see the configurations being performed along with their statuses.
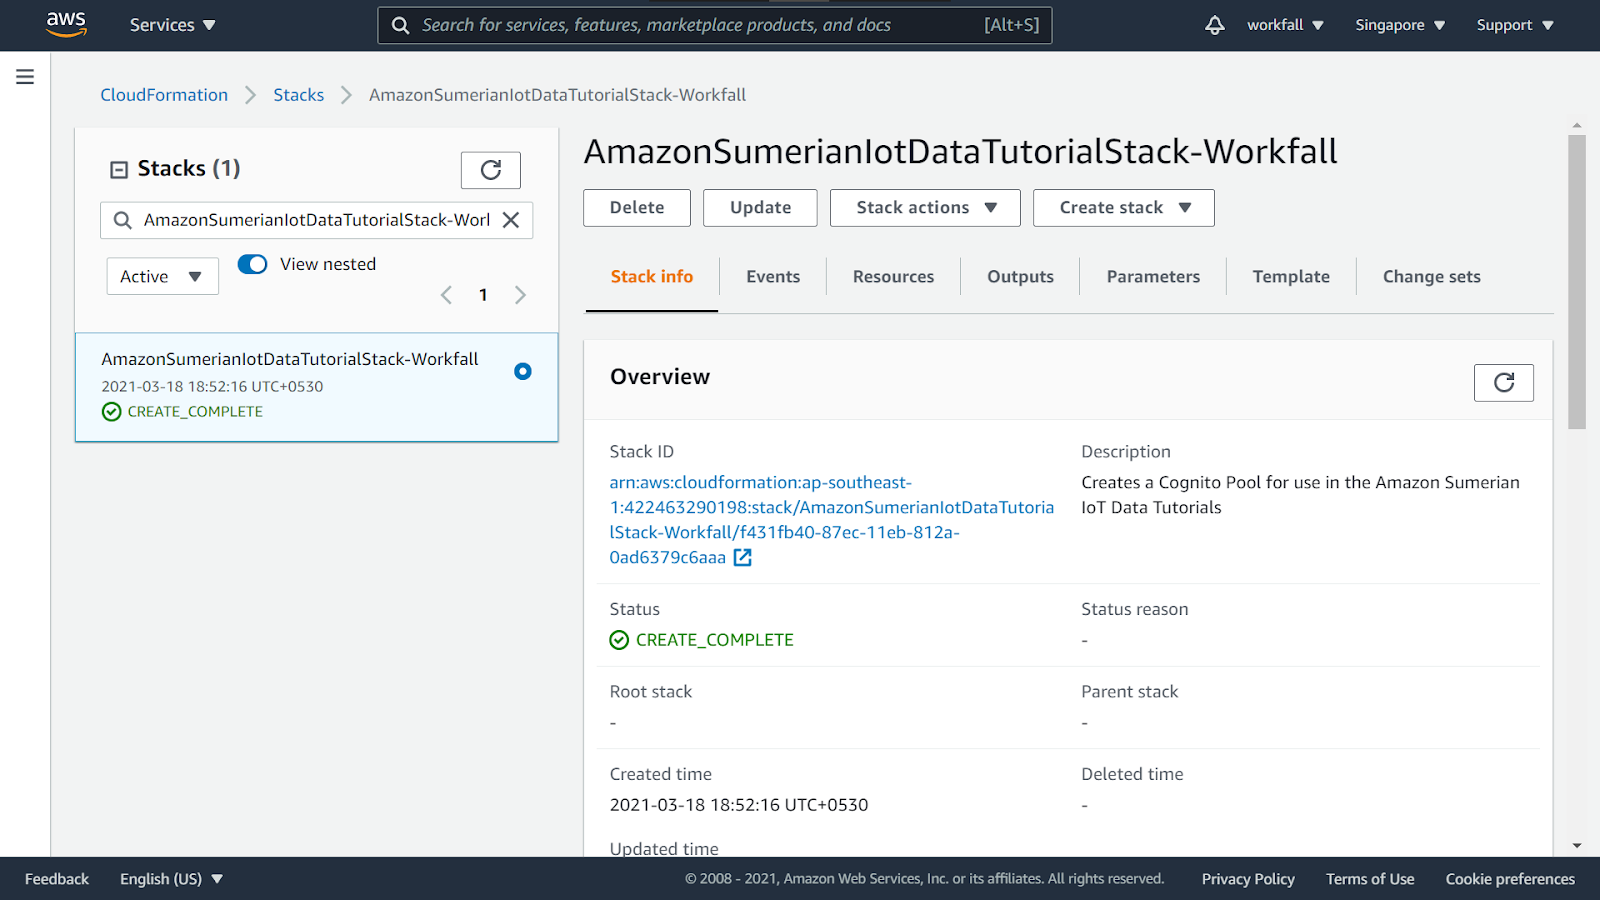
After a few seconds, click on the Stack Info tab and you will see the success status as shown below.
Now, click on the Resources tab on the dashboard. You will see the created resources. Click on the Logical ID of the Example role created.

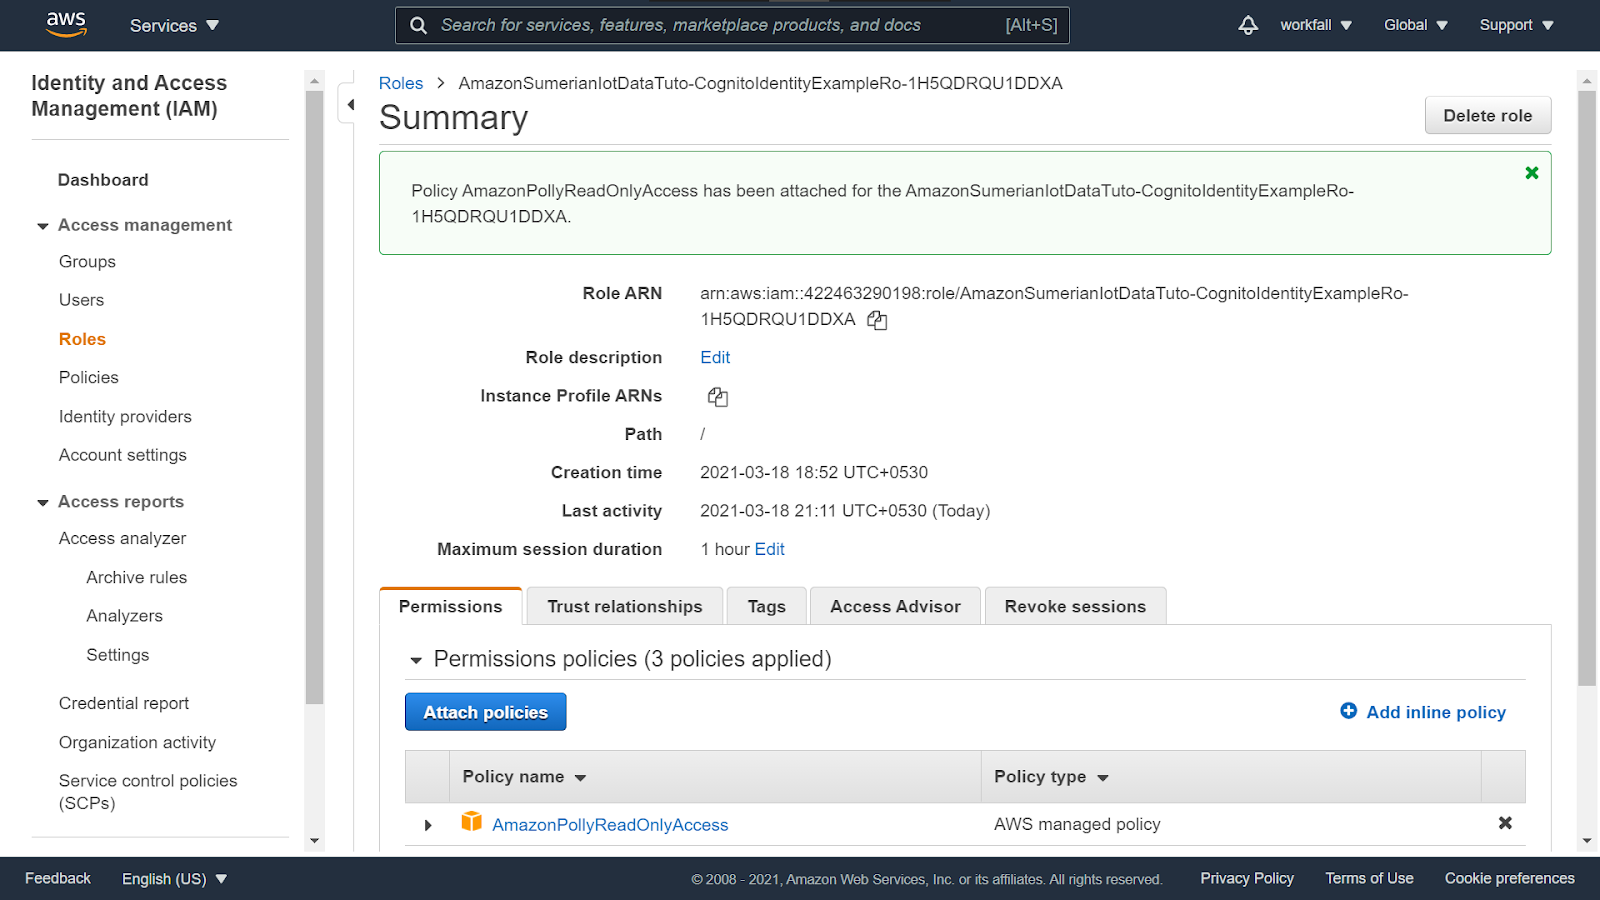
You will be navigated to the AWS IAM console and you will see 2 policies attached to the same role. Now we need to attach one more policy so that our Sumerian Bot can speak. Click on Attach Policies.

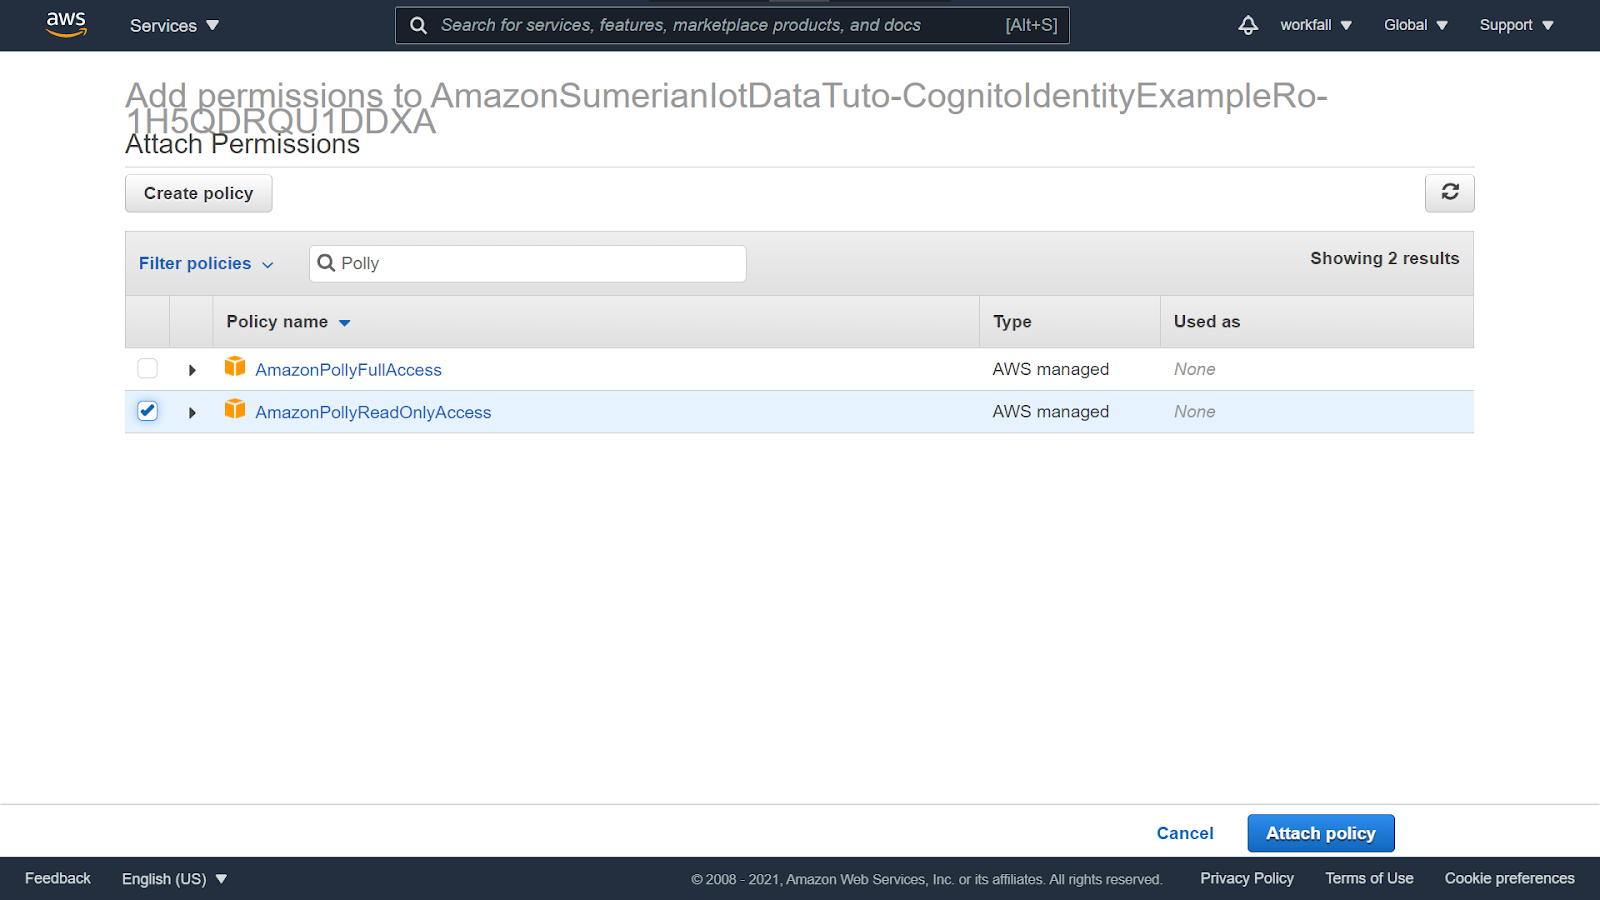
In the search bar, search for AmazonPollyReadOnlyAccess and select the checkbox beside it. Once done, click on Attach policy.
Once done, you will see the success message as shown below.
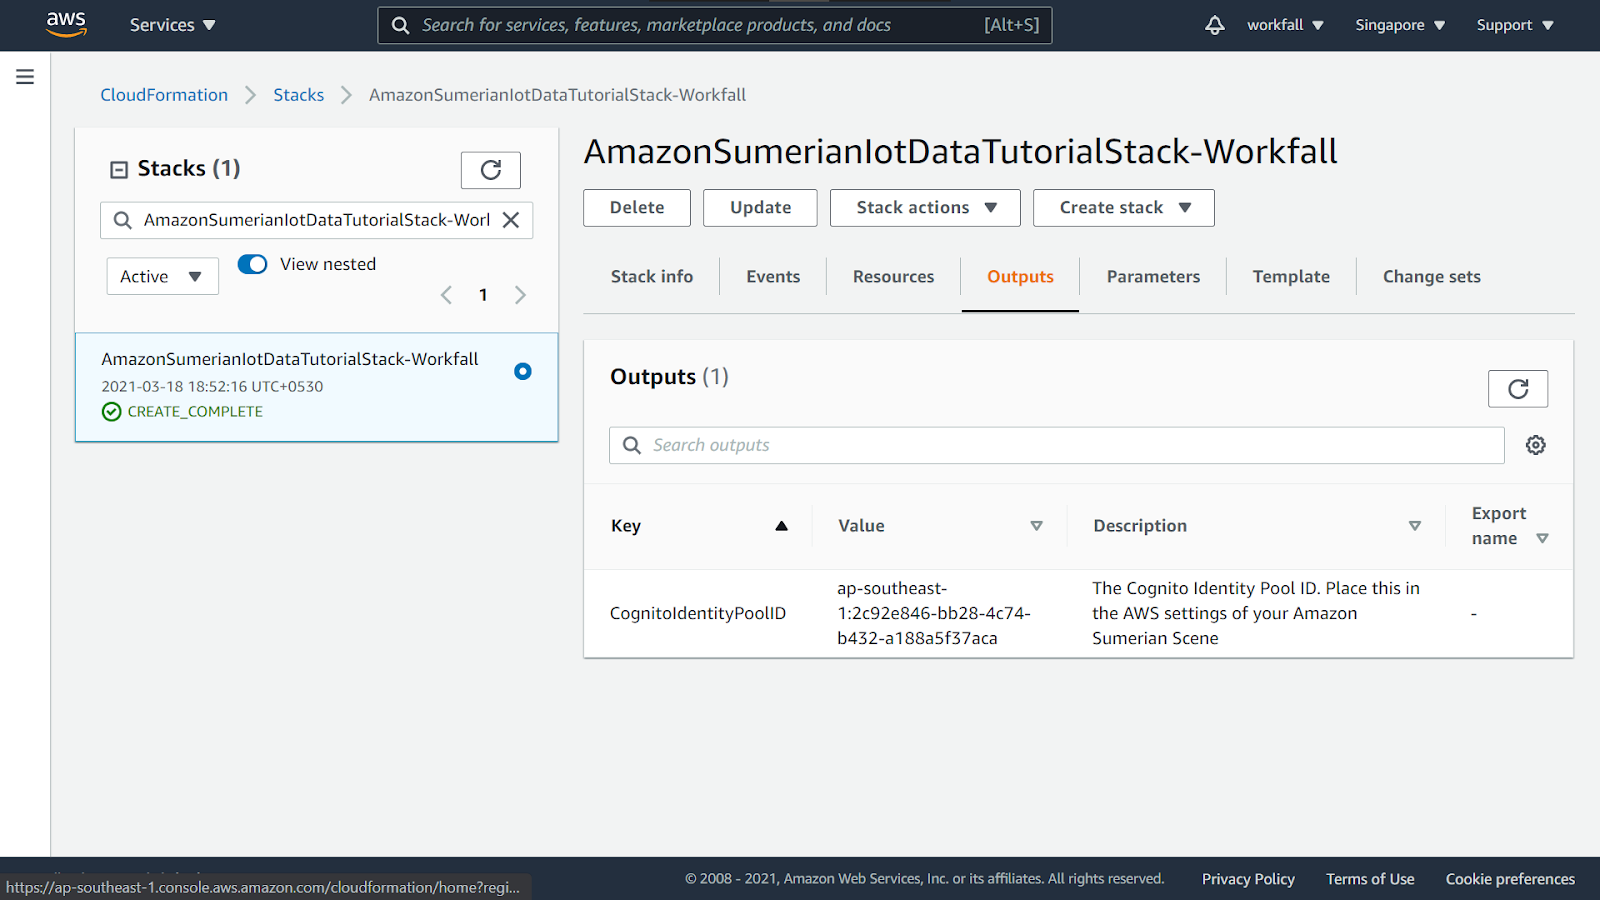
Navigate back to the CloudFormation console and select the Outputs tab. Not down the Value for the key ‘CognitoIdentityPoolId’ since you will need to enter the same on the Sumerian dashboard.
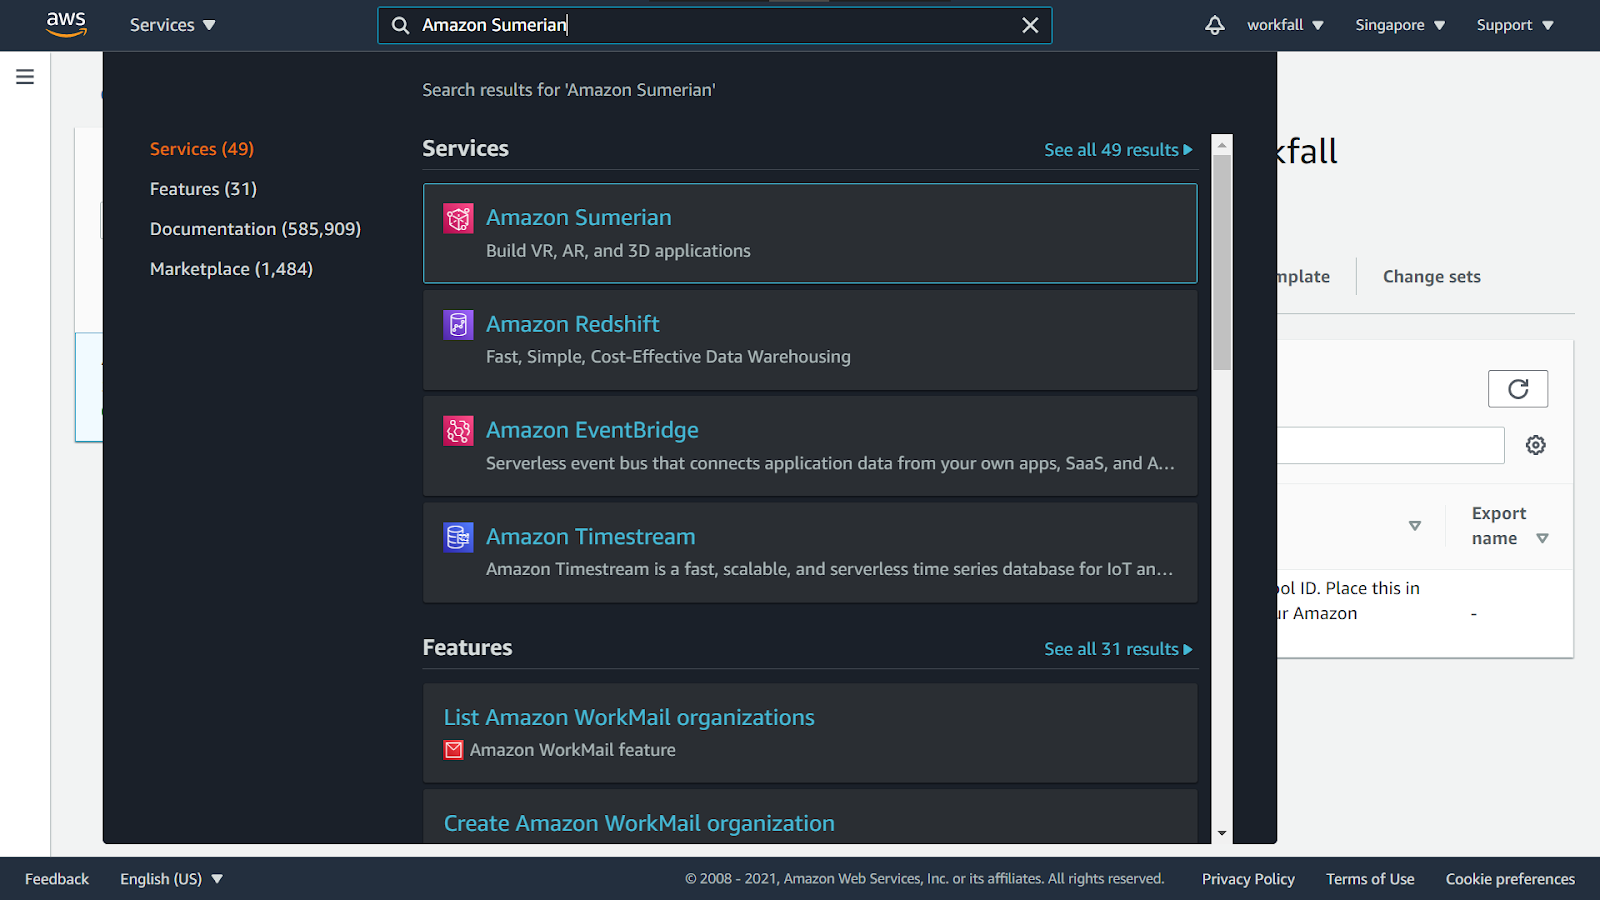
In the search bar, search for the service Amazon Sumerian and click on it.
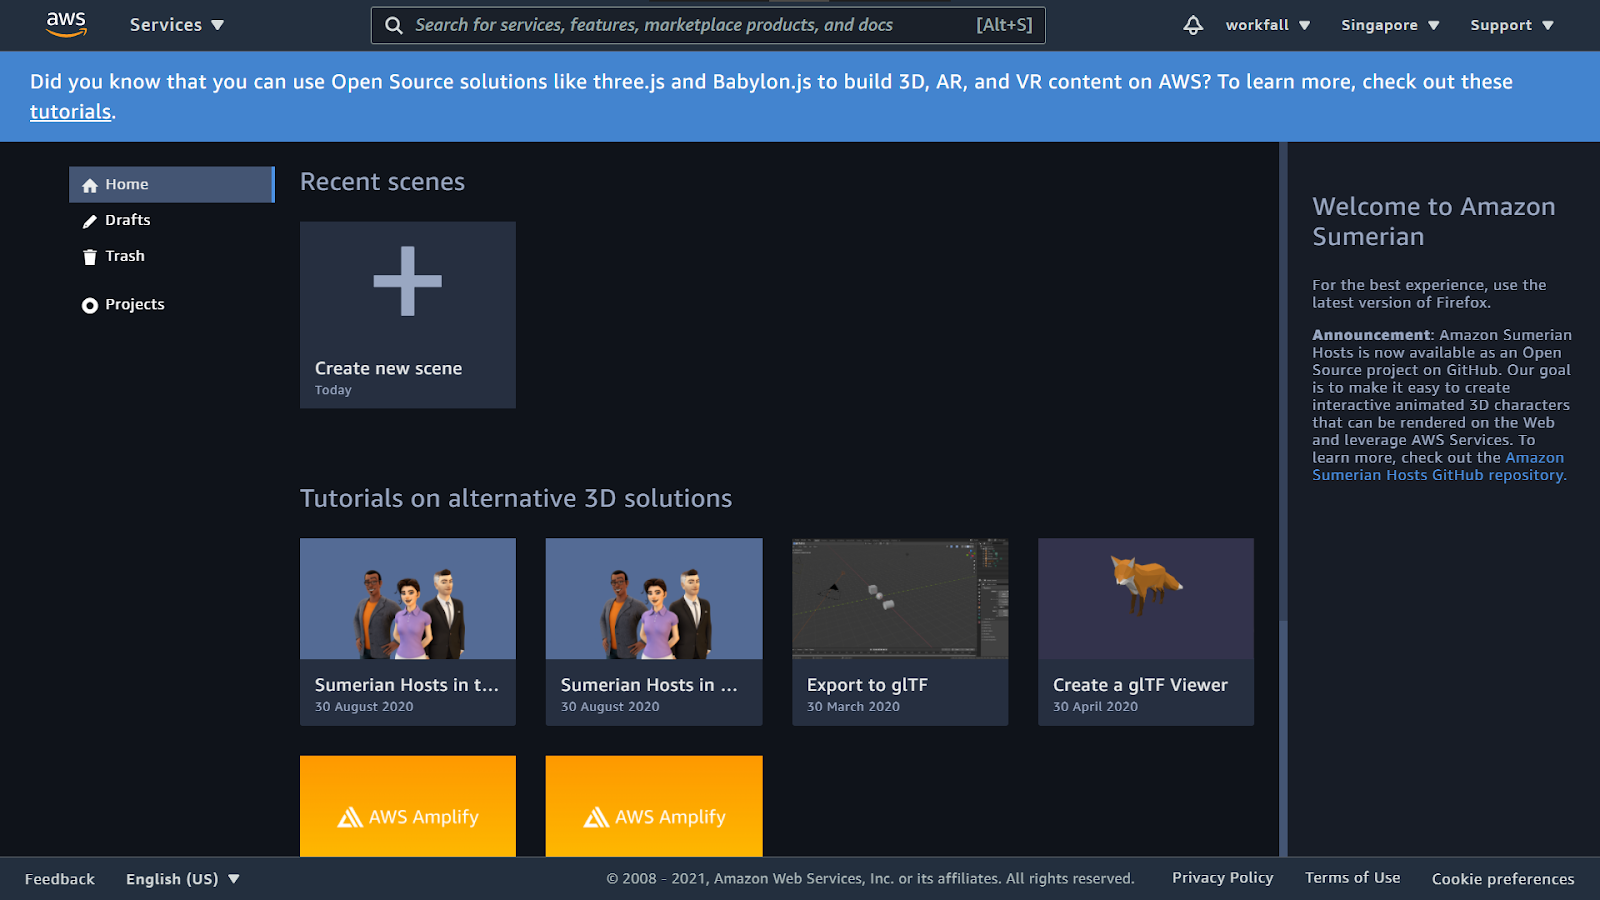
You will be navigated to the Sumerian dashboard as shown below. Click on Create a new scene.
Enter a name for the scene.
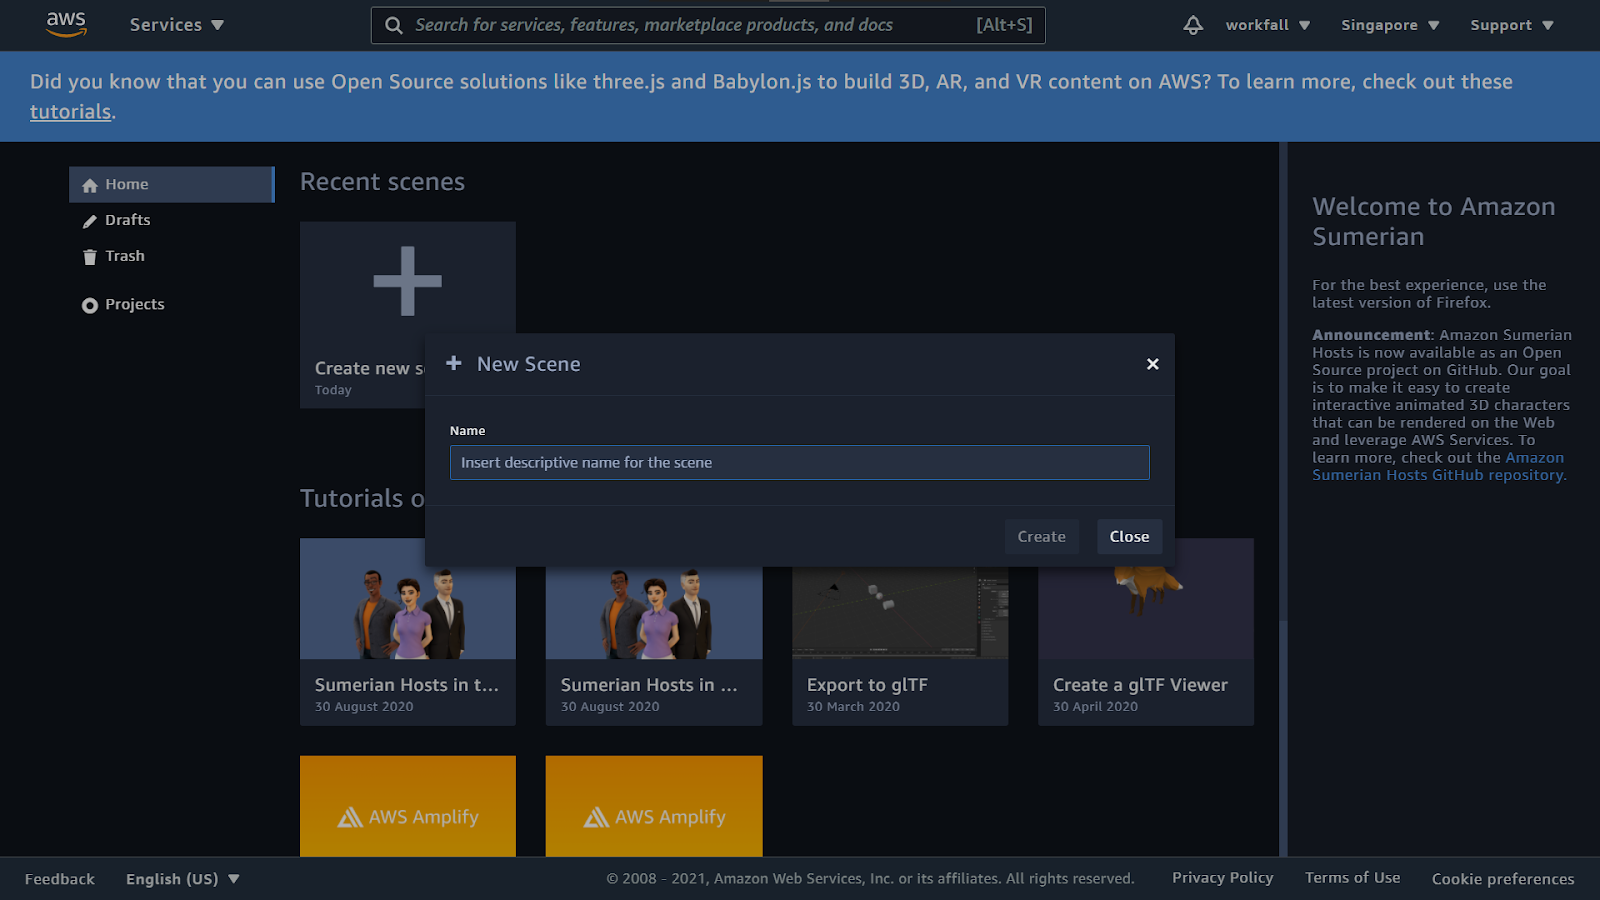
Once done, click on Create.

You will see the loading screen as shown below. It might take some time for the scene to be created.

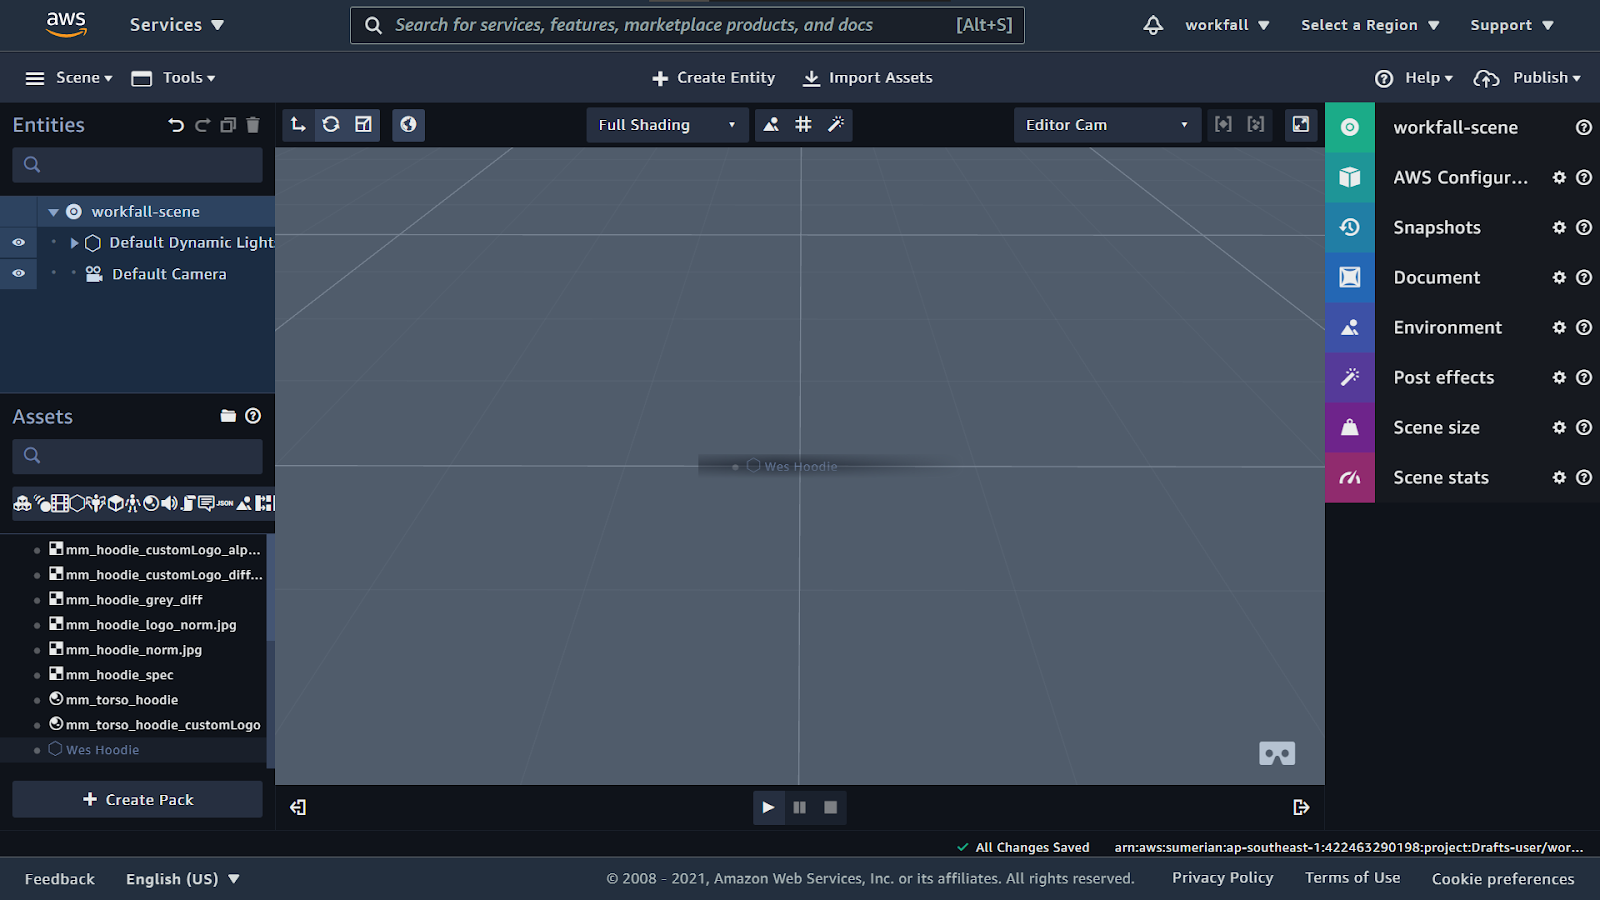
After a few seconds, you will be navigated to the newly created scene dashboard.
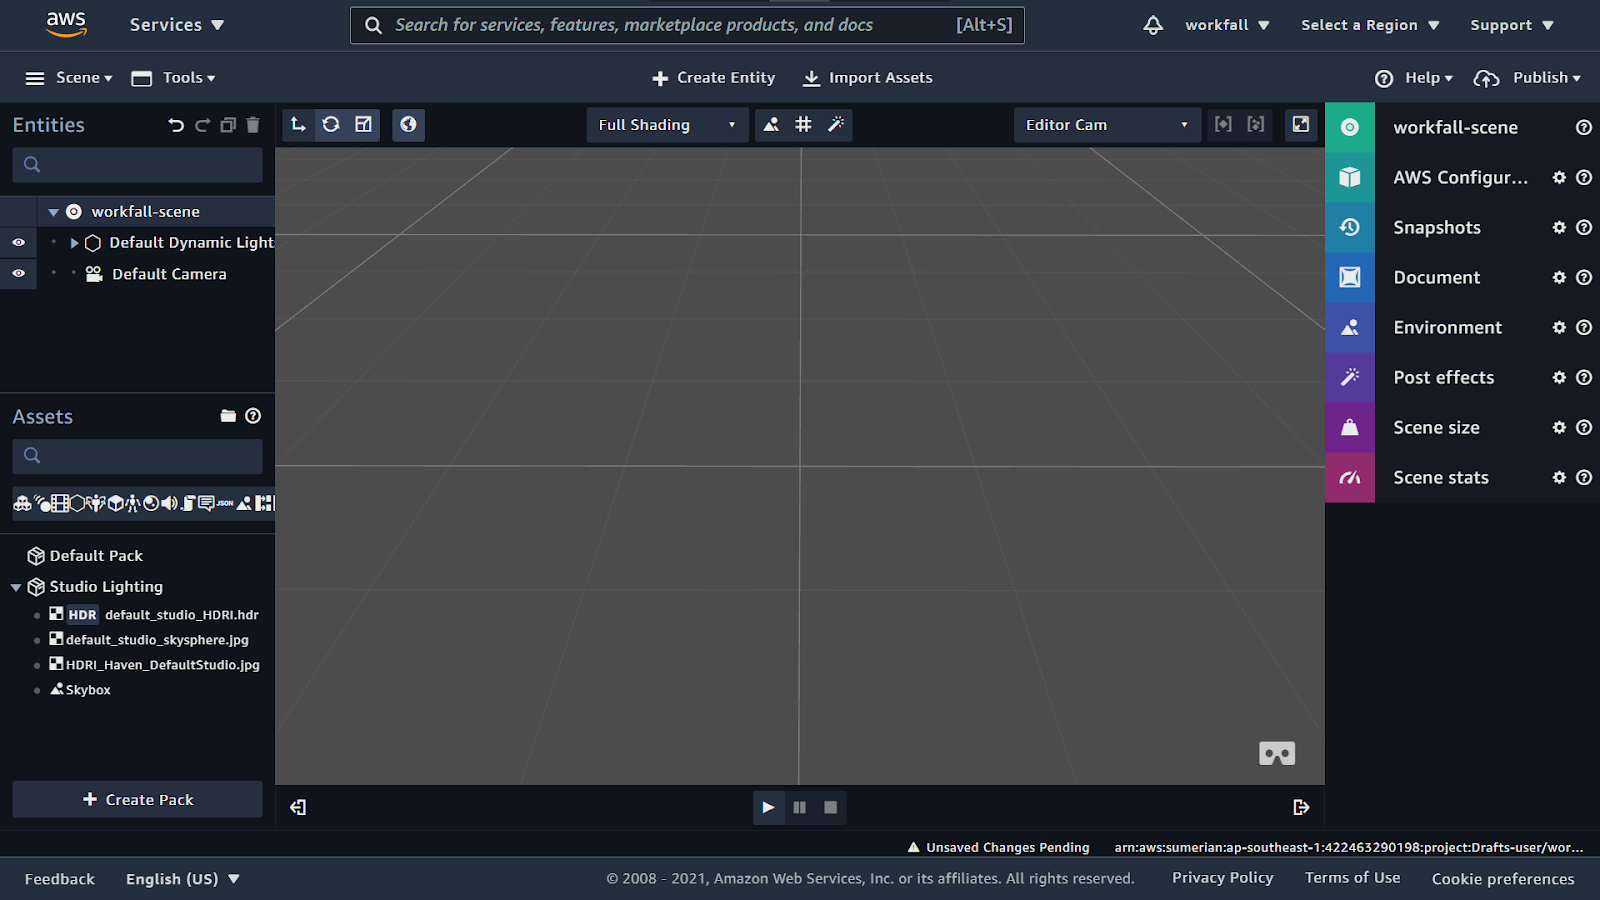
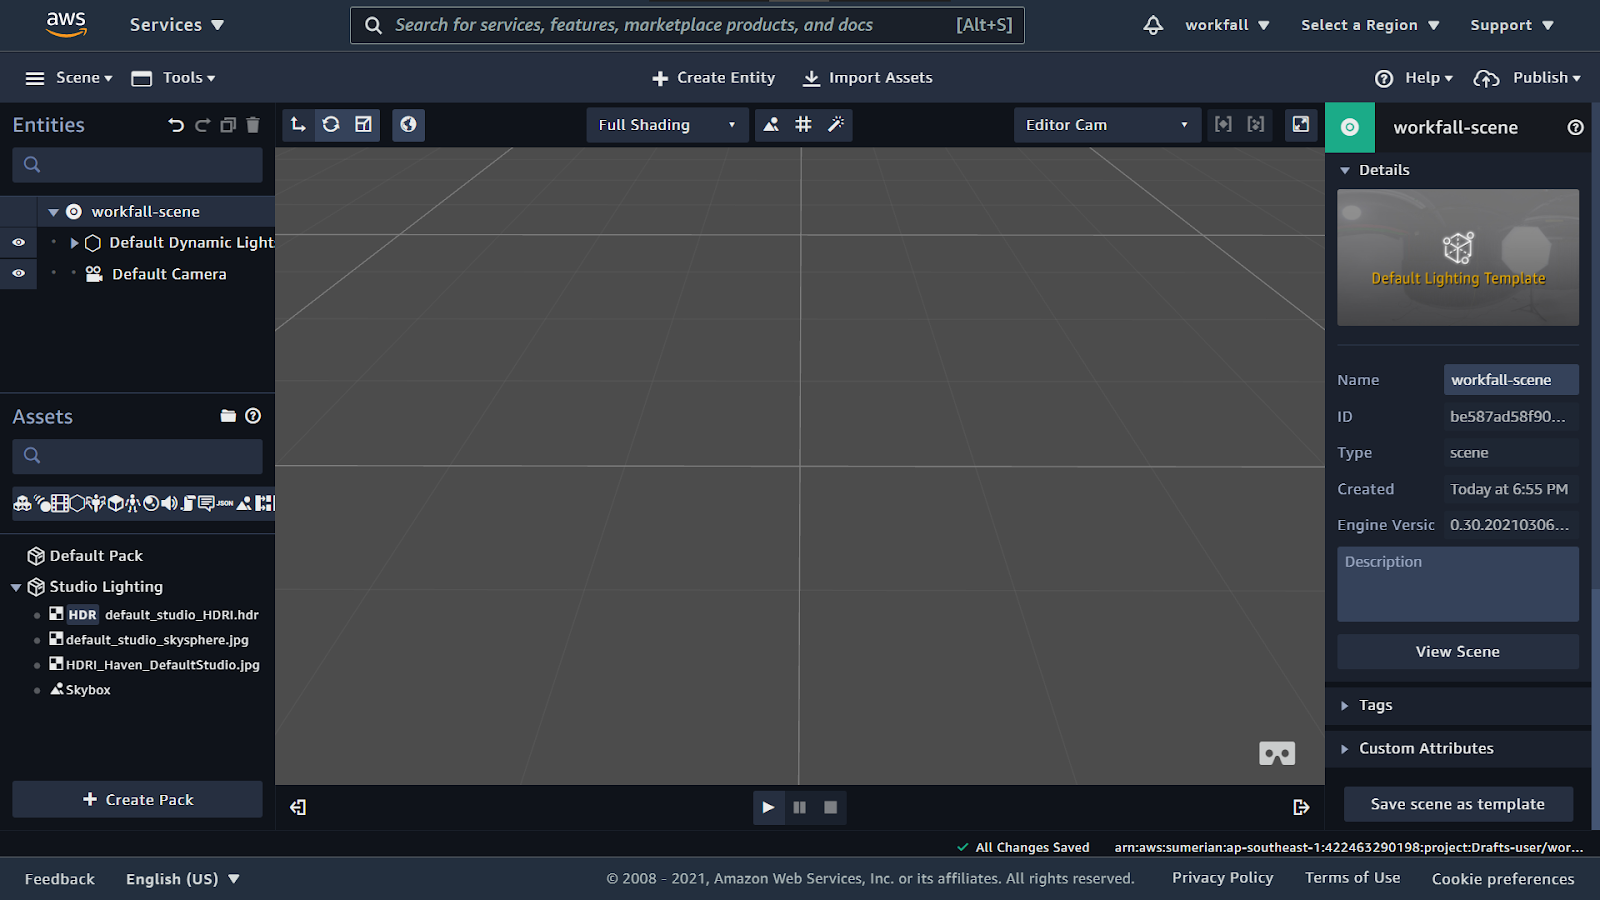
On the right pane, if you expand the created scene name tab, you will see the details for the same.
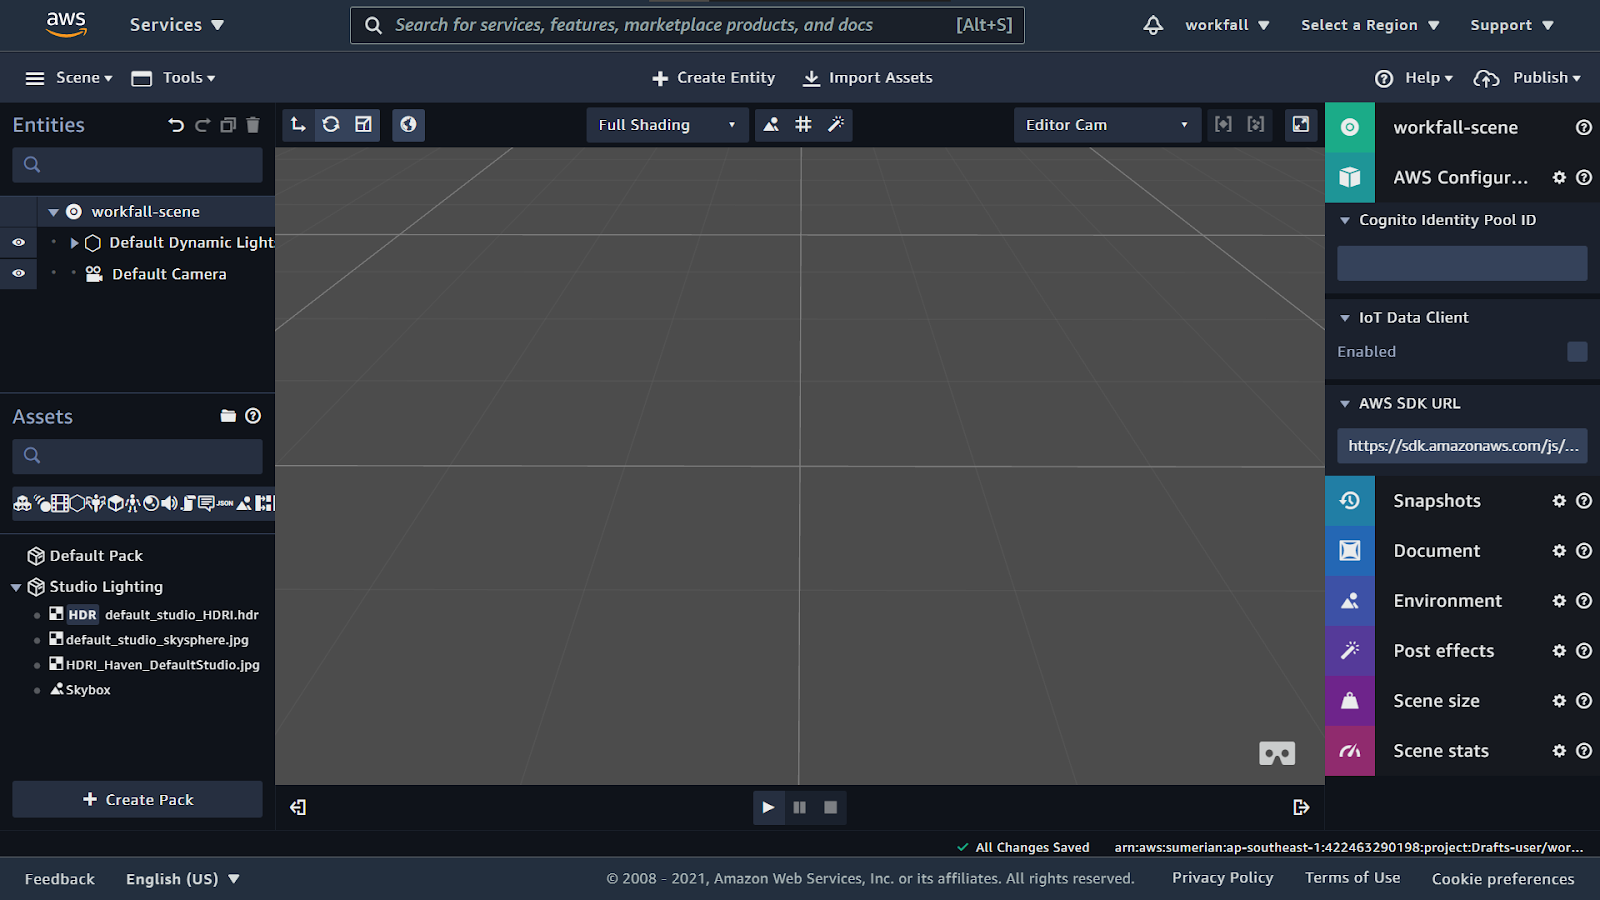
Now, expand the AWS Configuration tab on the right pane. Under it, expand the Cognito Identity Pool ID.
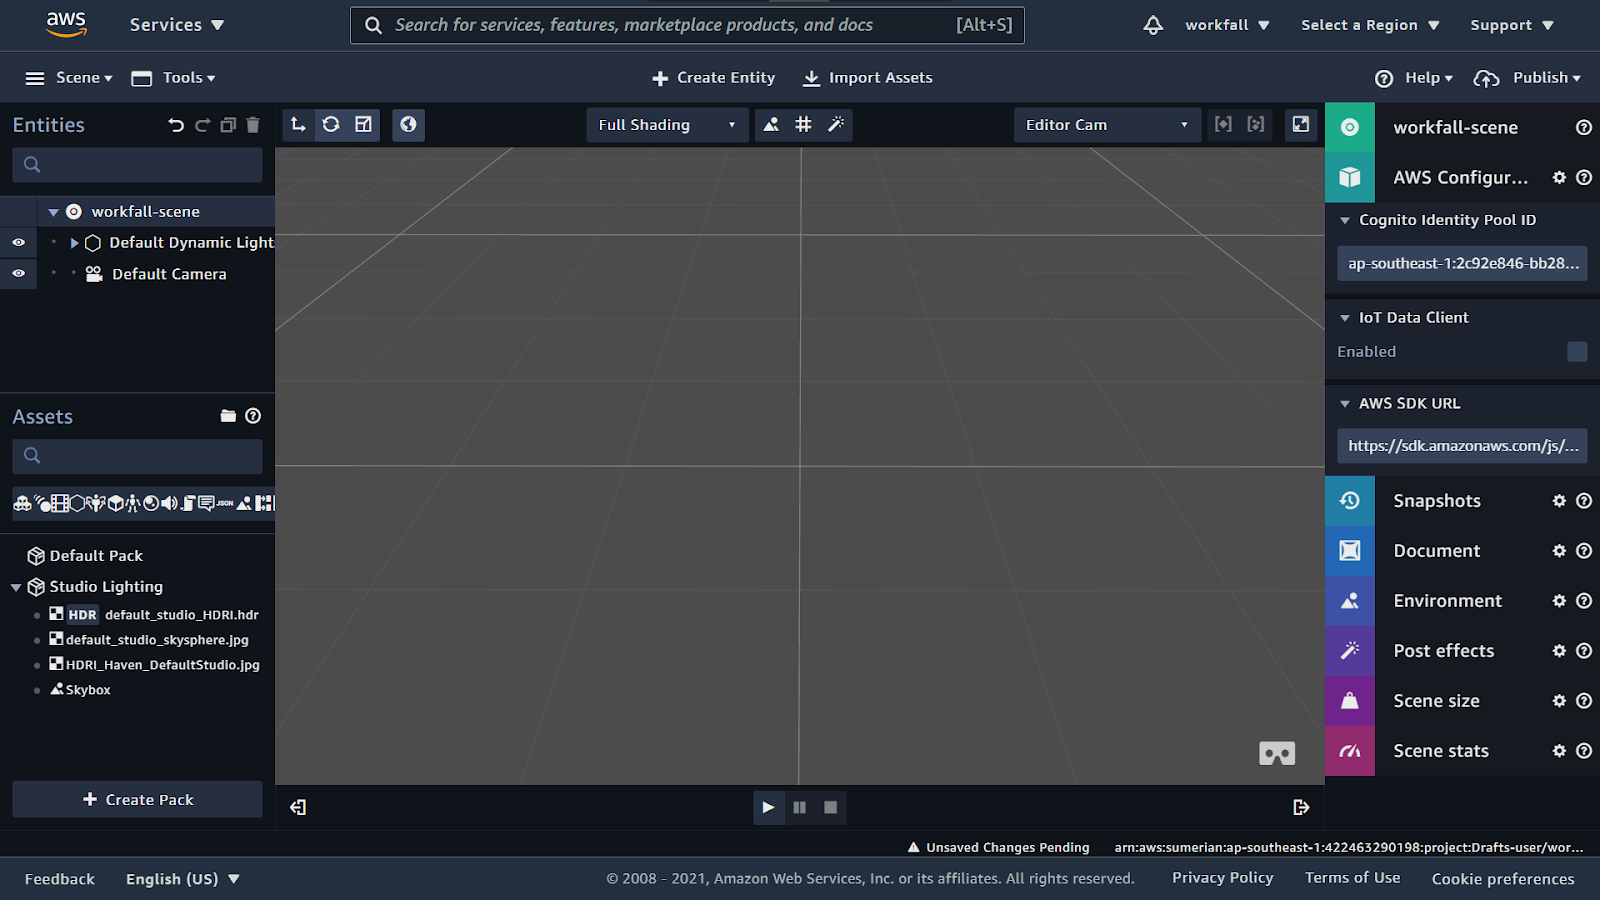
Enter the value you noted down above to give your scenes the required permissions.
Now, on the top of the scene, click on Import Assets to add a host.

A modal will open up with the different hosts and with the backgrounds that can be added to the scene.

If you scroll down, the ones with the pink mark are the backgrounds that can be added to the scene.

Scroll down a little more and the ones with the green mark are the lighting options available.
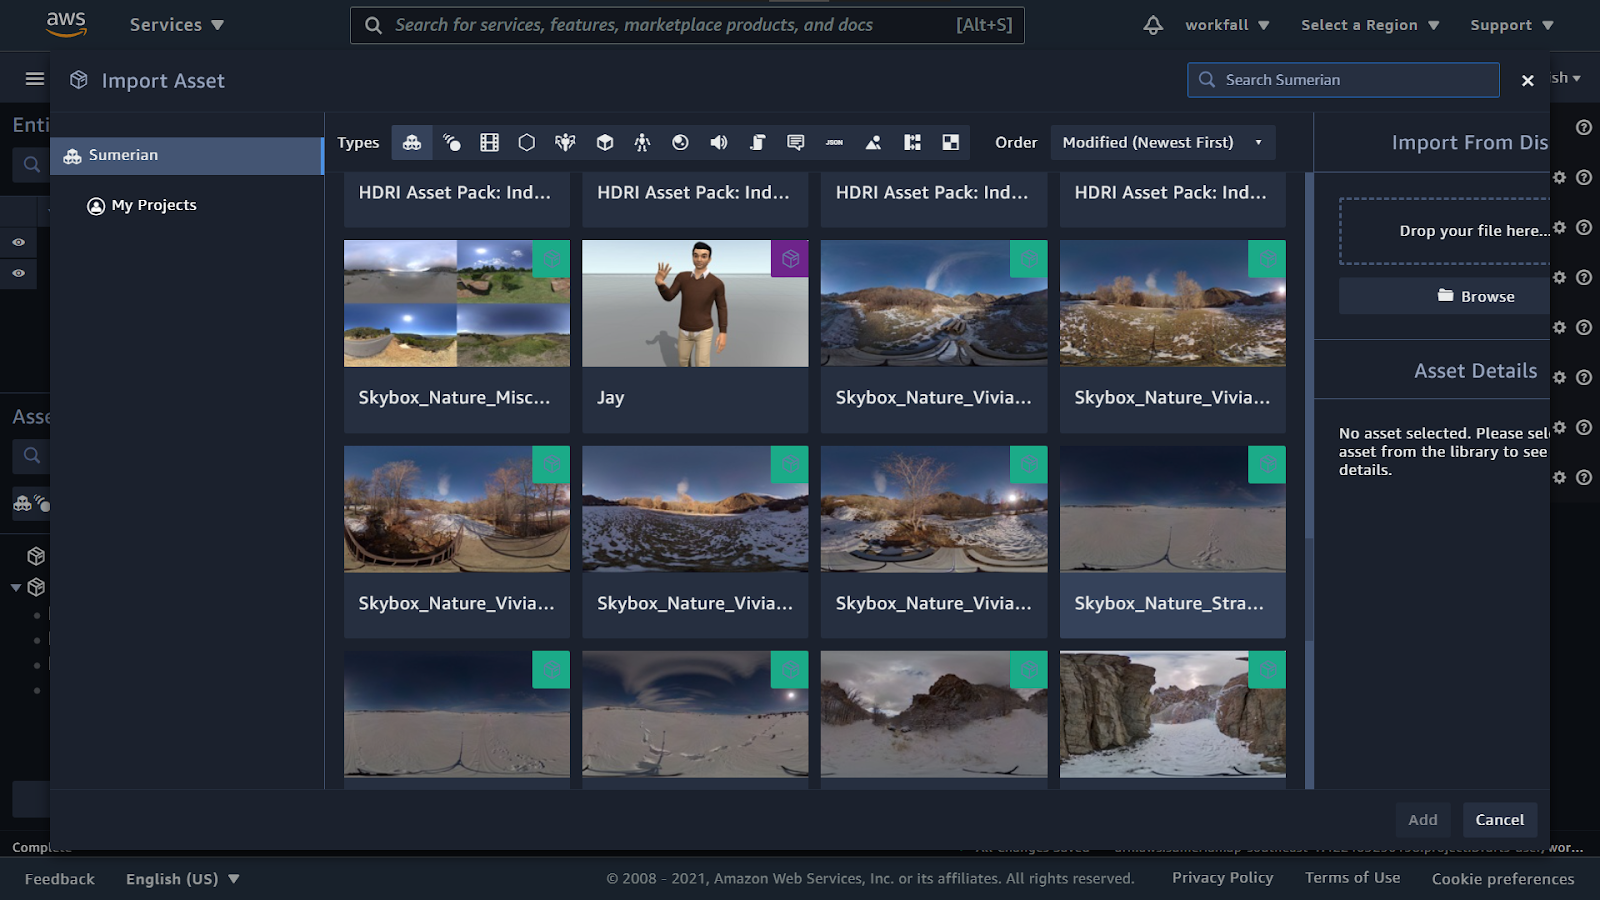
Now, select a host you want to add on your scene.

At the bottom of the window, you will see the Add button to add the host to the scene. Click on it.

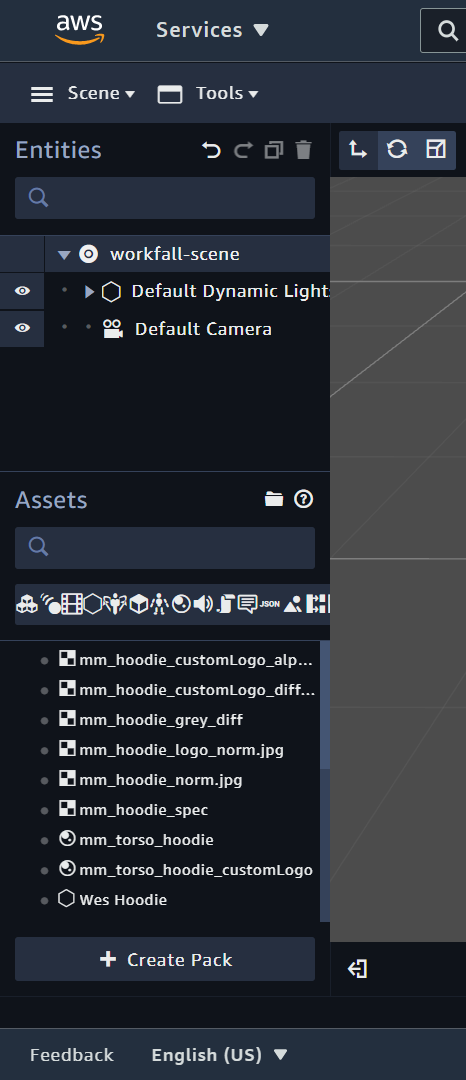
On success, you will see the hosts added in the left navigation pane as shown below.

As you can see in the below image, the one with the pentagon sign is the host you selected.
Click on it and drag it on the middle of the screen to add the host to the scene.
On success, you will see the host added as shown below.

To view the same in full-screen mode, on the top of the scene, you will find an option that mentions ‘Go into full screen mode’. Click on it.

Now you can see the entire scene with the host you added in the full-screen mode as shown below.
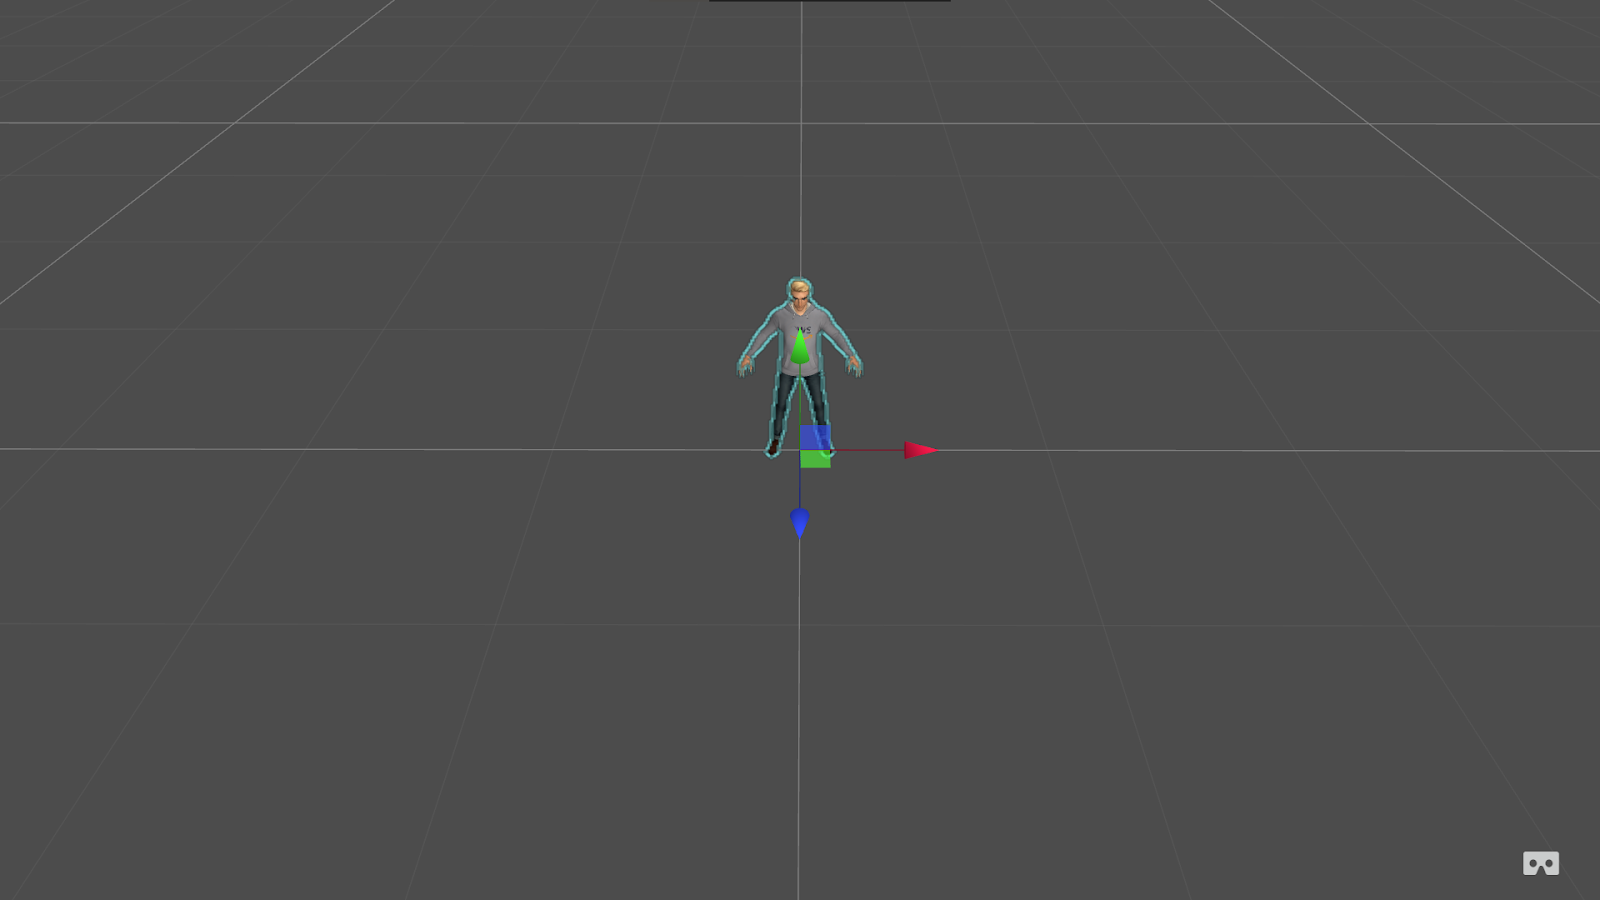
To update the settings, press the ESC key and get back to the normal mode. If you look at the host, there are coordinates (x,y,z) on the host. Click on any color row and drag your mouse to position your host on the screen.

Once done, click anywhere on the scene and the coordinates will disappear.

Currently, the scene is in the 3D mode and you can also view the scene in the 2D mode. On the top of the scene, click on the dropdown of the Editor Cam and select 2D Editor Cam.

You will be able to see your host in the 2D mode as shown below.

Now for other configurations related to the positioning of the host or the visibility of the host, on the top of the scene, click on Scale (R).

Click on the yellow mark and drag upwards to increase the height of the host.

Now to rotate the host, click on Rotate (E) on top of the scene.

Click on any of the colors in the ring and you can rotate the host as per your need.
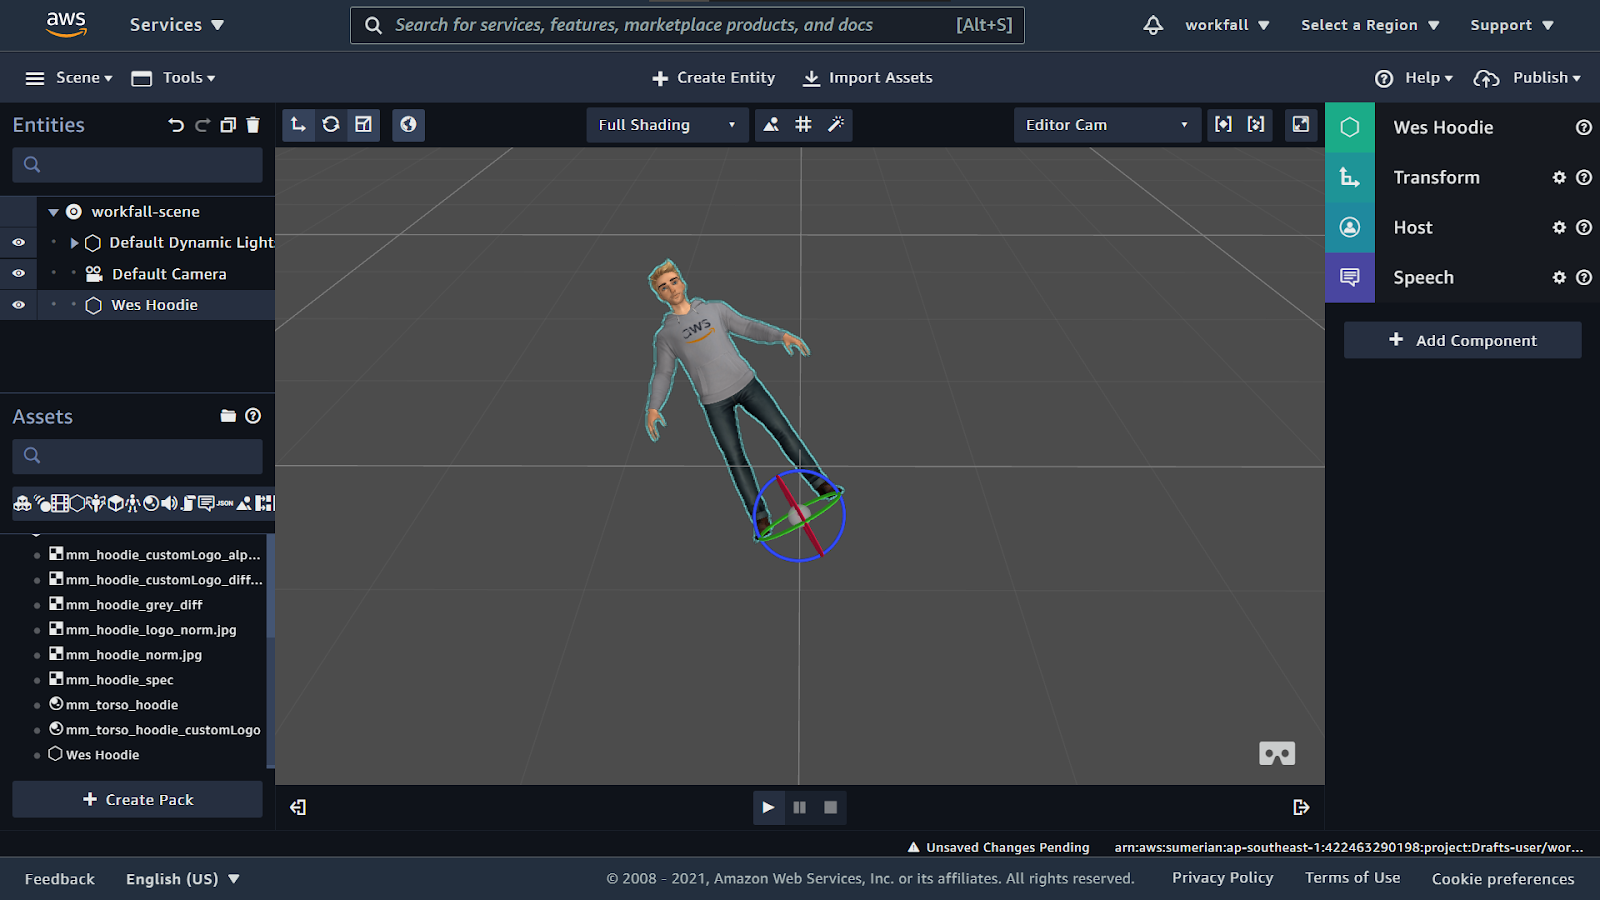
Once done, click on the scene to exit from the positioning configuration of the user.

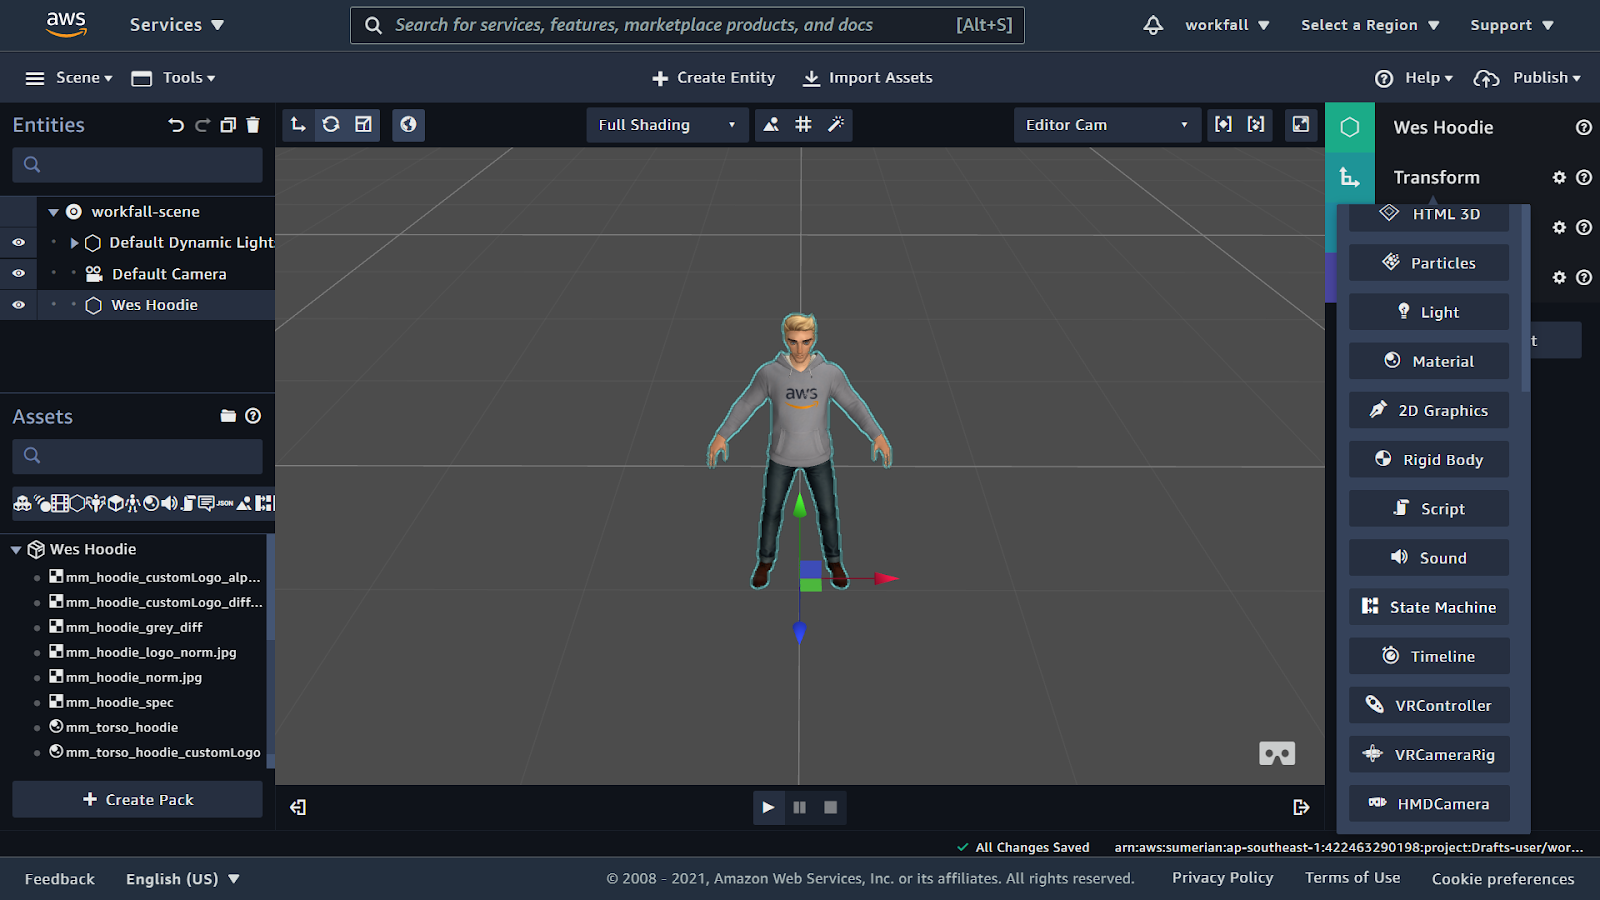
Now to alter the settings of the host and add speech and behavior aspects, click on the host. In the right pane, you will see the options available for that host.

Expand the Speech settings to start the configuration of adding speech to that user.
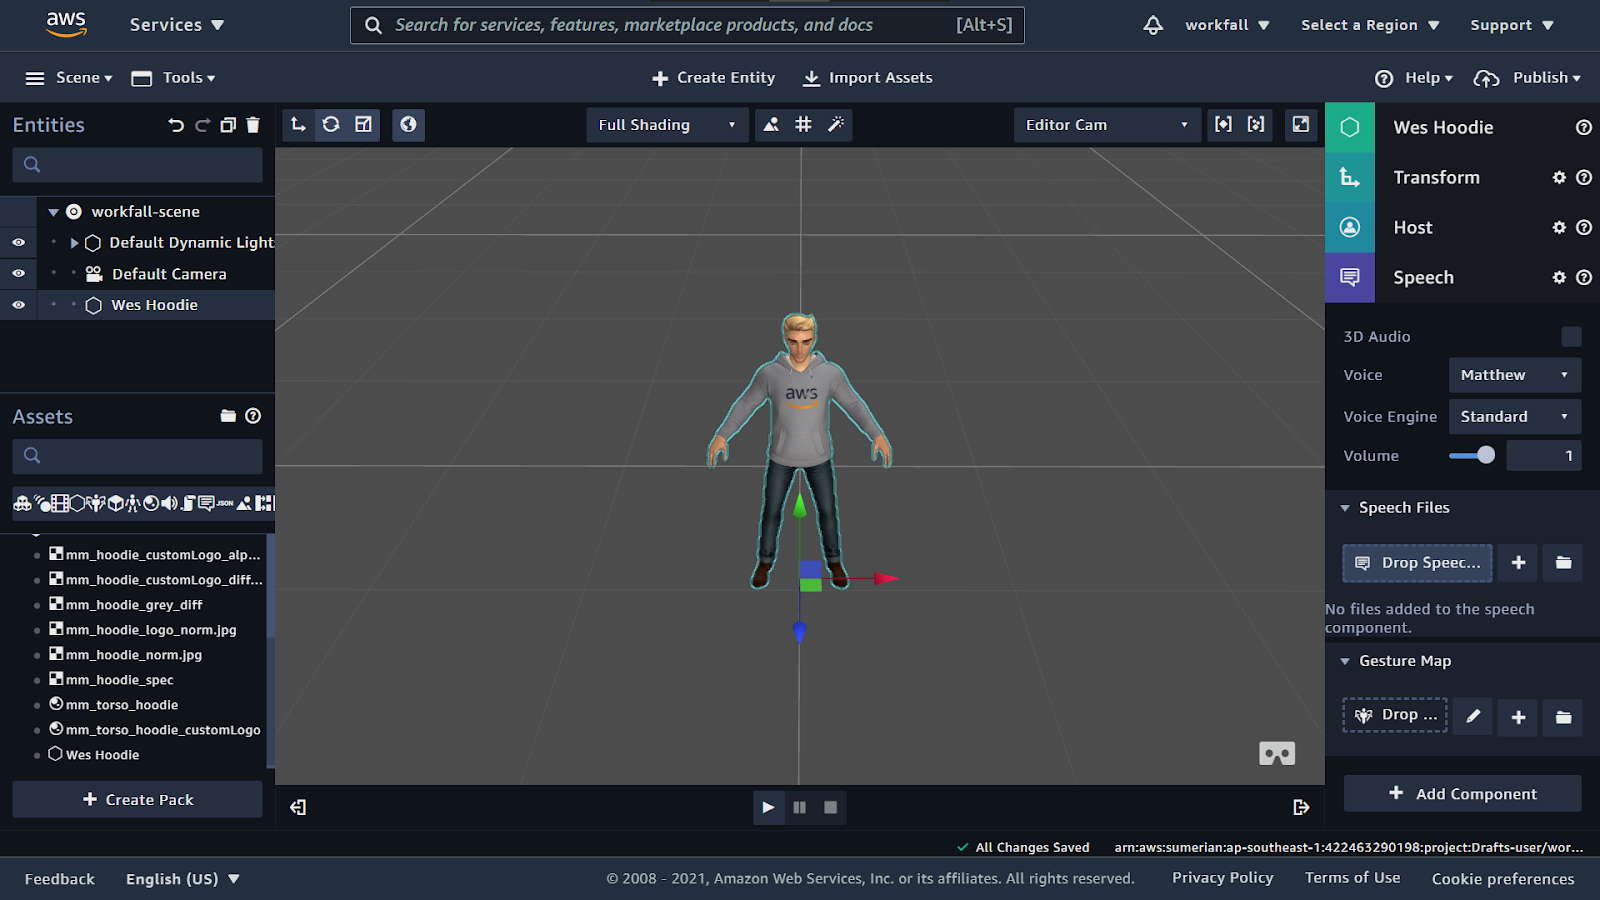
Expand the Speech files tab and click on the + sign to create a new speech file that will contain the texts to be spoken by the host.
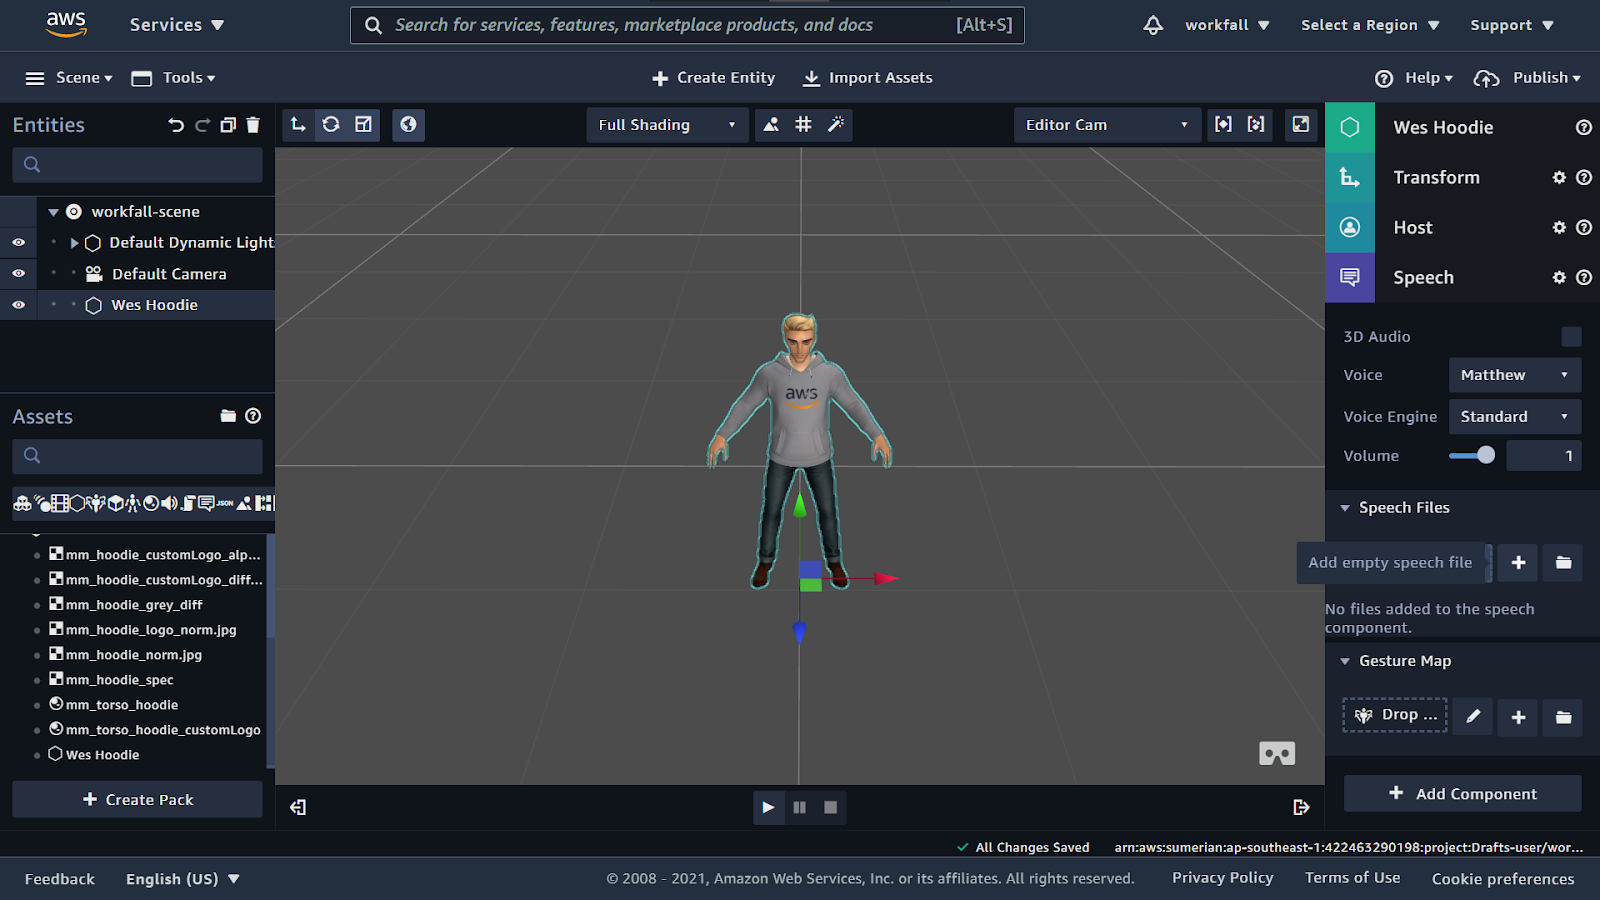
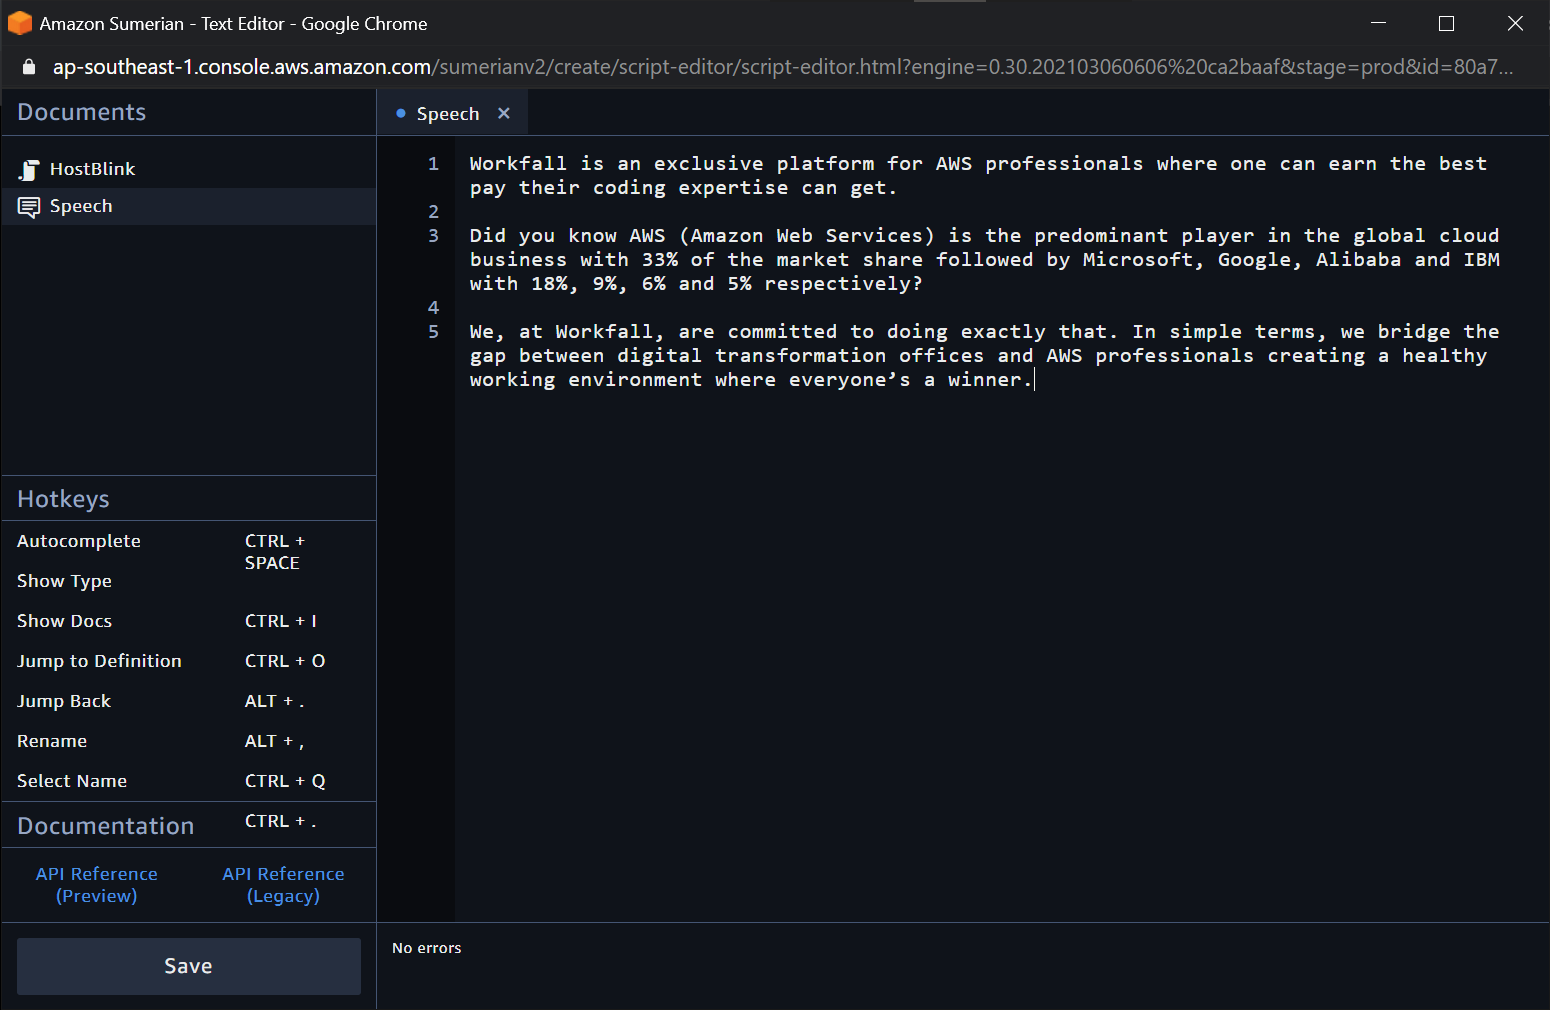
On clicking the + sign, you will be navigated to a new screen that will ask you to enter texts in the speech file.
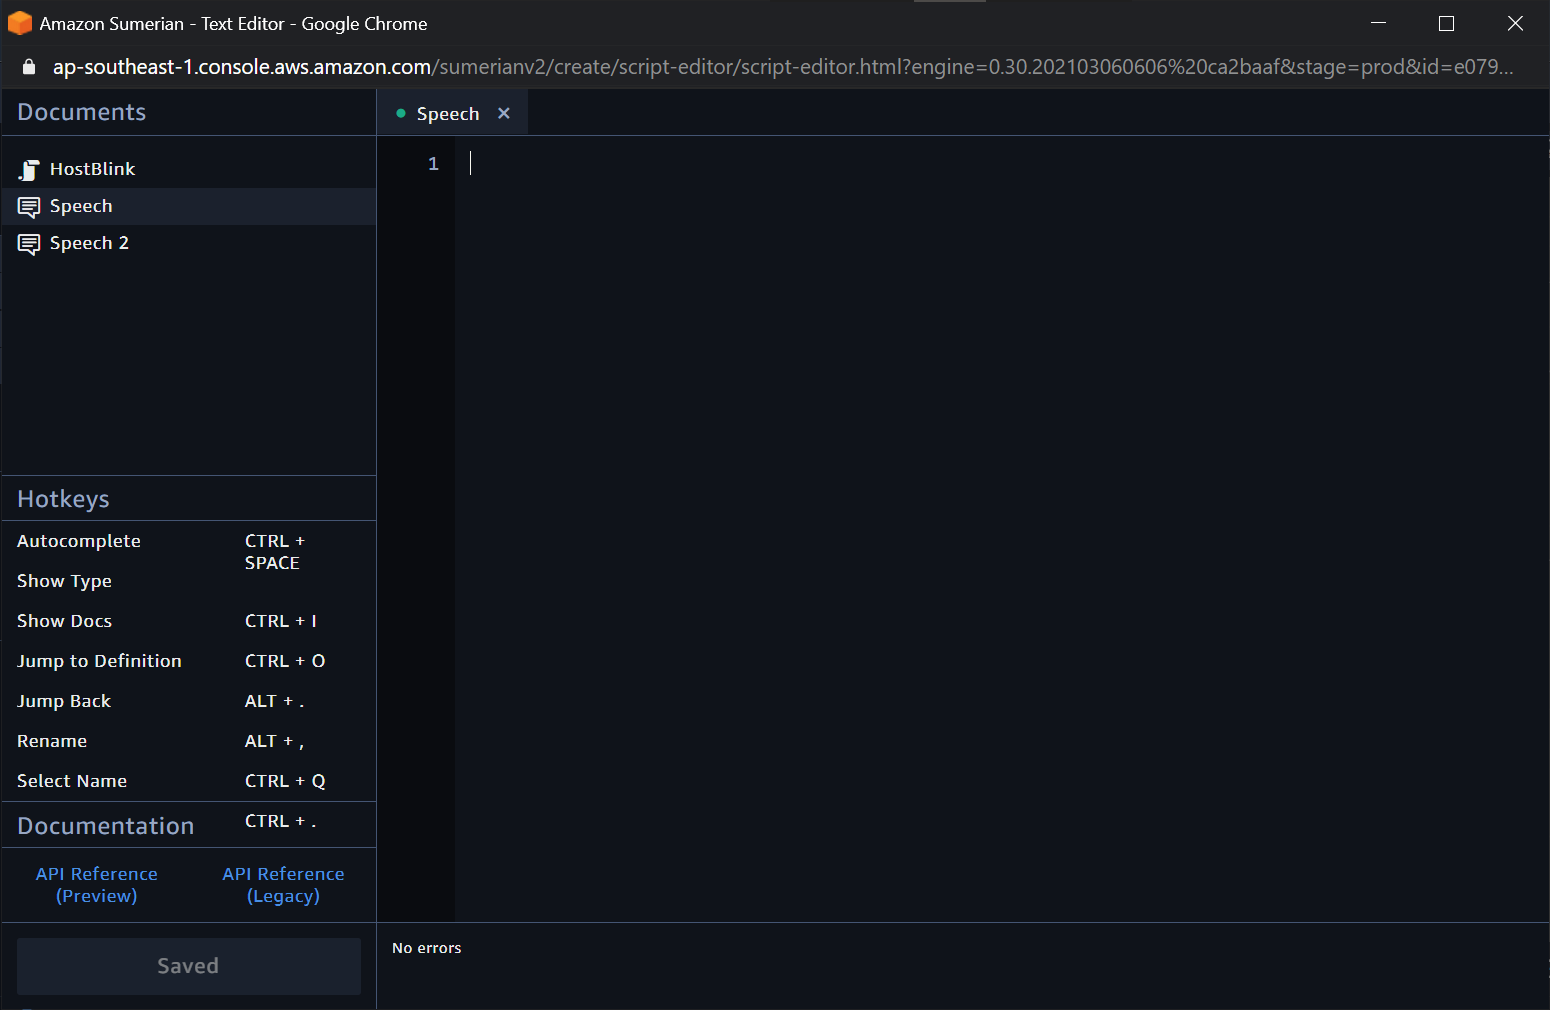
Enter the text you want your host to speak and once done, you need to hit the Save button on the bottom left of the screen.
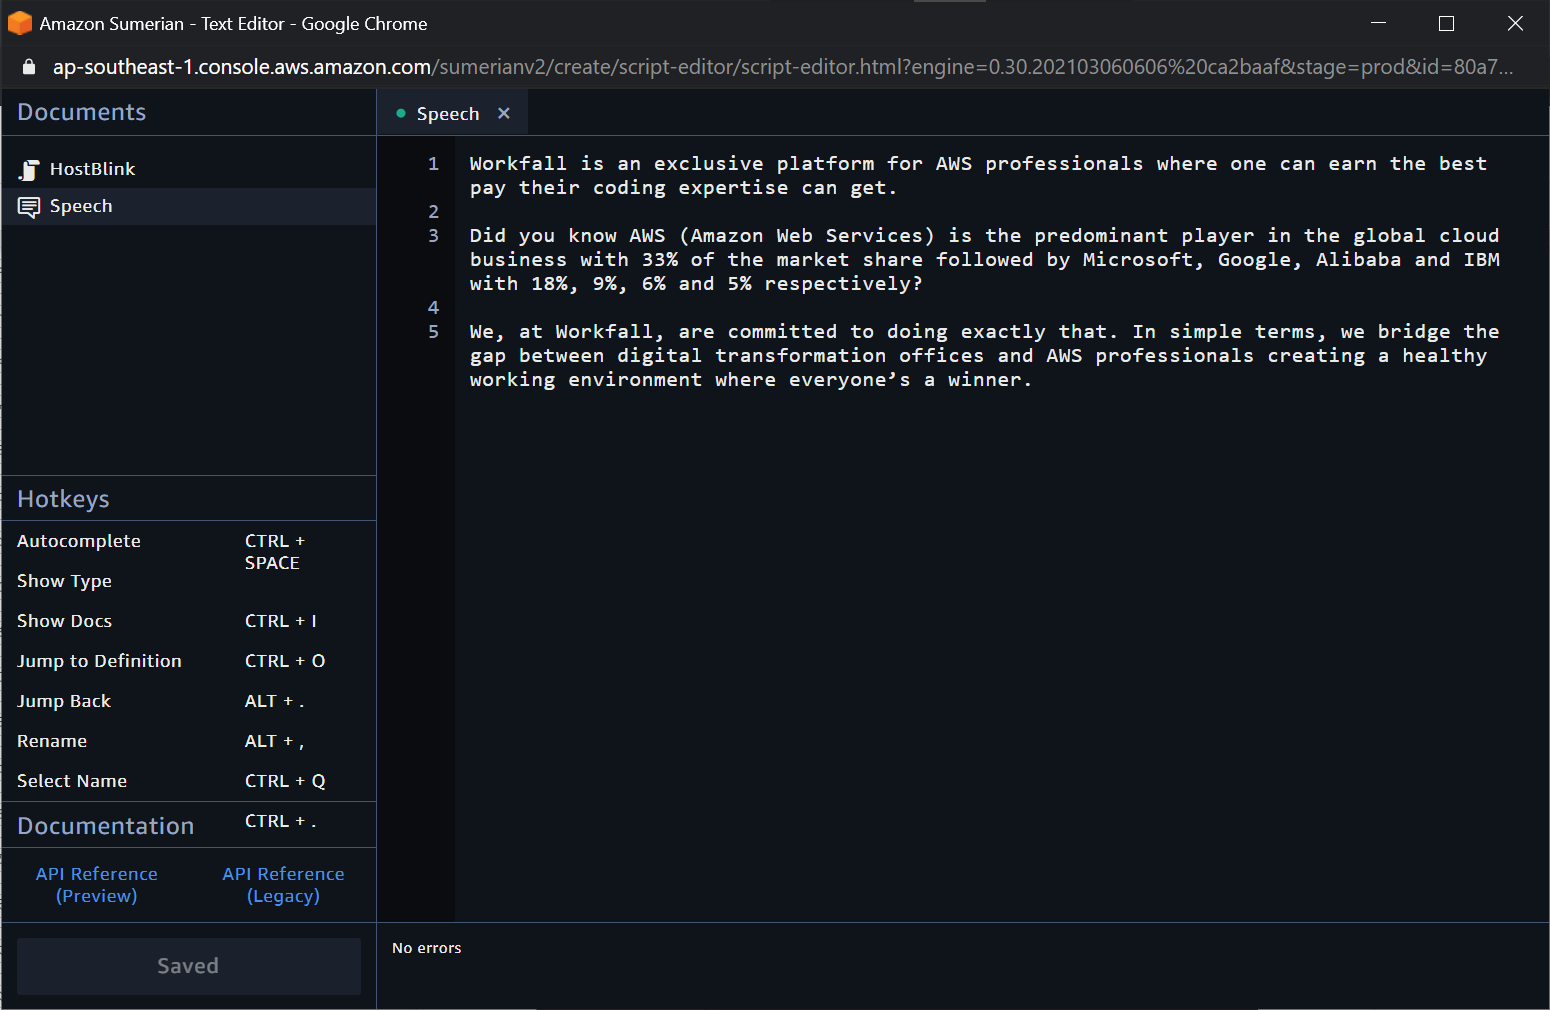
On hitting the Save button, you will see a green dot beside the speech file name which states that there are no errors.
Now, to add gestures for the host while speaking, expand the Gesture Map tab. Click on the + sign to add a default gesture map. Click on the pencil sign on the default gesture map to view the available gestures.
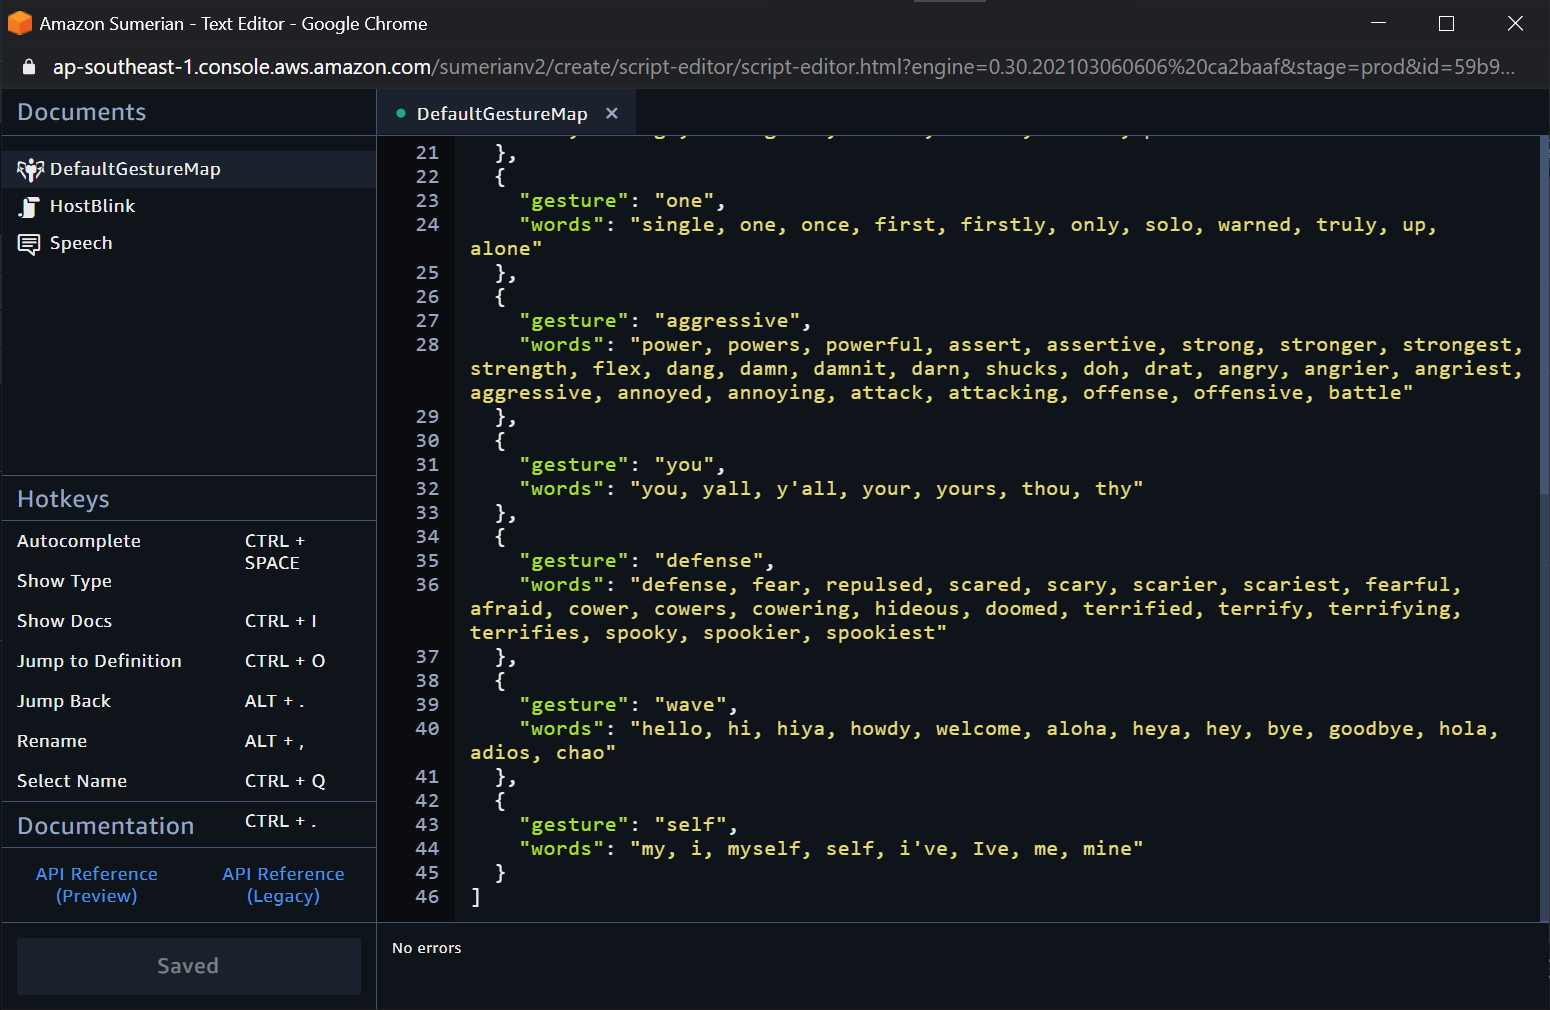
You will be navigated to a new file with the default gestures available for the host.

If you scroll down, at the bottom you will see the greetings gesture available for the host. Hit the save button in case the file is not saved.
You will see the default gesture map in the right pane. Now we need to add the gesture map to the speech file we created above.
On the left of the remove speech file (X) sign, click on that sign to add the newly created gestures to your speech file. Now if you open your file, you will get to see some different lines of code added to your speech file.

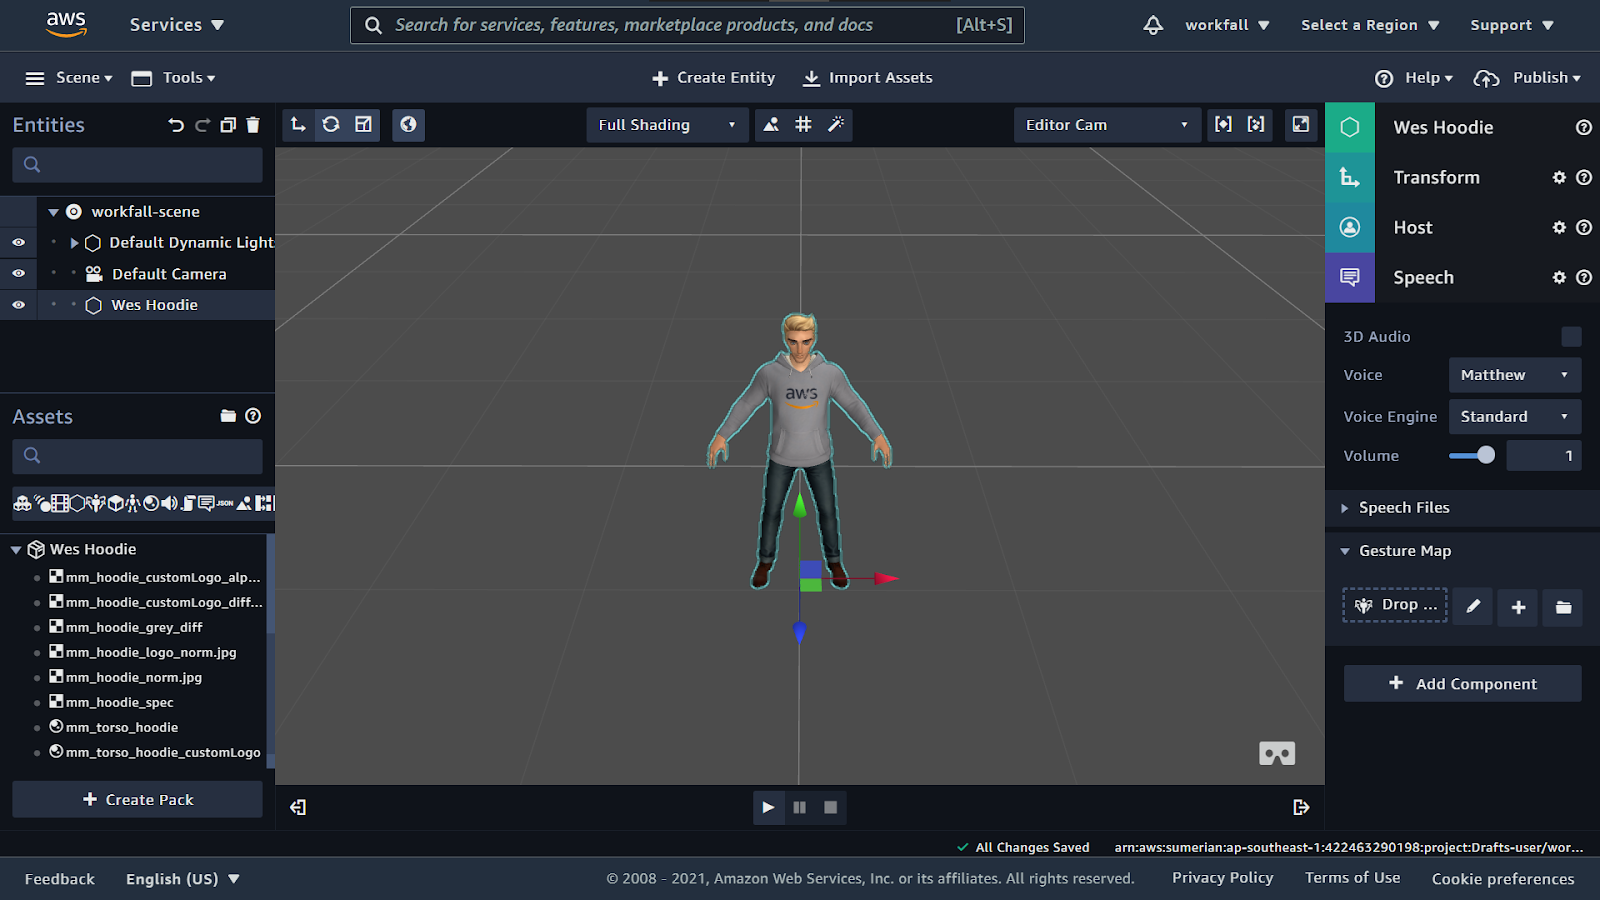
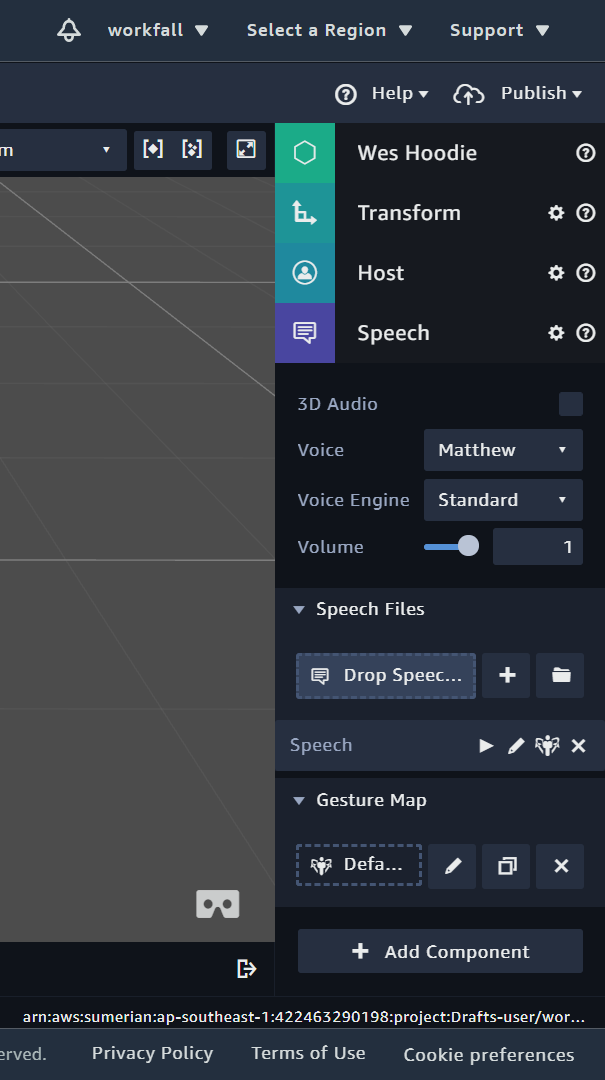
AWS Sumerian provides you the flexibility to change the Voice, Voice engine, and volume for the host. Click on the dropdown beside the Voice option and you can select the different voices available based on your requirements.

You can listen to the different voices and select one. To do so, hit the play button beside the speech file and you will hear the voice speaking words from the speech file you created above.

Now we need to attach the speech file with gestures to our host so that the host speaks the same. Click on the Add Component on the right pane.

You will see the different options available for the host.

Scroll down and select State Machine to create a behavior.
Now click on the + sign on the right of Drop Behavior to create new behavior for your host.

In case you have a behavior already created then you can drag and drop the behavior in the State Machine pane.

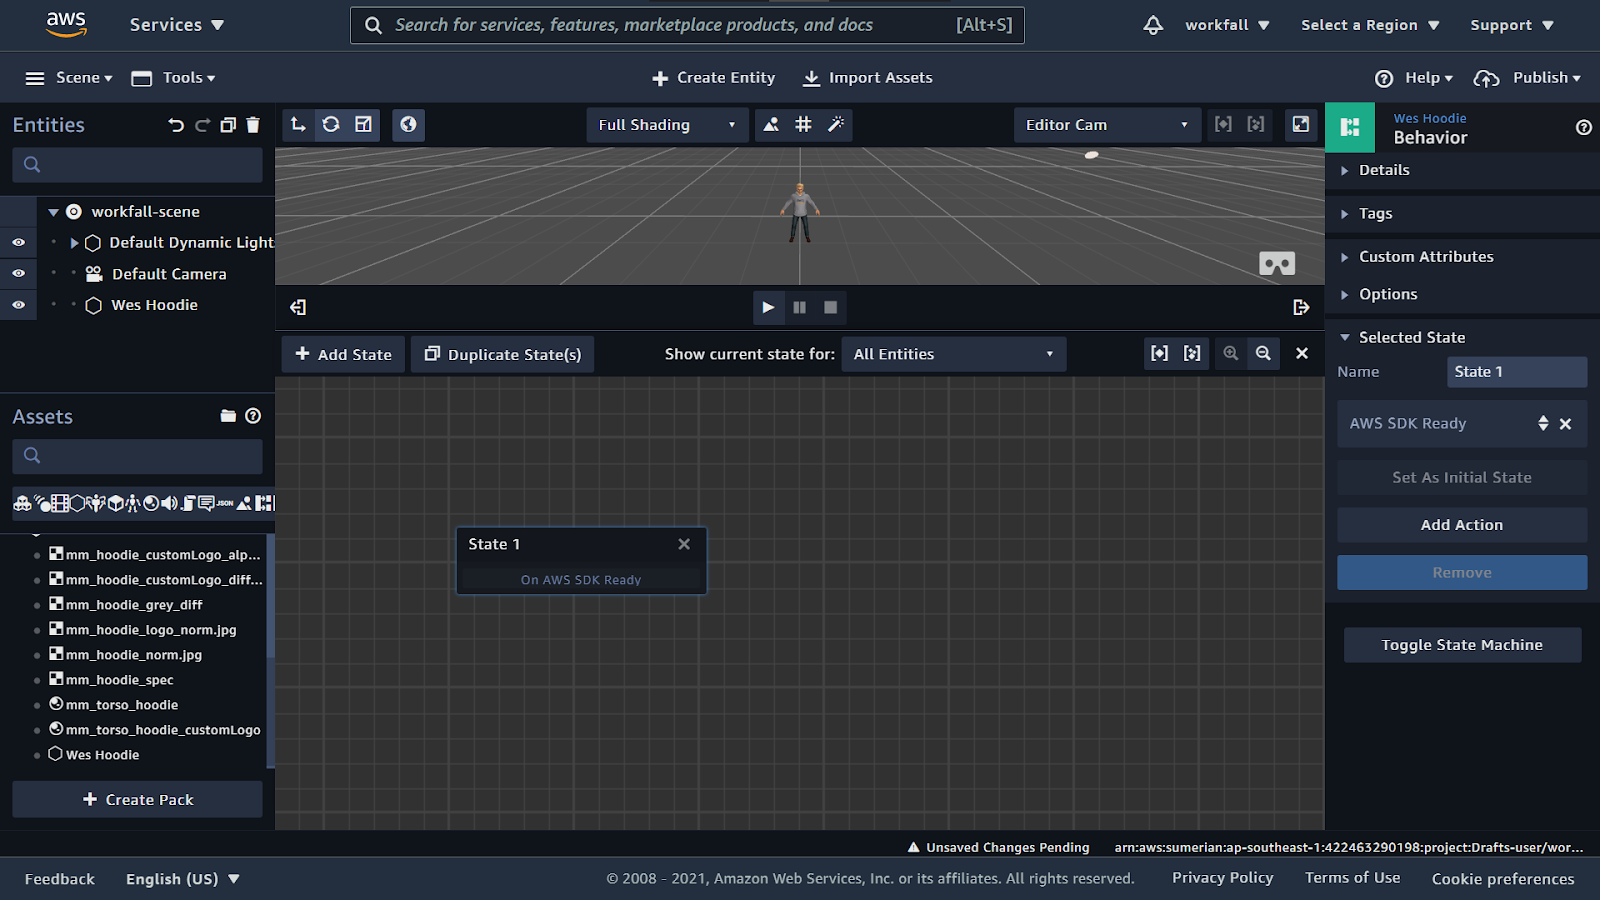
You will see a graph type of structure on the scene as shown below. You need to add the different states for your host in these states based on which the host will react. Select the state and you will see the settings on the right for the same.

Click on Add Action to add an action to the state. A modal will appear with the different types of actions available.

In the search bar, enter AWS SDK Ready and hit Enter. Double-click on the action in the pane.

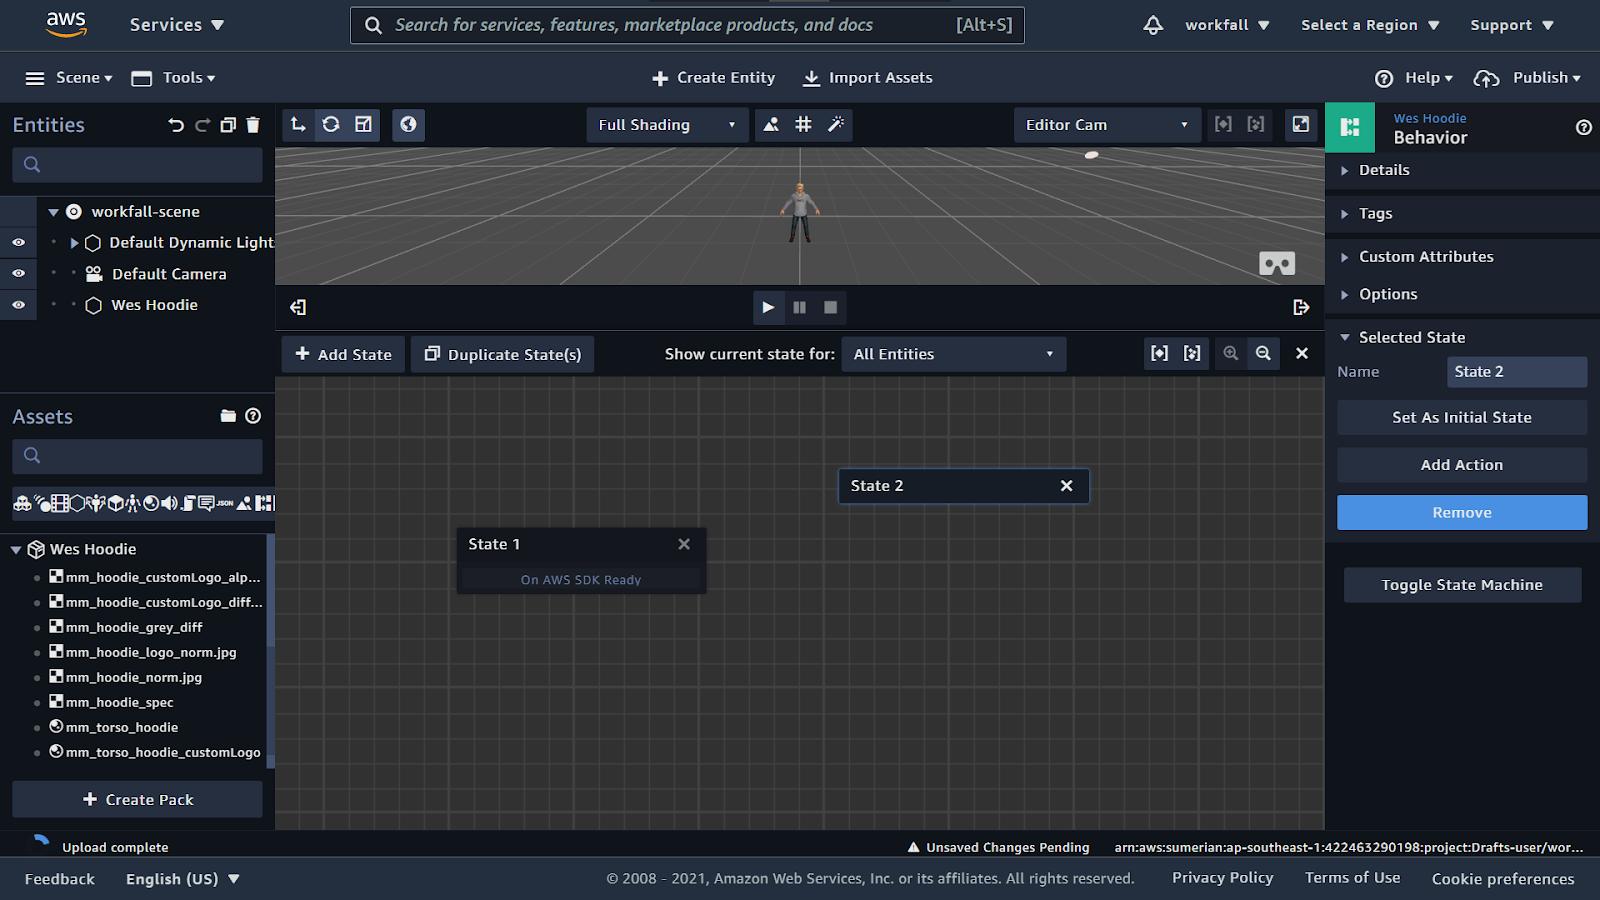
You will see that the action will be attached to that state. Now, click on Add State to create a new state.
Select the new state and click on Add Action for that state.
In the modal that appears, search for Start Speech and double-click on the action.
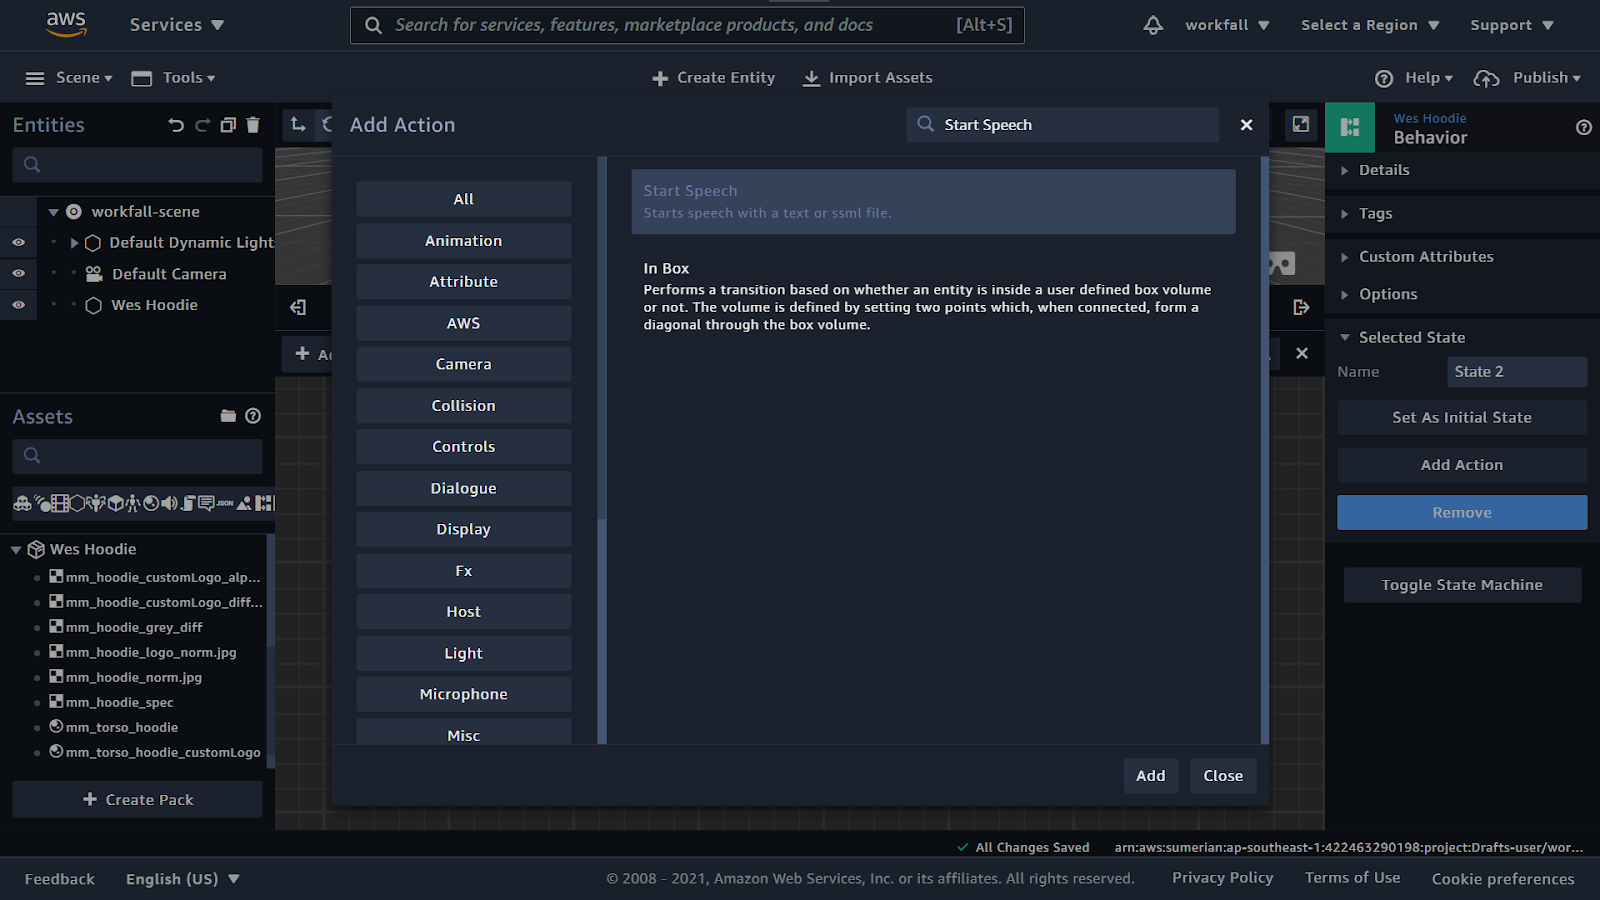
Once done, select the state 2 and you will need to attach the speech file to that state. On the right pane, besides the Speech dropdown, select the Speech file you created above.
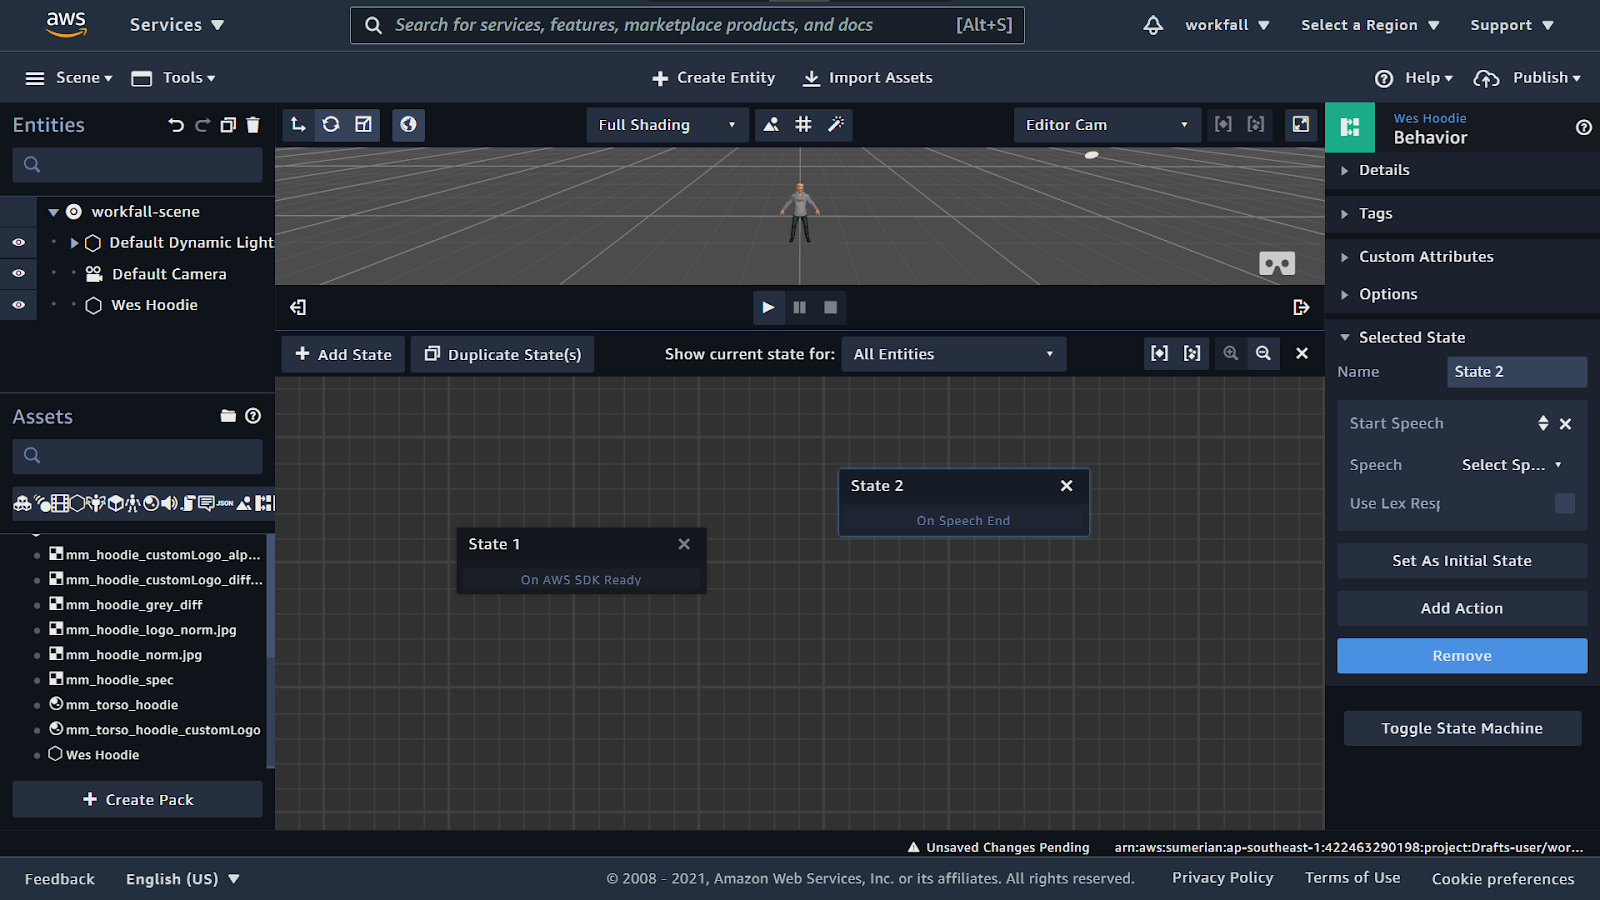
Wait for the changes to be saved. As you can see on the bottom of the screen it shows whether the changes are saved or not.

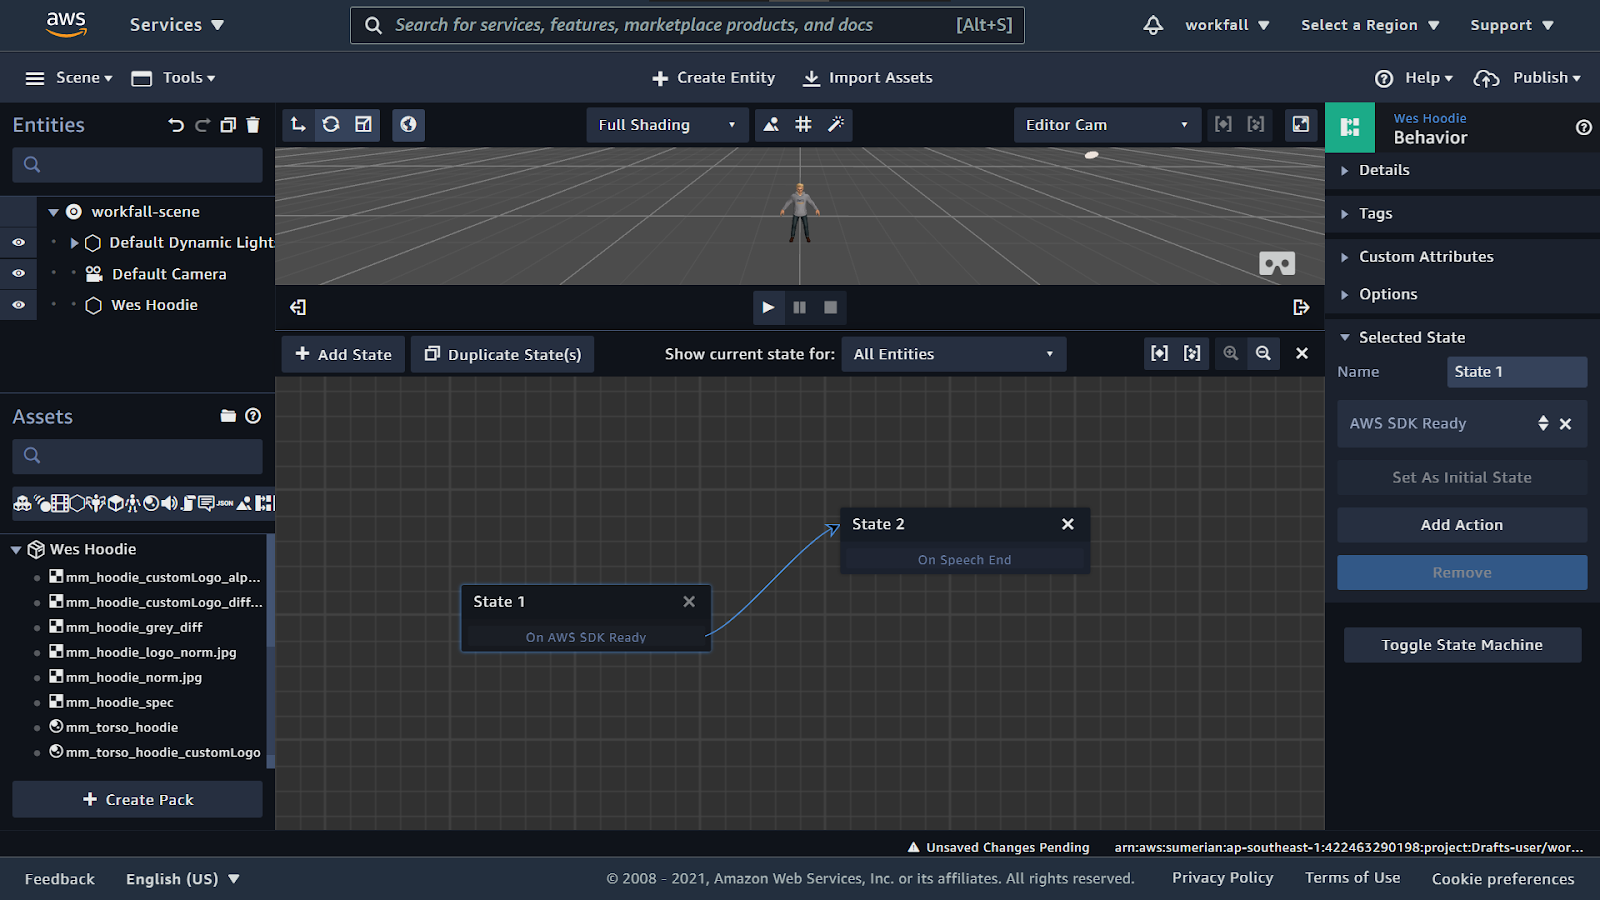
Now you need to connect both the states. You can do so by selecting state 1 and dragging to state 2, you will see an arrow connecting the state 1 to state 2 as shown below.
Now to remove the grids, click on Toggle Grid on the top of the scene.

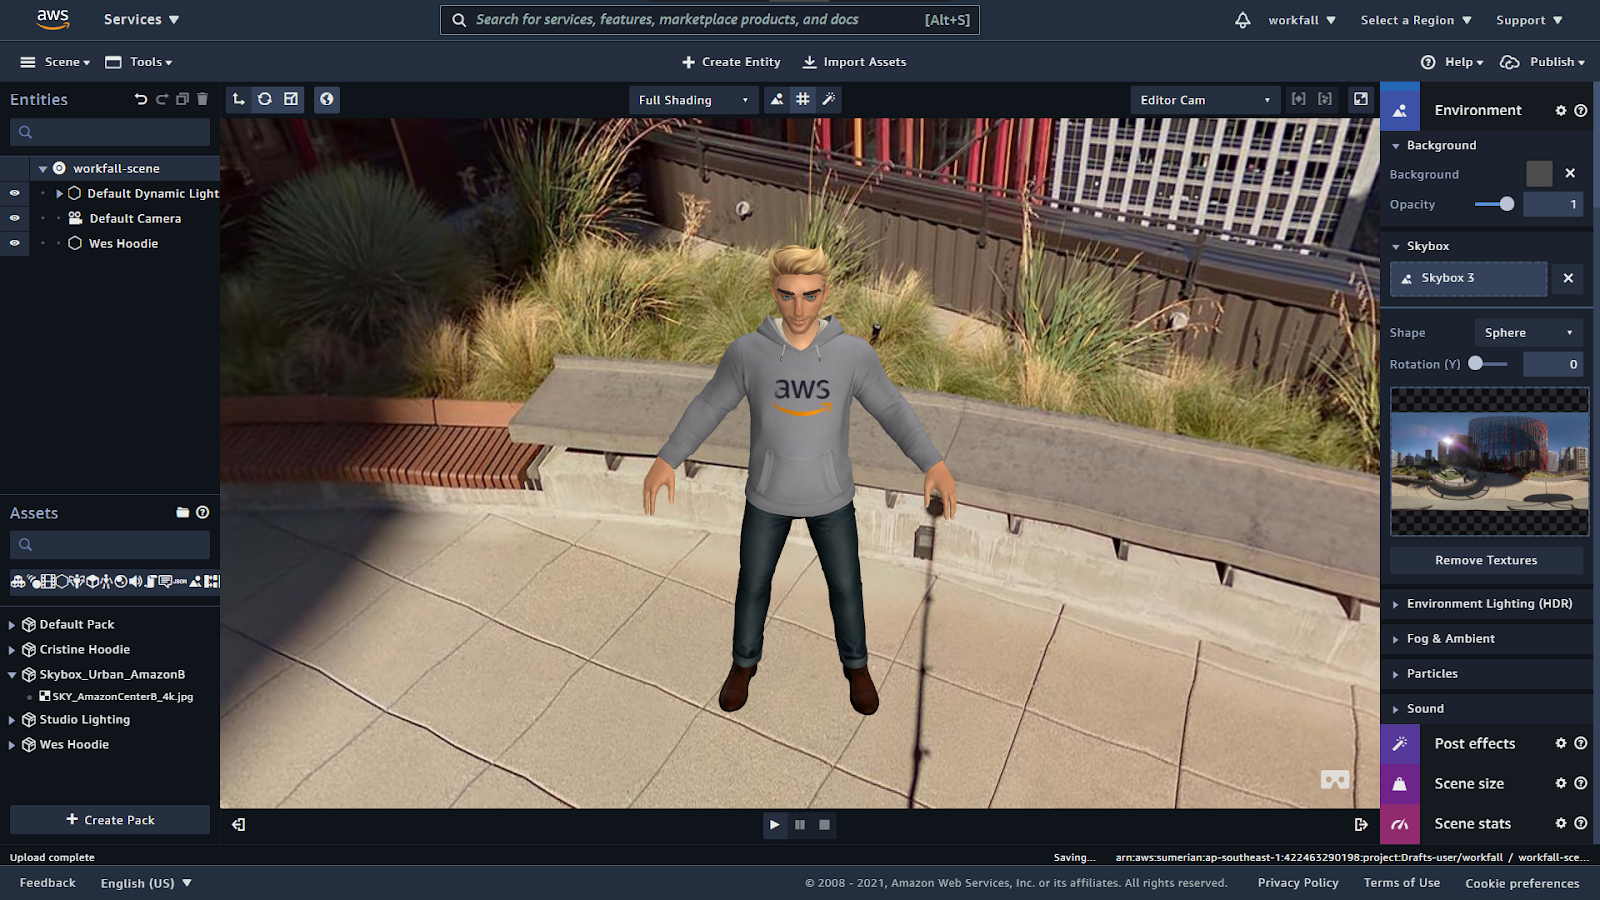
The final scene will look like as shown below. Now you can hit the play button to see the final scene with our Sumerian Bot speaking the lines we added in the Speech file with gestures.

[[[ Add video: Sumerian_Bot1.mp4 ]]]
To add a background, click on import assets on the top of the scene. Click on the textures tab to see all the available textures. Select a texture and click on add on the bottom on the modal.
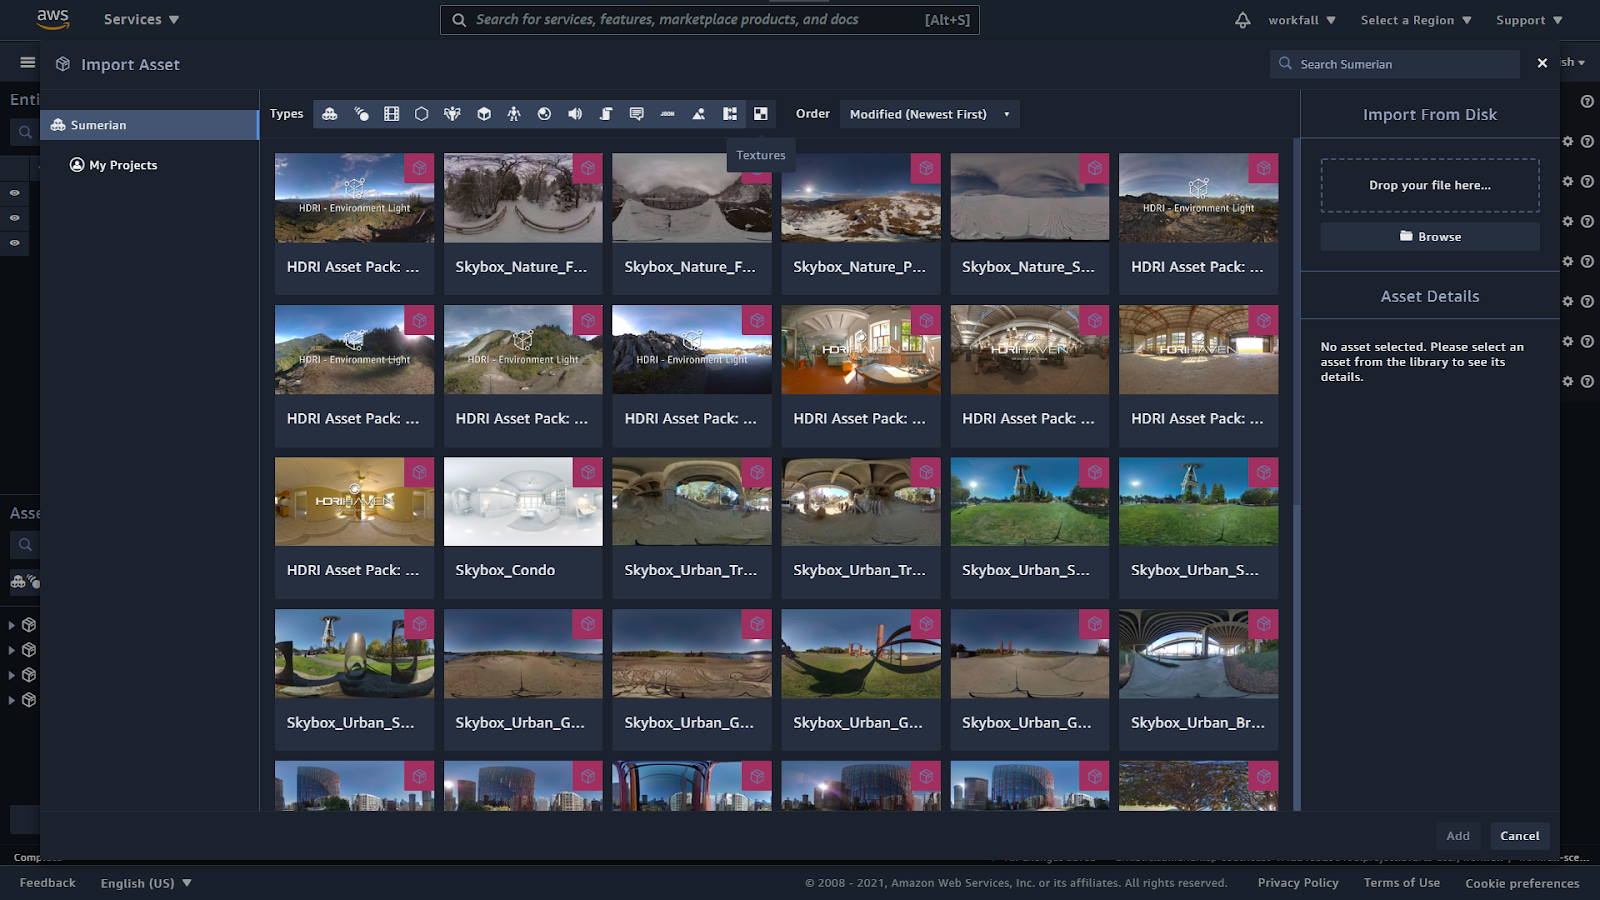
You will see the image file added for the same under the assets tab as shown below.

To add the texture to the background, on the right pane expand the Environment tab. Under it expand the Skybox tab. Sumerian also provides you with the flexibility to upload a background 3D image.

Now drag and drop the image file from the assets section to the skybox setting. The final result after adding the background is as shown below.
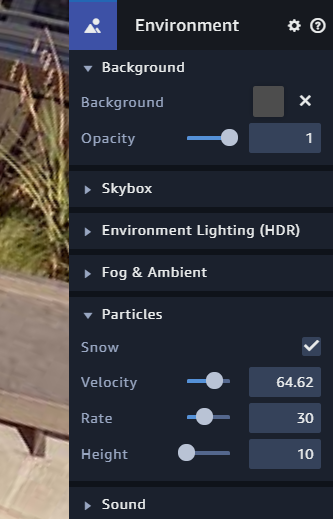
You can also add particles (eg. snow) to the scene. For doing so, expand the Particles tab under the Environments tab and check the box besides snow. You can control the velocity, rate and height of the particles.
You can hit the play button at the bottom of the scene to see it in action. To publish it and view the same on an URL hit, on the right bottom on the dashboard, and click on Publish. From the dropdown select Create public link.

Click on Publish to publish the version of your scene.
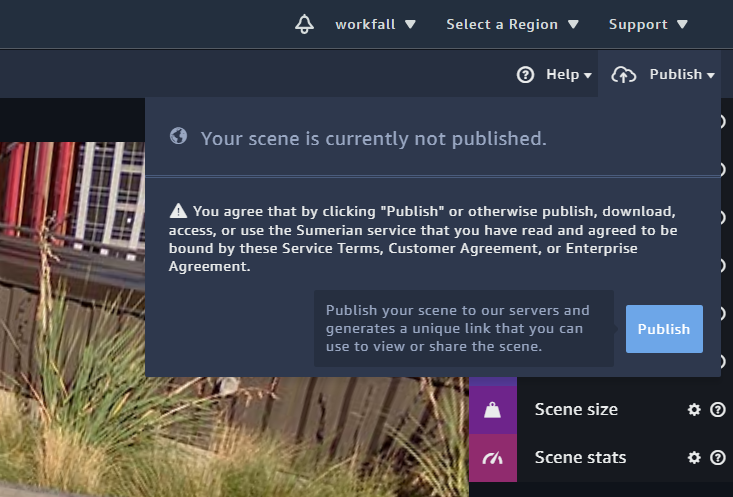
On success, you will receive a URL. Copy and paste the URL into a new tab and you will be able to see the scene in action you just created. You can make changes to your scene and click on Republish to publish a new version for the same.

[[[ Add video: Sumerian_Bot2.mp4 ]]]
Conclusion
In this blog, we explored in detail the AWS Sumerian Service and also saw it in action for a business use case creating, configuring, and publishing a Sumerian bot with proper gestures and with text-to-speech conversion for the speech file. We will discuss more use cases of Amazon Sumerian in our upcoming blogs. Stay tuned to keep getting all updates about our upcoming new blogs on AWS and relevant technologies.
Meanwhile …
Keep Exploring -> Keep Learning -> Keep Mastering
This blog is part of our effort towards building a knowledgeable and kick-ass tech community. At Workfall, we strive to provide the best tech and pay opportunities to AWS-certified talents. If you’re looking to work with global clients, build kick-ass products while making big bucks doing so, give it a shot at workfall.com/partner today.