In this blog, we will discuss how to build an Angular Application using AWS Amplify and will demonstrate how to build an Authentication Application using AWS Amplify and Angular web framework without configuring the backend manually.
In this blog, we will cover:
- Need for Serverless Frameworks
- Benefits of Serverless Frameworks
- Popular Serverless Frameworks
- Why is Amplify considered to be the best option?
- What is AWS Amplify?
- Scenarios where AWS Amplify is the best option
- Benefits of AWS Amplify
- Build an application using AWS Amplify and Angular web framework to handle authentication of users (Signup and Login functionalities)
Need for Serverless Frameworks
‘Serverless’ in its own term has two different aspects each of which describes its own application architecture. First is the Back-End as a Service – BaaS which is usually monitored and maintained by some third party. Second is the Function as a Service – FaaS which initiates the execution of a function through certain events triggered on demand. Serverless Frameworks offer an enormous number of advantages over traditional cloud-based or server-centric infrastructure. Serverless Frameworks make it easy for developers to build and spin up applications faster with the ability to scale on-demand, accommodate infrastructure changes when required, and reduce costs. With the use of Serverless Frameworks, developers need not worry about managing and provisioning backend servers beforehand.
Benefits of Serverless Frameworks
Let’s dive into some of the major benefits of using a serverless framework for a project:
- Easy Deployment: A serverless framework for an application consisting of multiple API calls, authentication, etc. could be perfect if you want to spend less time in the development of the backend and spin up the application fast. Deploying an application on-demand within a few hours makes a serverless approach the best solution. You need not worry about the infrastructure since the application, once deployed easily, can scale easily.
- Spend more time designing the UX: For a customer-based application, customers do not care about your infrastructure. They do not get to see how you are handling your backend with chunks of code. The only thing they notice is the UX of the application i.e. the front end since the look and feel is more important to them. Using a serverless framework, you can spend more time developing the front end and worry less about the back end.
- Reduction in Cost: Whether it be a startup or a well-established business, one of the major considerations is finding out a way to cut down costs with ease. For any business running a customer-based application, going serverless is considered to be the best way of dropping down huge costs. Since a serverless framework takes less computing power and requires no human intervention, there is a huge amount of drop in the costs. The amount differs depending on your use case.
- Scalability: When it comes to business planning, if your business grows at a huge pace then you need to consider if your physical server can handle a huge amount of traffic. Moving to a serverless approach, lets you accommodate your requirements on-demand and adjust your infrastructure accordingly. This in turn reduces the burden of provisioning extra servers and increasing costs without knowing whether it is needed for sure.
Apart from the above-mentioned major benefits of the Serverless Frameworks, some of the additional benefits involve:
- Improvisation in Latency
- Flexibility
- On-demand usage
- Increased efficiency
- Need not worry about the underlying infrastructure
- Optimization
- Easier to manage via console
Popular Serverless Frameworks
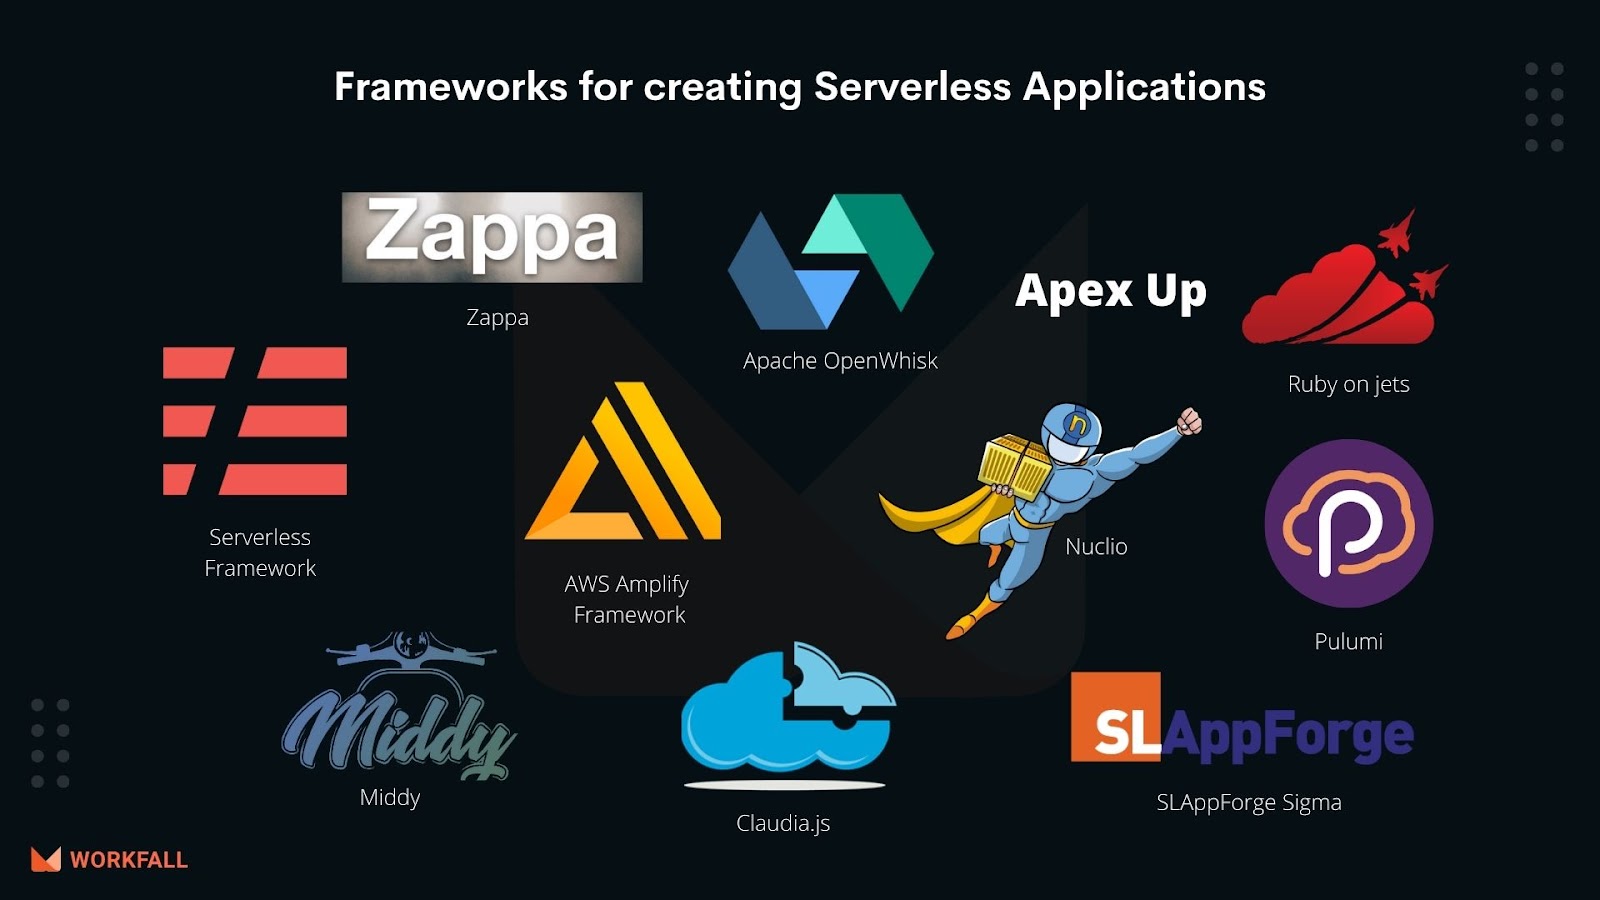
- Claudia.js: Claudia.js provisions developers a means of building and deploying scalable event-driven Node.js projects to AWS Lambda and API Gateway.
- Middy: Middy serves as a simple middleware engine that lets developers focus on business logic and simplify the AWS Lambda code using Node.js rather than focusing on additional aspects like authentication, authorization, validation, etc.
- Architect: The architect makes a developer’s life easier when it comes to building highly scalable, serverless applications with minimal amounts of code. The Architect is an Infrastructure as Code (IaC) framework that allows developers to create, deploy and maintain AWS cloud function-based applications.
- Jets: Jets is a Ruby Serverless Framework that aids Ruby developers in building serverless applications by mapping Lambda functions and API Gateway resources.
- Up: Up lets developers deploy infinitely scalable serverless applications, APIs, and static websites within no time. It focuses on deploying vanilla HTTP servers, thus, there comes no need to invest time in learning some new protocol.
- Serverless: The name of the framework talks for itself. The framework grants developers the ability to build web, mobile, and IoT applications that comprise microservices that execute in response to an event.
- Sigma: Sigma is the first completely browser-based IDE built with the purpose of easing the development of serverless applications. Sigma furnishes drag-and-drop code generation which gives developers the flexibility to integrate vital serverless services, such as API Gateway, S3, etc.
- Pulumi: Pulmuni stands as an open-source SDK that developers can leverage to create, deploy and manage cloud infrastructure. It functions with VMs, networks, and databases. In addition to containers, Kubernetes clusters, and serverless functions.
- Auth0: Auth0’s Webtask is an addition to the serverless framework. It gives developers the freedom to create applications without worrying about the underlying infrastructure’s compatibility. Developers can emphasize writing server-side logic and deploy their work seamlessly using Webtask’s CLI. It basically removes the need to configure a backend for simple mobile or single-page apps.
- Riff: The riff serves as an open-source platform for building and executing functions, applications, and containers on Kubernetes. The integrated CLI equips Kubernetes lovers with the ability to manage their function workflow with Knative.
- Squeezer: Squeezer framework is the world’s first platform to merge the robustness of microservices with the immutability of blockchain technology. Its management-less maintenance allows developers to deploy the code and forget about handling scaling requirements.
- PureSec: PureSec enhances the security of one’s serverless application by providing a Serverless Security Platform by protecting the application end-to-end. It achieves this by coupling the SSP process with the CICD pipeline.
- Snipcart: Snipcart is a dual-nature serverless framework. On one side it acts as an eCommerce solution helping people with smaller needs on the other side it allows users to perform back-end actions using its very dashboard which is based on API calls and webhooks.
Why is Amplify considered to be the best option?
In the era of cutting down costs while deploying applications in an easier and faster way, there is a major competition in the market amongst the different types of serverless frameworks. If you are planning to build an application (mobile/web) from scratch or thinking to develop an already existing application, Amplify is considered to be a great framework. Amplify lets developers take advantage of already built functionalities, in turn, to help them create efficient full-stack applications. In addition to that, Amplify can also be used for React Native app development.
Nowadays, it is said that the cloud will be amplified in the near future. There are major cloud competitors in the market but the growth of Amazon Web Services – AWS has recently doubled drastically competing the giants such as Google Cloud and Microsoft Azure. AWS recently started focusing on coming up with services for building a very robust, secure, and scalable solution to facilitate web and mobile application development. To make life easier for developers, AWS comes with the Amplify library plugin – AWS Amplify to simplify the flow of building complex web and mobile-based applications.
What is AWS Amplify?
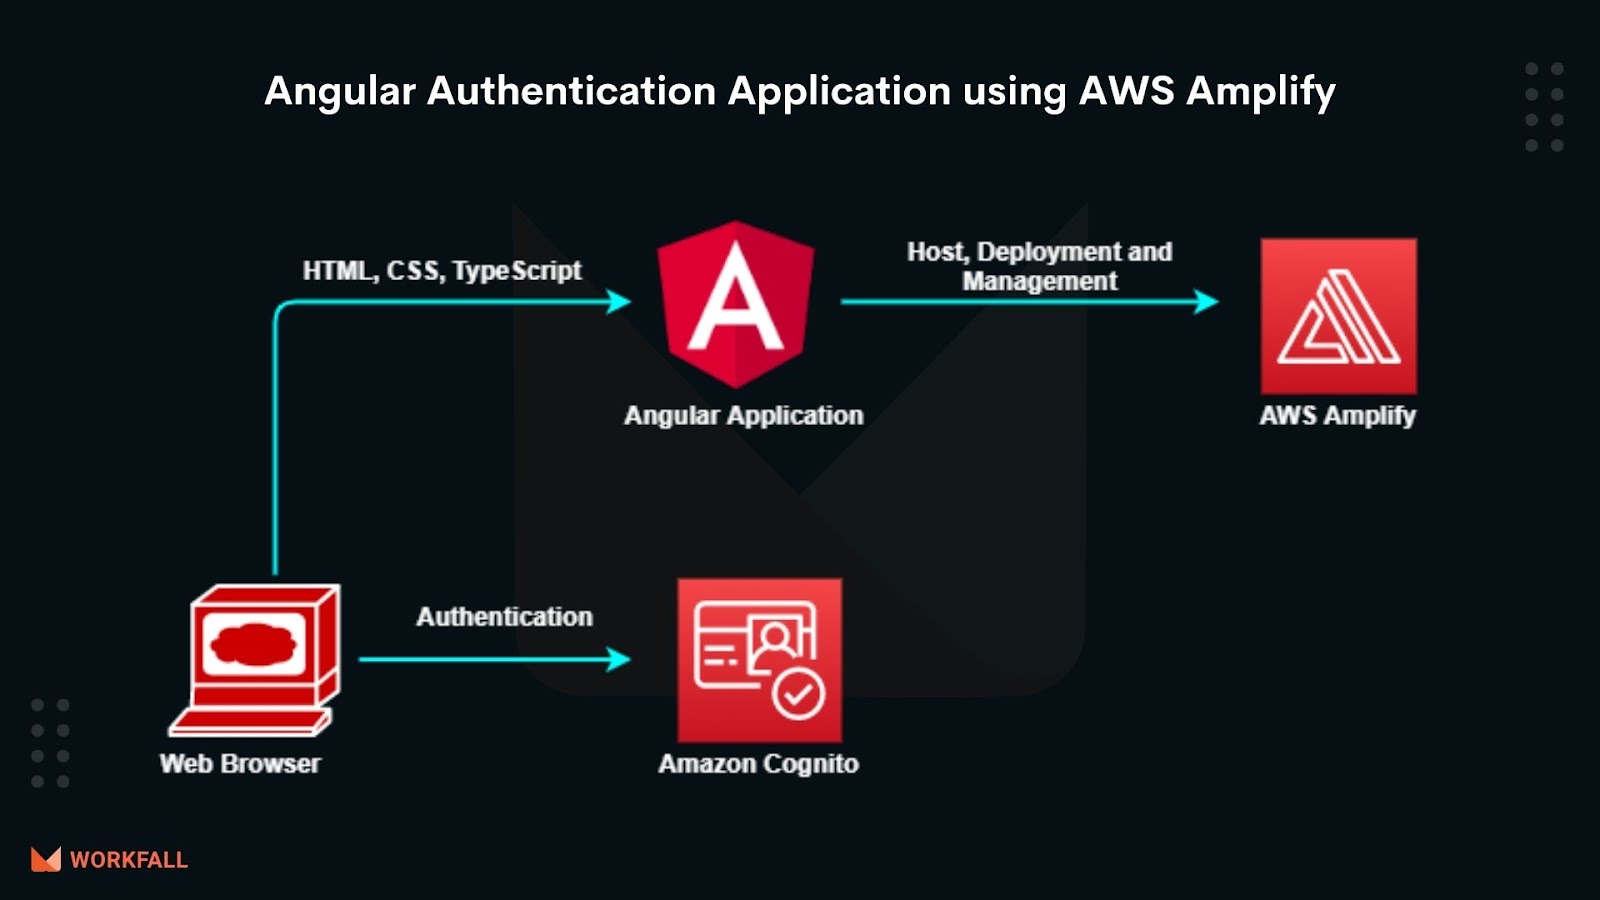
AWS Amplify is designed to provide an interactive and attractive interface for developers who wish to perform tasks in a scalable and secure manner. It allows developers to build JavaScript applications following the best practices leading to the fastening of the development cycles. In simplest terms, it is a Serverless Framework platform with a set of libraries, command-line interface, and UI components that let developers build secure, scalable web and mobile applications backend and integrate it with mobile platforms such as built-in iOS, Android, React Native, Ionic, and Flutter or web frameworks such as React, Angular, Vue, and Next.js. AWS Amplify even provides the ability of easy application authentication integration with the service, Amazon Cognito. It in turn makes it easy to authenticate users, store data securely, monitor usage metrics, and implementation of server-side coding.
Scenarios where AWS Amplify is the best option:
Let’s have a look at some of the much-needed business requirements where AWS Amplify is considered the best option:
- Building a cloud-connected application on the web and mobile platforms
- Building a custom backend using ready-to-use components
- Make use of JavaScript in mobile app development
- Do not bother about the underlying infrastructure (i.e. maintaining servers and backend)
- When you prefer faster and scalable applications
- Enhancement of any existing application using cloud features
Benefits of AWS Amplify
AWS Amplify framework encapsulates various integral services under the hood which simplifies the process of creation and maintenance of robust, secure, scalable, and high-performance web and mobile applications. Let’s have a little peek under the hood to understand the benefits of using AWS Amplify:
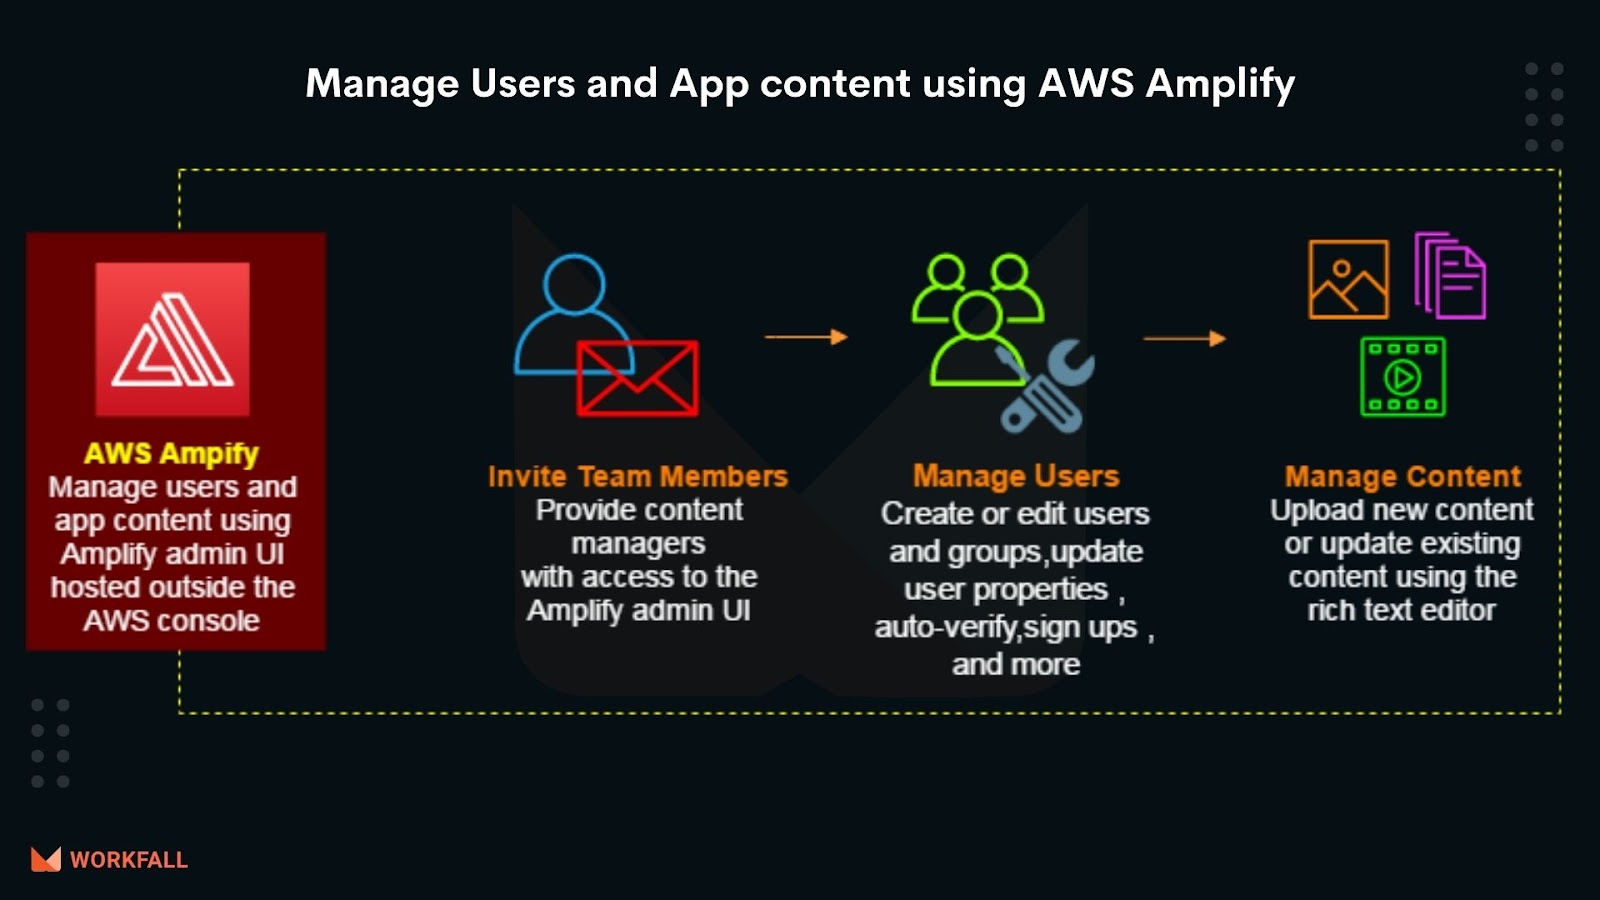
- Easy Backend Configuration: AWS Amplify streamlines the process of development through AWS Amplify’s Admin UI and CLI which makes the process easier and faster to configure the backends of the mobile and web applications. The Admin UI presents ways of integrating authentication, authorization, modeling data, and managing users, all in a single place.
- Flawlessly Connect Frontends: AWS Amplify automatically understands the front-end framework used for static websites by merely connecting Amplify with the source code repository. Amplify would then build the application and deploy it globally on the content delivery network (CDN). Every time the developer commits the frontend code into the repository the build process starts by deploying the backend followed by the frontend.
- Utterly Simple Deployment: Deployments using Amazon Amplify are extremely simple and take just a few clicks. In order to deploy an app, the developer has to connect a code repository, confirm build settings for the front end and the backend, add environment variables (if any), and then choose to Save and Deploy to deploy the application to the global content delivery network (CDN).
- Smooth Content Management: With the help of Admin UI, the developers can delegate access to content editors, and testers to keep the application’s data up-to-date and assure the application remains bug-free. Admin UI also gives developers the flexibility to manage app users, their authentication, creation/editing of users’ groups, etc.
Apart from the above-mentioned benefits, AWS Amplify also provides the following:
- Experiences like Native at lower costs
- Integration with multiple mobile platforms and web frameworks
- UI-driven modern approaches to building scalable applications
- Faster experience
- Flexibility
- On-demand infrastructure scaling
- Automated testing for mobile applications to release updates at a faster pace
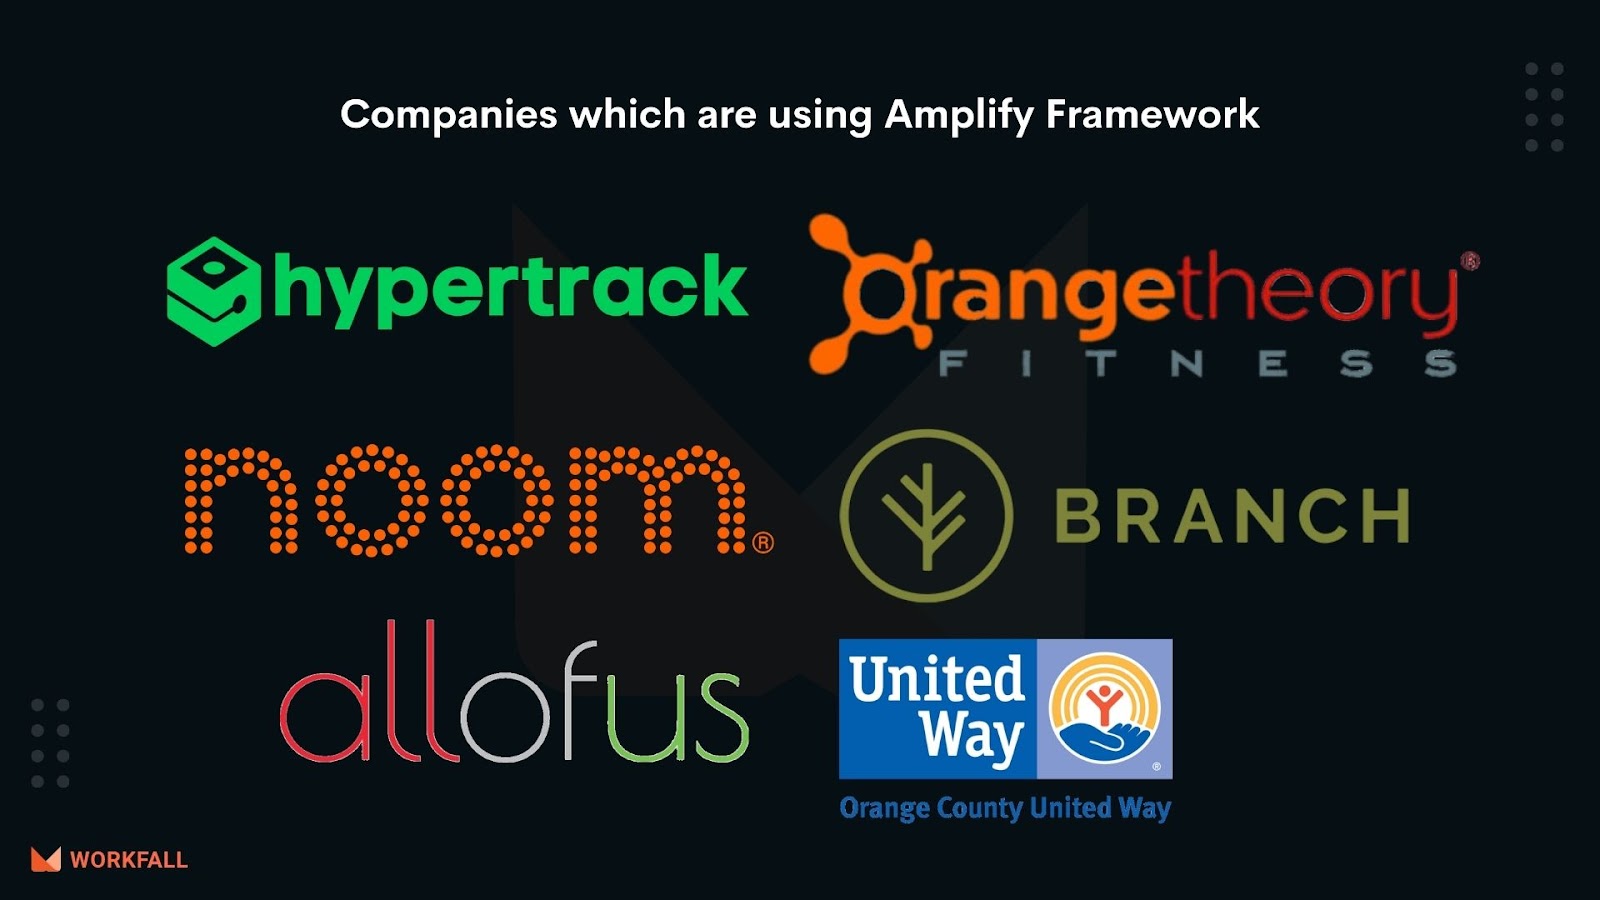
Companies which are using Amplify Framework
Amplify can be used by developers at start-ups and enterprises to accelerate their development speed. Following are some of the big companies which are using Amplify tools and services to enable mobile and front-end web development.
Let’s do hands-on
Considering a scenario where we want to build an Authentication application with Signup and Login functionalities using the web framework Angular and AWS Amplify. The signed-up user details will be displayed in Amazon Cognito:
To implement this, we will do the following:
- Ensure that the prerequisites are configured.
- Install the Amplify CLI
- Configure AWS Amplify
- Create an IAM user with Administrator privileges
- Create an Angular application
- Initialize the Amplify project
- Set up the Authentication service using Amplify CLI
- Build and host the application
- Check Amazon Cognito for the user authentication confirmation
Pre-requisites:
- NodeJs v10.x or later: Download Now
- AWS Account: Create one
Install the Amplify CLI using the command:
npm install -g @aws-amplify/cli
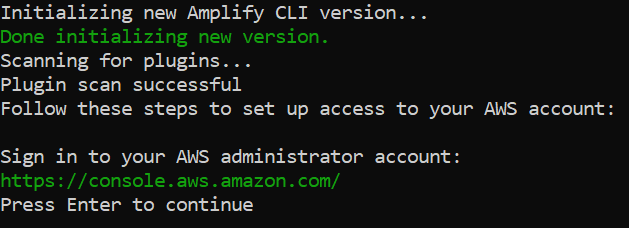
On successful installation, the console will print the below-mentioned message:

Next, Configure AWS Amplify and sign in to your account using the command:
amplify configure
Sign in to your AWS administrator account and press enter:
Now, select the AWS region, and user name and you will be directed to the AWS IAM console for user creation:

Enter the desired Username and select the ‘Access Type’ as ‘Programmatic Access’ for the user and click on the ‘Next: Permissions’ button

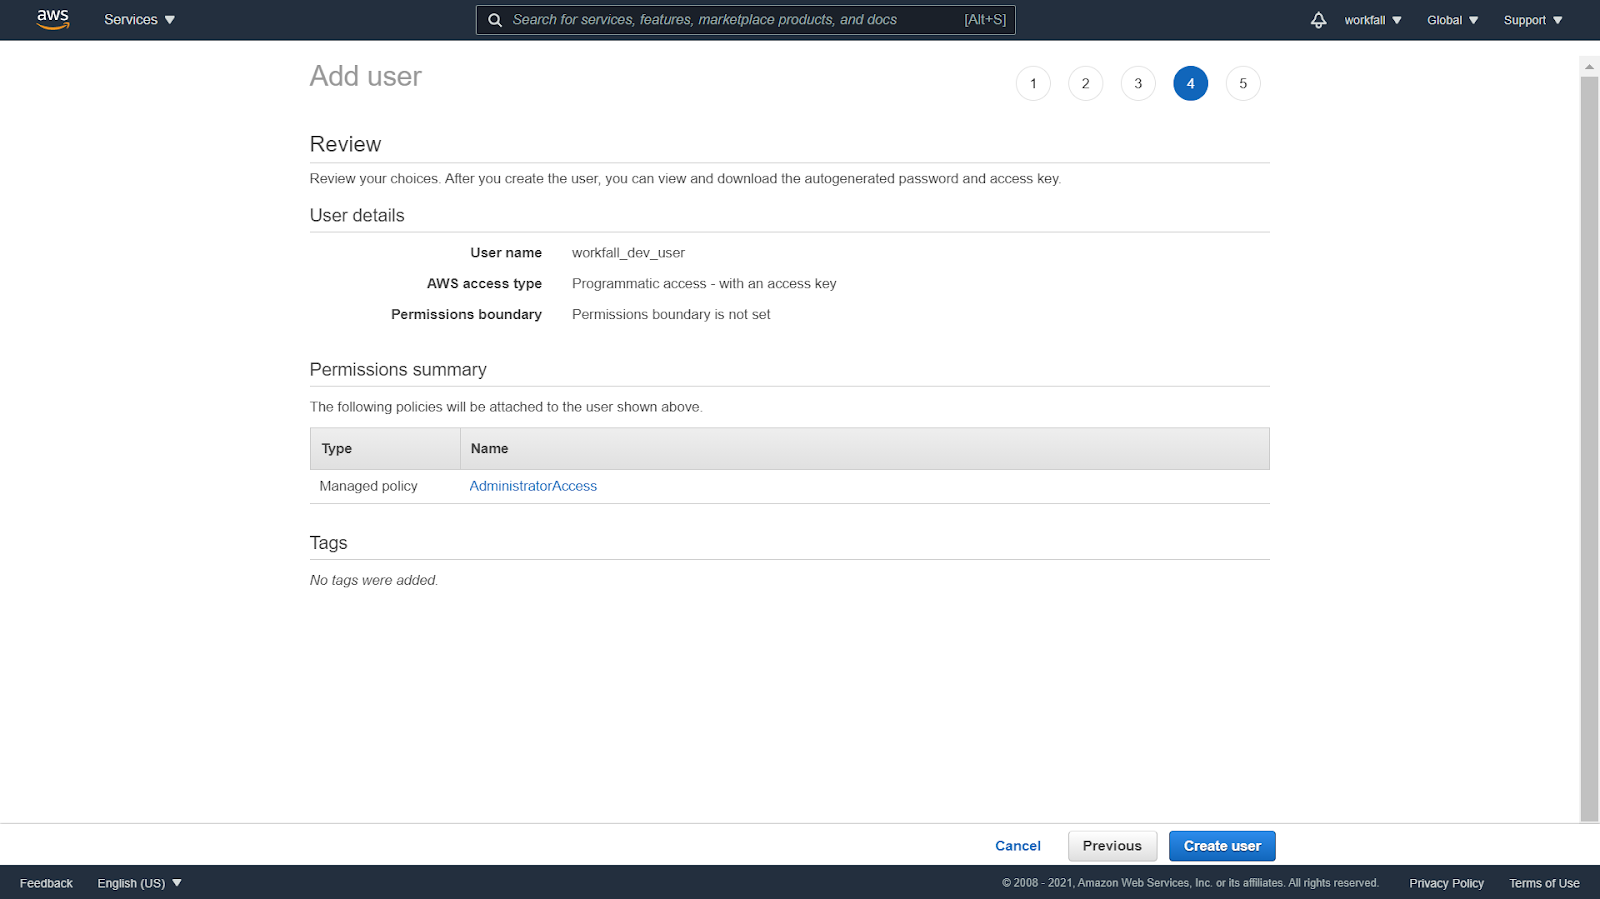
Select ‘Attach existing policies directly’ and select ‘AdministratorAccess’ and click on ‘Next: Tags’ button.

Add Tags (if any). In this blog, we’ll be skipping the tags. Once done, click on the ‘Next: Review’ button, to review the new user and policies applicable for the same.

Click on the ‘Create User’ button to finalize the user creation process.
Once done, download the .csv file and note down the ‘Access key ID’ and ‘Secret access key’.

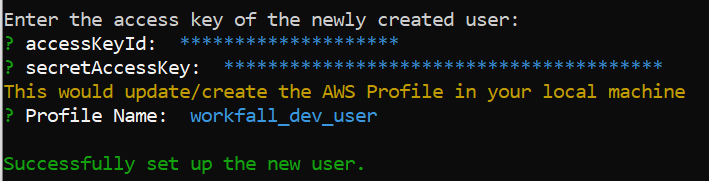
Now, switch to your terminal and hit ‘Enter’. You’ll be prompted to enter the ‘Access Key ID’ and ‘Secret Access Key’, enter those from the downloaded .csv file. Enter the ‘Profile Name’ of your choice and press ‘Enter’. This will successfully create a new user.
Now, to create a new Angular application. Enter the following command:
npx -p @angular/cli ng new [your_app_name]
Select your preferences for the Angular routing and stylesheet format.

After the installation, enter the directory of the application:
cd [your_app_name]
Now, add the following to your src/polyfills.ts file:
(window as any).global = window;
(window as any).process = {
  env: { DEBUG: undefined },
};
Now, use the following command to initiate a new amplify project:
amplify init
Enter the following details according to your preferences:

On successful completion of the setup, your environment will be created and your project will be connected to the AWS Cloud.

Now install the Amplify Angular libraries and run the application using the following commands:
npm install --save aws-amplify @aws-amplify/ui-angular
npm start
On successful compilation and build, you’ll see the following on your terminal:

Now, create an authentication service in Angular using the following command in your project’s root directory:
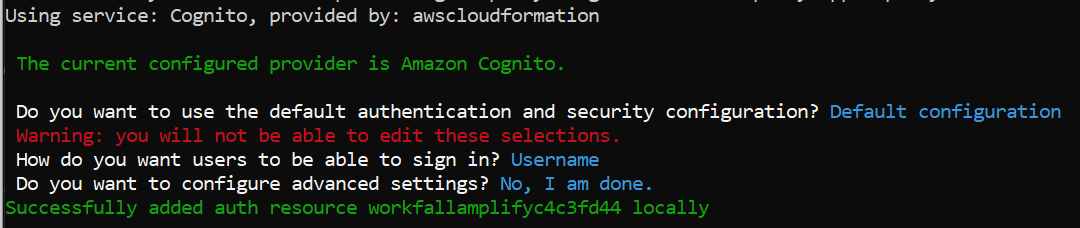
amplify add auth
To initialize the authentication service using Amazon Cognito, select the following options:
To deploy the application, run the following command:
amplify push

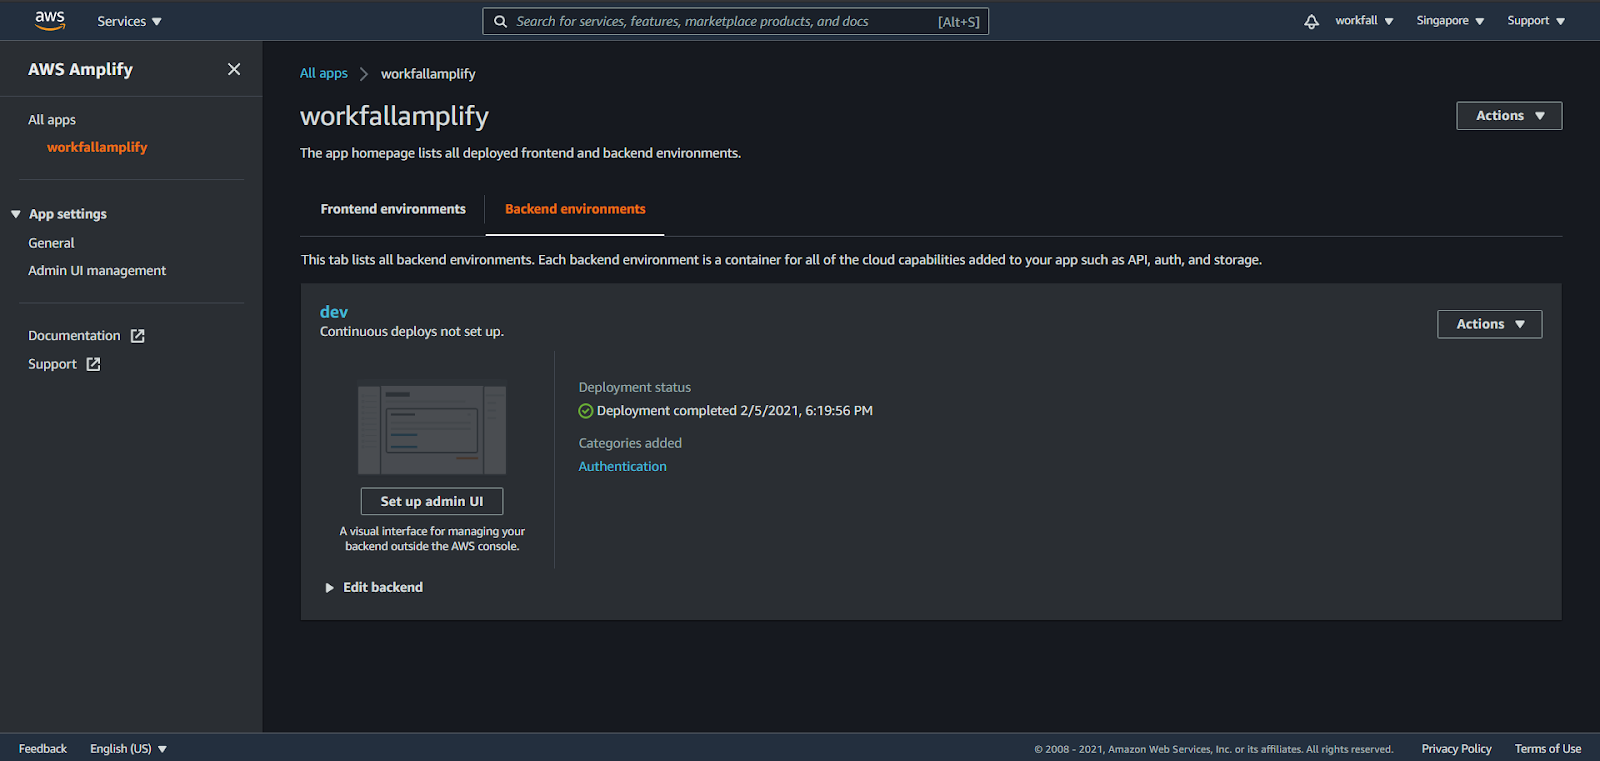
To view the deployed application in your project at any time, you can go to Amplify Console using AWS Console:

For Backend environments, you’ll find the ‘Authentication’ service added under the ‘Categories added’ section
Add the following imports in ‘src/main.ts’:
// Import these to load the 'Amplify' configuration file and connect 'Amplify' to the app

import 'zone.js';
import Amplify, { Auth } from 'aws-amplify';
import awsconfig from './aws-exports';

Amplify.configure(awsconfig);
Auth.configure(awsconfig);

// Import ends here
If you come across an error for the ‘import awsconfig’ stating “could not find a declaration file for module ‘./aws-exports’”, then add the following (“allowJs”: true) to in the ‘tsconfig.json’ file to fix it:
"compilerOptions": {
    "allowJs": true,
}
Import AWS Amplify UI module in ‘src/app/app.module.ts’ file:
/* import AmplifyUIAngularModule  */
import { AmplifyUIAngularModule } from '@aws-amplify/ui-angular';
Now, add the above imported module under the ‘imports’ section in the same file ( ‘src/app/app.module.ts’):
imports: [
    /* configure app with AmplifyUIAngularModule */
    AmplifyUIAngularModule,
]
Add the following code in ‘src/app/app.component.ts’ file:
import { Component, ChangeDetectorRef } from '@angular/core';
import { onAuthUIStateChange, CognitoUserInterface, AuthState } from '@aws-amplify/ui-components';

@Component({
  selector: 'app-root',
  templateUrl: './app.component.html',
  styleUrls: ['./app.component.css']
})
export class AppComponent {
  title = 'workfall-amplify-app';
  user: CognitoUserInterface | undefined;
  authState!: AuthState;

  constructor(private ref: ChangeDetectorRef) {}

  ngOnInit() {
    onAuthUIStateChange((authState, authData) => {
      this.authState = authState;
      this.user = authData as CognitoUserInterface;
      this.ref.detectChanges();
    })
  }

  ngOnDestroy() {
    return onAuthUIStateChange;
  }
}
Add the following code in ‘src/app/app.component.html’ file:
<amplify-authenticator *ngIf="authState !== 'signedin'"></amplify-authenticator>

<div *ngIf="authState === 'signedin' && user" class="App">
    <amplify-sign-out></amplify-sign-out>
    <div>Hi, {{user.username}}</div>
</div>
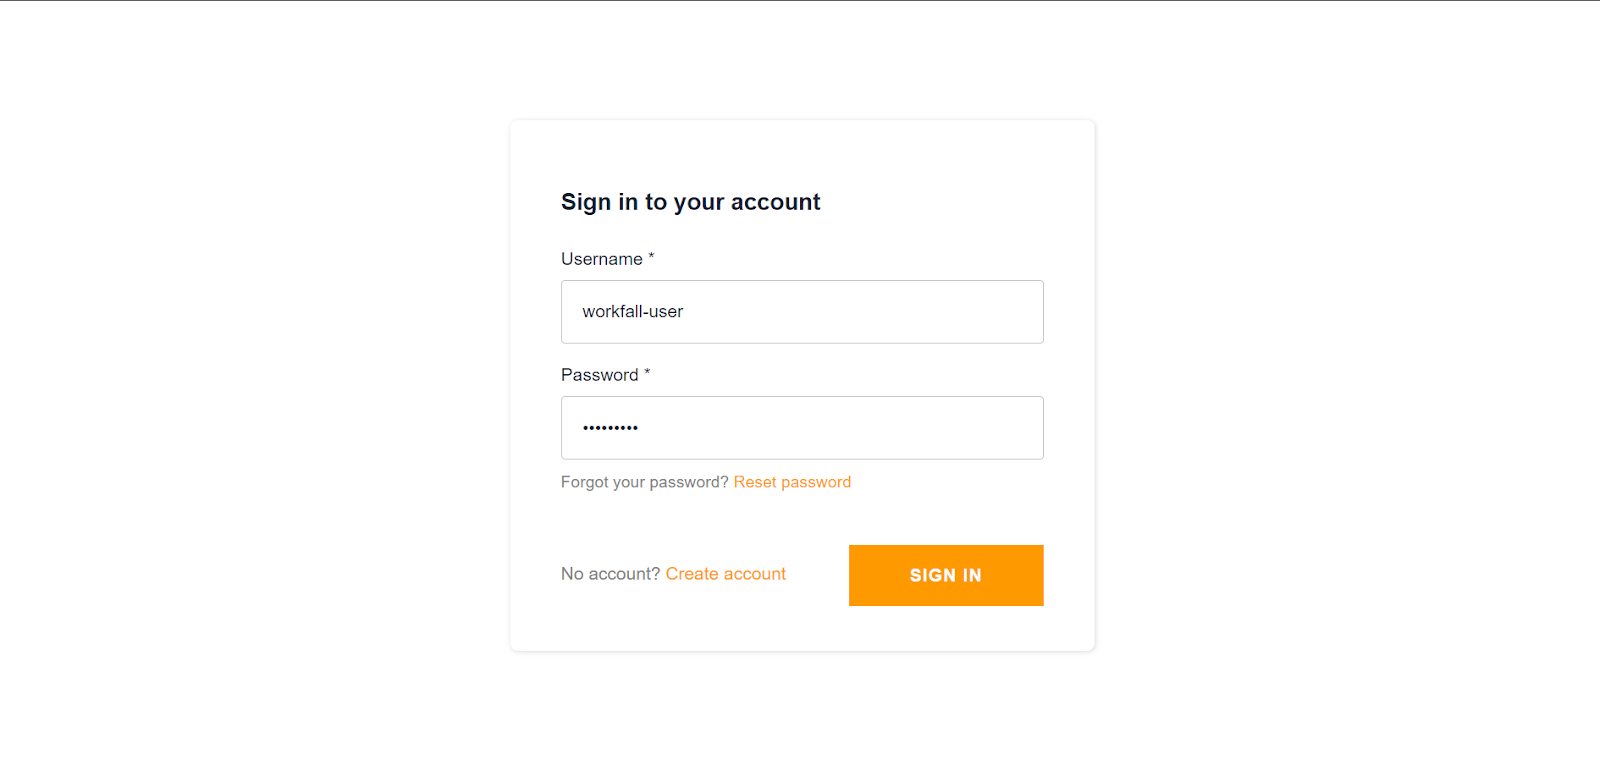
Now, you can open your browser and run the application on ‘http://localhost:4200’:
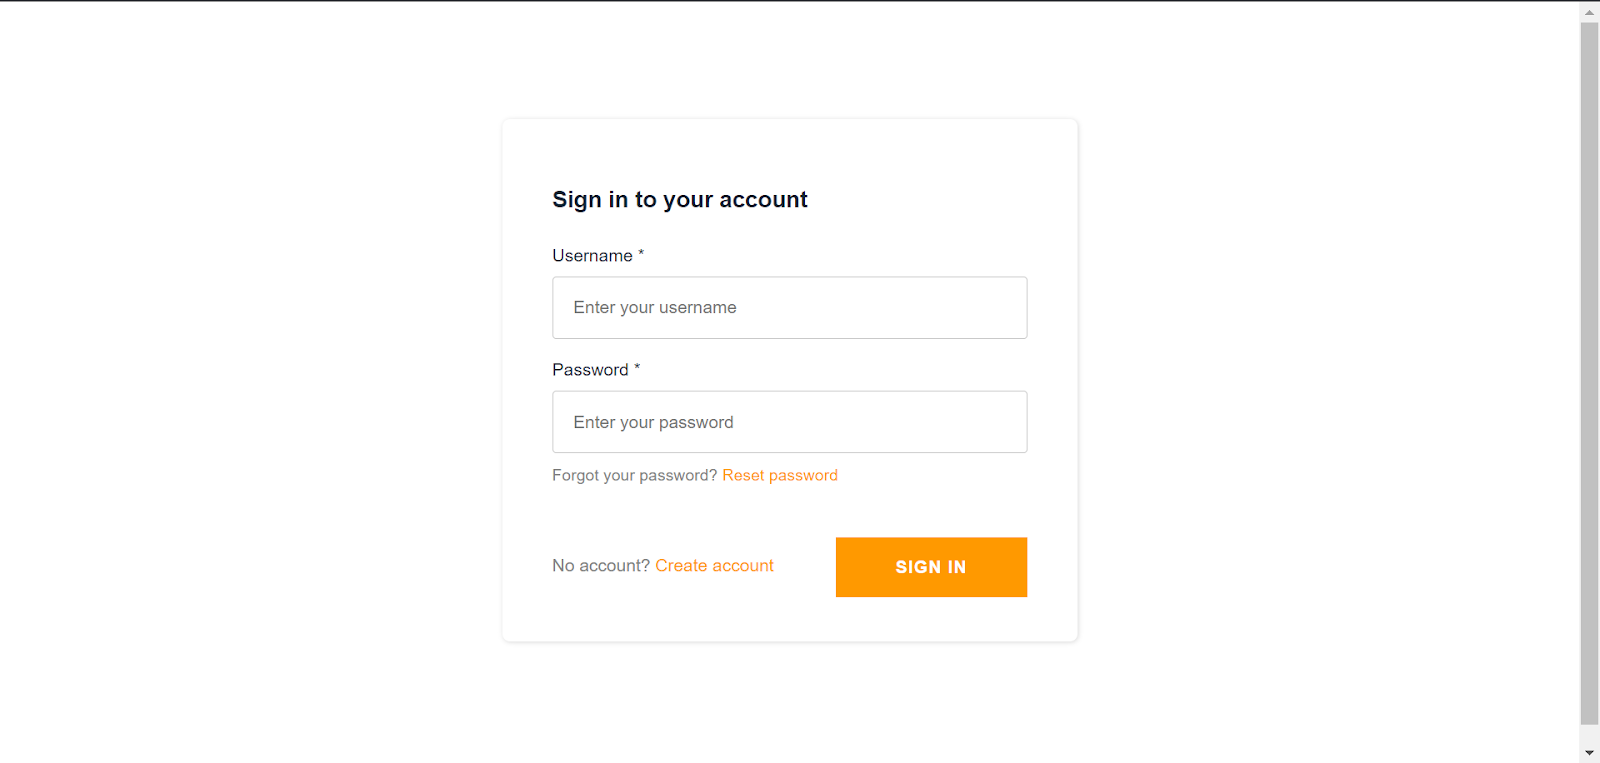
Now, let’s try to ‘Sign in’ and check if authentication is working properly. Since we have not created an account yet, it should give us an error stating “User does not exist”.

Now, let’s create an account.

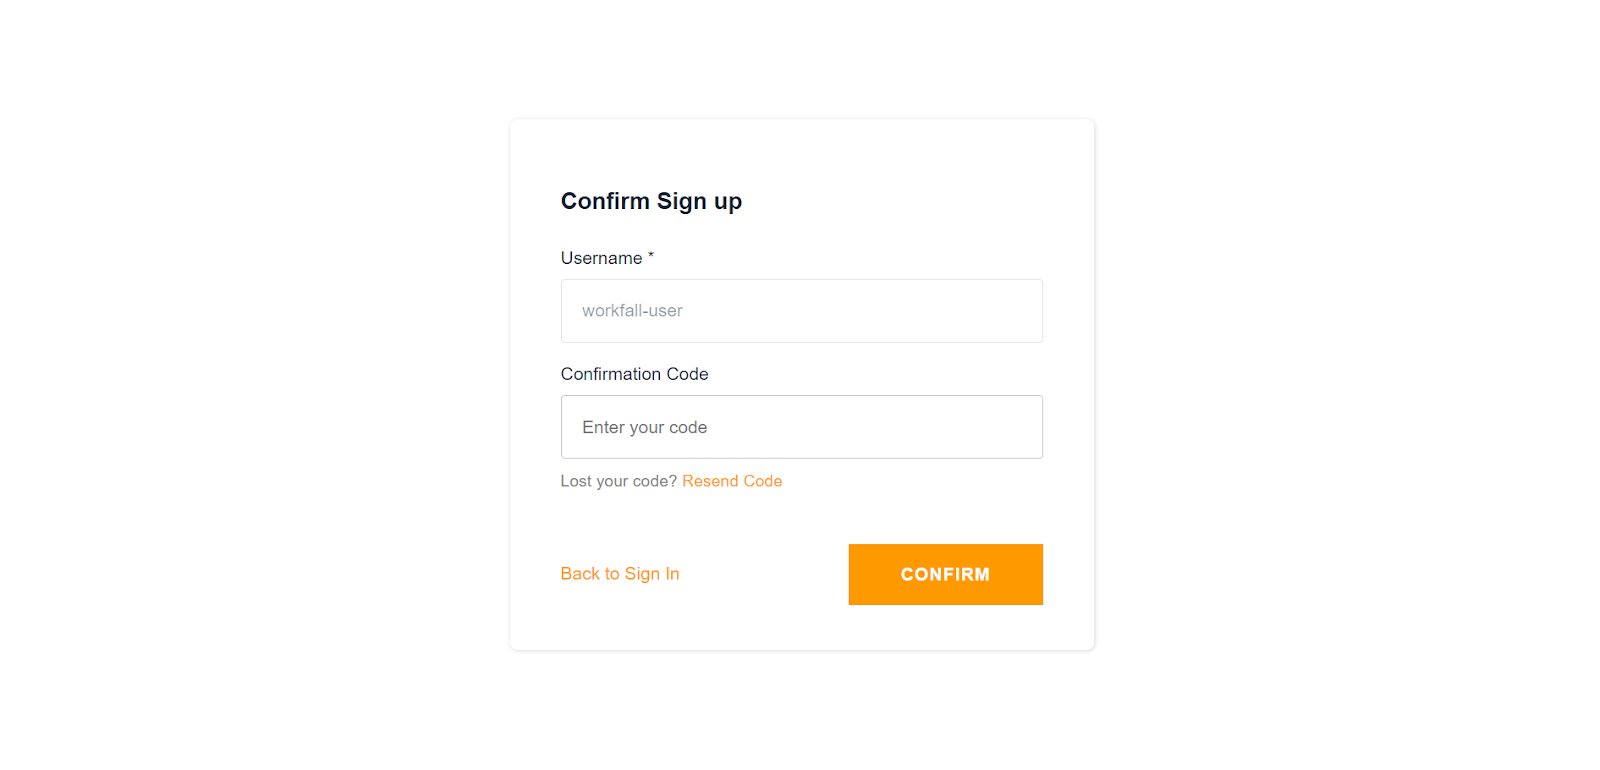
Once you hit on ‘Create Account’, you will receive a ‘Confirmation Code’ on the email address used for creating the account:

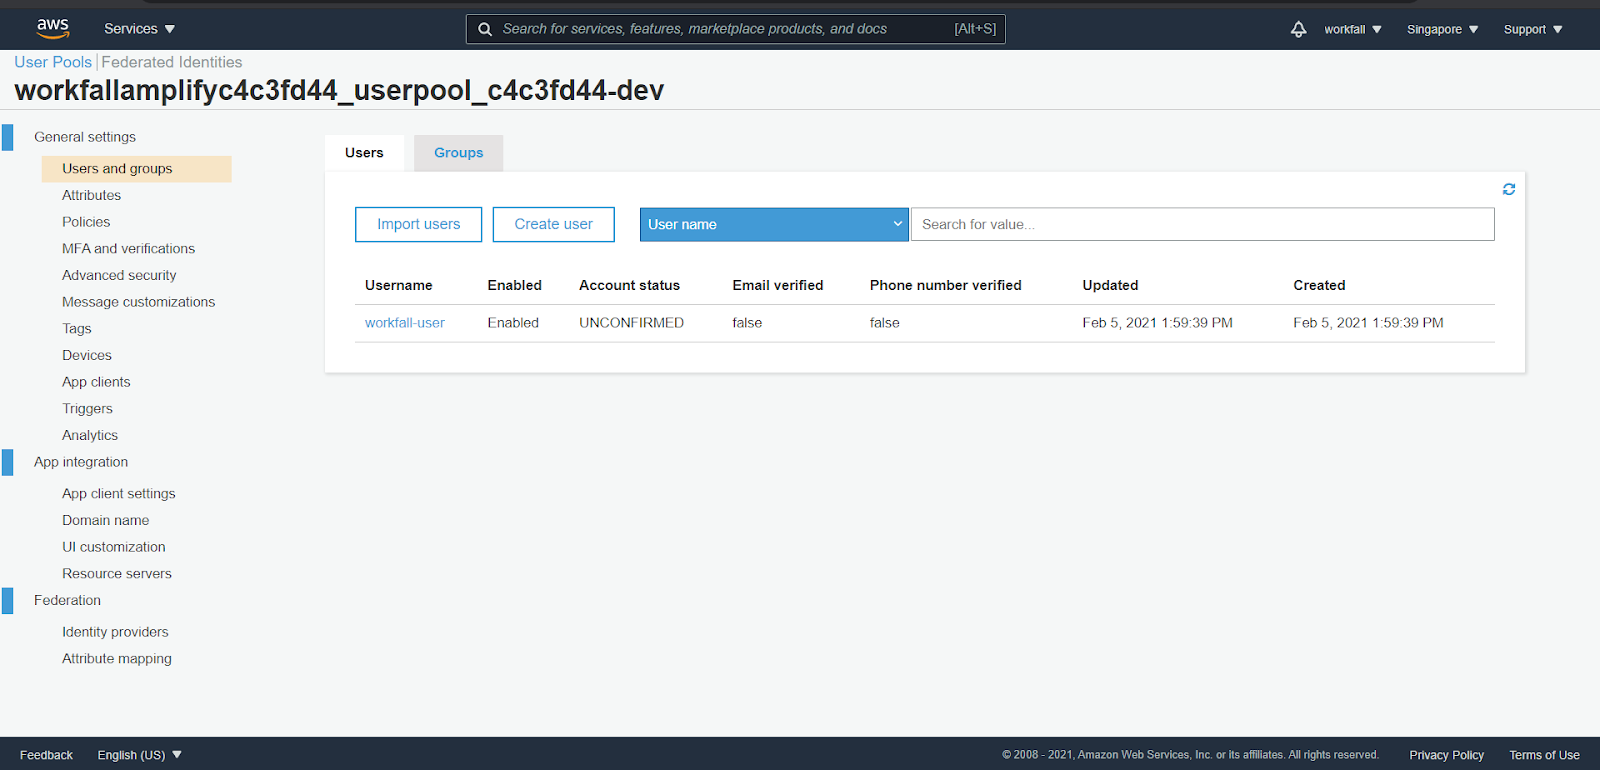
Now, you can go to the Amazon Cognito console to view if the user is registered:
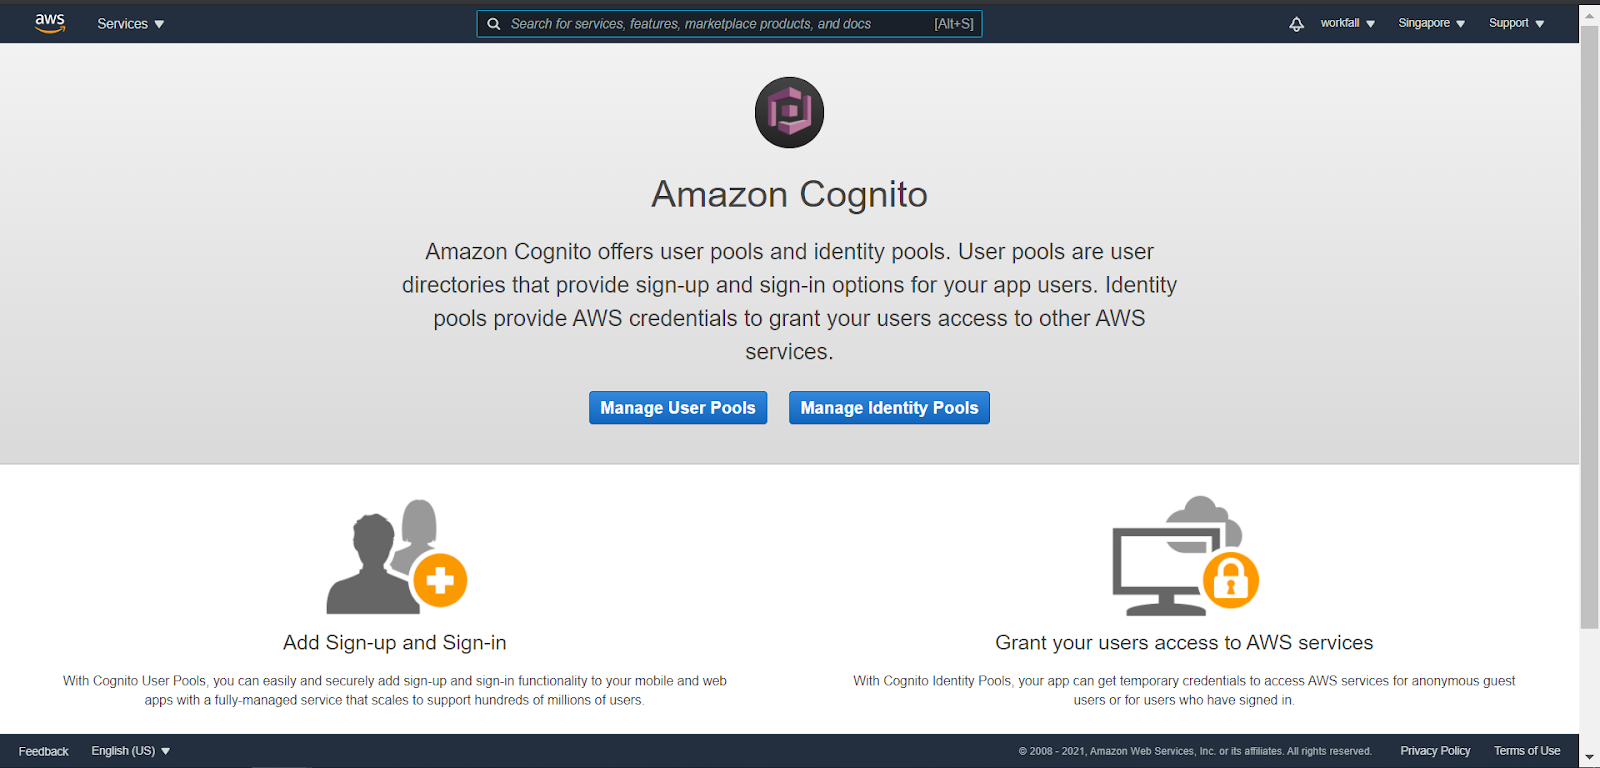
Click on ‘Manage User Pools’ and you will find a ‘user pool’ already created while configuring the application using AWS Amplify. Click on the created user pool

You will find the user you recently created with the ‘Account status’ as ‘UNCONFIRMED’ since we have not added the ‘Confirmation code’ on UI.
Now, go back to the UI, enter the confirmation code, and click on ‘Confirm’:

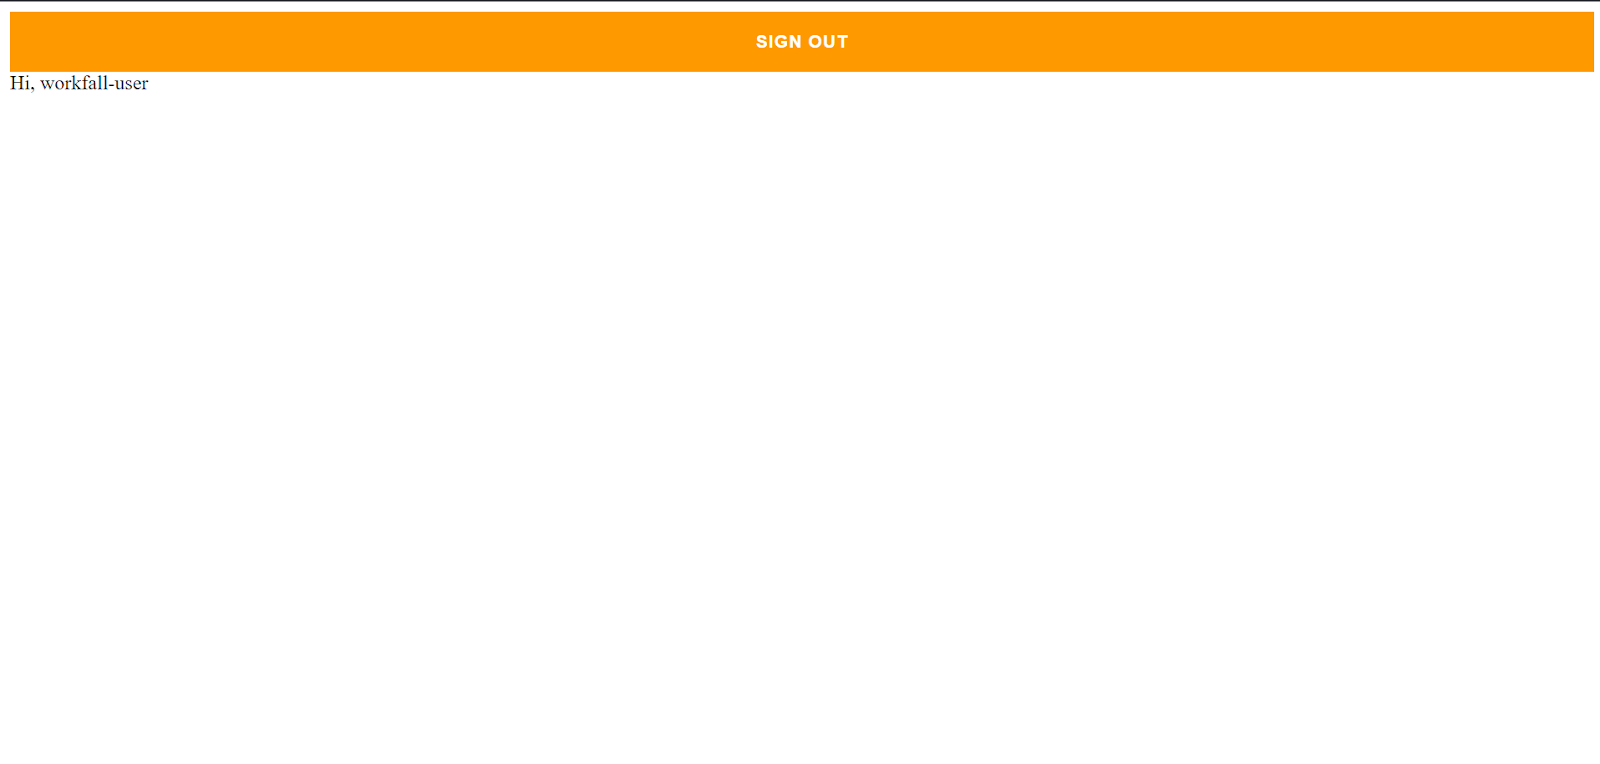
On hitting ‘Confirm’, you will be logged in and navigated to the home page.
Get back to the Amazon Cognito console and hit ‘Refresh’. You’ll find the ‘Account Status’ of the user changed to ‘Confirmed’.

Now, you can click on ‘Sign out’ and try signing into the application using your credentials used for registration.
You will be signed-in and navigated to the application’s dashboard.
Conclusion
In this blog, you have seen how we can build an Authentication application with signup and login functionalities using a web framework Angular and AWS Amplify to serve the backend. We have used AWS Amplify’s integration with Amazon Cognito for maintaining and storing the registered users’ data. We will discuss more about AWS Amplify and its integration with other services in our upcoming blog. Stay tuned to keep getting all updates about our upcoming new blogs on AWS and relevant technologies.
For any further queries, feel free to post your comments, we are happy to help!
Meanwhile …
Keep Exploring -> Keep Learning -> Keep Mastering
This blog is part of our effort towards building a knowledgeable and kick-ass tech community. At Workfall, we strive to provide the best tech and pay opportunities to AWS-certified talents. If you’re looking to work with global clients, build kick-ass products while making big bucks doing so, give it a shot at workfall.com/partner today.